| The Ovation Fan Club | ||
| ||
| Random quote: "Ovation Guitars really don't get the respect they deserve!" - Alex Pepiak |
 Patch's Parlor Build... Patch's Parlor Build...
| View previous thread :: View next thread | |
| Member Communities -> Bottom Feeding Luthiery Guild | Message format | |
| DanSavage |
| ||
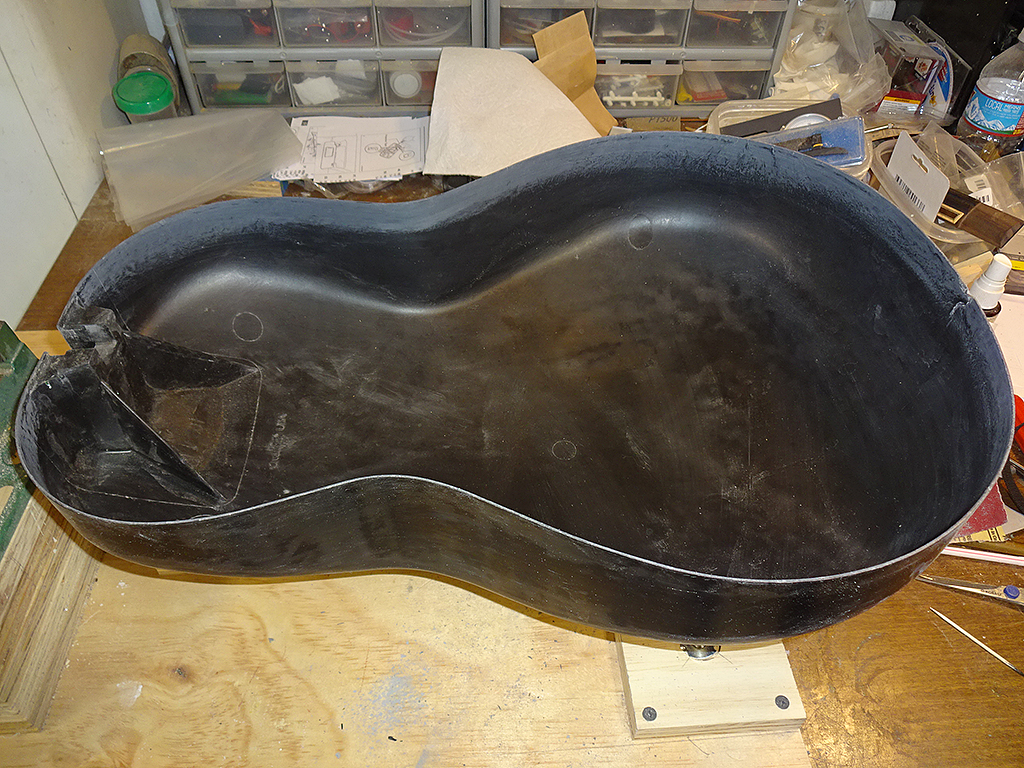
Joined: June 2012 Posts: 2303 Location: Lake Forest, CA | Thanks, Jonmark and you're welcome. Getting closer, Patch. After this molding stuff, building a guitar almost seems easy. Michel, Thanks. I'd planned to pretty much do it like the factory does with a large mahogany wood block. When I lay up the bowl, I'll add an extra layer of cloth at the neck block area to add strength. Stewmac sells wood neck blocks, but I'm not sure it has enough height. I'll order one in the future to check it out. Failing that, I'll give JB a shout and see if I can get an OEM bolt on block like they use. While the bare bowls are pretty flexible on their own, once you glue it to a top it forms a cantilever beam of sorts and gets really rigid. | ||
| |||
| DanSavage |
| ||
Joined: June 2012 Posts: 2303 Location: Lake Forest, CA |
Moving right along.
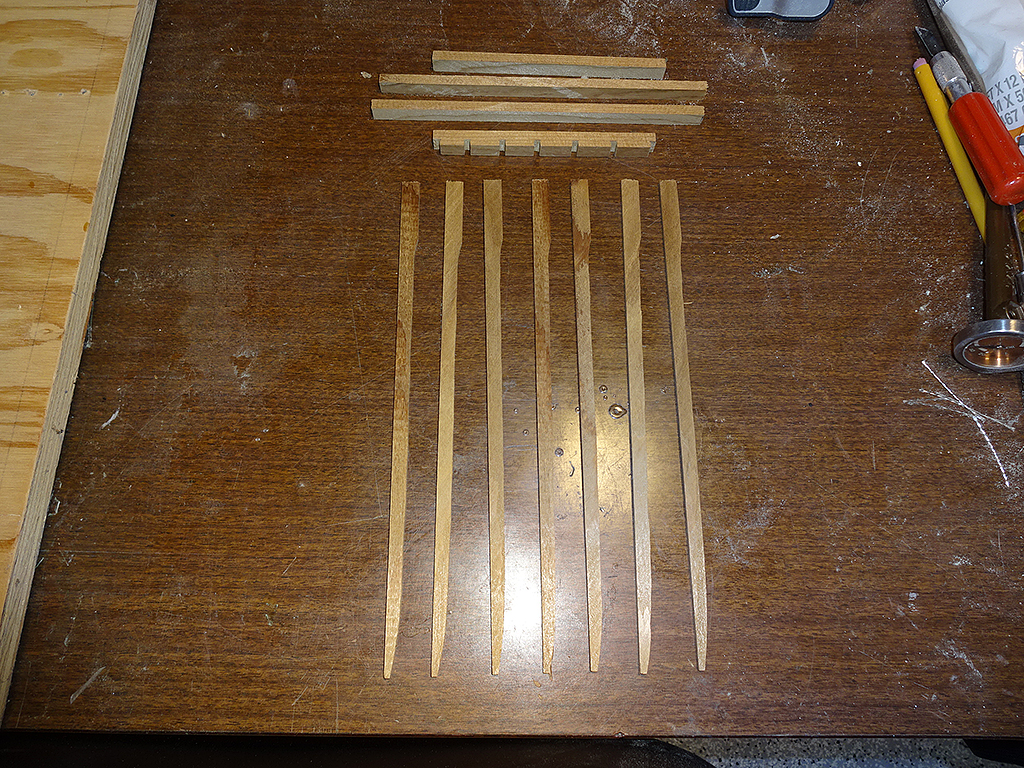
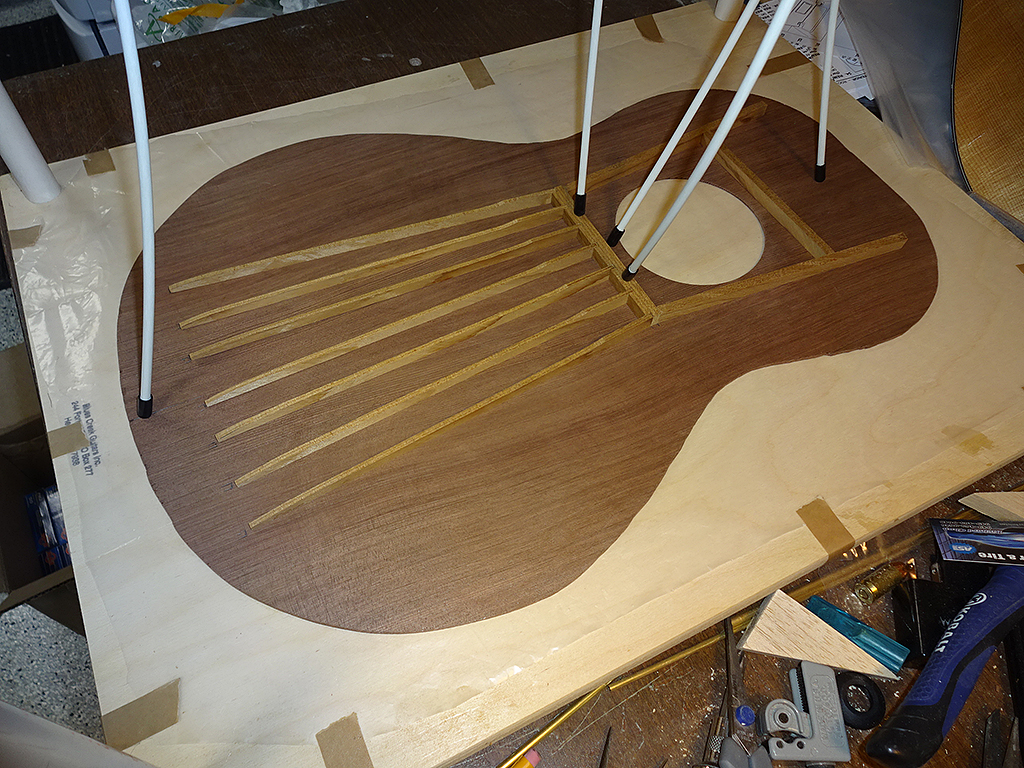
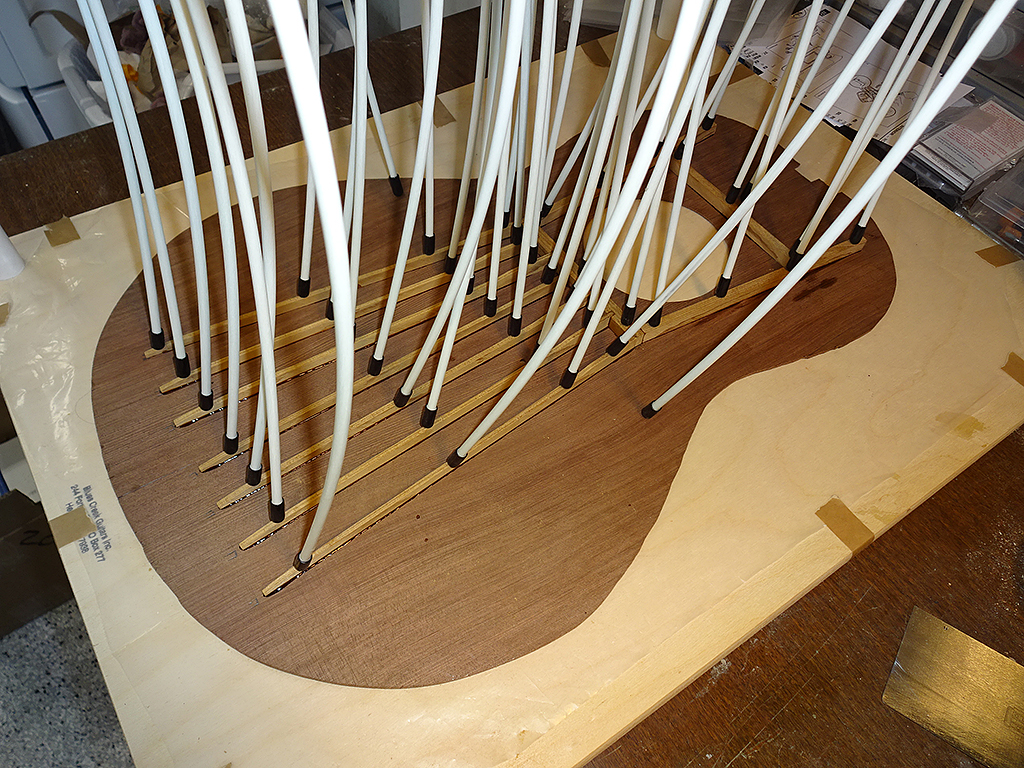
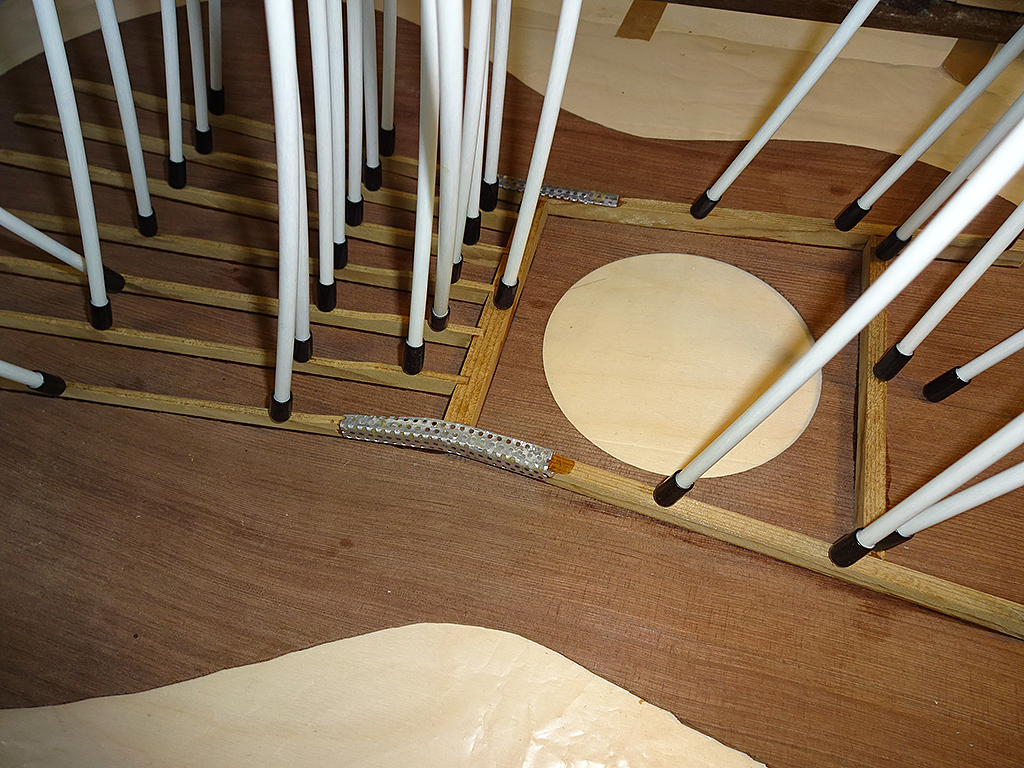
I also rough cut the braces. This guitar will be getting an A-brace pattern using torrefied Adirondack spruce.
One change of plans is that I was going to make this a bolt-on neck. Because the dovetail is so thin, I'm afraid that it would split the heel when I drill it or try to screw in the threaded insert. So, this is going to be a glue-on neck, with the neck glued to an SMC bowl, just like the 1624 the neck came from. | ||
| |||
| DetlefMichel |
| ||
Joined: May 2011 Posts: 751 Location: Muenster/Germany | DetlefMichel - 2017-12-15 7:43 PM the structural reinforcements I ment the arched structures inside on the neck heel, you can see them if you look in an Ovation. Aren´t they necessary to prevent torsion from the neck joint? And if you want to built a bolt-on neck: My luthier used an incredibly thin CLV board for the inside reinforcement of my 12 string guitar with bolt-on neck (and for my other guitars). This may be better than a solid mahogany block. (I hate guitars with set necks). | ||
| |||
| DanSavage |
| ||
Joined: June 2012 Posts: 2303 Location: Lake Forest, CA | Ah, now I understand what you meant. Edited by DanSavage 2017-12-19 10:14 AM | ||
| |||
| jay |
| ||
Joined: January 2009 Posts: 1249 Location: Texas | I wrote cantilever before, but it's actually a monocoque structure. Just checked with Vegas...the over/under for the # of folks this provided clarity for is at 1...with some heavy hitters betting the under. I thought a monocoque structure was the class of spaceship the Millennium Falcon belonged to.
Edited by jay 2017-12-19 6:35 PM | ||
| |||
| DanSavage |
| ||
Joined: June 2012 Posts: 2303 Location: Lake Forest, CA | LOL! Did you google the word, monocoque? | ||
| |||
| jay |
| ||
Joined: January 2009 Posts: 1249 Location: Texas | No. No need to look up words I can't pronounce | ||
| |||
| DanSavage |
| ||
Joined: June 2012 Posts: 2303 Location: Lake Forest, CA | Its pronunciation almost sounds dirty. LOL! Mono-****. LOL! The dirty word filter won't let me post how it sounds. Edited by DanSavage 2017-12-19 8:32 PM | ||
| |||
| seesquare |
| ||
Joined: November 2002 Posts: 3599 Location: Pacific Northwest Inland Empire | A single rooster. Sift that, Filter Censor! BTW, nice work, Dan. I understand the principle & physics- just didn't know that is what it's called. | ||
| |||
| DetlefMichel |
| ||
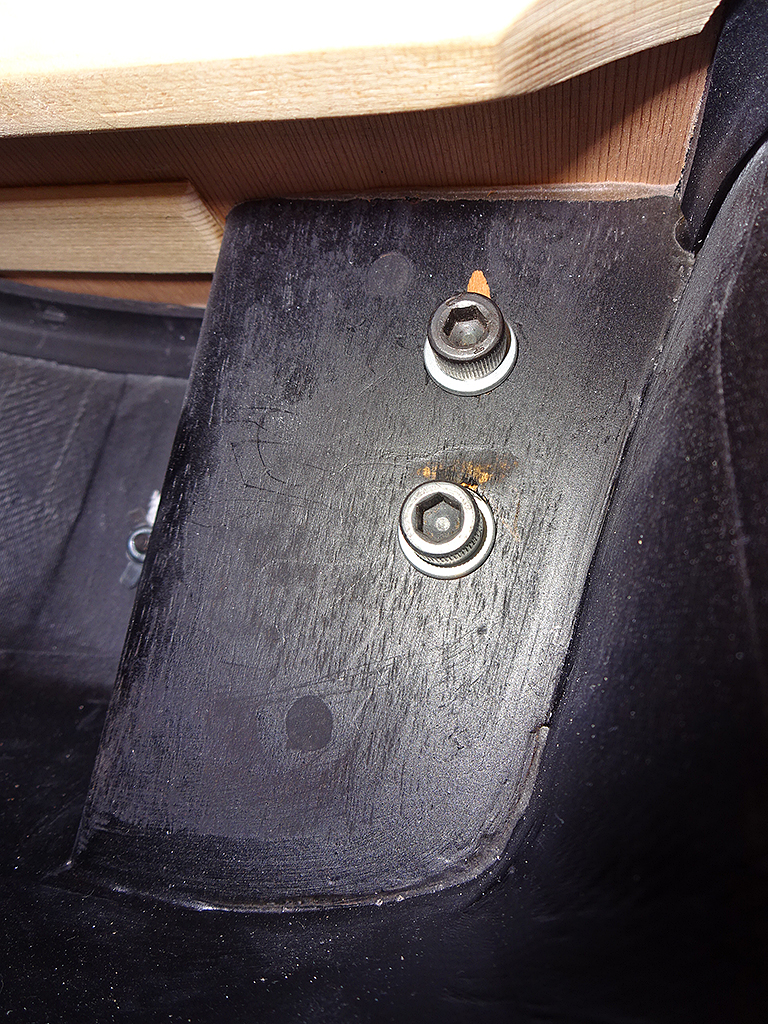
Joined: May 2011 Posts: 751 Location: Muenster/Germany | Now I see. I did several neck-resets on my old Ovations and I always wondered how the tiny neck mounts should hold up all the tension. It´s not only the strings, but whan I grab my guitar I always have it on the neck, never on the body, and thus there are enormous leverage forces on that point if you simply put the guitar out of the case...Since I have seen (and touched) this small construction inside I handle my Ovations with much more care. Especially when I have my heavyweight 1688 in hands I always remember that 2 screws in a 1,5 cm piece of plastic compound on a 55cm torsion arm...brrrrr...for me that is a nightmare. Your woodblock joint looks more trustable to me. | ||
| |||
| DanSavage |
| ||
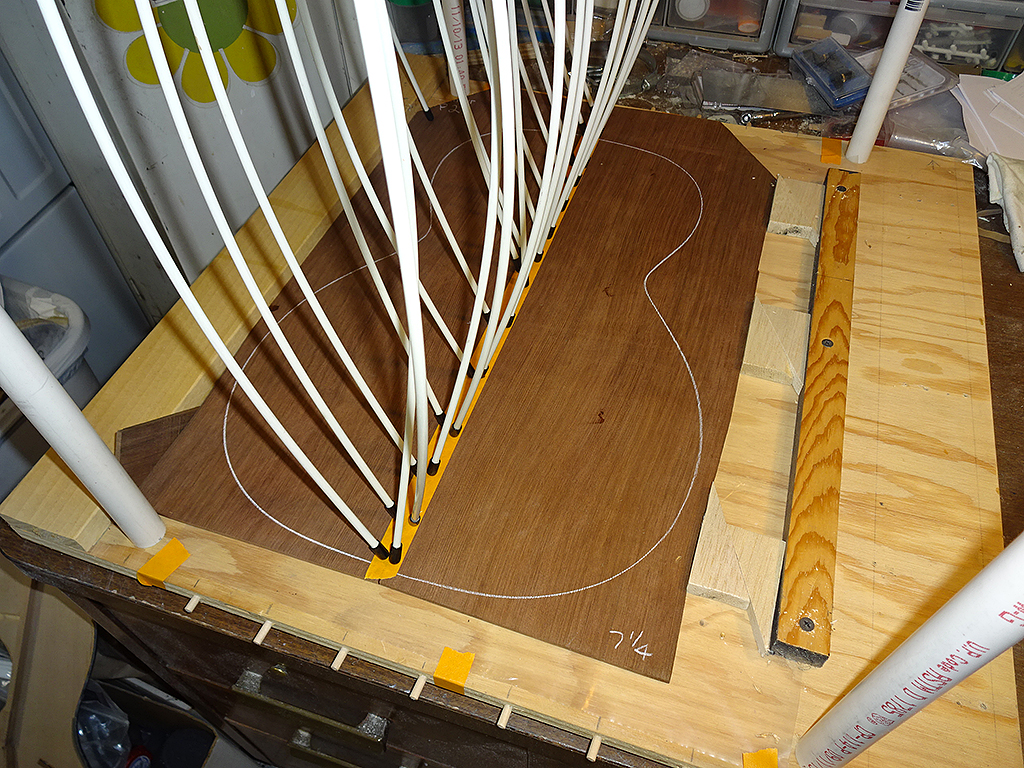
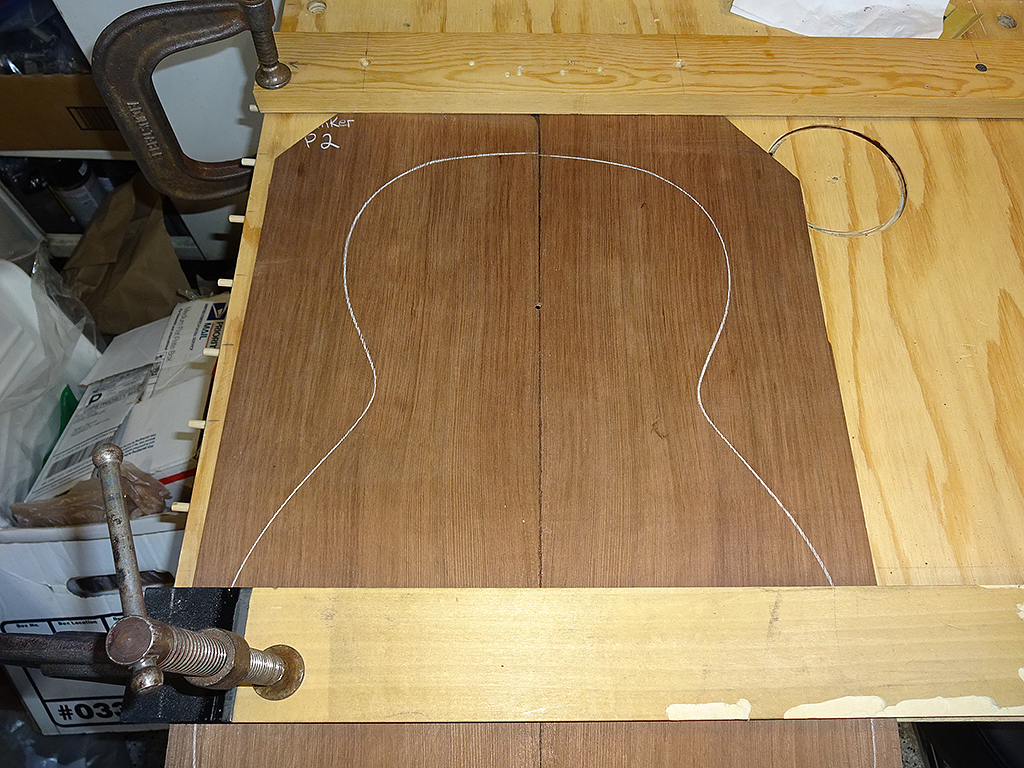
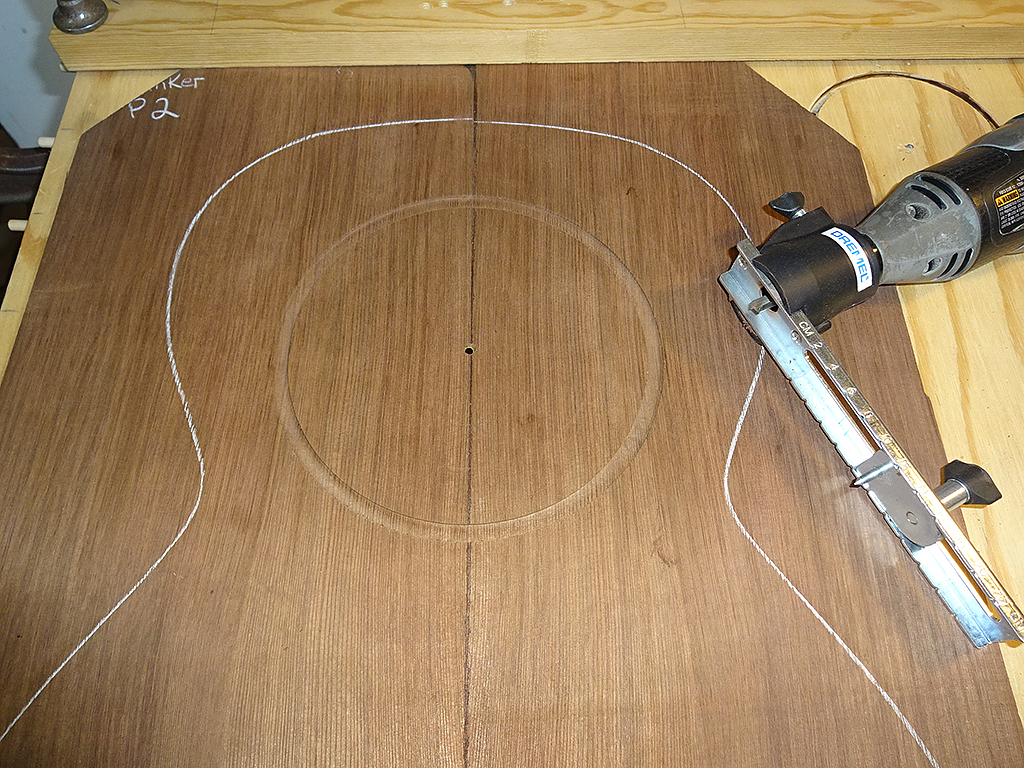
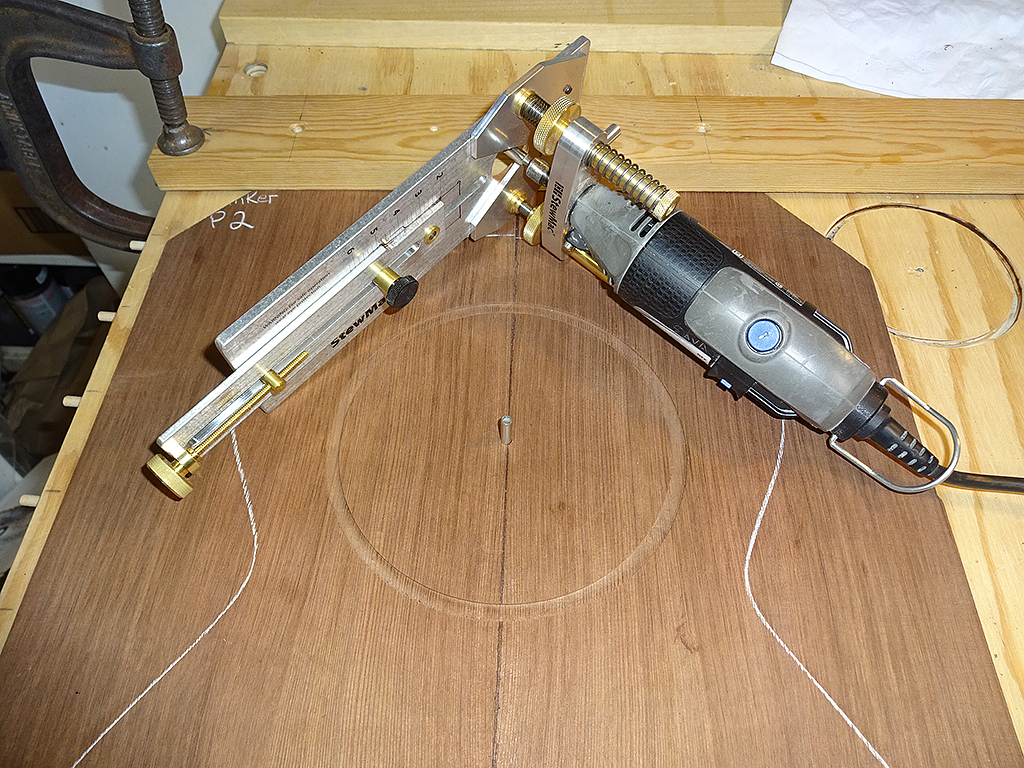
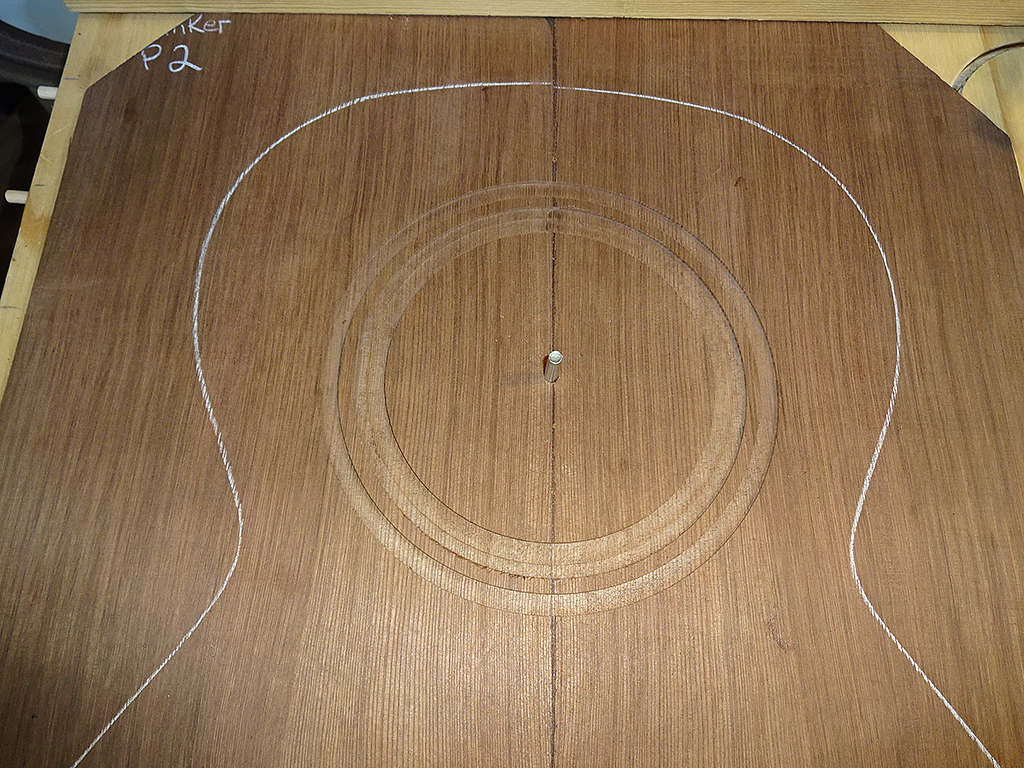
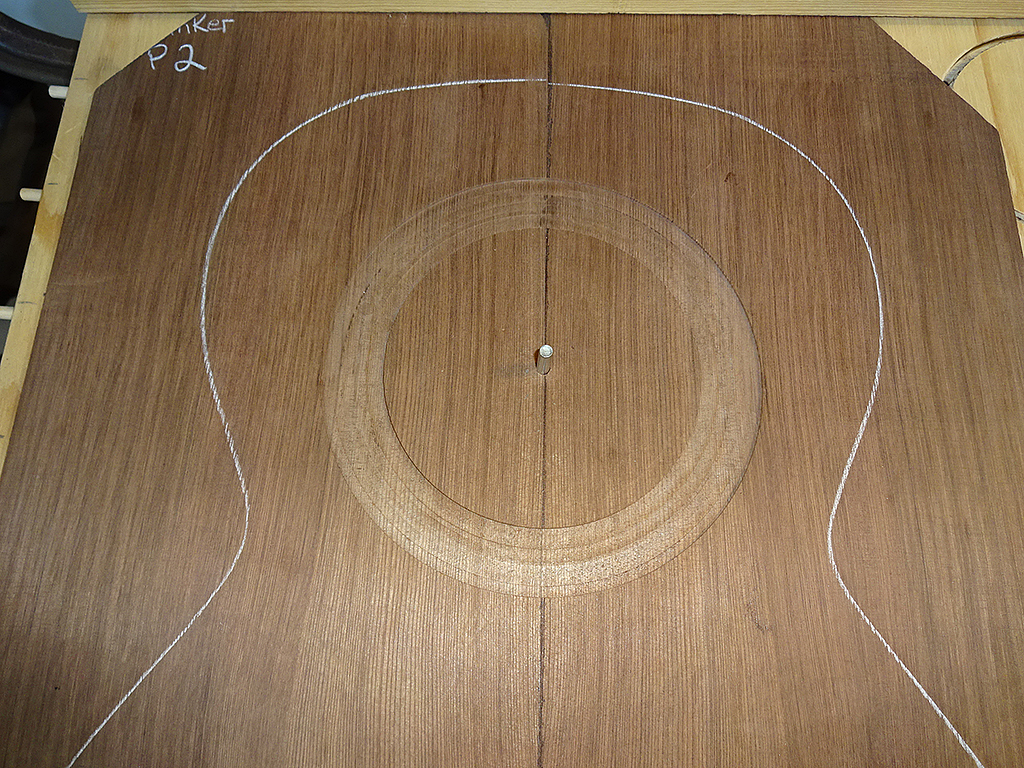
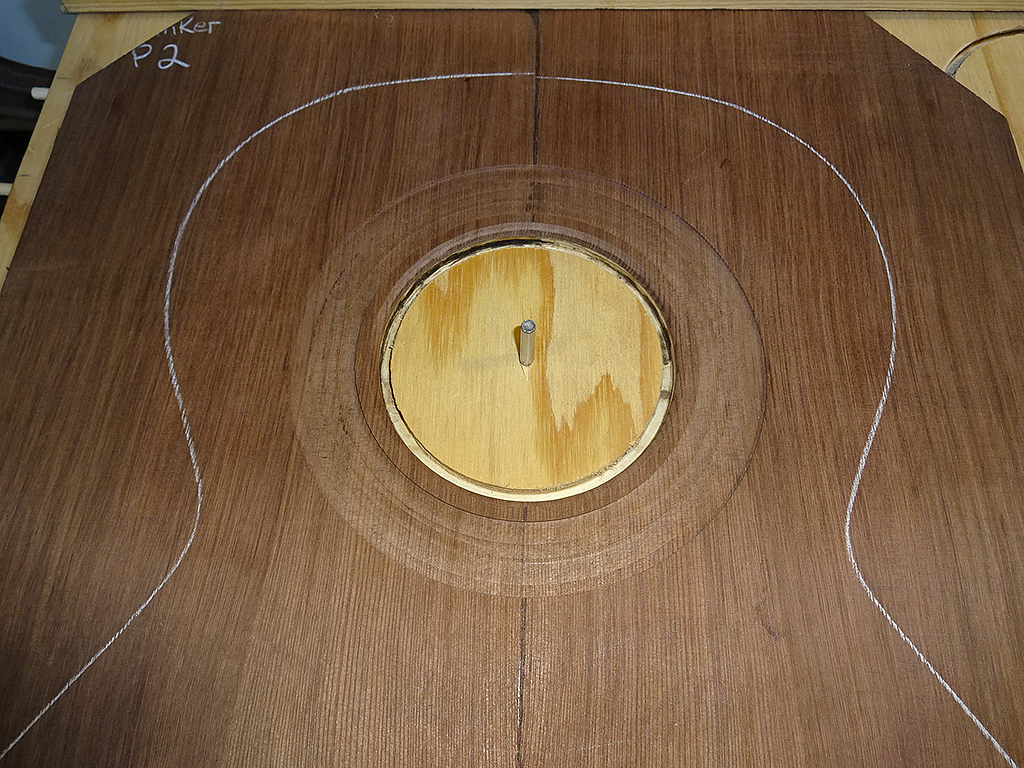
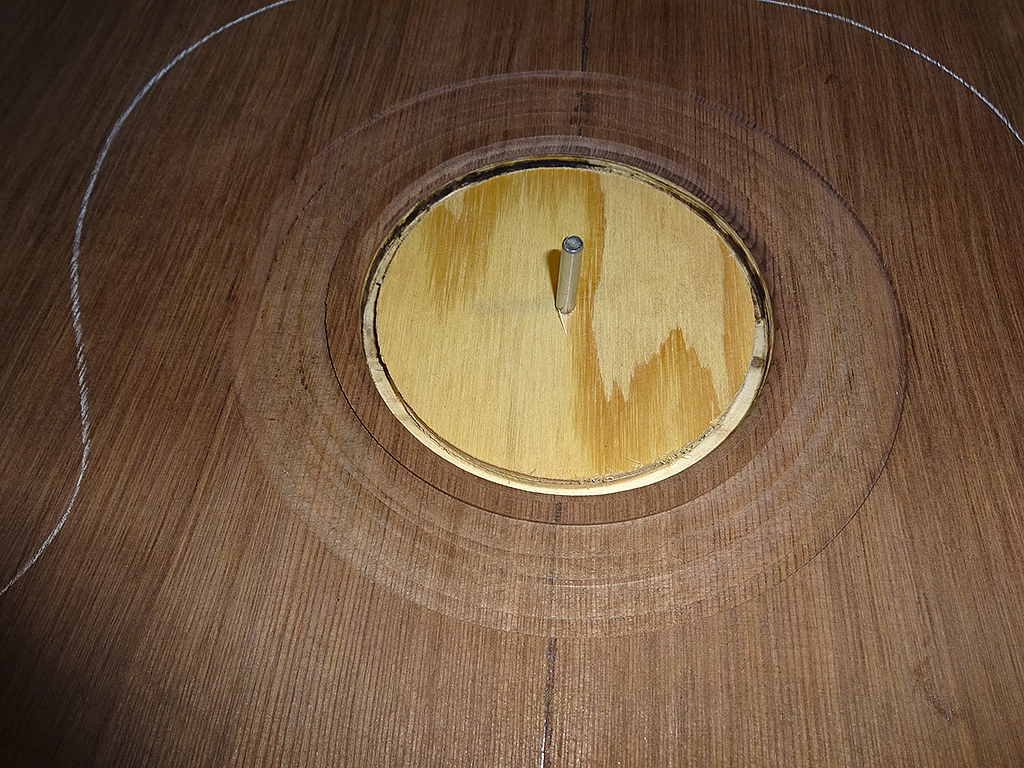
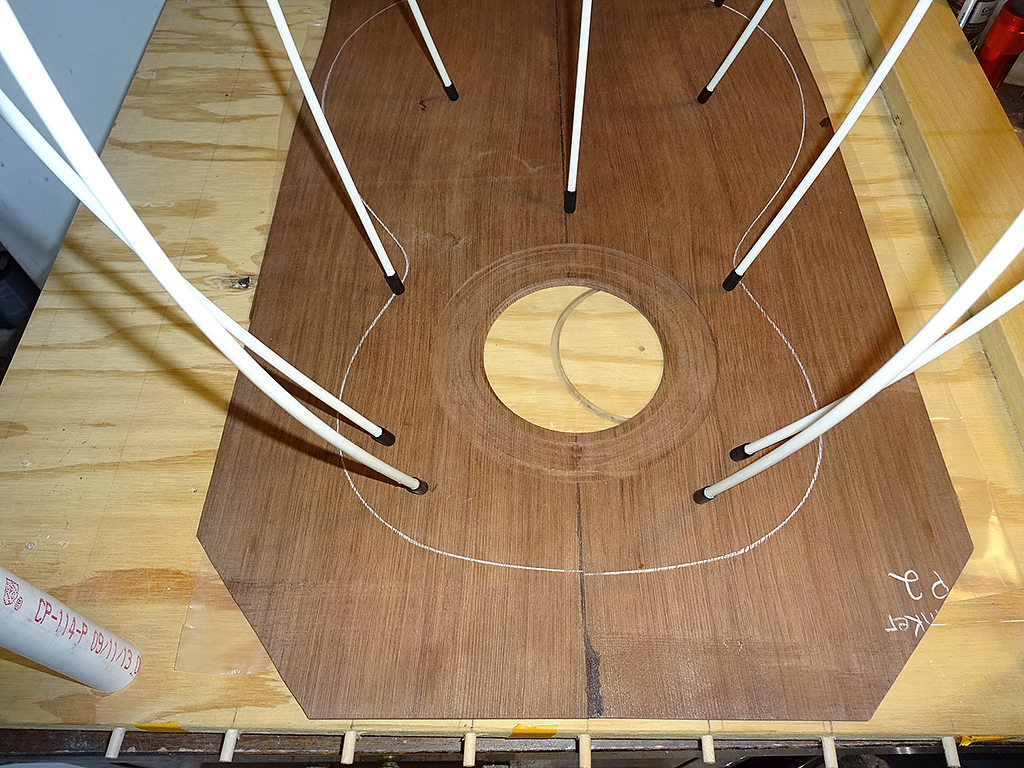
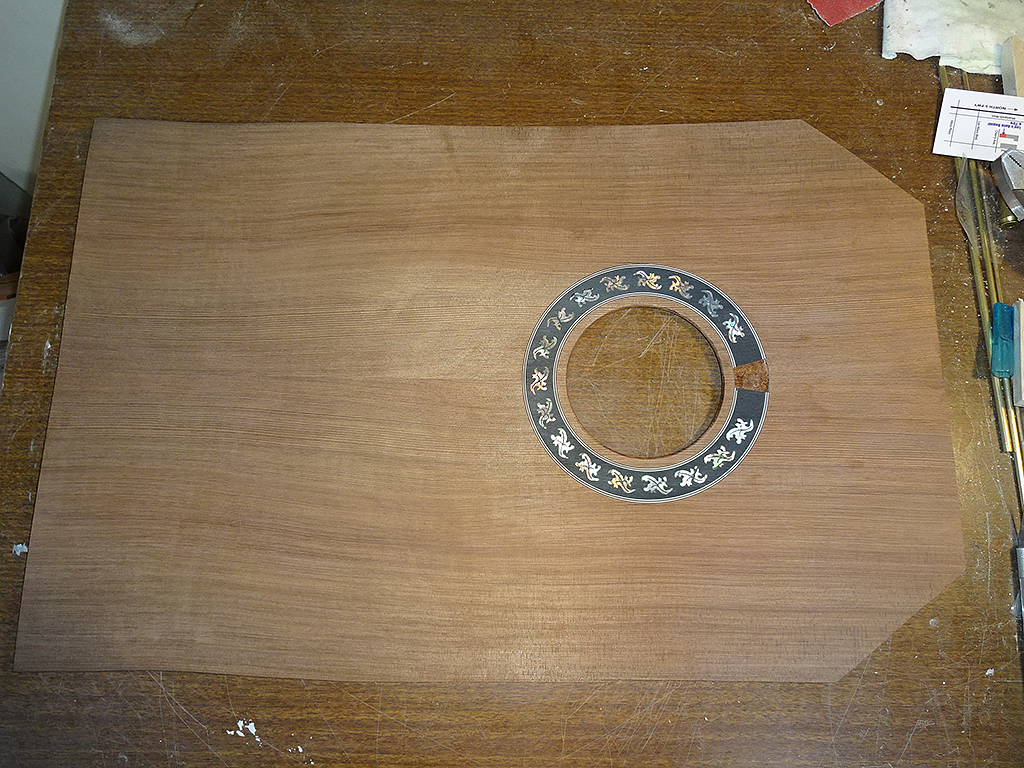
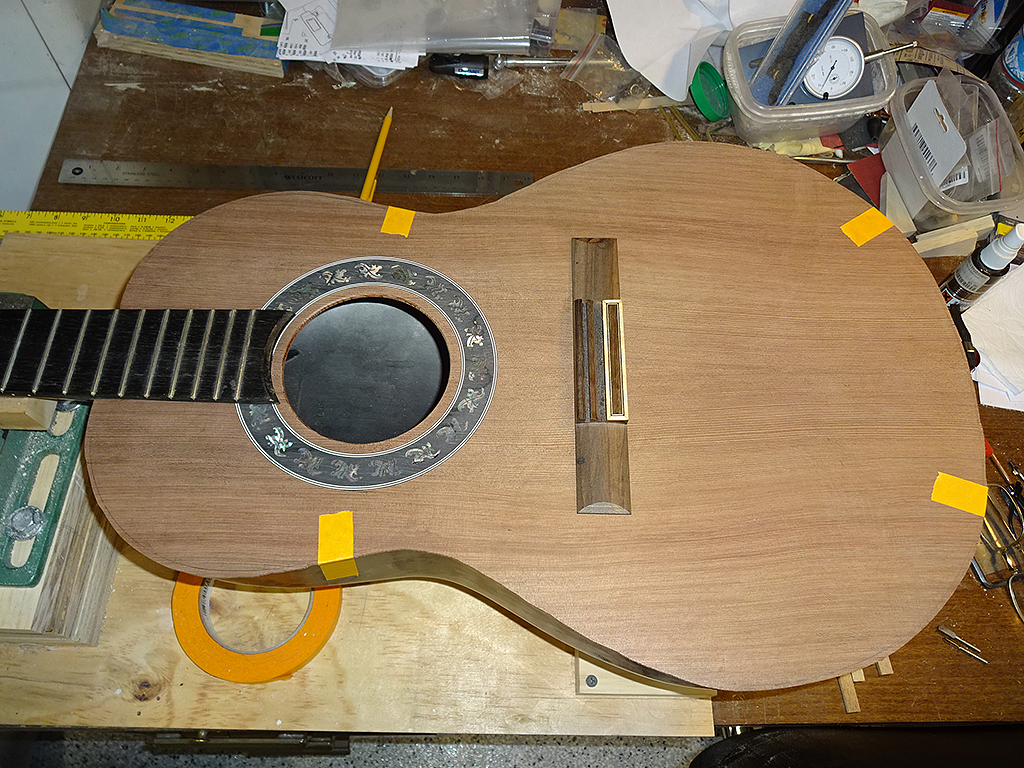
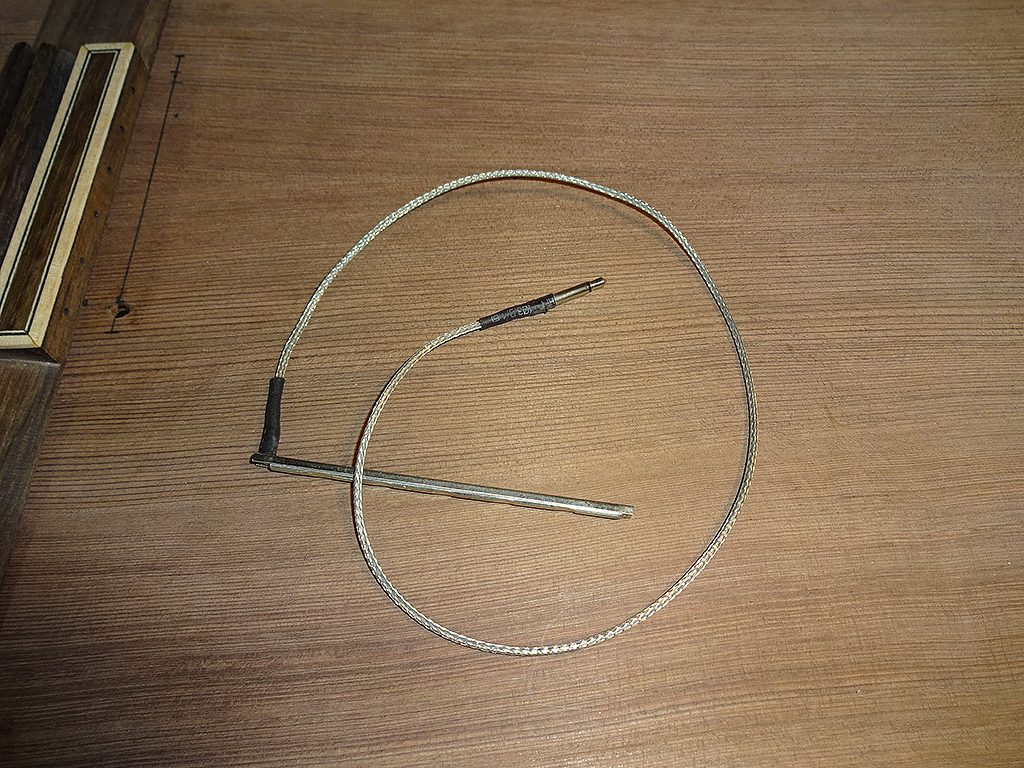
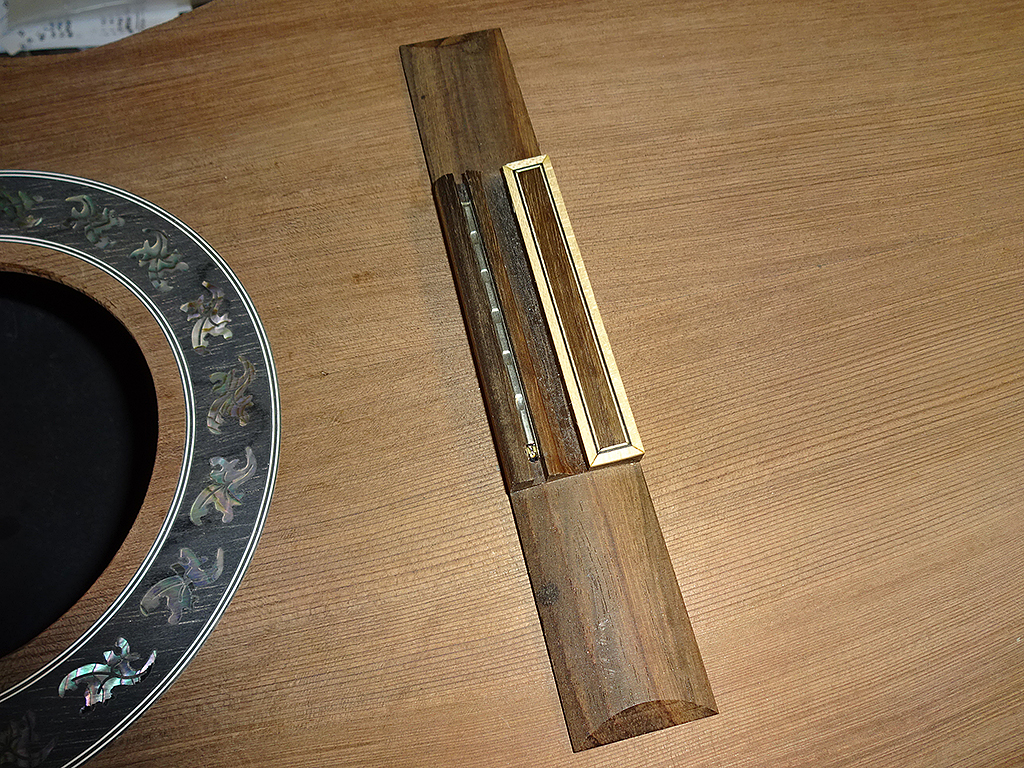
Joined: June 2012 Posts: 2303 Location: Lake Forest, CA | I had to acquire a couple of tools to route the rosette channel and cut and round the sound hole.
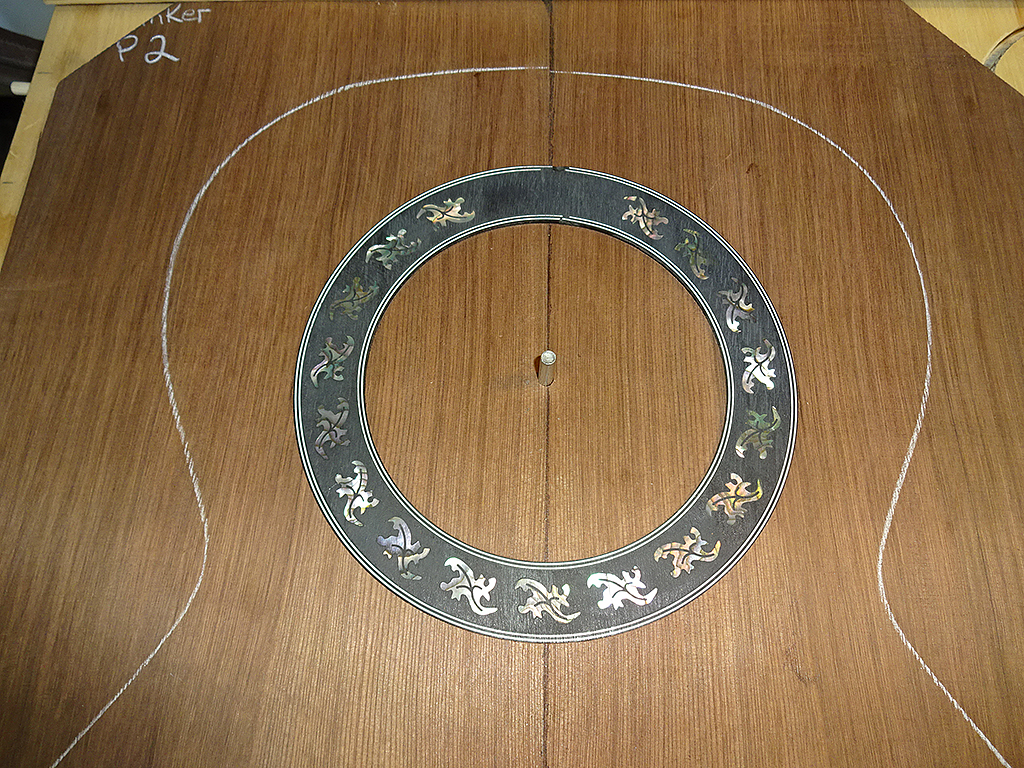
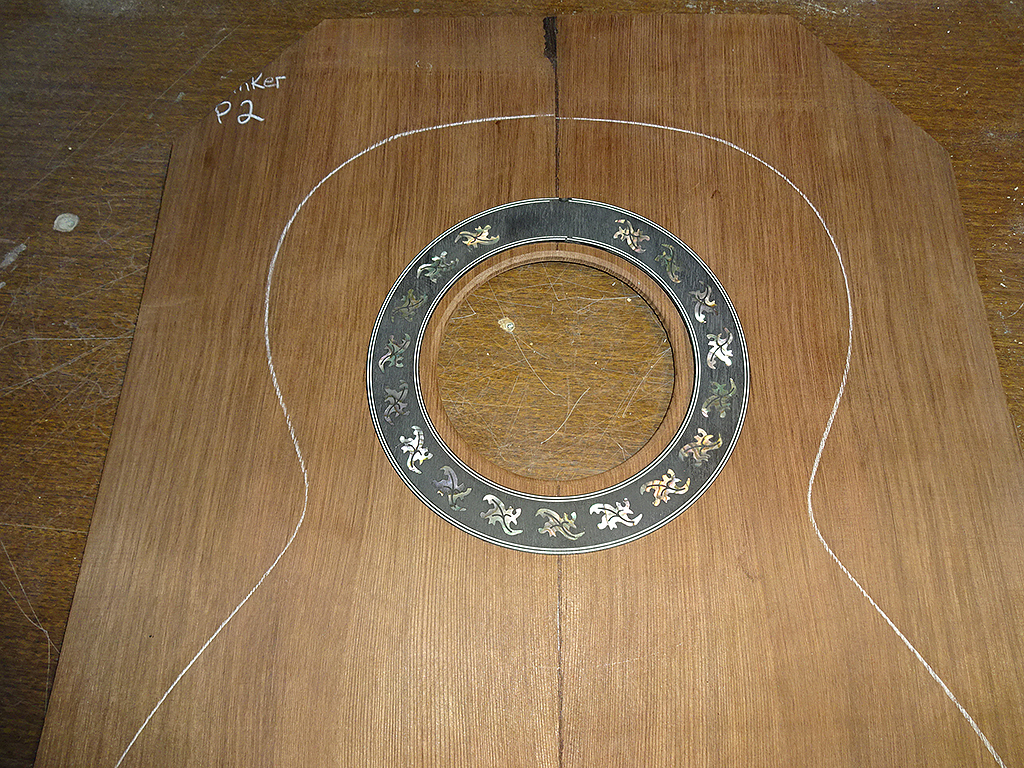
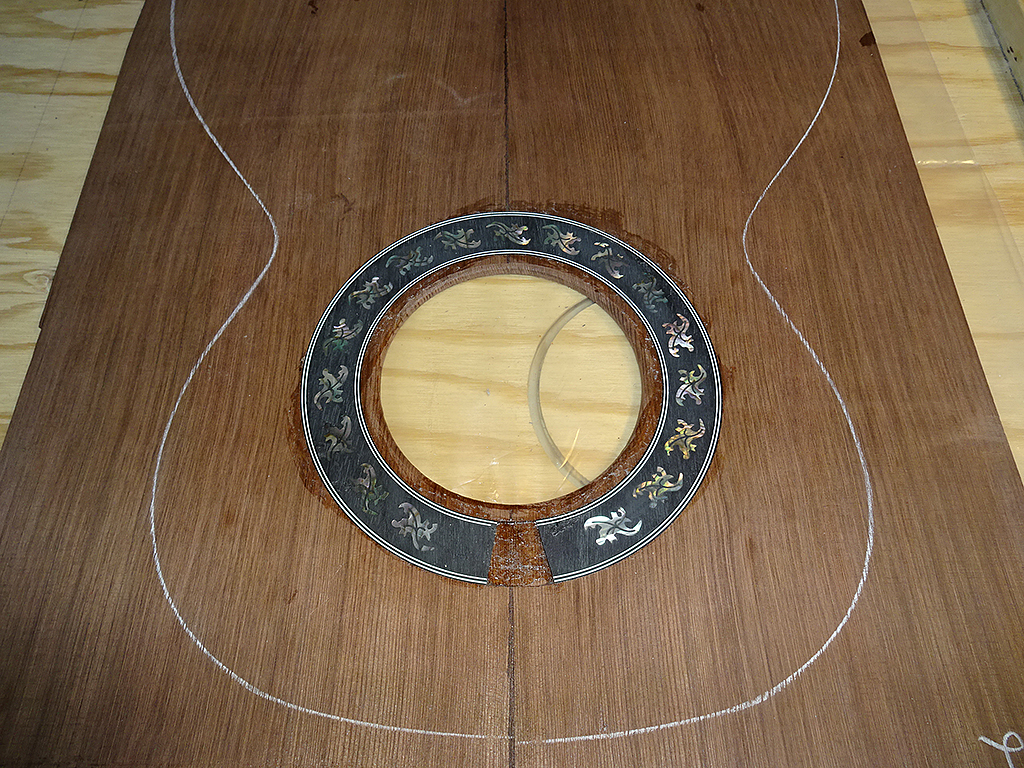
Test-fit of the rosette --success!
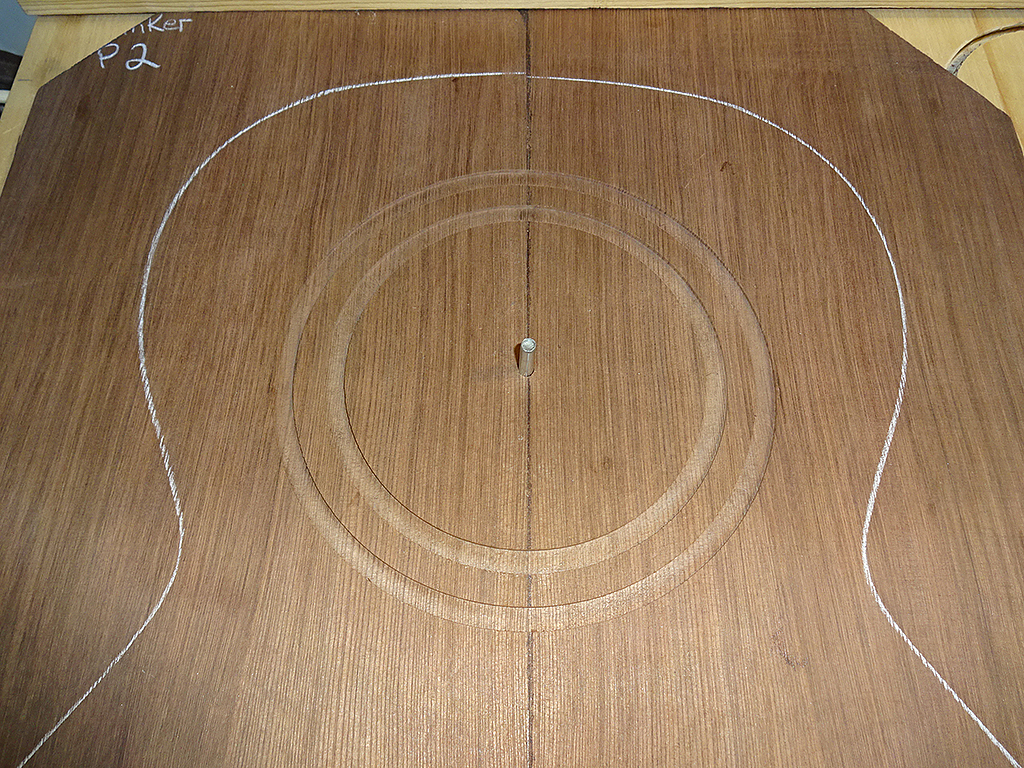
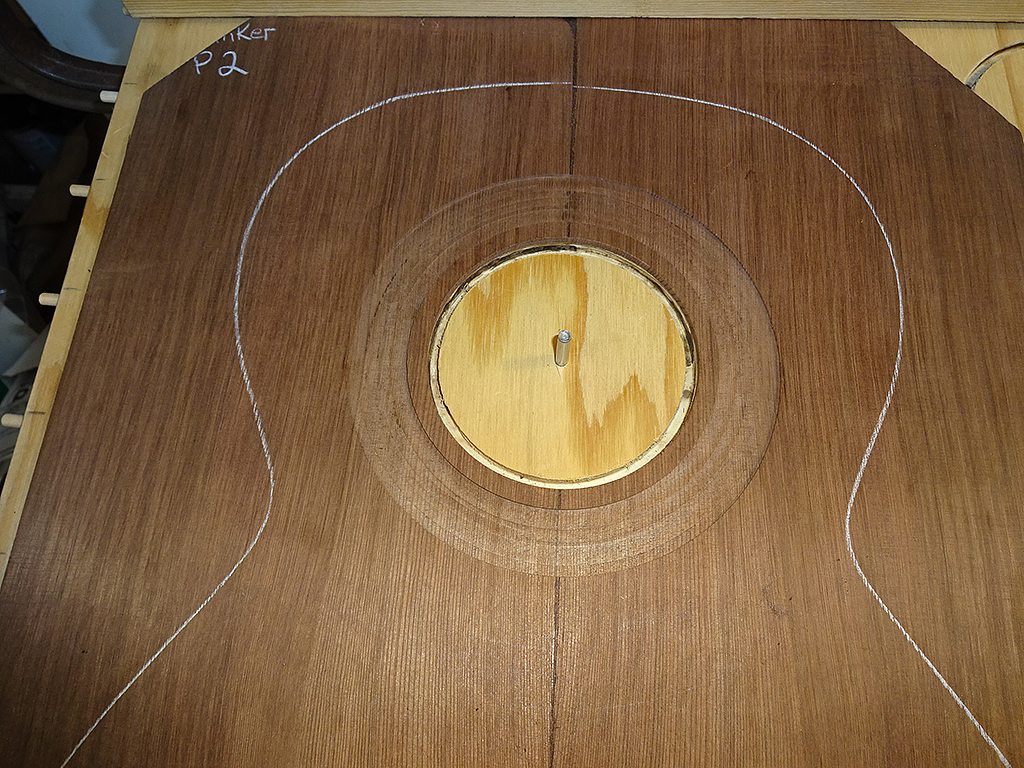
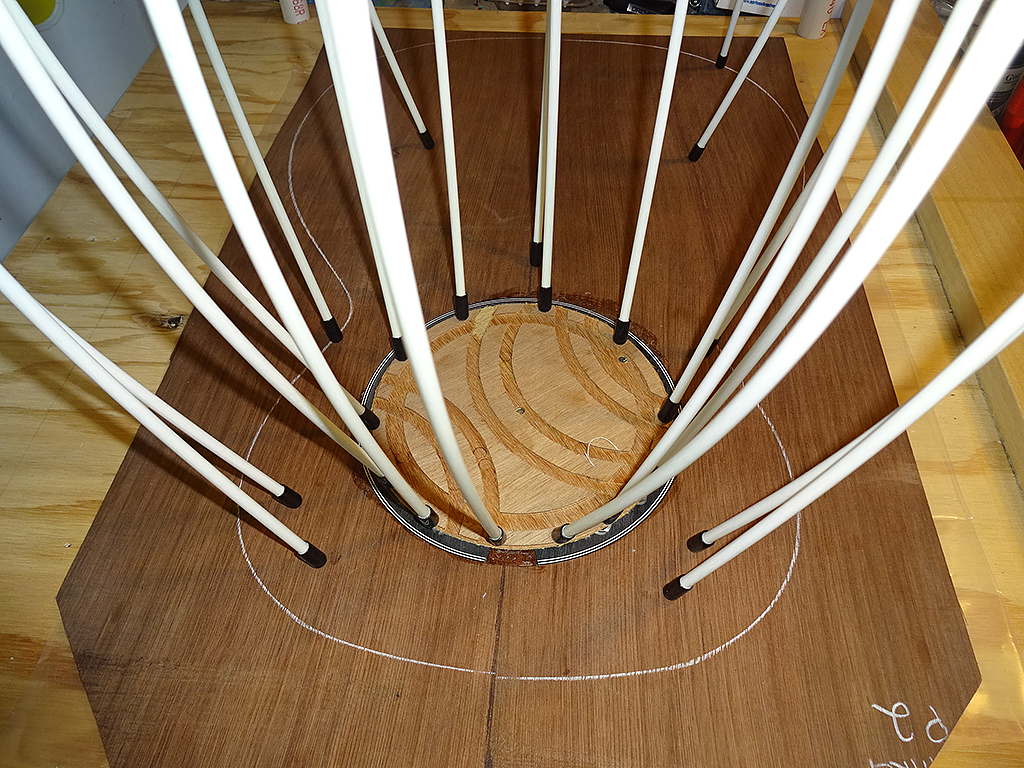
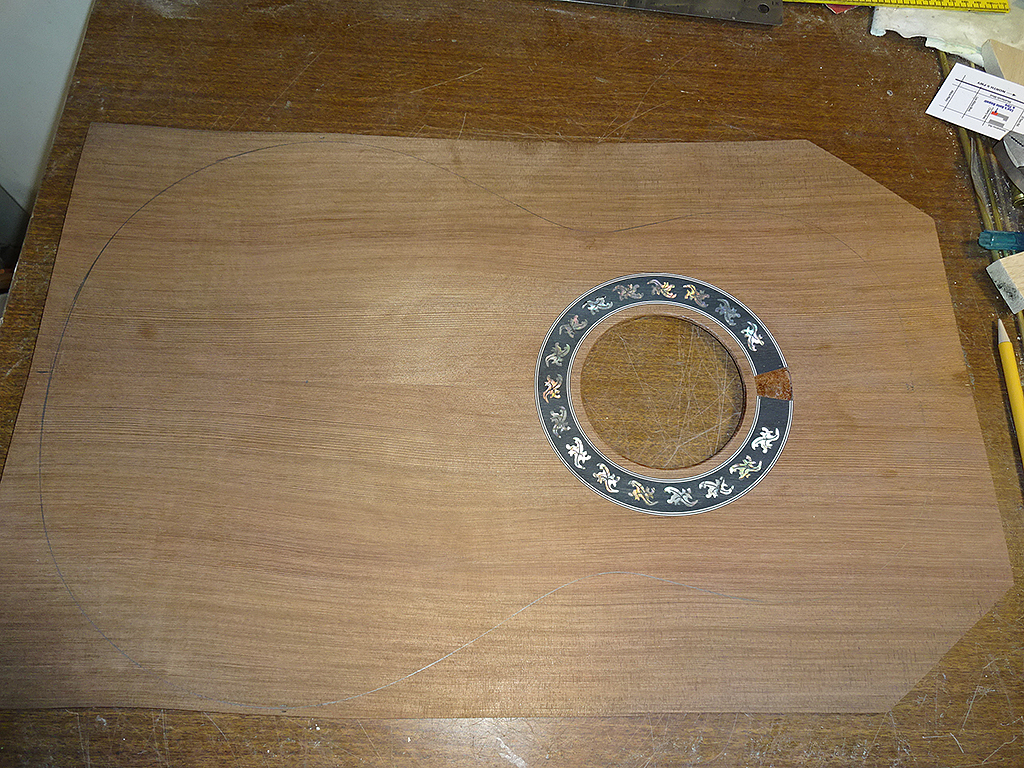
Route open the sound hole.
Test-fit the rosette into groove.
| ||
| |||
| Jonmark Stone |
| ||
Joined: May 2008 Posts: 1553 Location: Indiana | Pretty rosette. | ||
| |||
| Jonmark Stone |
| ||
Joined: May 2008 Posts: 1553 Location: Indiana | Nice job Dan. Edited by Jonmark Stone 2017-12-30 9:45 AM | ||
| |||
| jay |
| ||
Joined: January 2009 Posts: 1249 Location: Texas | Dan, these builds never get old. It becomes clearly evident why they started slapping the rosette on top of the guitars back in the late 60s and continued the practice. Tremendous effort! It is bound to be a stunning guitar. Congrats. | ||
| |||
| DanSavage |
| ||
Joined: June 2012 Posts: 2303 Location: Lake Forest, CA | Thanks, Jonmark. Thanks, Jay. | ||
| |||
| DanSavage |
| ||
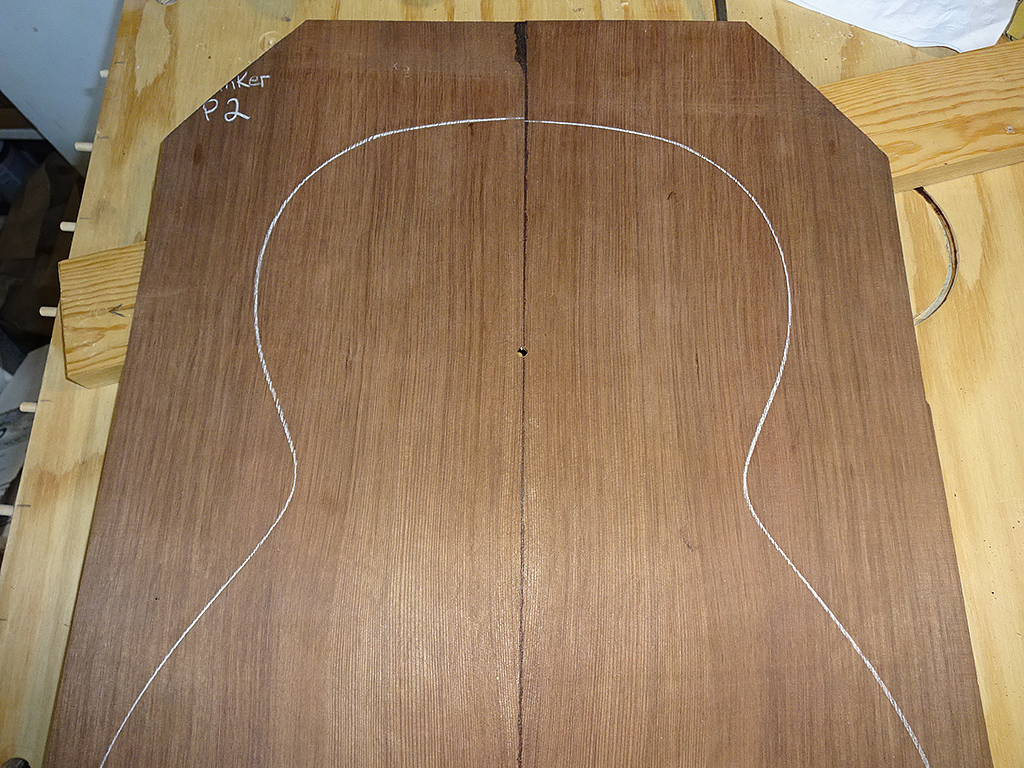
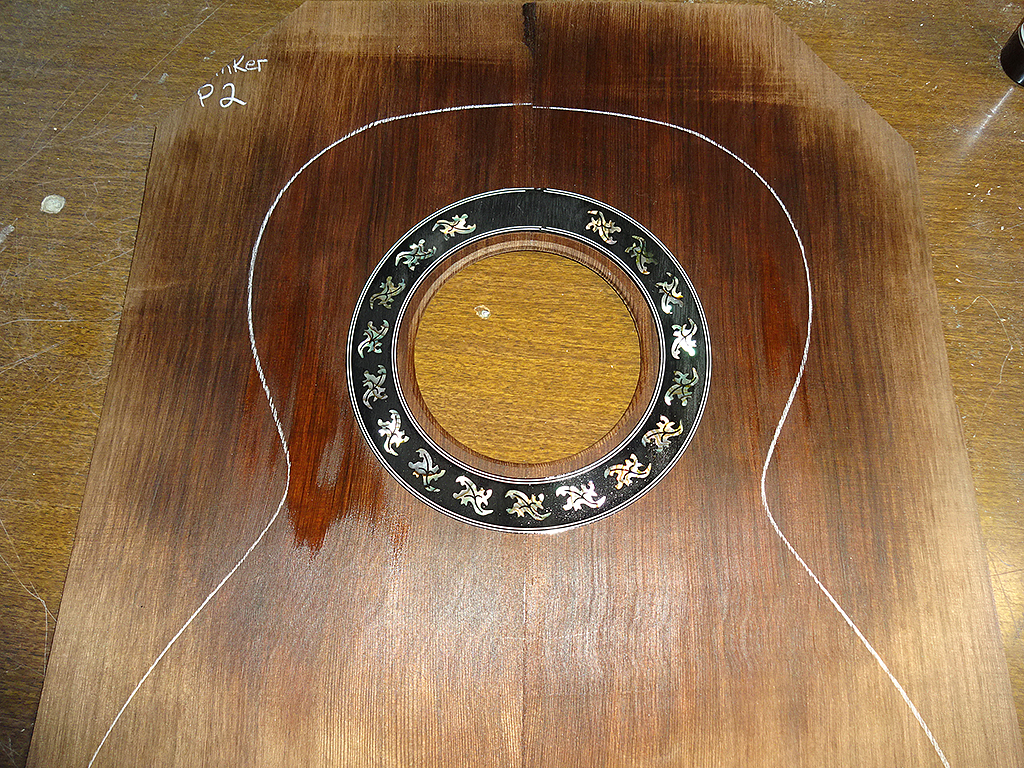
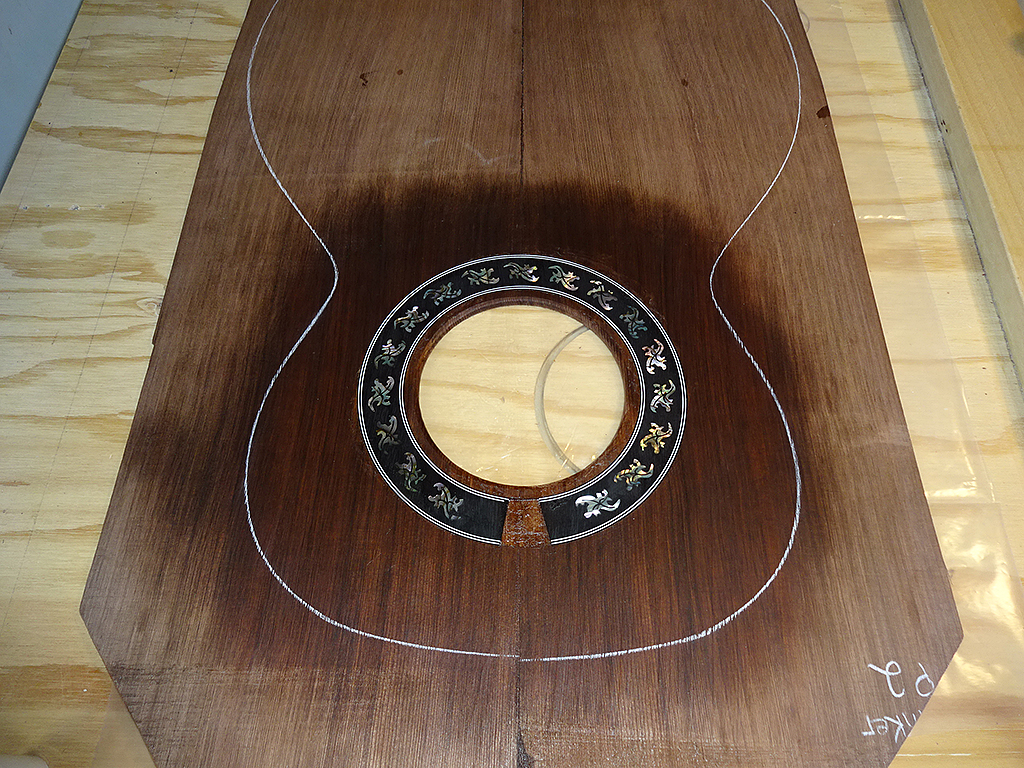
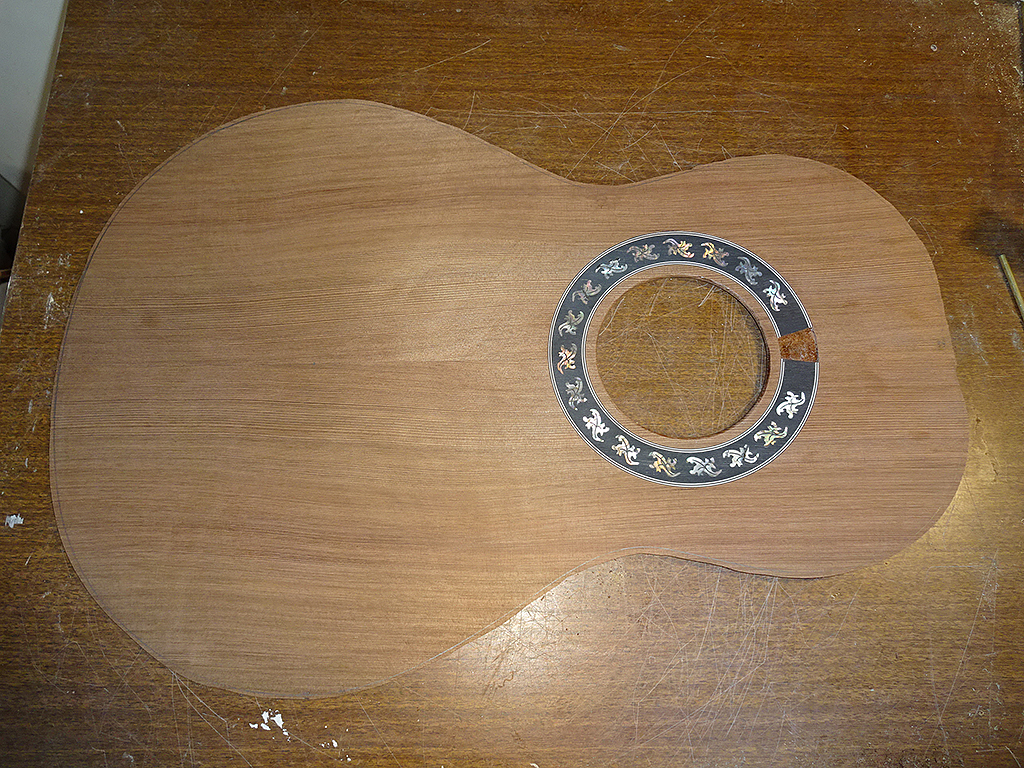
Joined: June 2012 Posts: 2303 Location: Lake Forest, CA | I pulled the top out of the gobar deck. I'm happy with how it turned out. It was easy to get very clean edges when routing the redwood. The spruce tends to fray a little bit which requires sanding to clean up the edges. The depth of the groove leaves the rosette just a little proud of the surface.
I'll take the top to the sanders next week to surface sand the top, then thickness sand it. Then, it's time to rough cut the top and glue the braces. | ||
| |||
| Patch |
| ||
Joined: May 2006 Posts: 4221 Location: Steeler Nation, Hudson Valley Contingent | Looking over the last posts in detail lifted my spirits a bit after a very tough December. Can't wait to see more! | ||
| |||
| DarenSavage |
| ||
Joined: December 2016 Posts: 128 | Helping Dan with routing the groove for Patch's Parlor was a great experience. We did 4 tests, plus a couple of go-no-furthers. Mostly, I ran the vacuum except on the final cut when I was a human clamp, holding the top down to ensure an even cut. We cut a variety of woods during our tests, and the final cut in Patch's redwood was the cleanest. Whew! Edited by DarenSavage 2018-01-05 5:47 PM | ||
| |||
| moody, p.i. |
| ||
Joined: March 2002 Posts: 15652 Location: SoCal | You mean Dan doesn't get it right, the first time, every time? I'm bummed..... | ||
| |||
| DarenSavage |
| ||
Joined: December 2016 Posts: 128 | moody, p.i. - 2018-01-06 4:45 PM You mean Dan doesn't get it right, the first time, every time? I'm bummed..... Ha ha! For the tests, no. For Patch's top, yes. I did come away with a pretty cool drink coaster, though. | ||
| |||
| DanSavage |
| ||
Joined: June 2012 Posts: 2303 Location: Lake Forest, CA | I got the top thickness sanded yesterday.
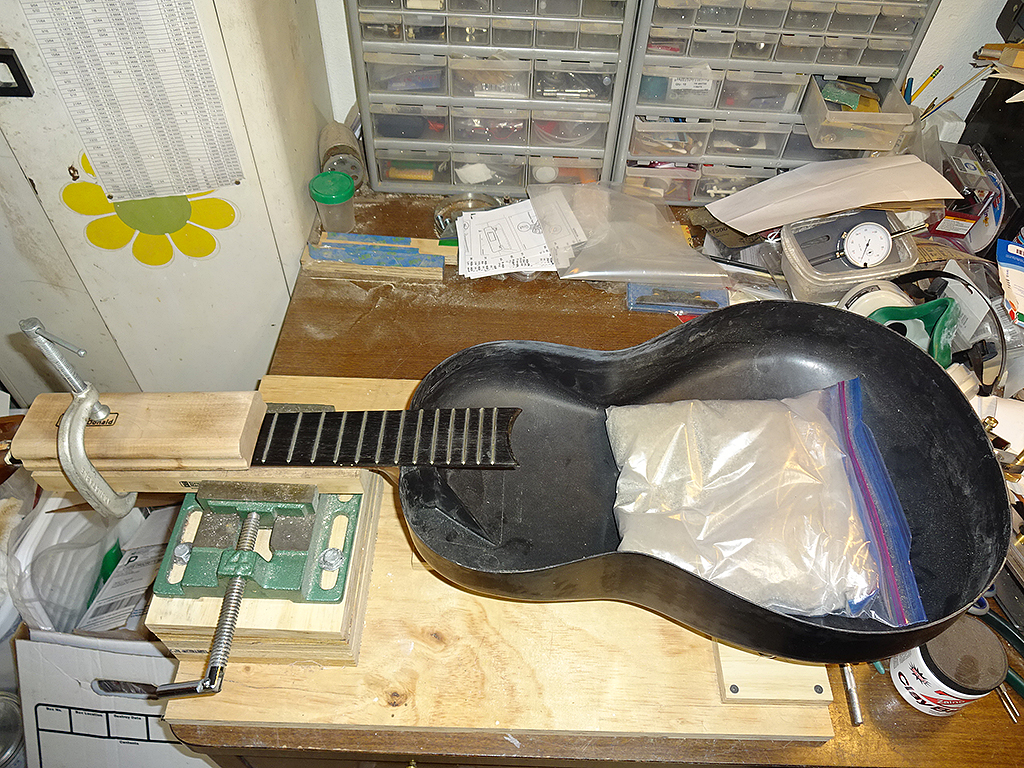
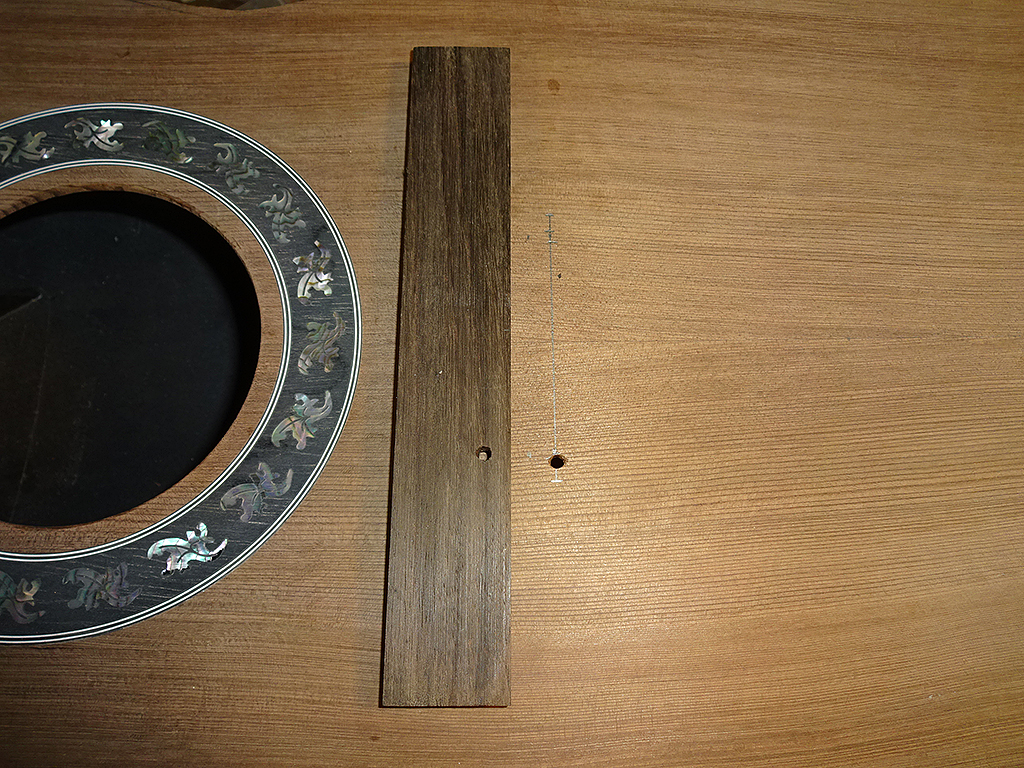
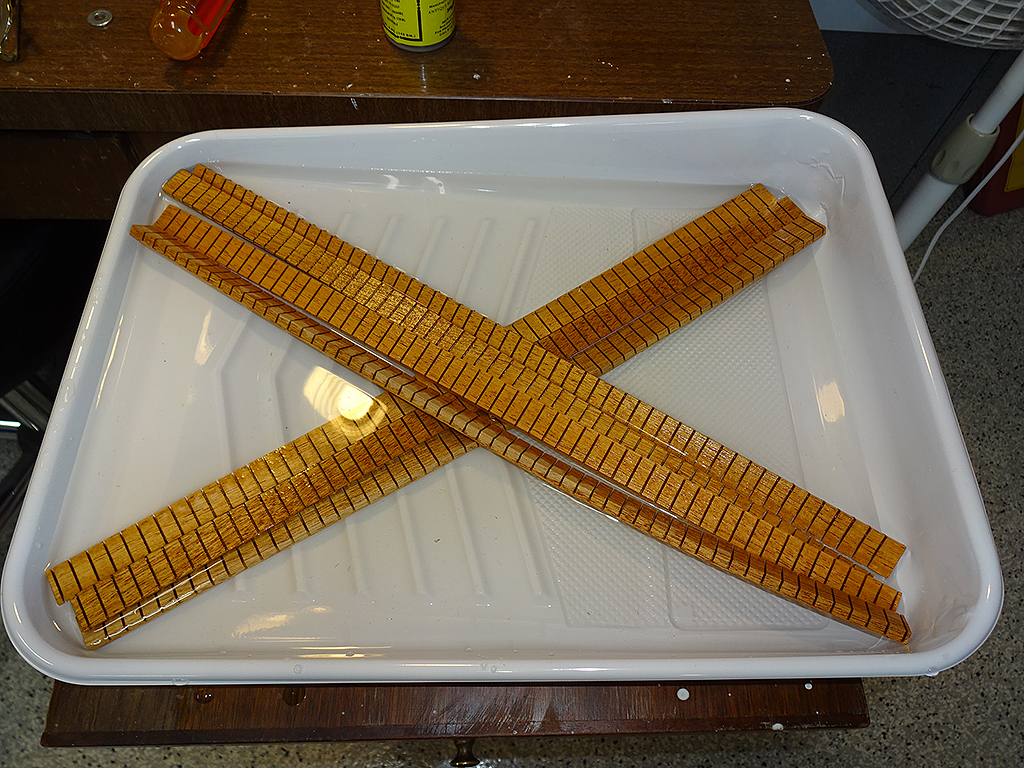
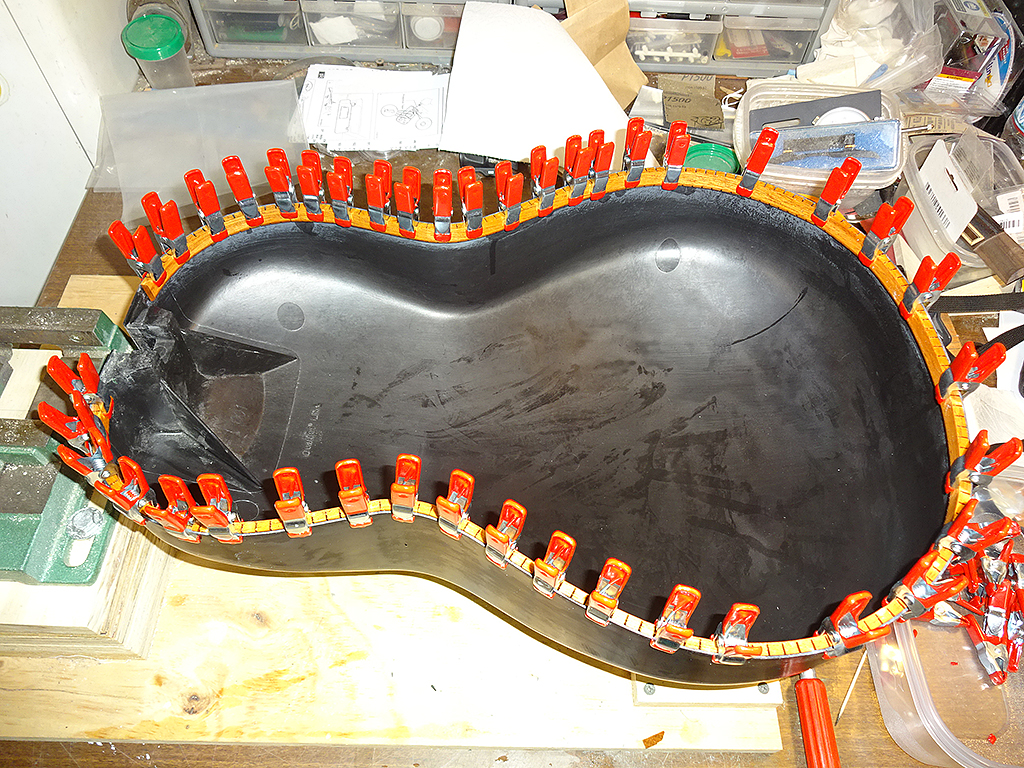
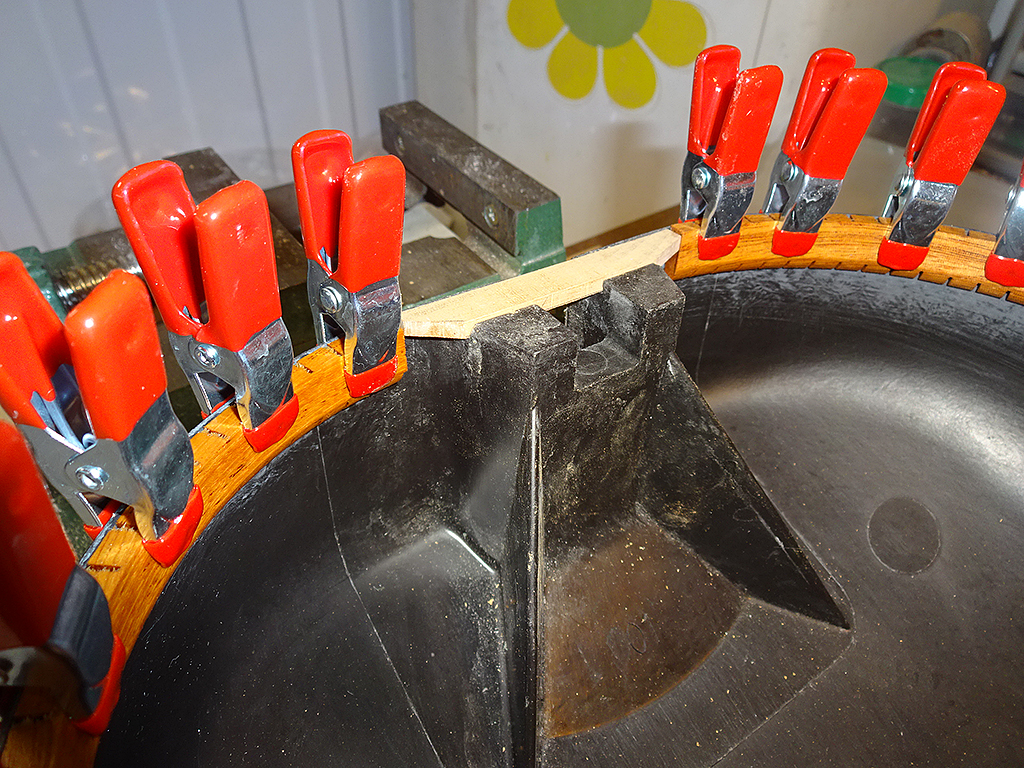
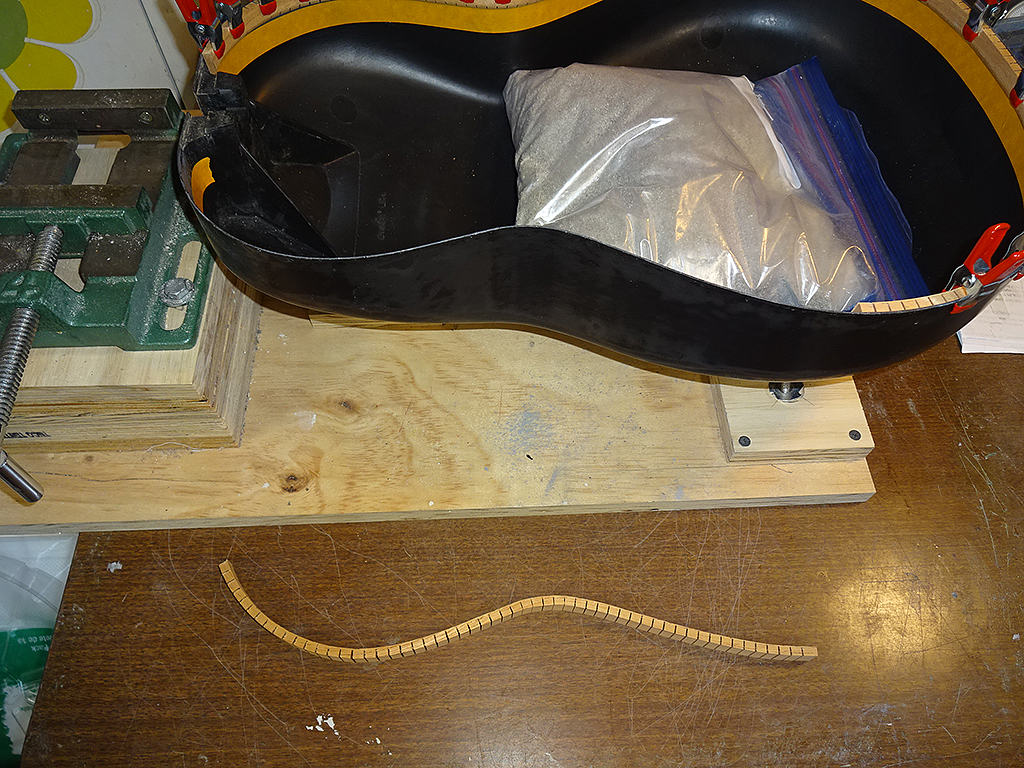
Filler piece made from scrap mahogany. I'll let the lining dry for 24 hours. Once it's dry, I'll remove each strip one at a time and glue it to the bowl.
| ||
| |||
| Patch |
| ||
Joined: May 2006 Posts: 4221 Location: Steeler Nation, Hudson Valley Contingent | I've been crazy-sick all weekend. Seeing this update made me feel a little better. Thanks Dan. (And Daren too apparently.) | ||
| |||
| DanSavage |
| ||
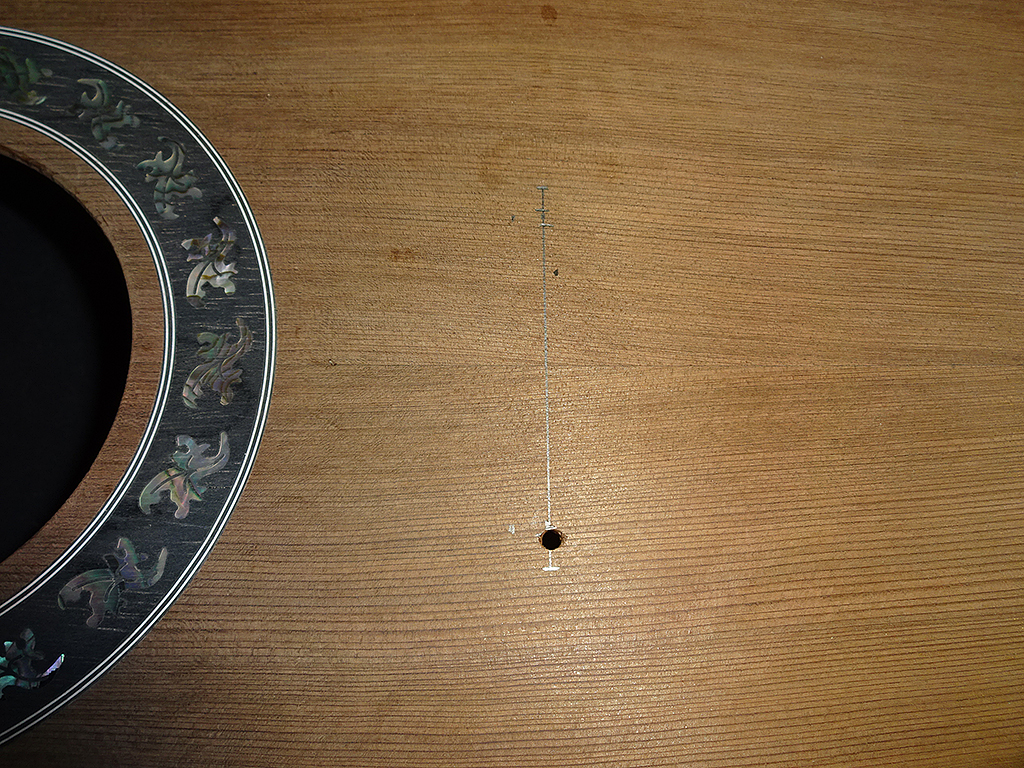
Joined: June 2012 Posts: 2303 Location: Lake Forest, CA | Sorry to hear you've been under he weather, Patch.
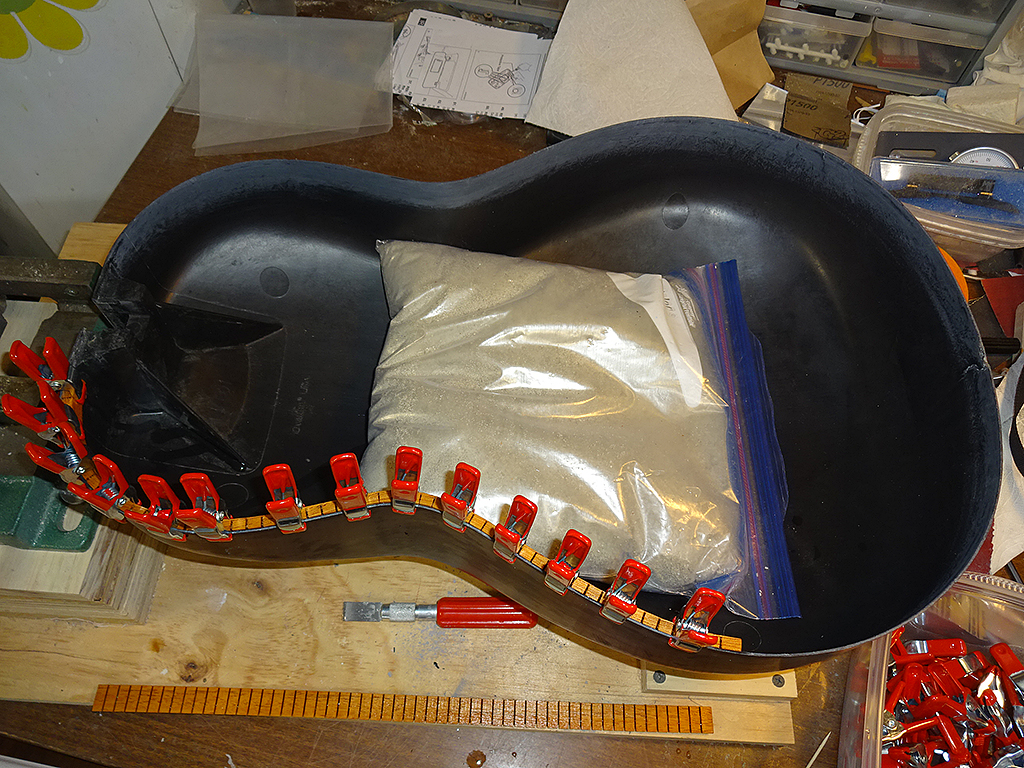
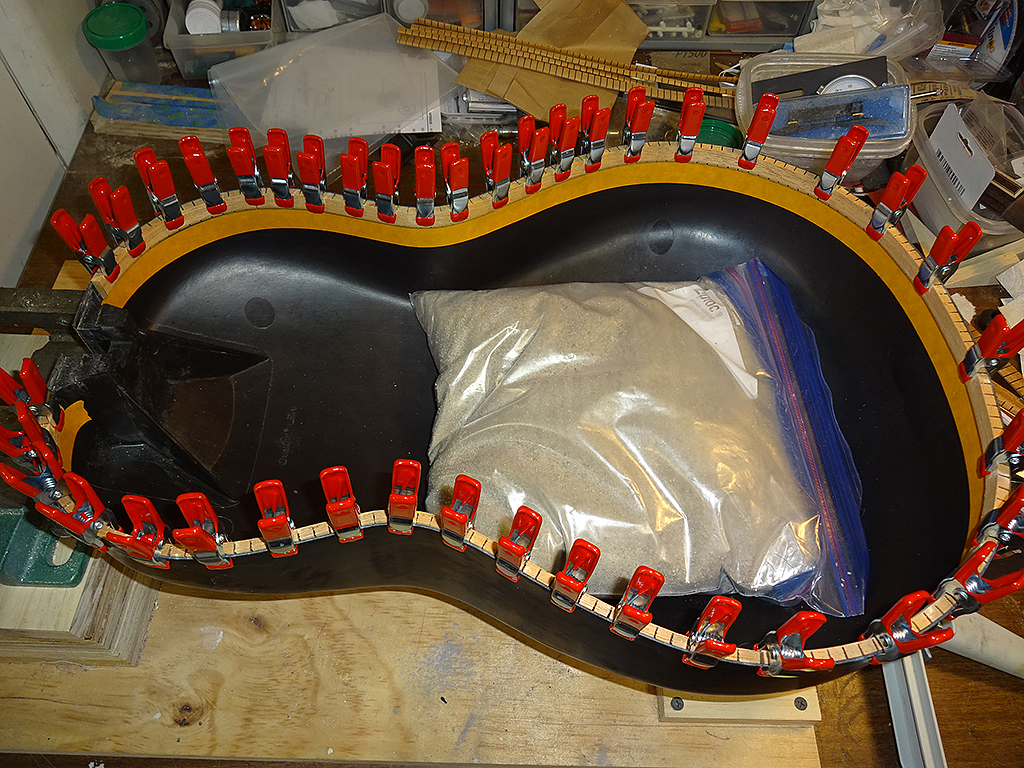
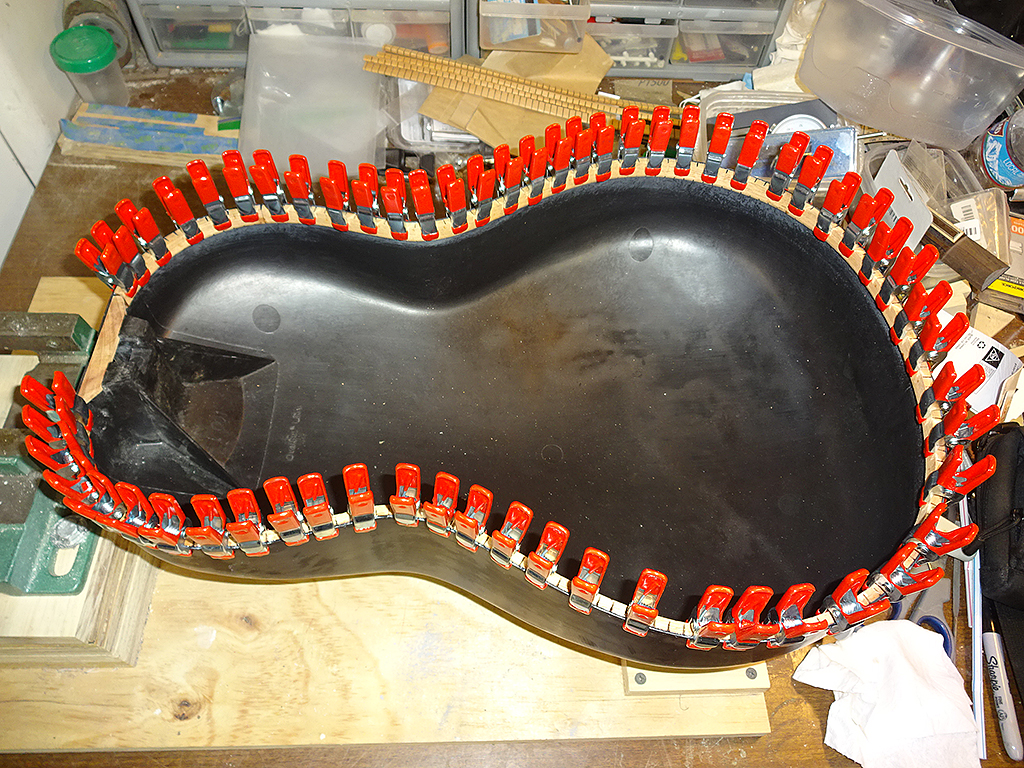
This will do two things for me. First, it'll show me where to stop gluing and second, once I get the lining clamped, I can peel the tape away leaving a clean glue line.
| ||
| |||
| BCam |
| ||
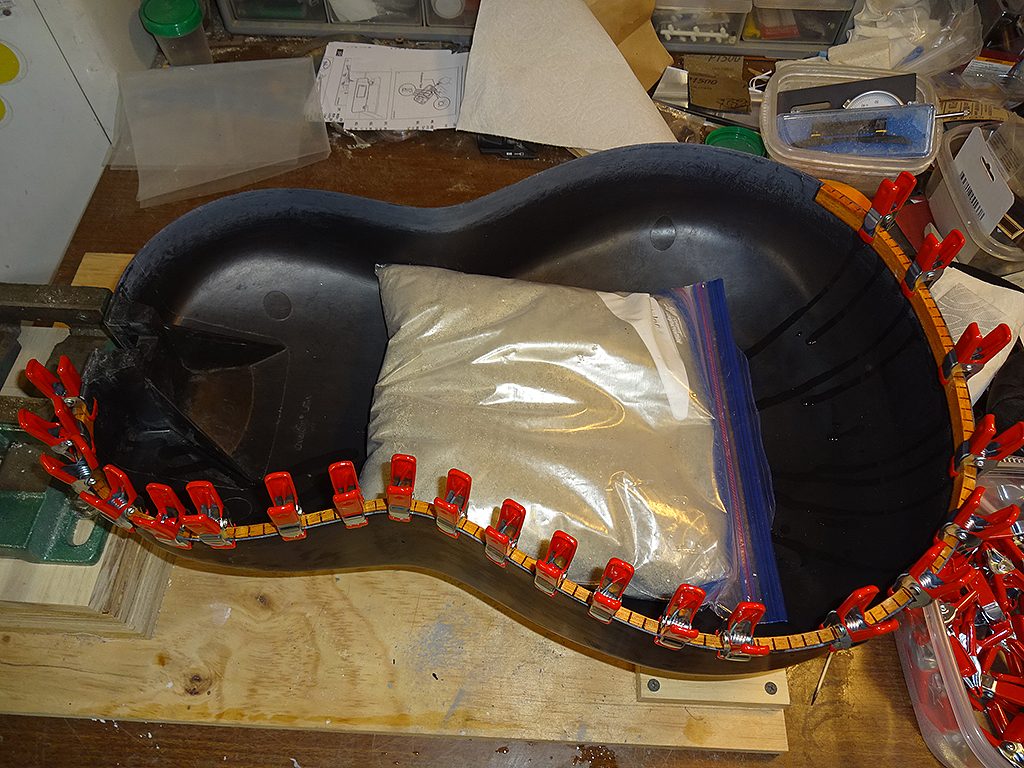
Joined: October 2014 Posts: 268 | You can never have too many clamps! | ||
| |||
| DanSavage |
| ||
Joined: June 2012 Posts: 2303 Location: Lake Forest, CA | Ha ha! Yeah, I actually need to order 10-20 more.  | ||
| |||


| Jump to page : < 1 2 3 4 5 6 7 > Now viewing page 3 [25 messages per page] |
| Search this forum Printer friendly version E-mail a link to this thread |
| This message board and website is not sponsored or affiliated with Ovation® Guitars in any way. | |
| (Delete all cookies set by this site) | |