| The Ovation Fan Club | ||
| ||
| Random quote: "There are more love songs than anything else. If songs could make you do something we'd all love one another." -Frank Zappa |
 1978 1617 Legend Rebuild... 1978 1617 Legend Rebuild...
| View previous thread :: View next thread | |
| Member Communities -> Bottom Feeding Luthiery Guild | Message format | |
| BanjoJ |
| ||
Joined: September 2012 Posts: 809 Location: Thredbo, NSW, Australia | Thanks Dan. That makes sense. It got me a little curious about changing the radius on a fingerboard, and I see that plenty of people do that. I'm now wondering if there would be enough wood to change a flat fingerboard to a 10" radius. | ||
| |||
| DanSavage |
| ||
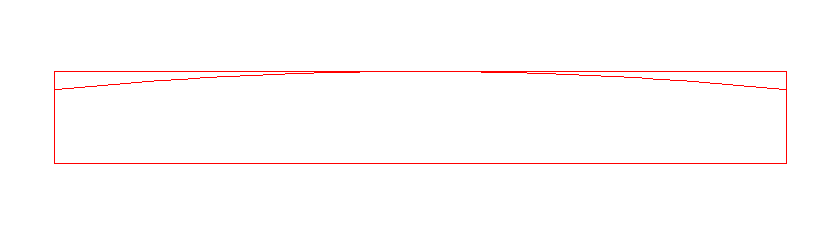
Joined: June 2012 Posts: 2303 Location: Lake Forest, CA | BanjoJ - 2015-12-21 10:04 PM I'm now wondering if there would be enough wood to change a flat fingerboard to a 10" radius. CAD to the rescue. Assuming a radius of 10", a fretboard width of 2" and a thickness of 1/4", which is the nominal thickness of my fretboard at the center, I would say that there would be enough wood. See below. The center is .25" and the edges are just under .2" (.1999")
Edited by DanSavage 2015-12-22 1:06 AM | ||
| |||
| arumako |
| ||
Joined: October 2012 Posts: 1018 Location: Yokohama, Japan | Just awesome, Dan. You're making quick progress on this one! Interesting point about the pick-ups not being able to catch the torrefied quality of the sound board. If Ovation really is going to make a wood backed bowl, a "Cool Tube" style pre-amp is really going to be necessary in the future. The work you're doing on the neck is really educational too. Looking forward to your choice of finish on the sound board and the neck too. | ||
| |||
| BanjoJ |
| ||
Joined: September 2012 Posts: 809 Location: Thredbo, NSW, Australia | DanSavage - 2015-12-22 6:03 PM CAD to the rescue. Assuming a radius of 10", a fretboard width of 2" and a thickness of 1/4", which is the nominal thickness of my fretboard at the center, I would say that there would be enough wood. See below. The center is .25" and the edges are just under .2" (.1999")
Cool! With a lot of work removing and replacing the frets (probably too much work) I could make a nylon stringer more comfortable to play. I'm just not used to the flat fingerboard when playing barre chords. Alternatively, I could just practice more.  | ||
| |||
| DanSavage |
| ||
Joined: June 2012 Posts: 2303 Location: Lake Forest, CA | BanjoJ - 2015-12-21 11:45 PM With a lot of work removing and replacing the frets (probably too much work) I could make a nylon stringer more comfortable to play. I'm just not used to the flat fingerboard when playing barre chords. Alternatively, I could just practice more. That, or if you want to play nylon stringed Ovation with a curved fretboard, you could get a Country Artist. | ||
| |||
| DanSavage |
| ||
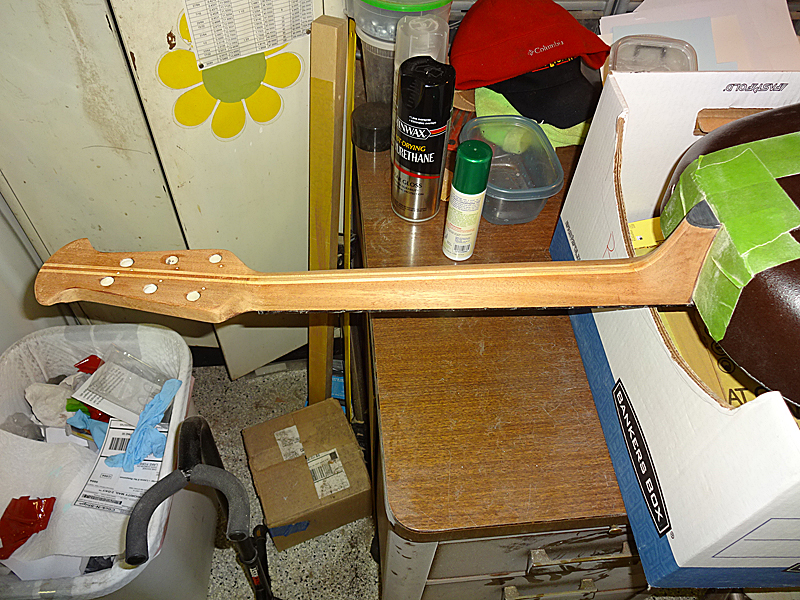
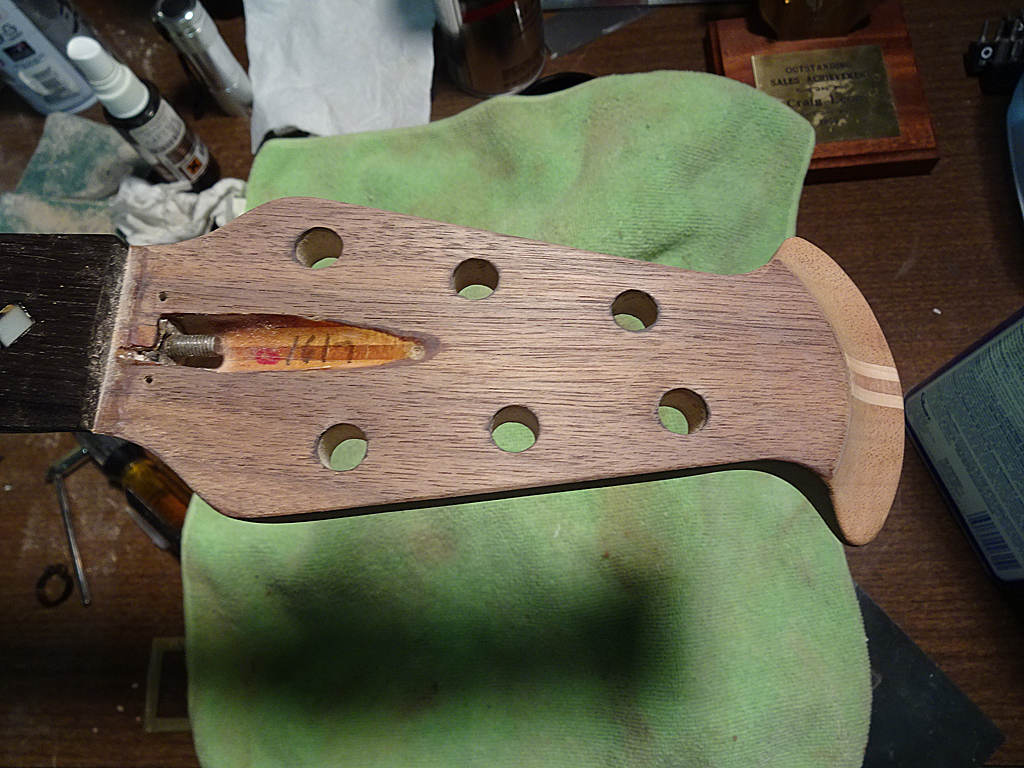
Joined: June 2012 Posts: 2303 Location: Lake Forest, CA | So, I sanded the finish off the neck and headstock.
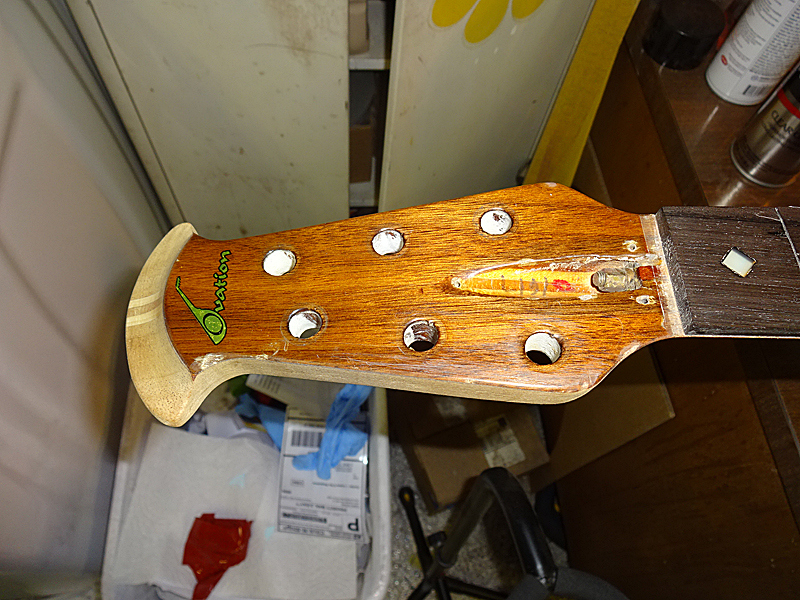
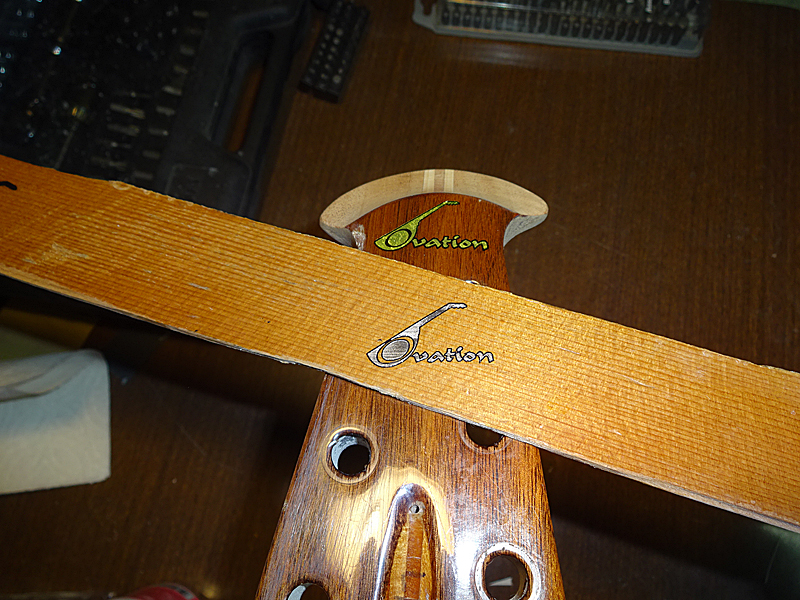
The original plan was to sand level the finish on the front of the headstock to preserve the original decal. But, the pre-existing gouge in the crook of the headstock up near the bottom of the guitar in the logo, along with a couple of new gouges I made with the Dremel when I was taking the finish off the sides of the headstock, had my pondering making a new decal.
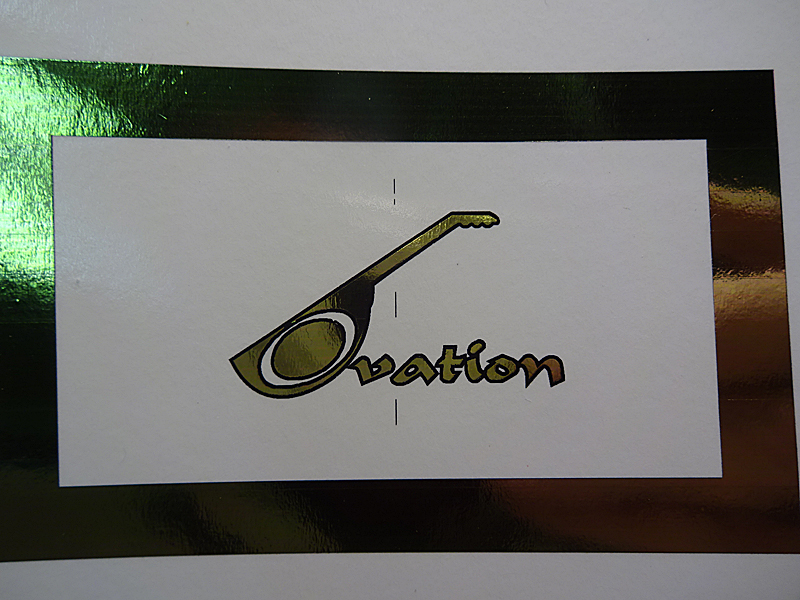
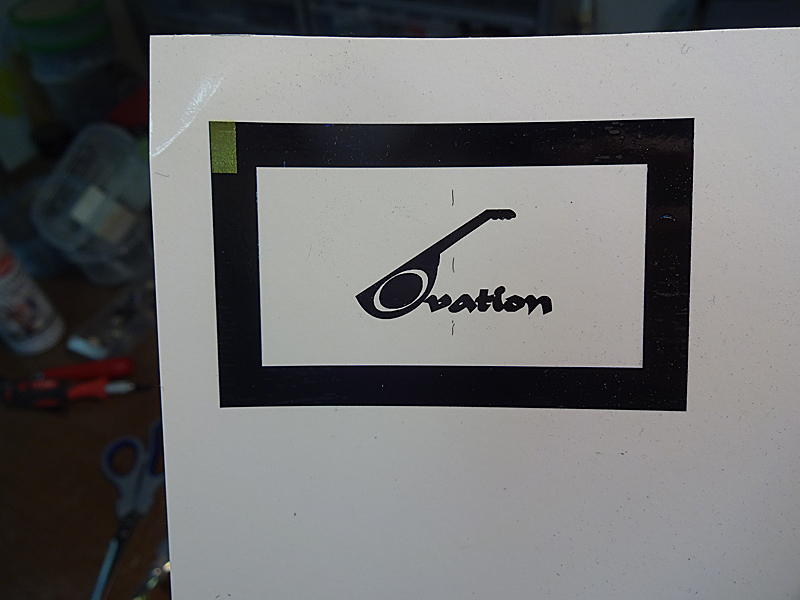
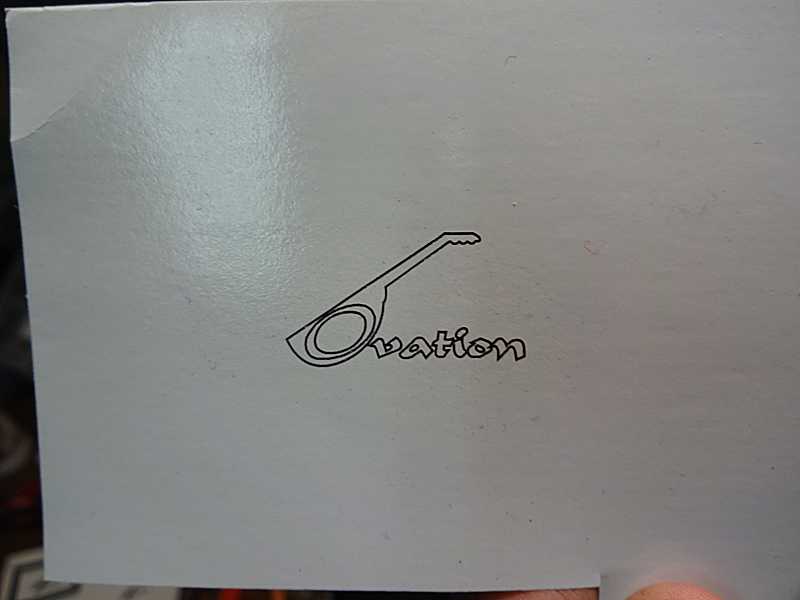
This logo artwork is slightly different from what I did for Jay's guitar. This artwork has a black outline around the gold. The original logos were just the gold.
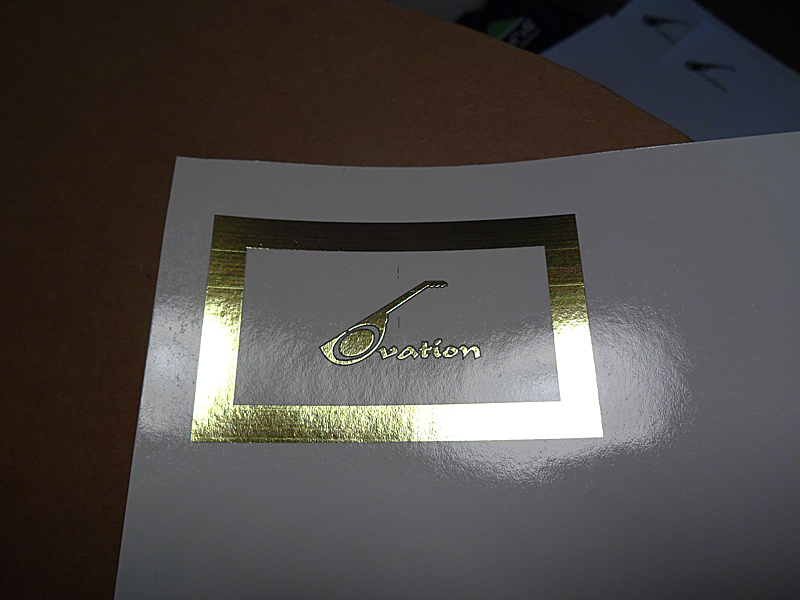
I have an Alps MD-5000 dry transfer printer that has the ability to print gold and silver foil, as well as metallics. Here's sample of the final artwork, printed on water-transfer decal paper, ready for the transfer process.
There were some bumps along the road. At first, I used the decal paper that came with the PulsarPro dry transfer system. The Alps foils didn't really stick too well to that paper. The artwork above was printed on Alps-specific decal paper. The gold border is necessary for the PulsarPro transfer system.
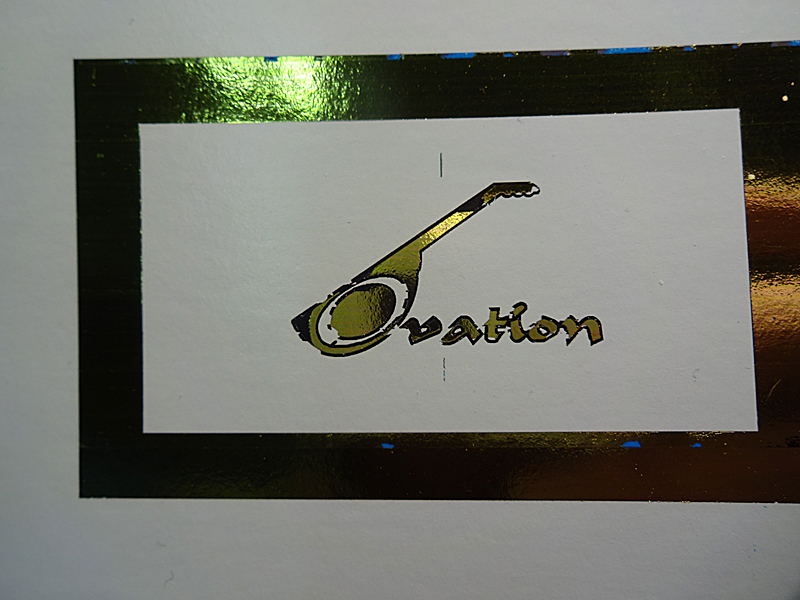
When I got this artwork below, I decided it was time to move onto the next step.
The decal paper with the artwork is covered with thin mylar and is run through a laminating machine to form a light bond between the artwork and mylar so the mylar acts like a carrier sheet. Afterward, the decal paper/mylar carrier is soaked in warm water until the decal releases. So far, so good. Onto the next step.
Whoops! Unfortunately, the heat and pressure from the laminator causes the artwork and mylar to form too strong of a bond for a reliable release. So, it's back to the drawing board.
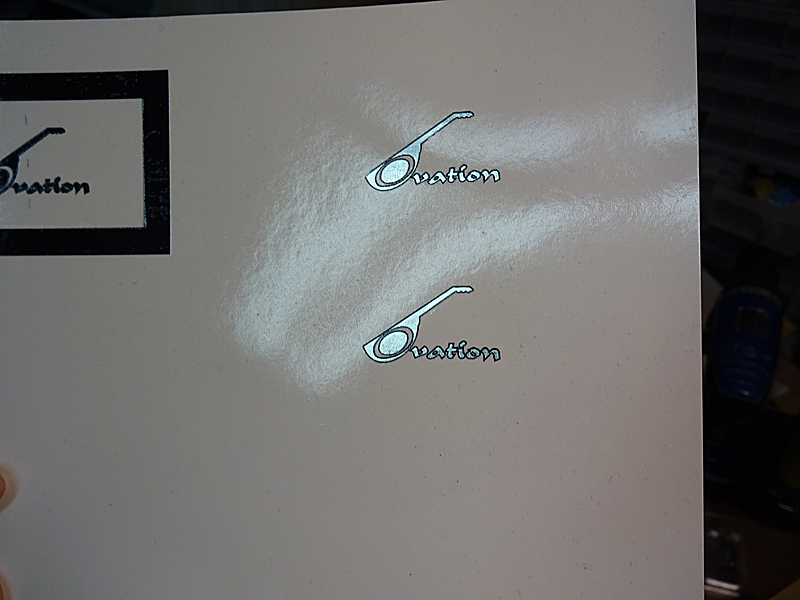
Not really. Just onto another system of decal preparation. About this time, I ran out of gold foil. So, I decided to use silver foil as a substitute. This time, I'm going old-school water transfer decals. First, the artwork is printed onto the decal paper, then sprayed with a thin coat of Krylon Krystal Klear acryllic paint. The clear paint seals the artwork in and acts as a carrier sheet when the decal paper coating is dissolved in water.
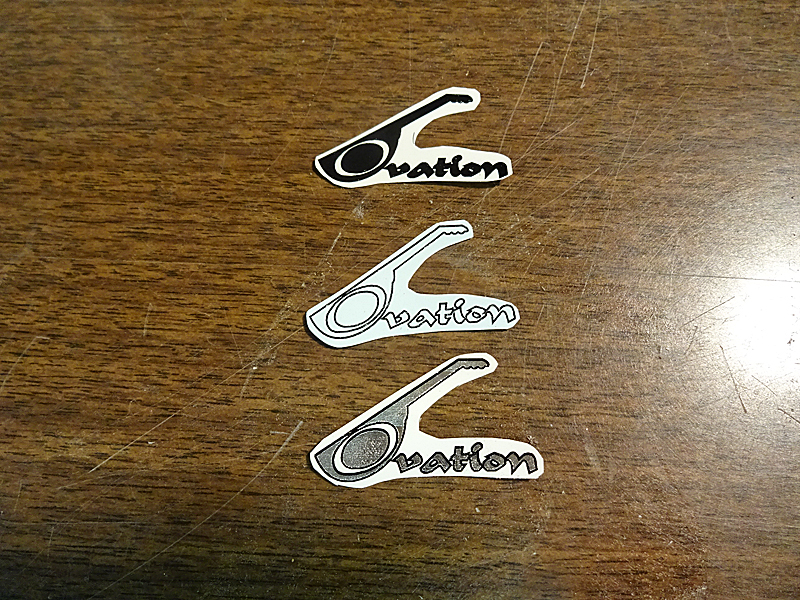
I'm also testing a solid-color mono-chromatic logo. This was a failure. This was the artwork I was printing when I ran out of gold foil.
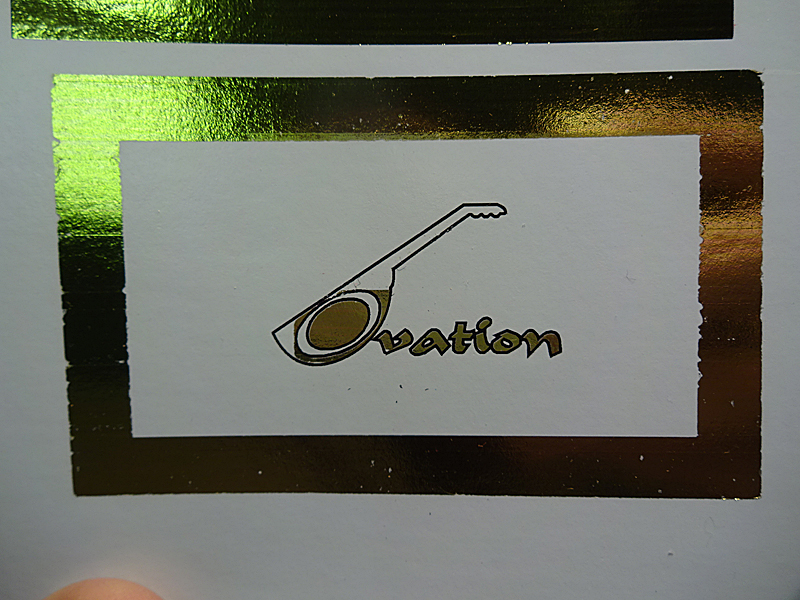
An outline logo.
All three are cut out with a pair of scissors, very close to the artwork to minimize the amount of carrier sheet showing through.
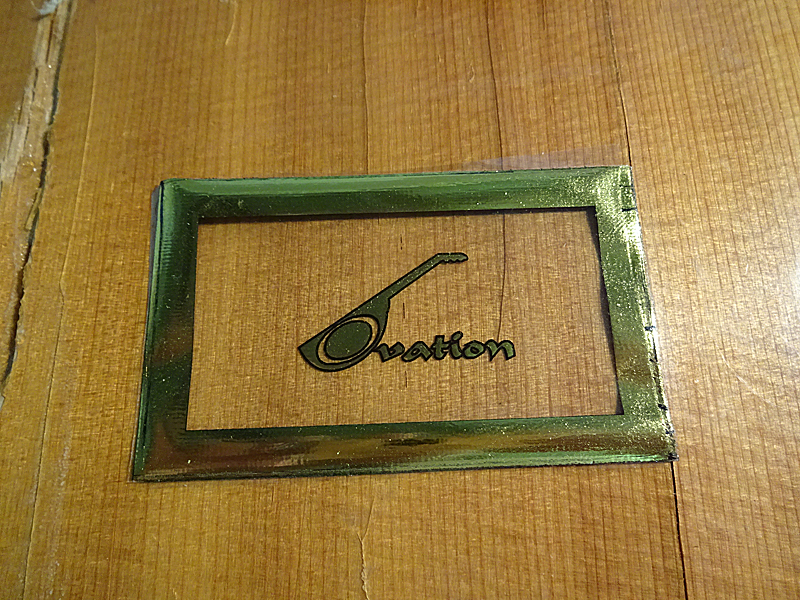
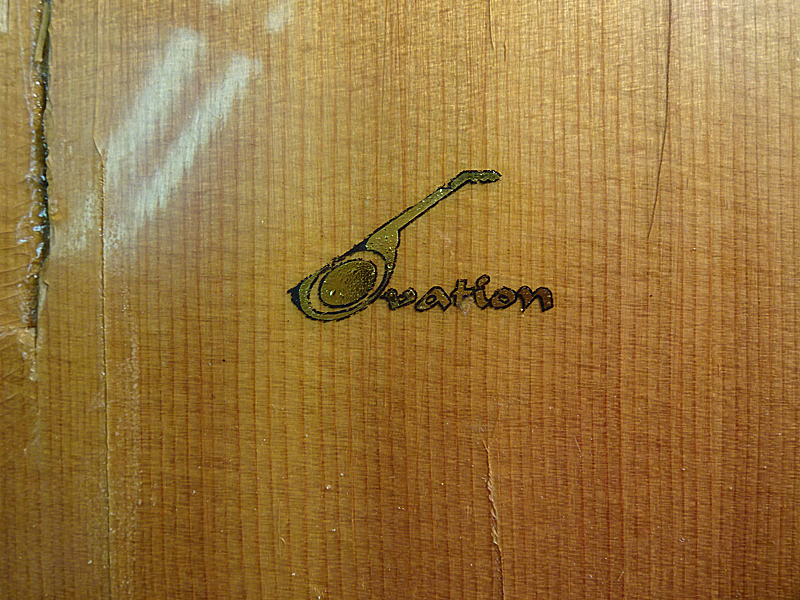
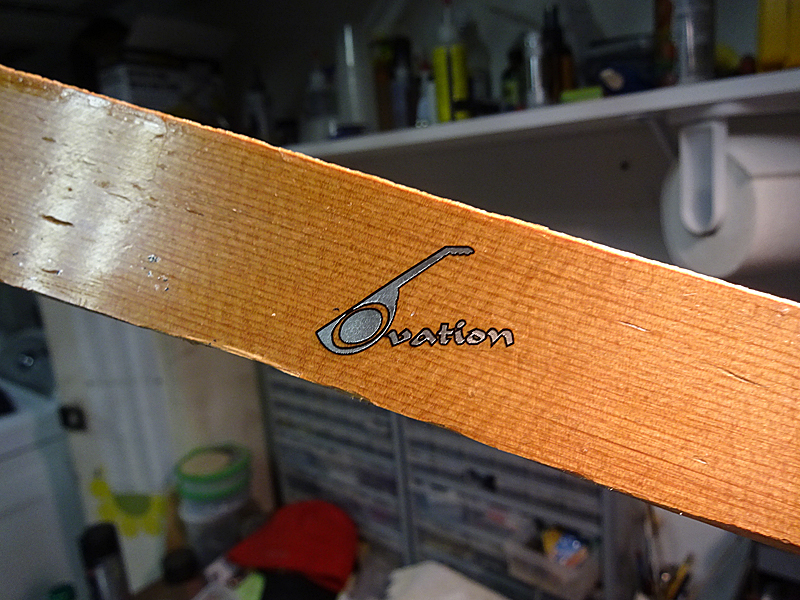
And, here's the silver logo stuck to a scrap of spruce that came from the 1617 top. I used this wood because it provides a smooth surface as a base and so I'd be able to see the wood grain showing through the artwork.
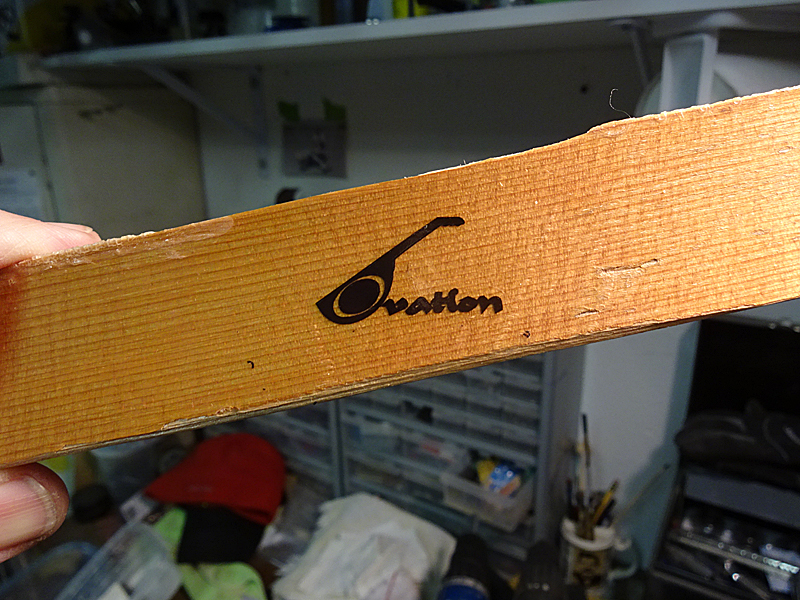
Here's the solid color logo. Unfortunately, the coat of Krylon was too thin on the outline logo and it fell apart when it released from the backing paper.
And, here's the silver logo next to the headstock logo. One change that will have to be made is to close in the "O" in the guitar. I thought is was hollow, but it's actually solid black. The rest looks pretty good.
Next, I'll spray some Minwax clear polyurethane over the decals to make sure the carrier sheet disappears. | ||
| |||
| Nancy |
| ||
Joined: December 2014 Posts: 1713 Location: Frozen Tundra of Minnesota | DanSavage - 2015-12-21 11:46 AM Thanks! Nope. Sanded right over them, starting with 80-grit and ending with 800-grit. This is how inlays are done. They usually stand slightly proud of the surrounding wood when they're first inlaid and are sanded flush. When I first started sanding with the 80-grit, the inlays dulled down, naturally. But, as I got to the higher grits their luster and depth came back so they're looking real purty again. As Always Dan, Thank You!!!! I love your Journals into rebuilding these Beauties! And Thank You for telling us about the inlays, I know the Center Hole Inlay I bought is not very shiny, and I was wondering if that was all the better it would ever look, but now I know better, and am very excited!! I can't wait until you do a full wood-round back, that is going to be Fascinating to watch each step too! I Love these projects!!  | ||
| |||
| tpa |
| ||
Joined: December 2004 Posts: 556 Location: Denmark | The silver logo also looks cool. The prints You make even seems standing out sharper than the classic decal. Edited by tpa 2015-12-30 6:19 PM | ||
| |||
| DanSavage |
| ||
Joined: June 2012 Posts: 2303 Location: Lake Forest, CA | Happy New Year!
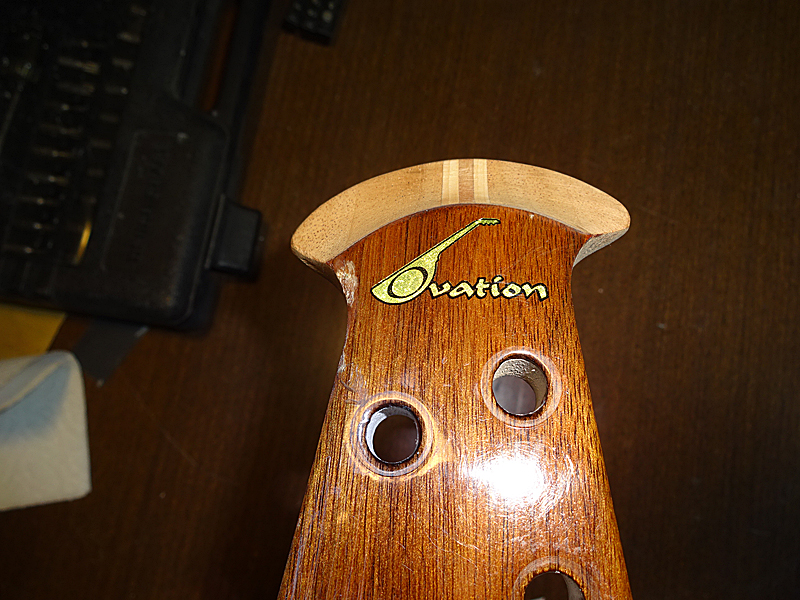
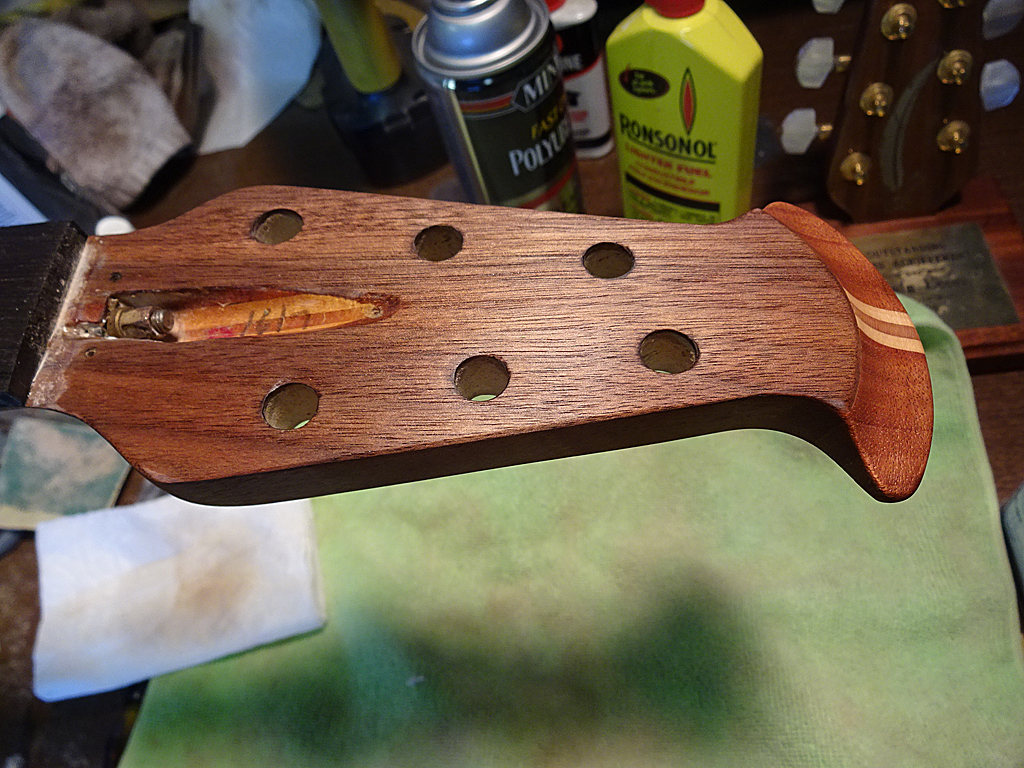
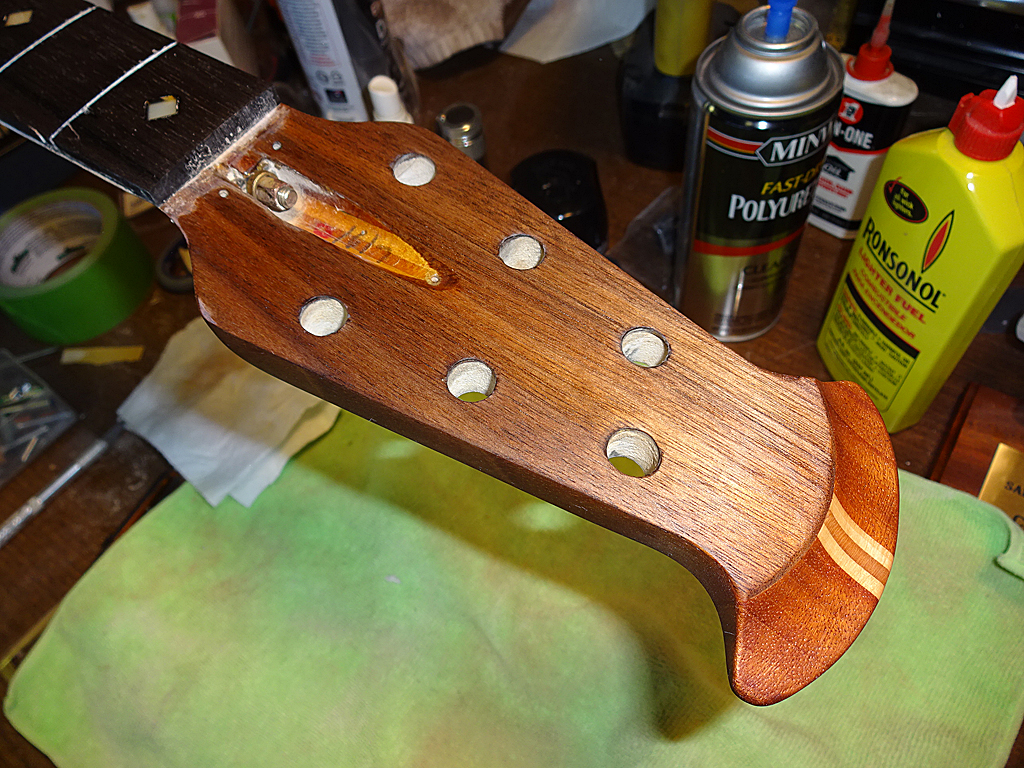
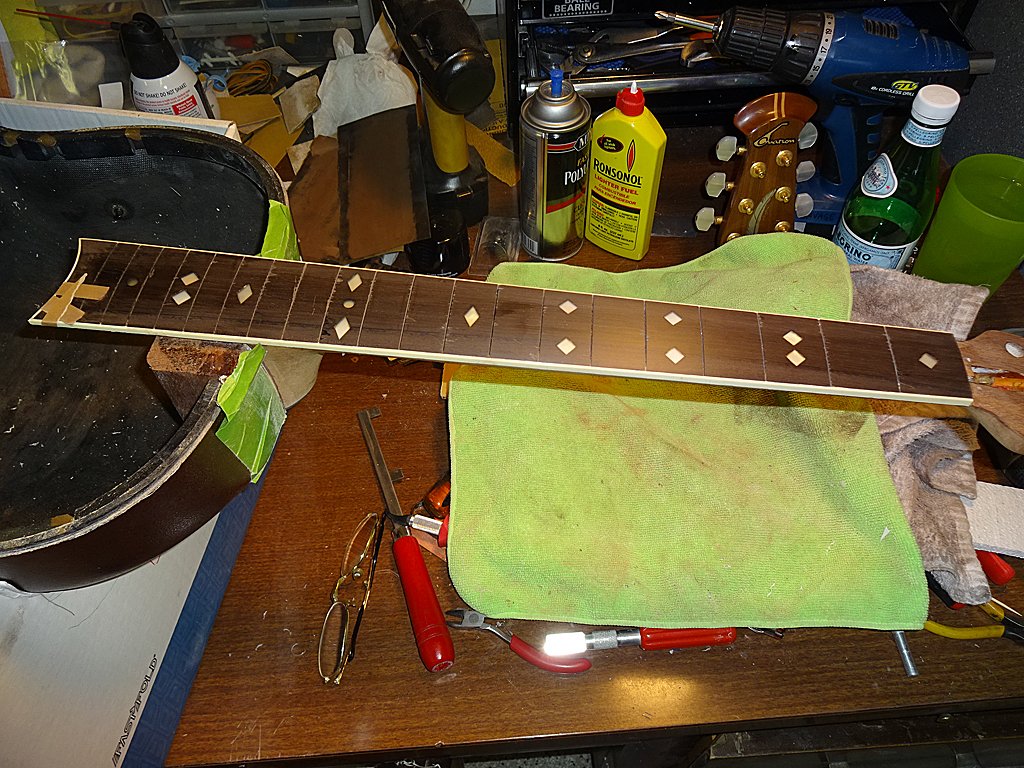
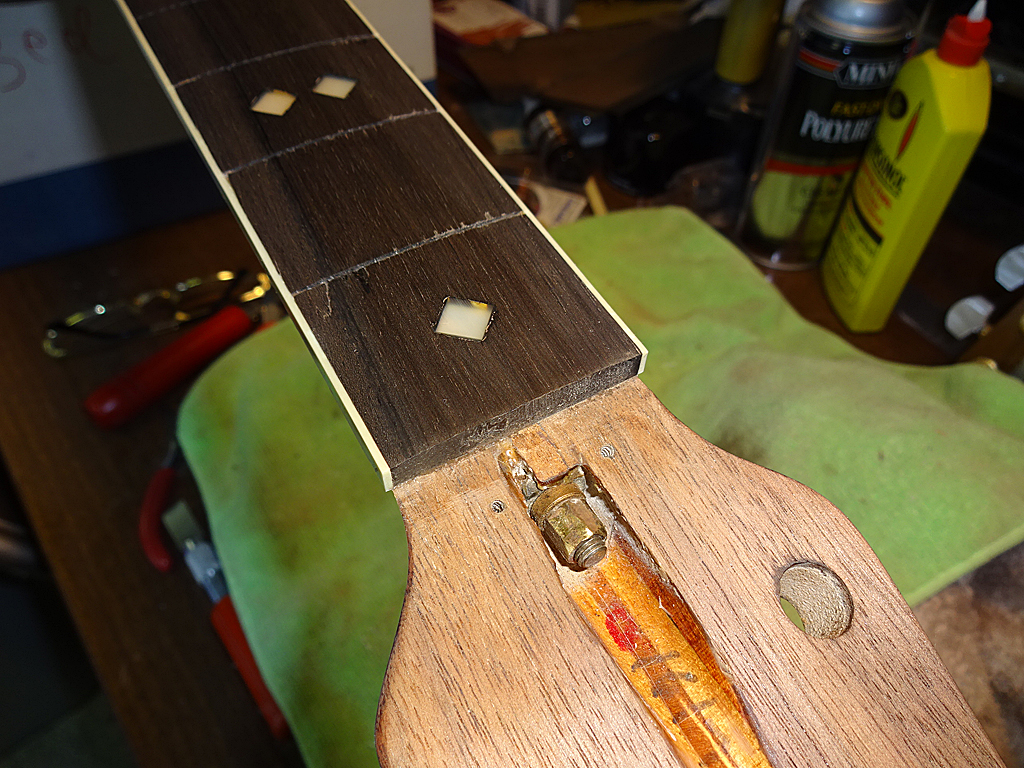
And, I wet the head stock with naptha so I could see what it will it look like under the new clear finish. The walnut is a nice contrast.
Next job is to glue the binding to the sides of the fret board. | ||
| |||
| BanjoJ |
| ||
Joined: September 2012 Posts: 809 Location: Thredbo, NSW, Australia | Looking good Dan. Keep 'em coming! | ||
| |||
| DanSavage |
| ||
Joined: June 2012 Posts: 2303 Location: Lake Forest, CA | Thanks for the kind words, everyone.
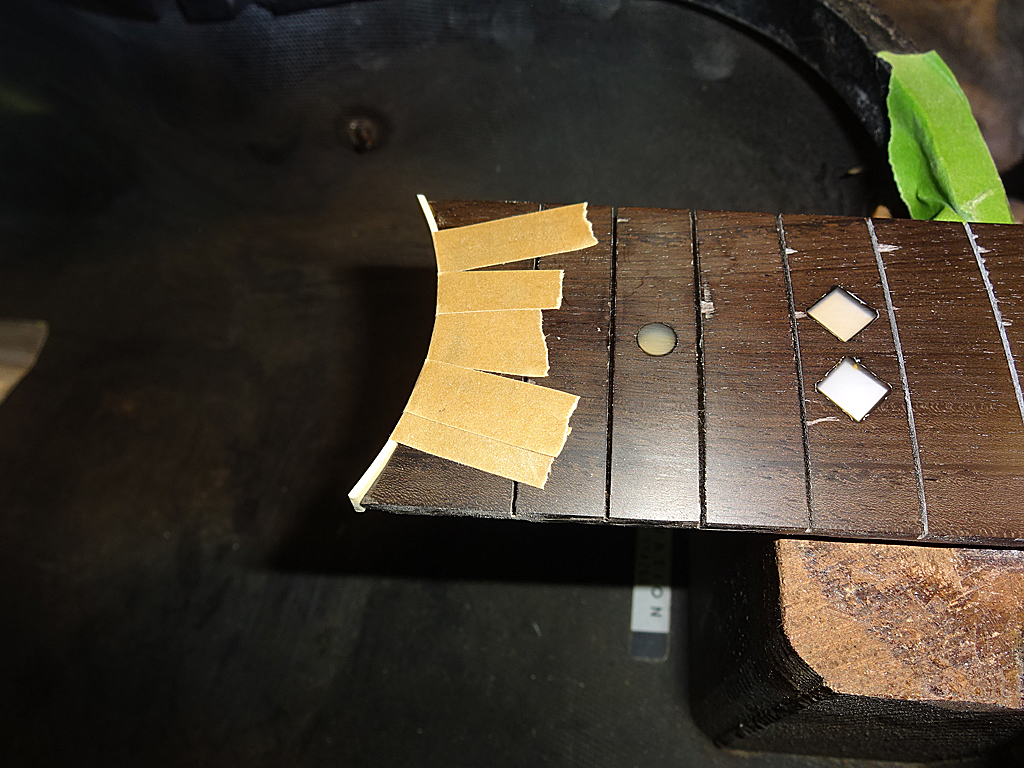
Strips of binding tape are pre-applied to the bottom of the fretboard to help keep the side bindings in alignment while they'r being glued.
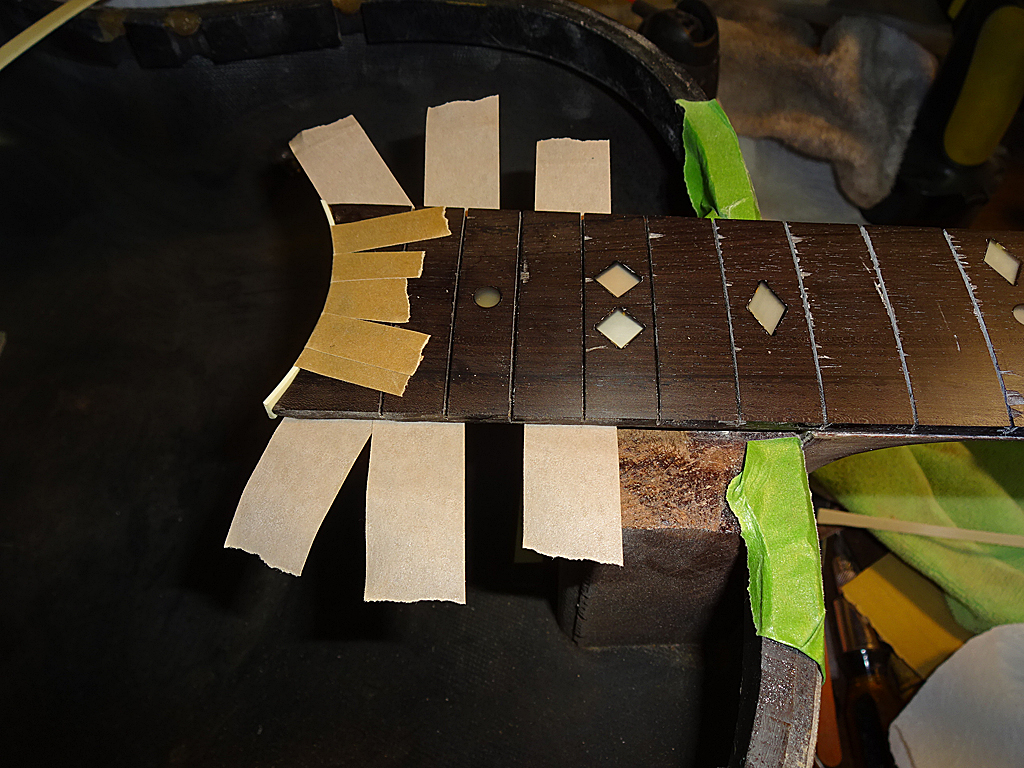
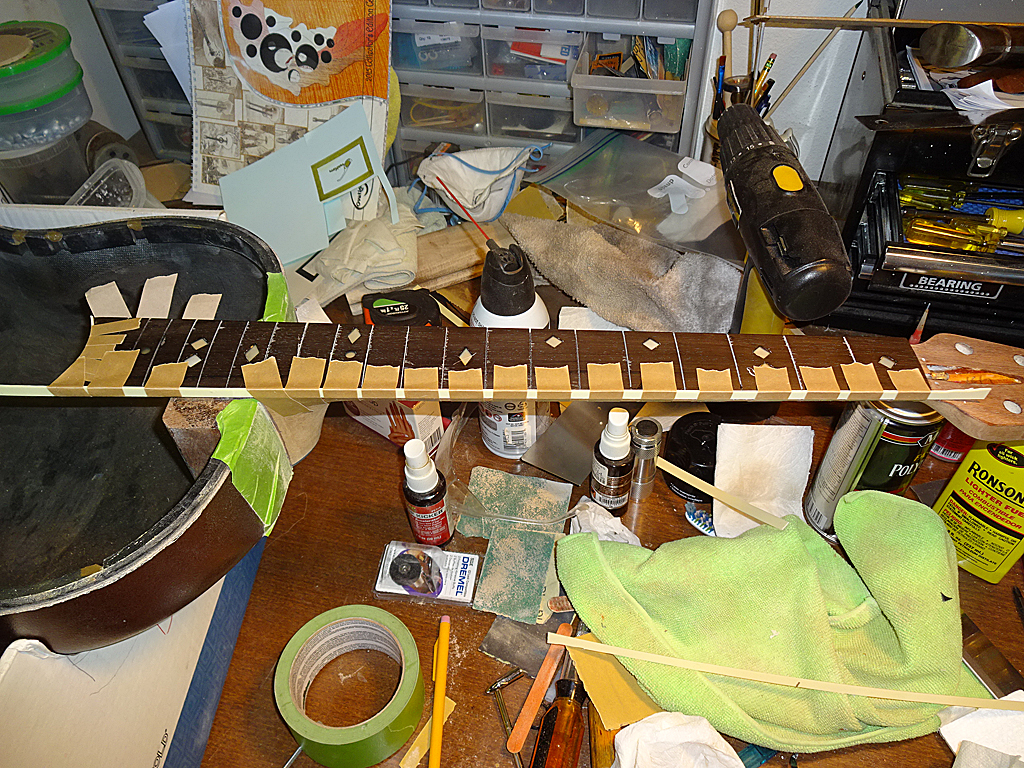
Working in about 9" segments the binding is glued and taped into place with binding tape.
Now, the binding for the other side is glued and taped into place.
I'll let the glue dry 24 hours, then peel off the tape tomorrow afternoon to see how it looks and, hopefully, start scraping the binding down to the shape of the neck. | ||
| |||
| Old Man Arthur |
| ||
Joined: September 2006 Posts: 10777 Location: Keepin' It Weird in Portland, OR | Such patient work. | ||
| |||
| tpa |
| ||
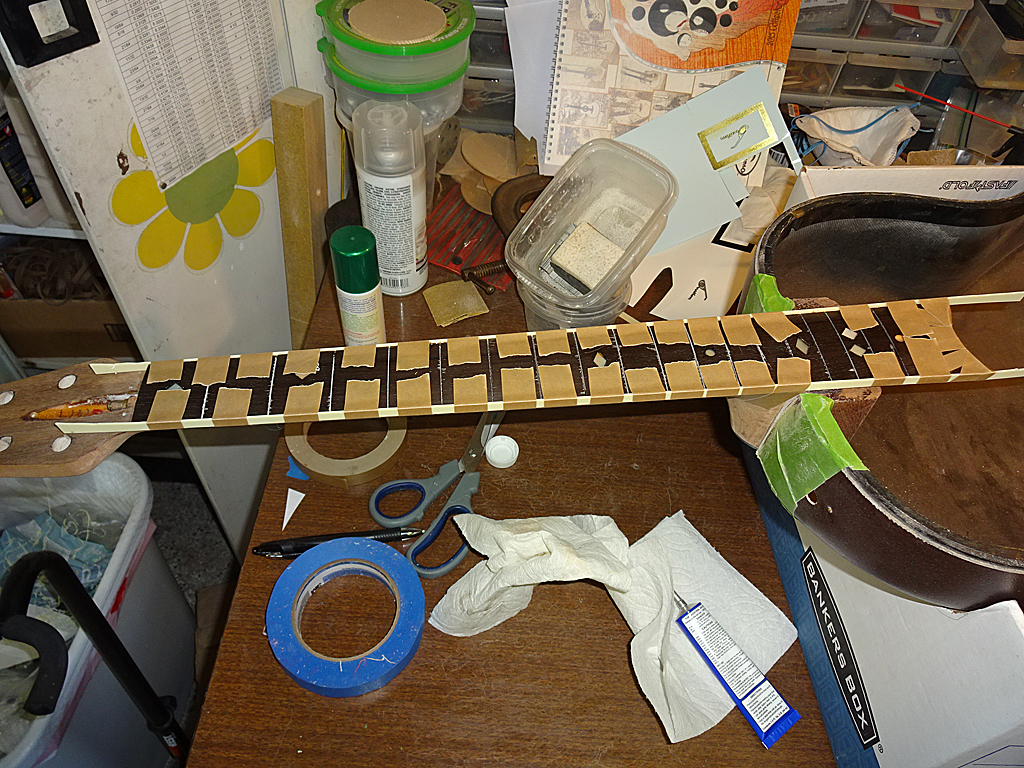
Joined: December 2004 Posts: 556 Location: Denmark | That box has earned its value a few times :-) While my wife is watching the Downton Abbey series on TV I totally prefer to follow your works. And I often wonder what the production time for a mass produced guitar actually is. CNC machining has probably cut the actual machining time and reduced the reject ratio to almost nil. But gluing and finish still take some time, I should think. Even with more sophisticated fixtures and tooling. | ||
| |||
| jay |
| ||
Joined: January 2009 Posts: 1249 Location: Texas | TPA..I often wondered that, especially when everything was hand made. How many man hours went into making a shiny bowl Balladeer...I am assuming that the bowl was actually a cost saving measure over wood boxes, both in time and money, then as well as today.
Edited by jay 2016-01-03 10:19 AM | ||
| |||
| seesquare |
| ||
Joined: November 2002 Posts: 3602 Location: Pacific Northwest Inland Empire | "the bowl was actually a cost saving measure over wood boxes, both in time and money, then as well as today." And, it still works better. Pure genius....... | ||
| |||
| DanSavage |
| ||
Joined: June 2012 Posts: 2303 Location: Lake Forest, CA | tpa - 2016-01-03 2:39 AM That box has earned its value a few times :-) While my wife is watching the Downton Abbey series on TV I totally prefer to follow your works. And I often wonder what the production time for a mass produced guitar actually is. CNC machining has probably cut the actual machining time and reduced the reject ratio to almost nil. But gluing and finish still take some time, I should think. Even with more sophisticated fixtures and tooling. Thanks. If I were 'mass-producing' a guitar, I could see building in batches of 5-6 guitars and perform each step to all the guitars in the batch before proceeding to the next step. It would add a little to the overall build time, but not nearly as much as building each guitar sequentially. | ||
| |||
| arumako |
| ||
Joined: October 2012 Posts: 1018 Location: Yokohama, Japan | Your projects are always so full of ingenuity, Dan! That Banker's Box has got to be one of the most versatile tools in your guitar repair arsenal. Just incredible detail (especially on the decal) and documentation! | ||
| |||
| DanSavage |
| ||
Joined: June 2012 Posts: 2303 Location: Lake Forest, CA | Thanks, Ken. Yes, the Banker's Box does make a good work stand for Ovation guitars. | ||
| |||
| DanSavage |
| ||
Joined: June 2012 Posts: 2303 Location: Lake Forest, CA | So, the work continues.
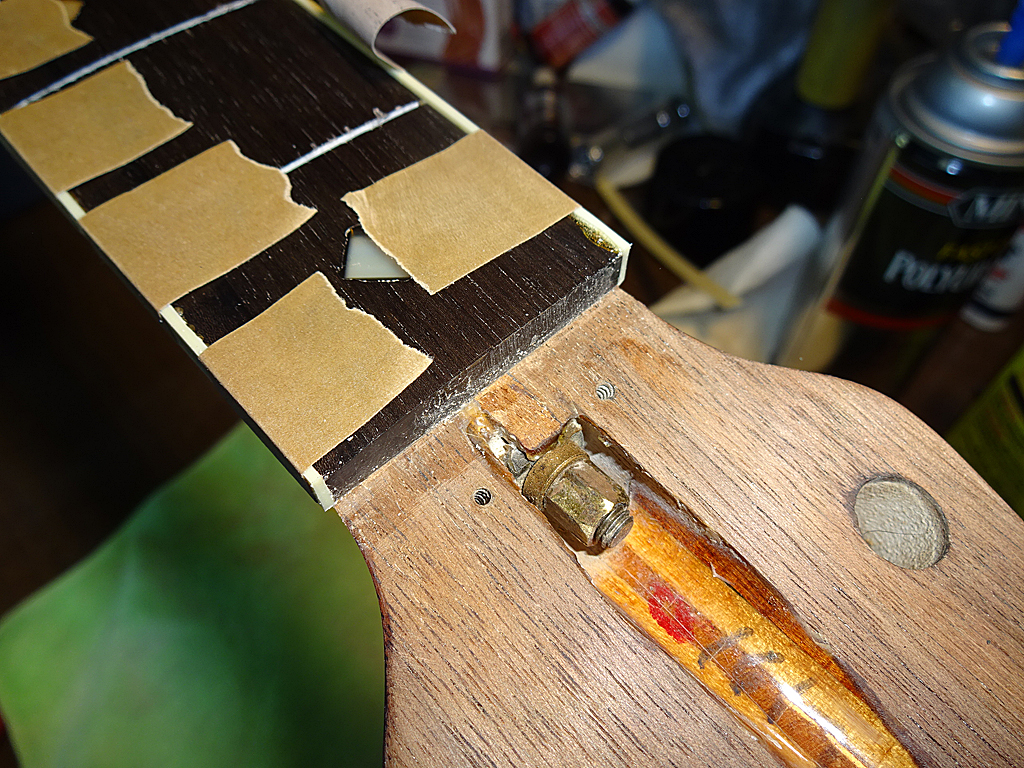
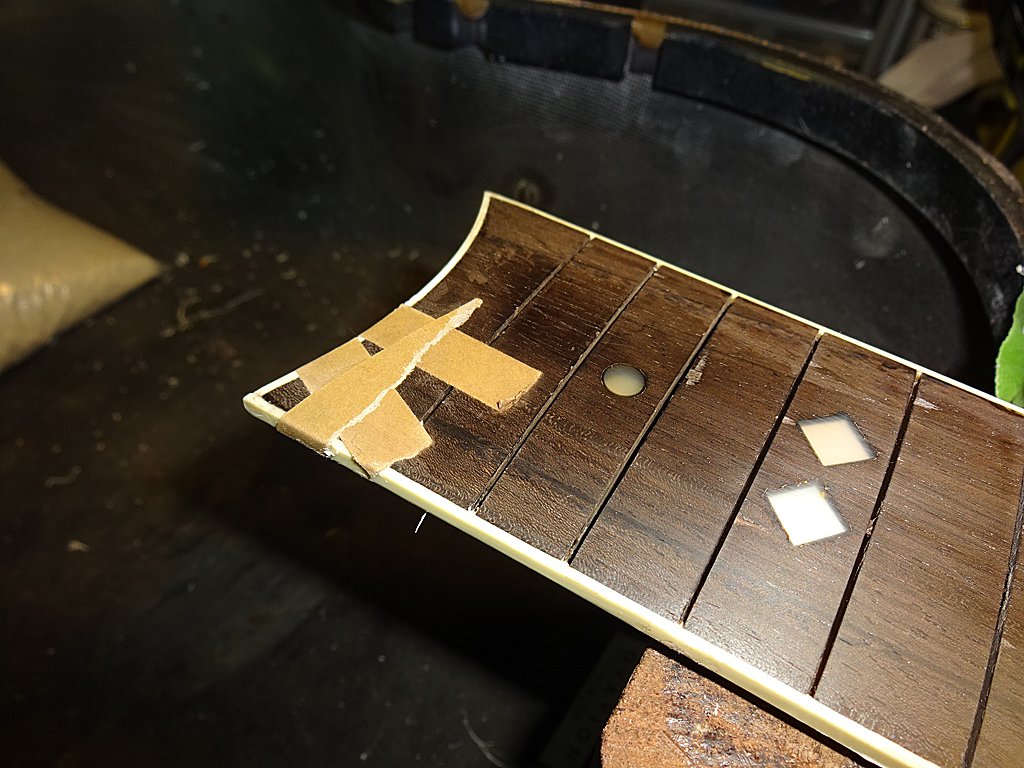
I used a razor saw to cut the binding flush with the end of the fingerboard.
And, removed the rest of the binding tape. There were a few areas where the tape had too good of a grip on the ebony fingerboard and pulled some chips out. These were glued with thin CA.
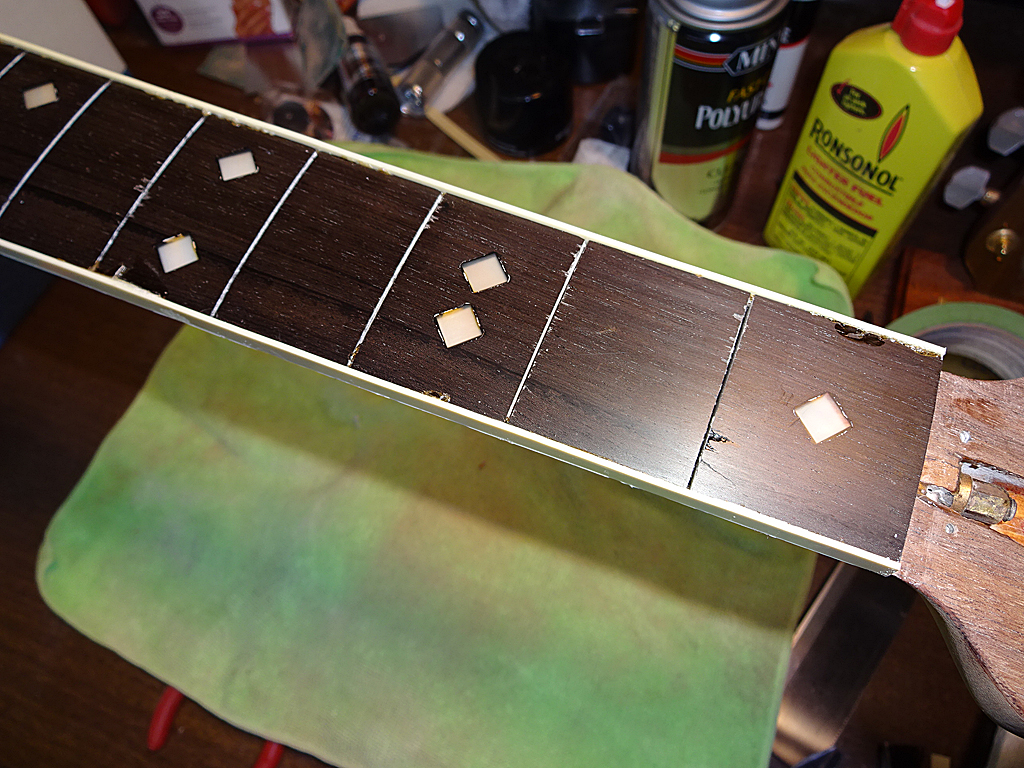
Binding has been scraped down so it's flush with the top of the fingerboard.
A little boo-boo happened when I got a little too exuberant with the scraping and pulled some of the binding away from the lower corner. This was re-glued and taped.
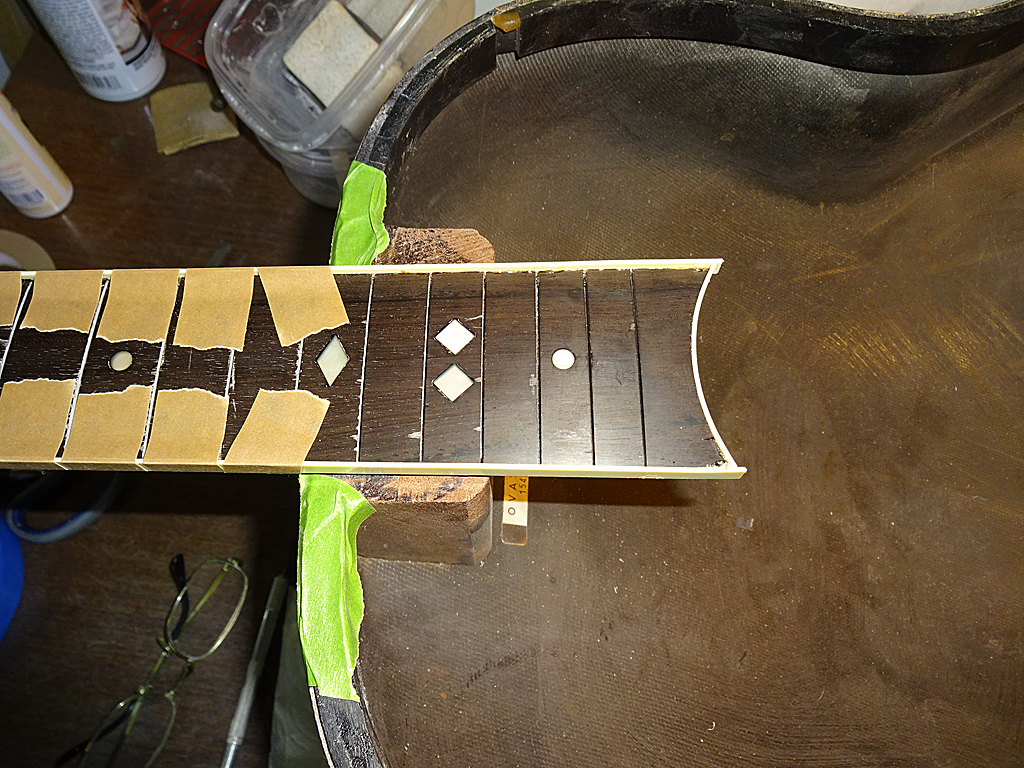
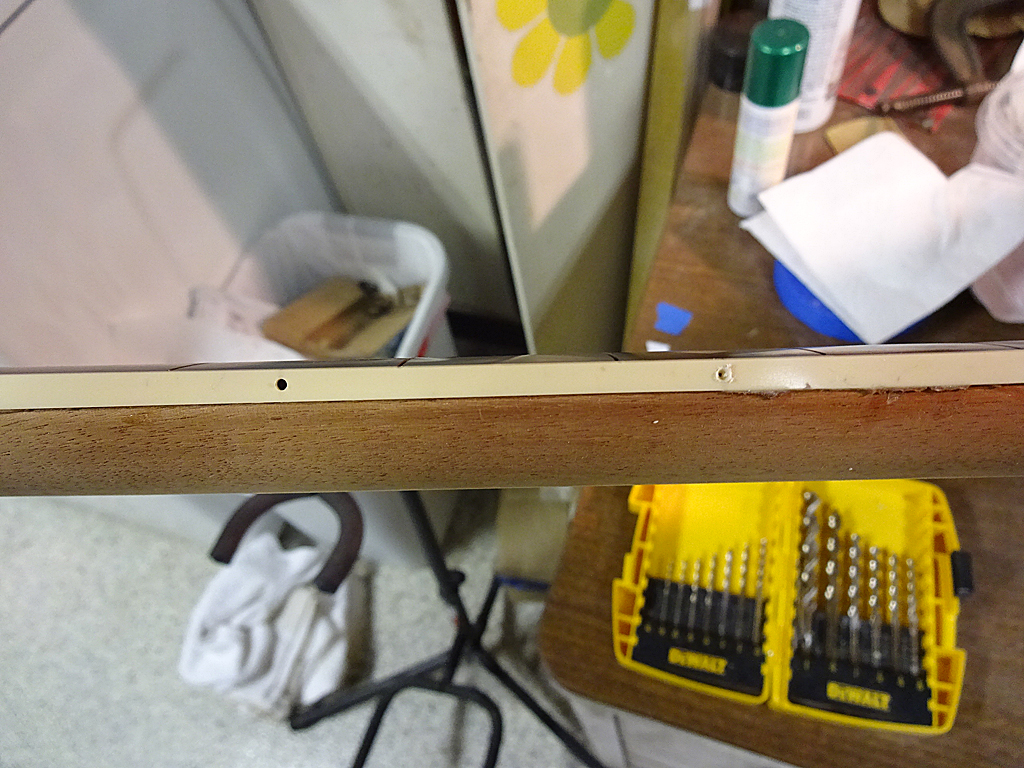
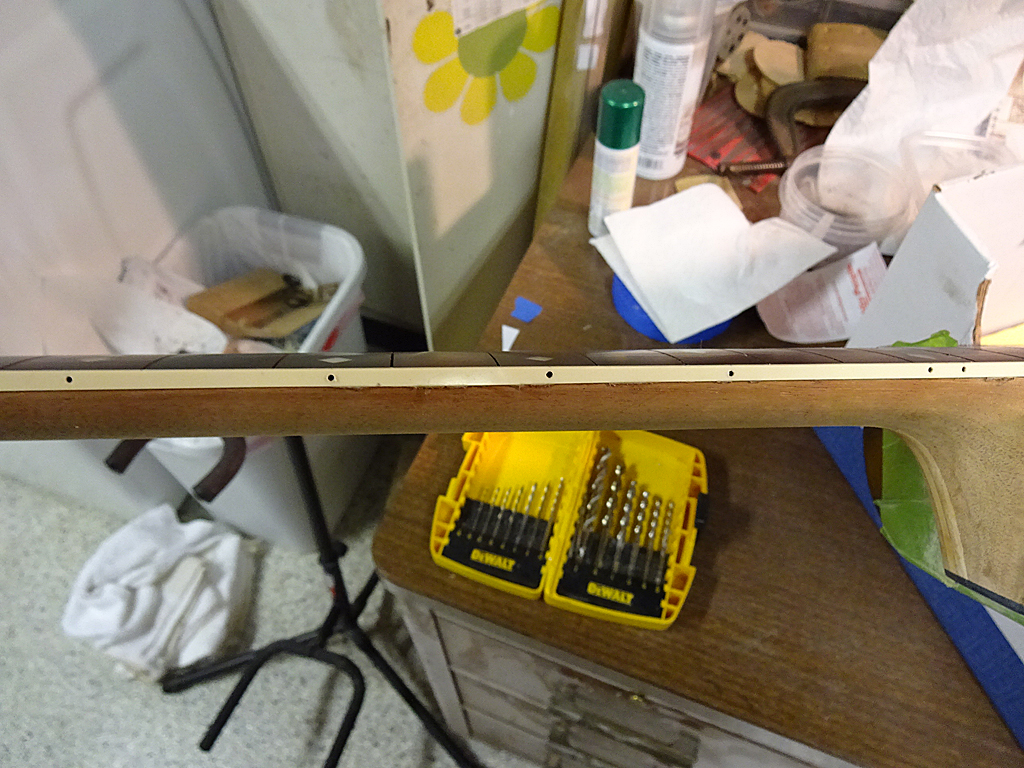
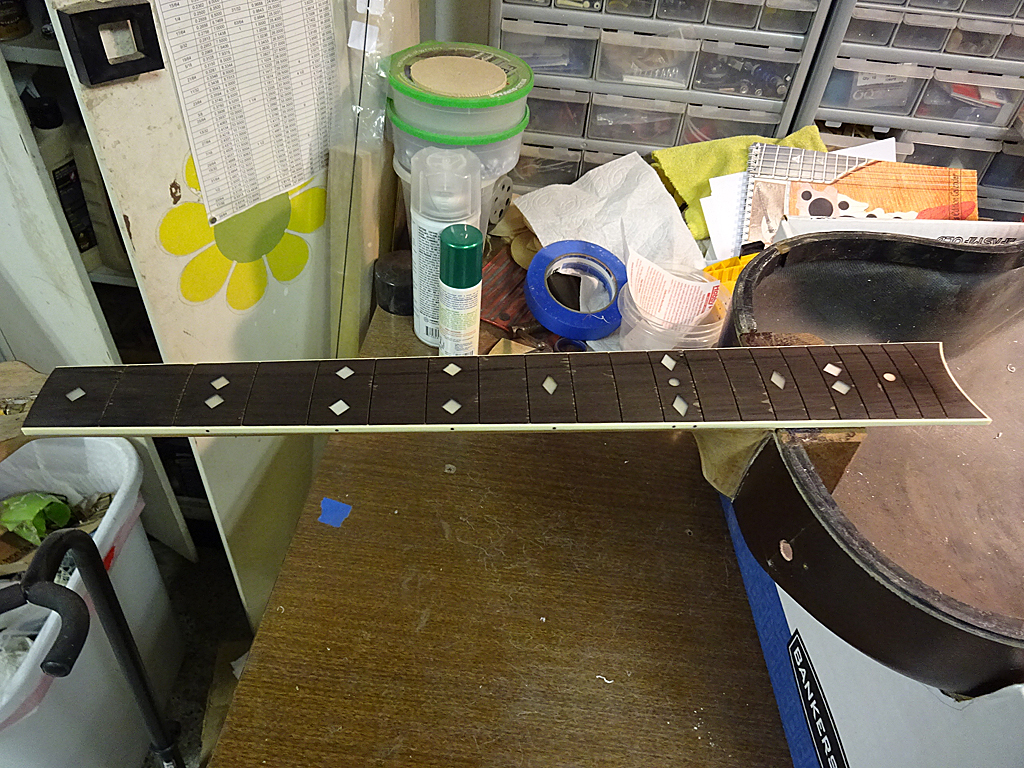
Next job is to drill the holes for the fret side marker dots. All hole locations were measured, then I used the point of a brad point bit to pre-drill the locations so the high-speed bit doesn't wander. The hole at the 3rd fret has been drilled and the 5th fret is next.
All the holes have been drilled. Ovation usually carries the fret side marker dots all the way to the sound hole, but I decided to stop at the 12th fret, mainly because the body gets in the way of playing the higher frets, and more importantly to me, anything above the 12th fret is no man's land.
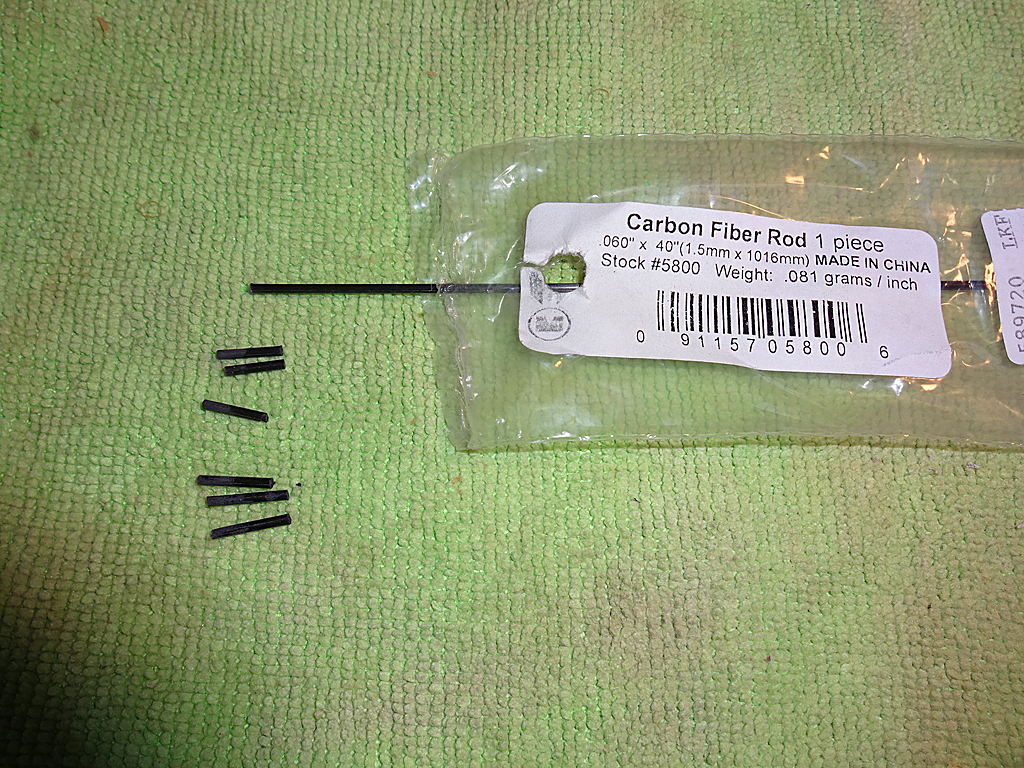
I tried to buy some fret marker material from the local Guitar Center, but the luthier behind the repair bench told me it was a special-order item. So, I went down to my local Hobby Sheeple, er, People and bought some 1/16" carbon fiber rod. It's harder to work with than the regular side fret marker material, (styrene or ABS) but it's still workable.
I sanded one end of each to give the glue some bite to hold the rods in place.
| ||
| |||
| Mark in Boise |
| ||
Joined: March 2005 Posts: 12750 Location: Boise, Idaho | Pretty amazing, Dan. I don't even know what a razor saw is. I was happy to finally replace the nut on my UKII with a brass one, as it was originally built, this weekend while watching bowl games. I didn't screw anything up as far as I can tell, so that's a success in my book. | ||
| |||
| DanSavage |
| ||
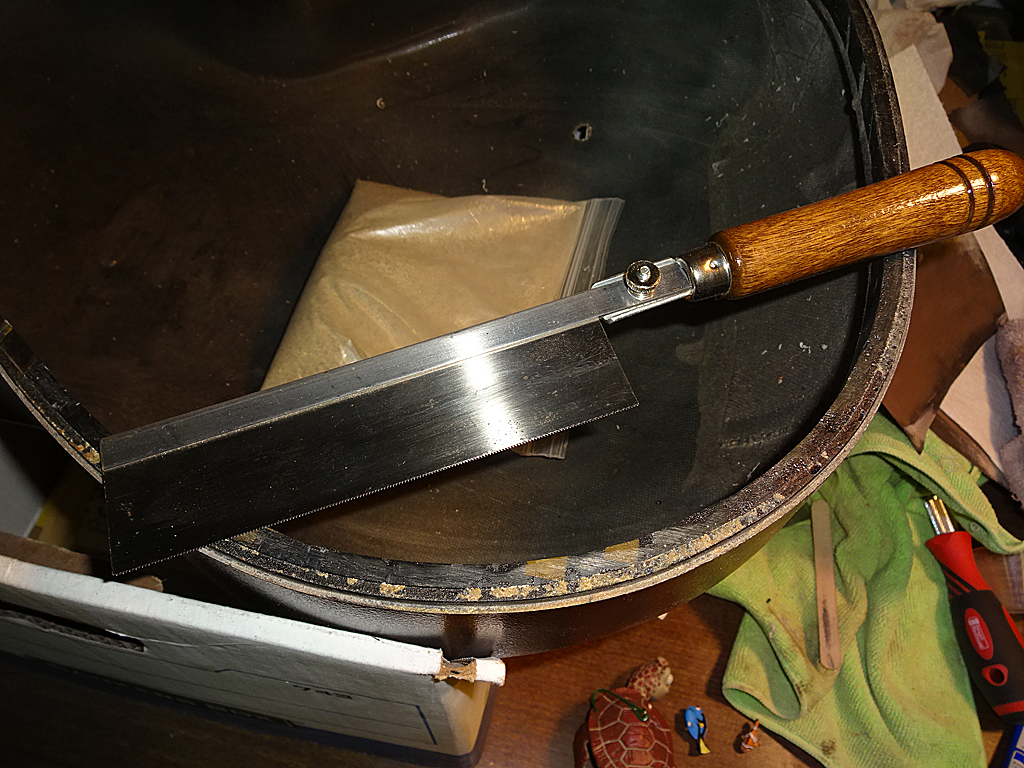
Joined: June 2012 Posts: 2303 Location: Lake Forest, CA | Mark in Boise - 2016-01-04 2:49 PM Pretty amazing, Dan. I don't even know what a razor saw is. I was happy to finally replace the nut on my UKII with a brass one, as it was originally built, this weekend while watching bowl games. I didn't screw anything up as far as I can tell, so that's a success in my book. Yup. That's how I measure success, too. Or, at least I screwed it up as little as possible. Here's a pic of a razor saw. This particular one is manufactured by Zona, but there are other manufacturers such as Xacto, etc. The blade is only .010" thick and has 100 or so teeth per inch. As a point of reference, the fret slots are .020", or twice as thick as this blade. This one is a back saw, but they also sell different shape blades.
Edited by DanSavage 2016-01-05 9:59 AM | ||
| |||
| DanSavage |
| ||
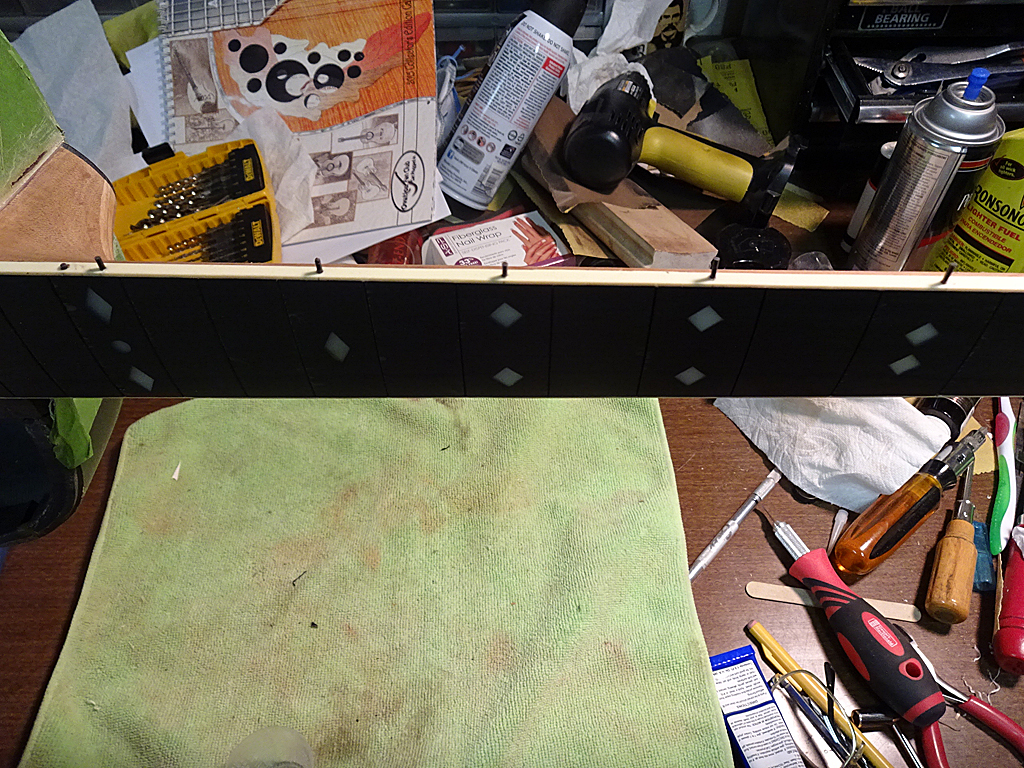
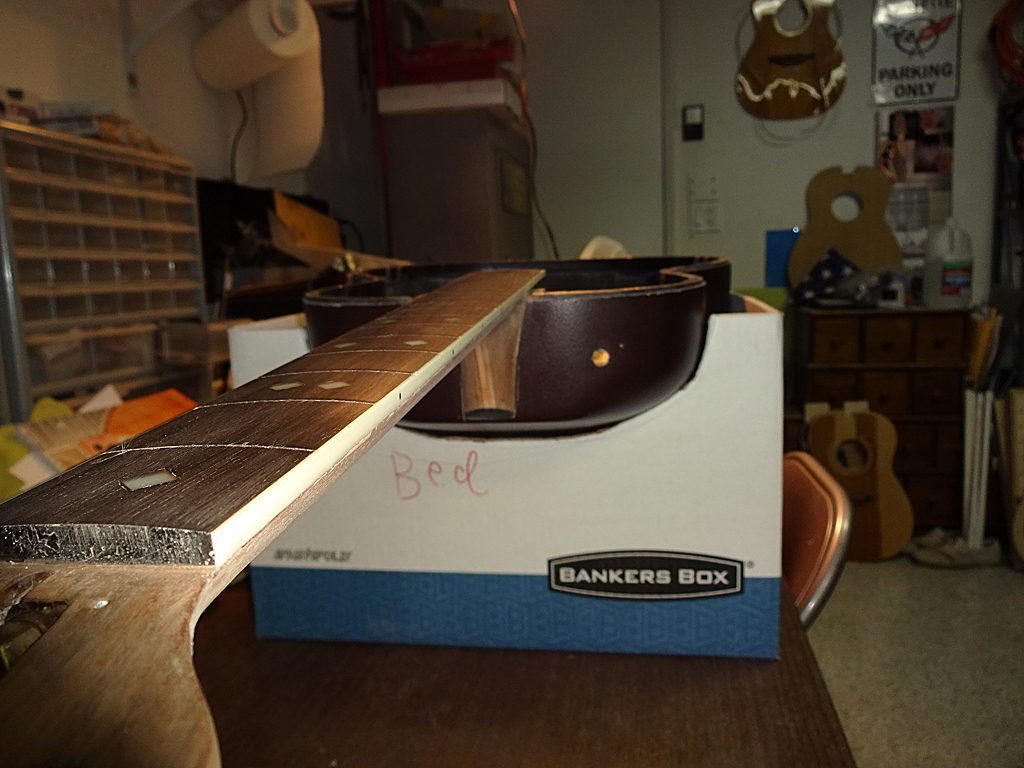
Joined: June 2012 Posts: 2303 Location: Lake Forest, CA | I used the razor saw to cut off the excess side markers, then shaped down the bindings.
Here's the bridge end of the fingerboard.
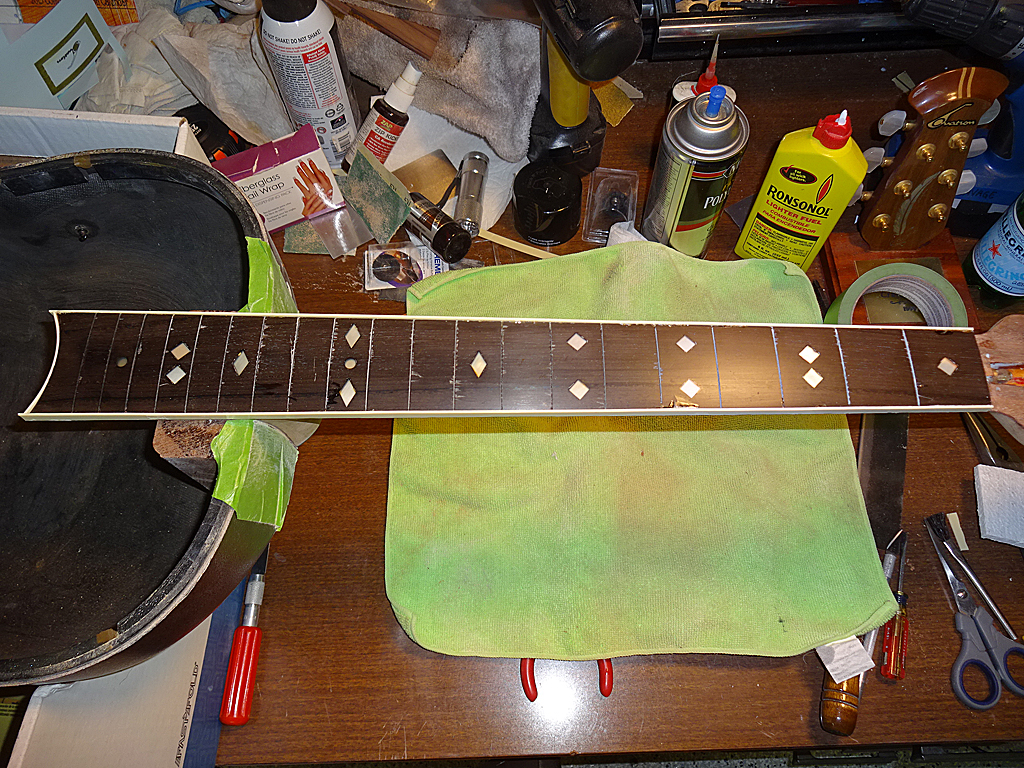
Looking down the side of the neck.
For the most part, the neck is done. It still needs frets, but I'll add those after I finish the work on the top. Next job is to start prepping the top for gluing to the body. Since I've covered this in detail on other threads I'll only post when I reach the major steps | ||
| |||
| standing |
| ||
Joined: December 2008 Posts: 1453 Location: Texas | Dan, Your repair/rebuild skills and ingenuity are indisputably impressive, but, I'm also very impressed by the quality of your photos and your thorough documentation. I envy the discipline it must take to stop working at each step and take photos. (I, for one, don't multi-task well enough to do that.) Thanks for putting in the extra effort of documenting each step, it's very informative, and provides invaluable resource/reference material for the rest of us. | ||
| |||
| DanSavage |
| ||
Joined: June 2012 Posts: 2303 Location: Lake Forest, CA | Thanks for the kind words, standing. I'm glad you're enjoying the (re)build. | ||
| |||
| DetlefMichel |
| ||
Joined: May 2011 Posts: 751 Location: Muenster/Germany | Your "re"-builds appear to me to be "improved"-builds..... | ||
| |||


| Jump to page : 1 2 3 4 5 Now viewing page 2 [25 messages per page] |
| Search this forum Printer friendly version E-mail a link to this thread |
| This message board and website is not sponsored or affiliated with Ovation® Guitars in any way. | |
| (Delete all cookies set by this site) | |