| The Ovation Fan Club | ||
| ||
| Random quote: "Got time to breathe, got time for music." --Briscoe Darling. |
 1967 Balladeer Rebuild... 1967 Balladeer Rebuild...
| View previous thread :: View next thread | |
| Member Communities -> Bottom Feeding Luthiery Guild | Message format | |
| DanSavage |
| ||
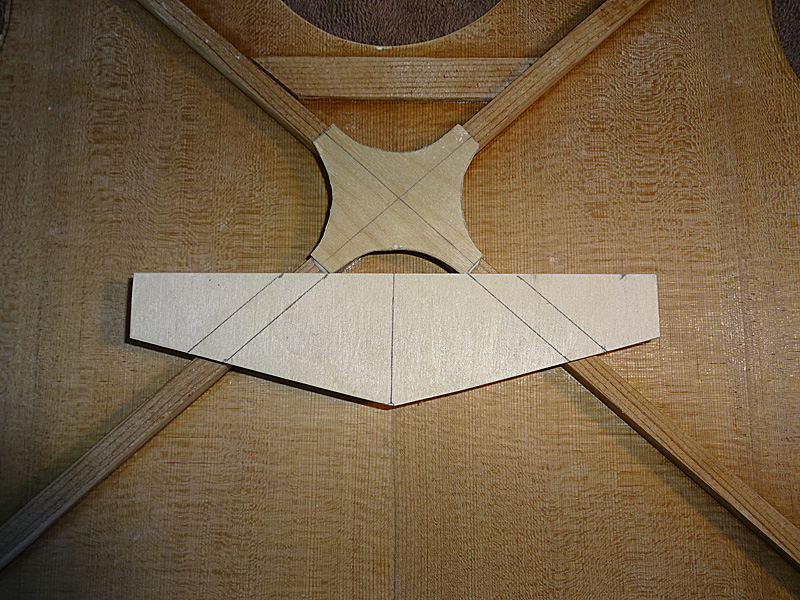
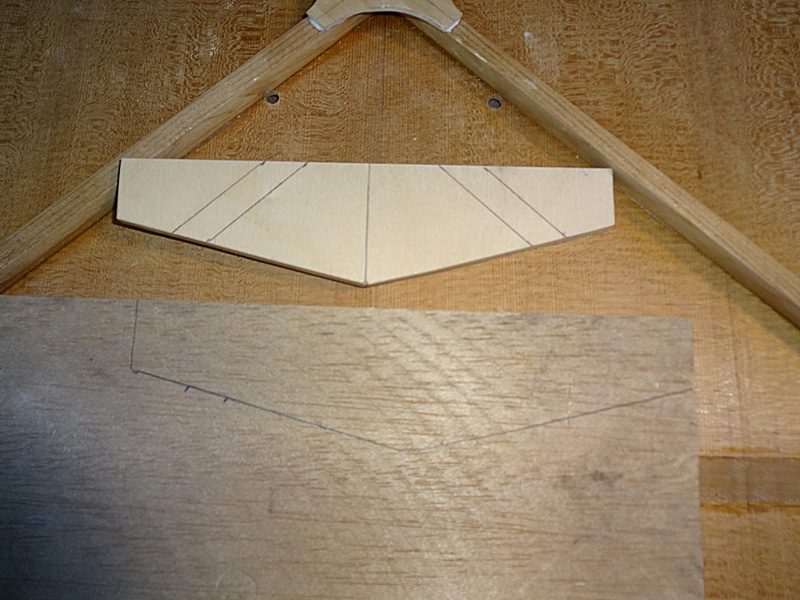
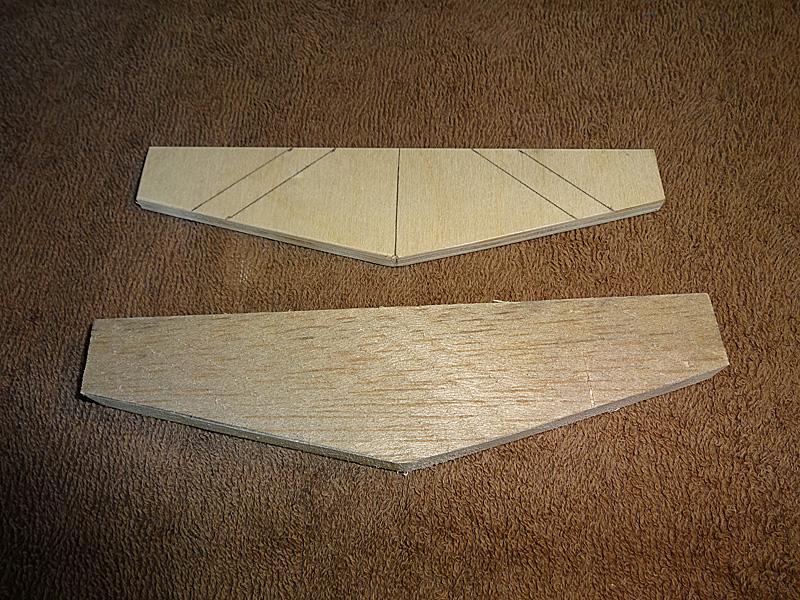
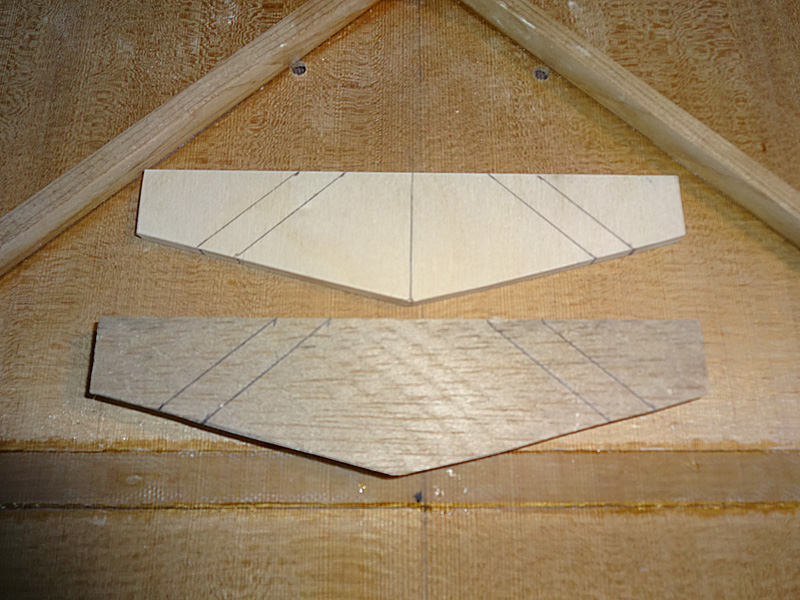
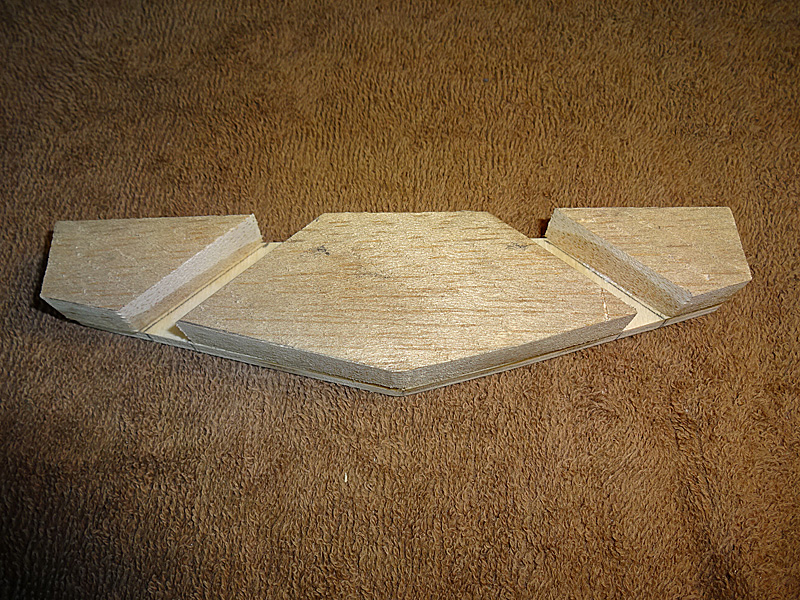
Joined: June 2012 Posts: 2303 Location: Lake Forest, CA | Progress continues... I cut the caul base plate out of 1/4" birch ply. I marked the center line and the location of the X braces.
Next, I traced the shape of the caul onto 1/2" hard balsa. Balsa is good for these types of jobs because it's dense enough so it doesn't crush under pressure, but soft enough so it won't mark the underside of the spruce top.
Transfer the brace locations to the balsa.
Cut, and glued to the birch ply using CA.
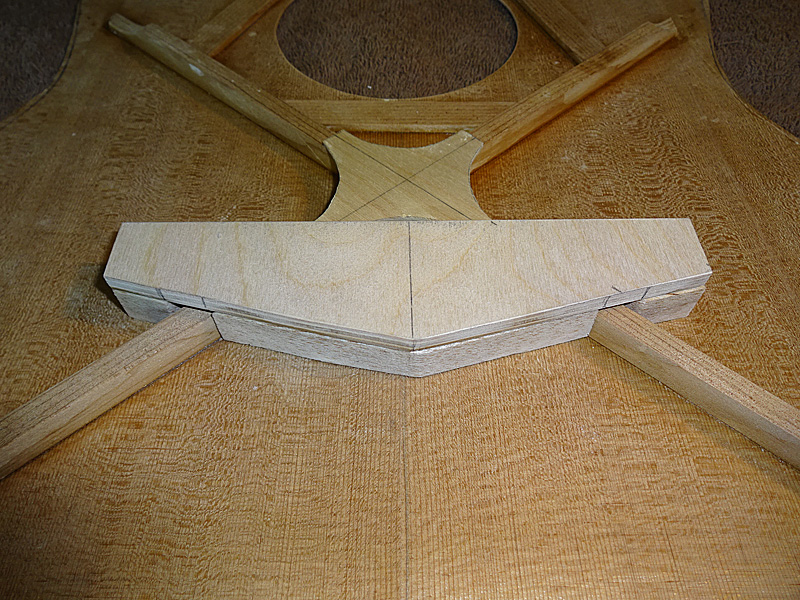
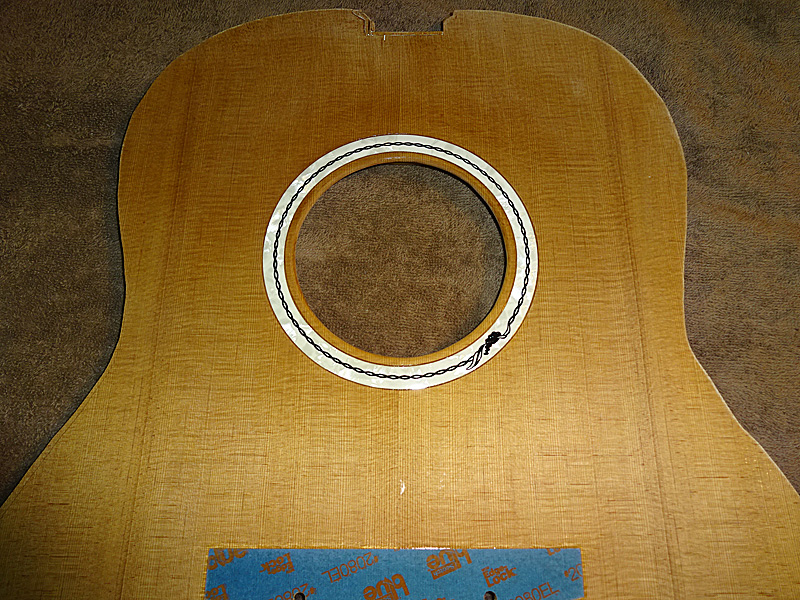
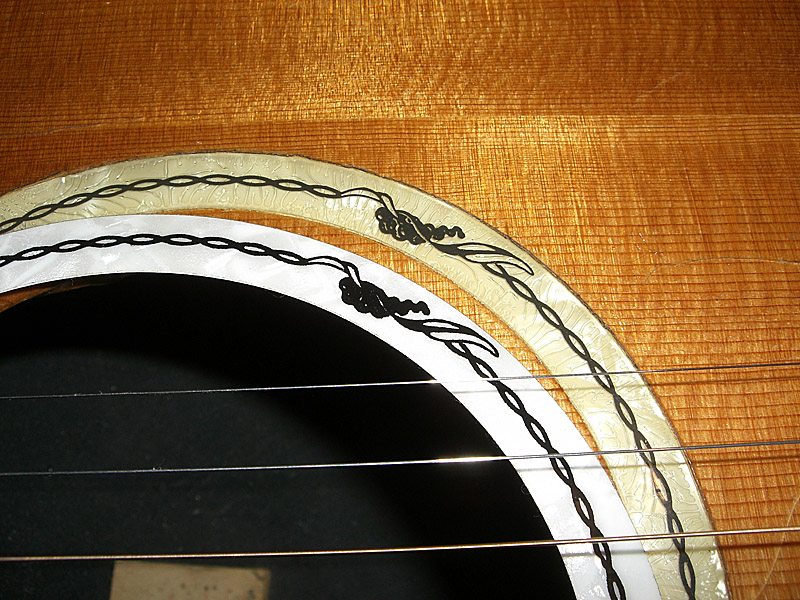
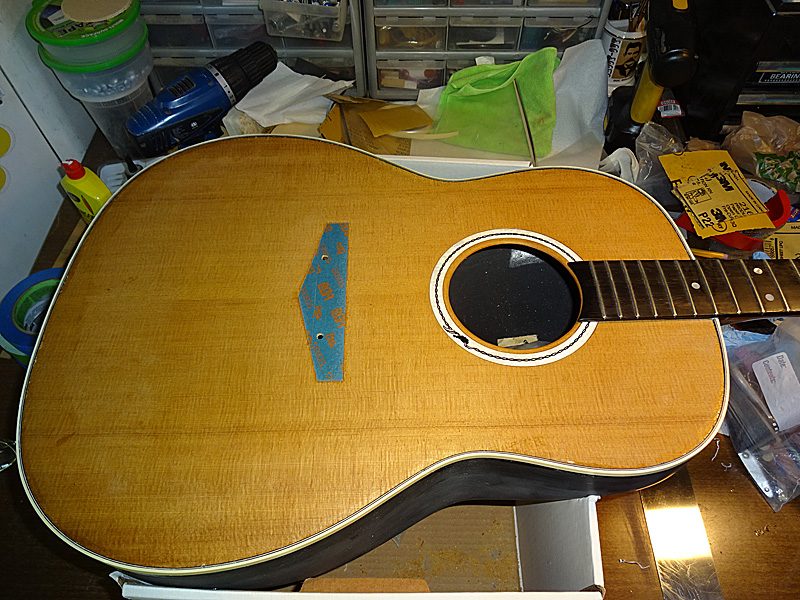
Next job is to glue the rosette into place. Is it at 5:00 or 5:15? I dunno. But, it's permanent now.
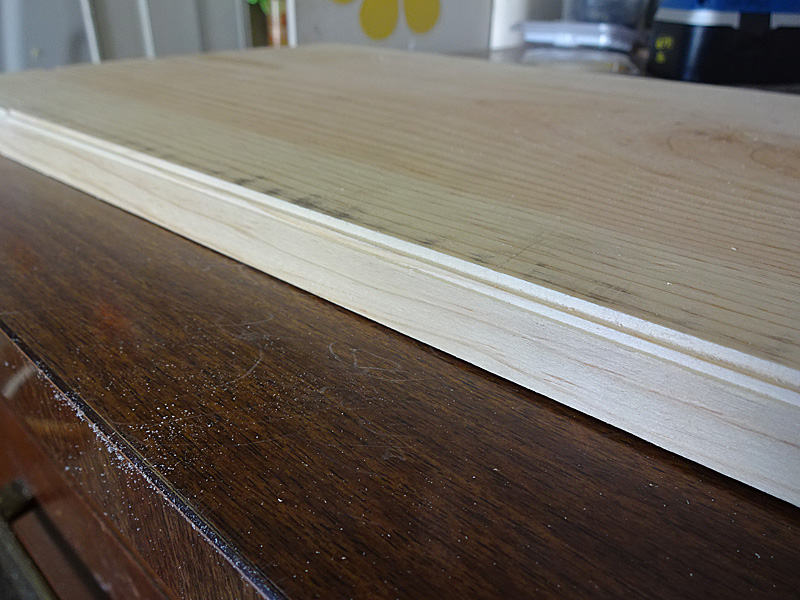
After that, it's time to grind down the excess and route the groove for the purfling and binding.
| ||
| |||
| jay |
| ||
Joined: January 2009 Posts: 1249 Location: Texas | Is it at 5:00 or 5:15? | ||
| |||
| jay |
| ||
Joined: January 2009 Posts: 1249 Location: Texas | Is it at 5:00 or 5:15? I think it was somewhere between 15 and 20, typically. (o1.jpg) (o2.jpg) (93.jpg) (o3.jpg) Attachments ----------------  o1.jpg (8KB - 0 downloads) o2.jpg (7KB - 0 downloads) 93.jpg (15KB - 0 downloads) o3.jpg (14KB - 0 downloads) o1.jpg (8KB - 0 downloads) o2.jpg (7KB - 0 downloads) 93.jpg (15KB - 0 downloads) o3.jpg (14KB - 0 downloads) | ||
| |||
| Old Man Arthur |
| ||
Joined: September 2006 Posts: 10777 Location: Keepin' It Weird in Portland, OR | Mine is a Re-issue... It is around 25 after.  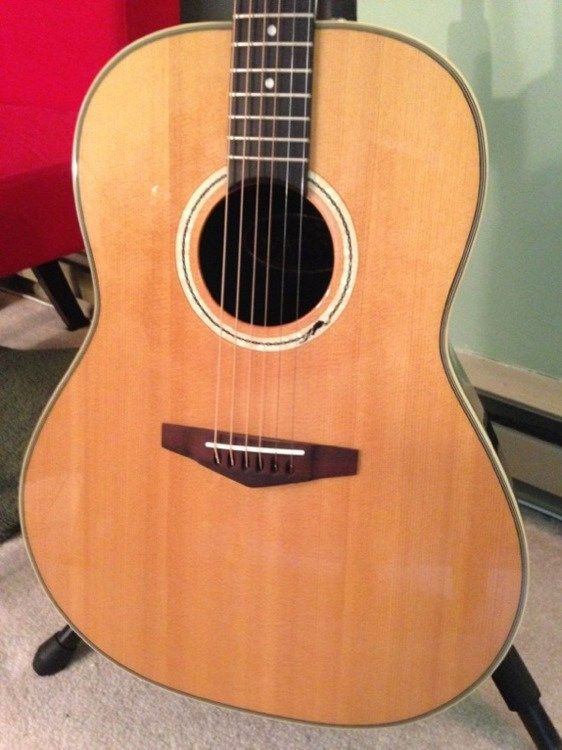 But my grapes kinda suck. No shiny spot highlight. Kind of a blur.  | ||
| |||
| DanSavage |
| ||
Joined: June 2012 Posts: 2303 Location: Lake Forest, CA | Yeah, the rosette rotational placement is like Art's RI. The RI rosette is muddied up compared to the original because it's probably the original silkscreen that's worn out. The rosette I got from the MS was the same way. It's actually a lot like this one below on the left. They had pretty loose standards back then when it came to gluing in the rosettes. Both of these guitars are original shiny bowls and both had the grapes in different spots on the clock.
Well, it is what it is. The rosette is glued down and ain't coming back up.
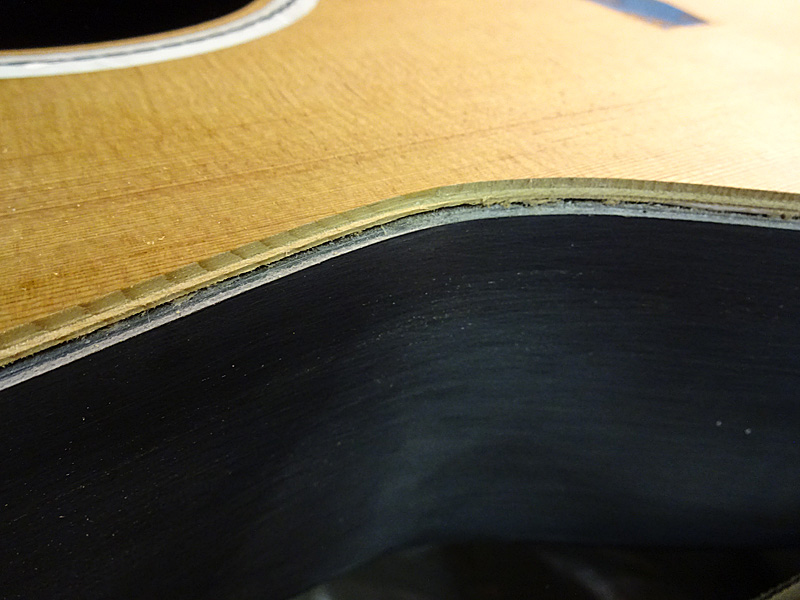
When I tap on the top, it's got a great big hollow sound like a drum, which is very good. Tonight's job is to grind down the edges of the top so it's flush with the sides of the bowl in preparation for routing the grooves for the purfling and binding.
Edited by DanSavage 2015-09-18 8:55 AM | ||
| |||
| clrules |
| ||
Joined: September 2005 Posts: 138 Location: Birmingham, AL | Absolutely fantastic!!!! | ||
| |||
| DanSavage |
| ||
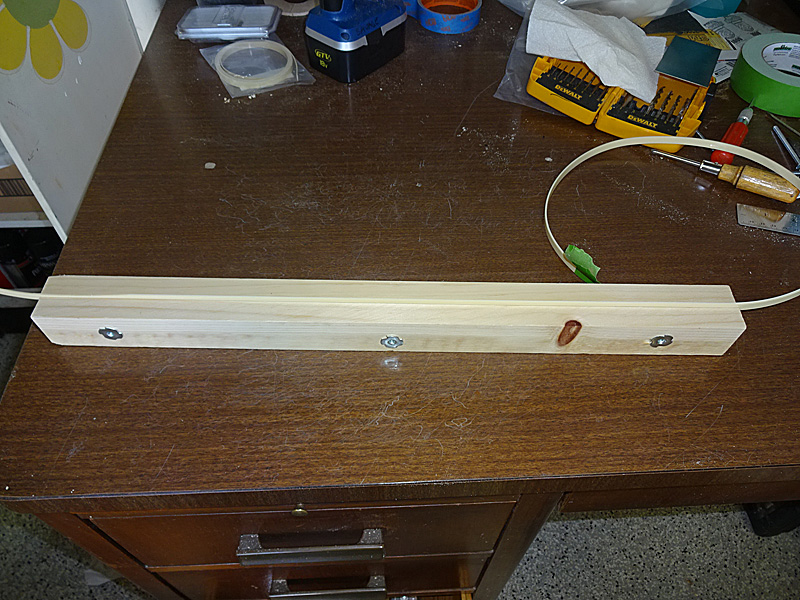
Joined: June 2012 Posts: 2303 Location: Lake Forest, CA | Thanks, Paul! It's getting there. Not as quickly as I would have liked, but that's another story. Before I attacked the guitar body I wanted to test the attachment on some scrap wood. This attachment will work, but just barely. Here are the grooves I cut in the scrap wood. The upper groove is for the purfling and the lower one is for the binding.
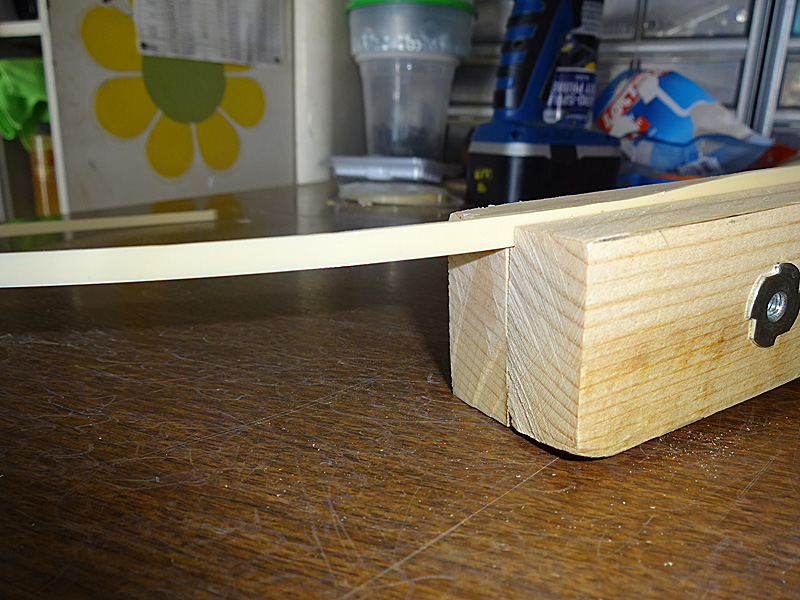
Speaking of binding, I bought some cream binding from AllParts.com. Their cream binding matches the color of the Ovation binding almost perfectly. The .060" is the correct thickness, but it's too wide which will make it hard to glue and tape the binding and purfling to the body. The binding on modern Ovations are about 1/4" wide. The early guitars used 3/16". So, I needed to remove 1/8". Now, I could have spent $200-$300 on a tool from Stewmac. Instead, I used my Stewmac router attachment to make a tool to narrow the binding, which is 5/16" wide. Here's the tool with the binding clamped into place.
I used my cabinent scraper to shave 1/8" off the binding.
Now, I'm ready to route the grooves into the body. I'm going to try to get that job done tonight. | ||
| |||
| DanSavage |
| ||
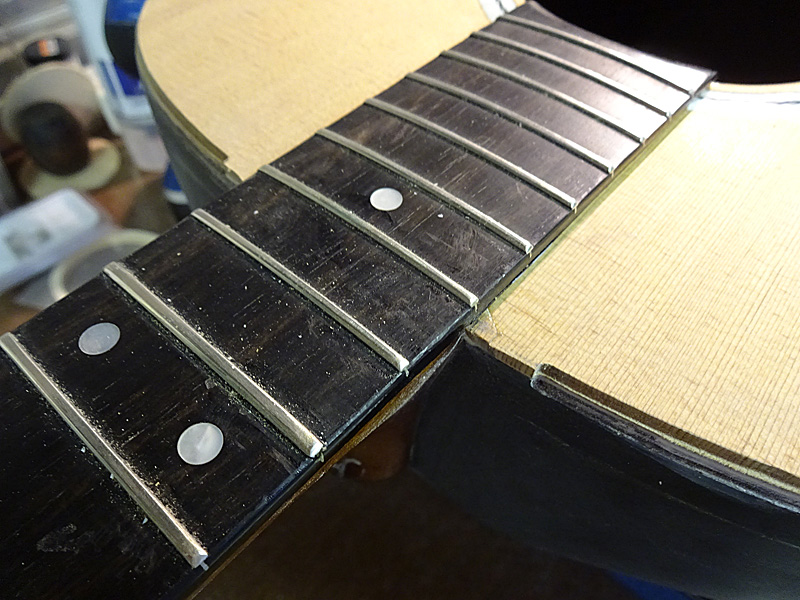
Joined: June 2012 Posts: 2303 Location: Lake Forest, CA | I was able to get the routing on the body done last night. (Yay!)
| ||
| |||
| Mark in Boise |
| ||
Joined: March 2005 Posts: 12750 Location: Boise, Idaho | Some of the tools you come up with are amazing, Dan. The Mother of Invention is very strong in you. | ||
| |||
| DanSavage |
| ||
Joined: June 2012 Posts: 2303 Location: Lake Forest, CA | Thanks, Mark. It comes from years of scratch-building model airplanes. | ||
| |||
| DanSavage |
| ||
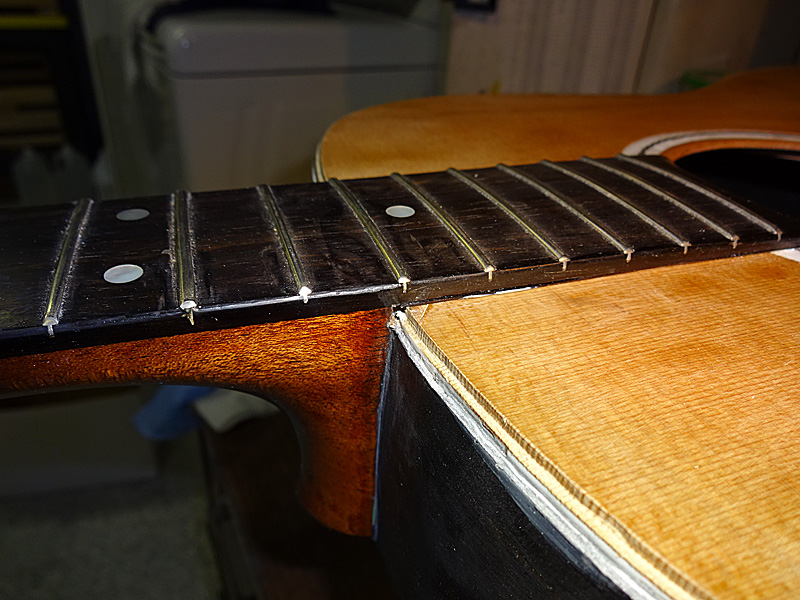
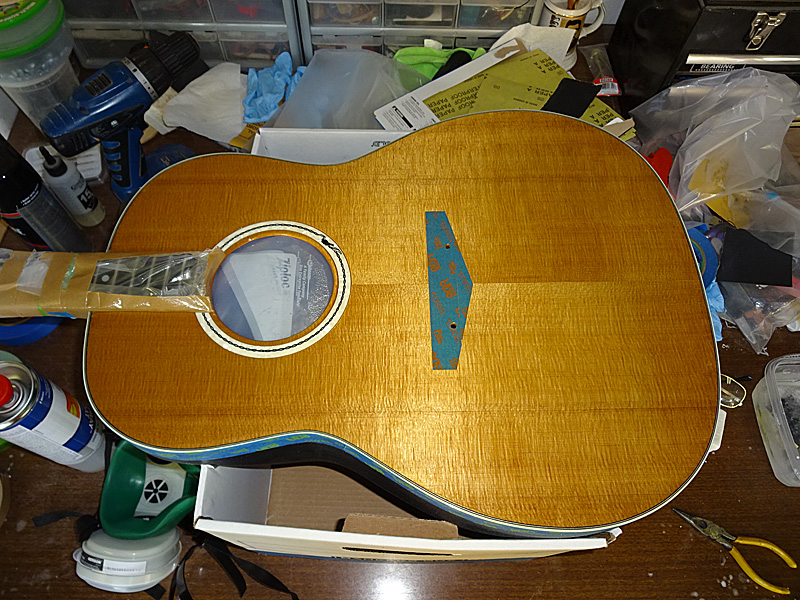
Joined: June 2012 Posts: 2303 Location: Lake Forest, CA | I finished carving the grooves for the purfling/routing.
Next job, gluing the purfling binding into place.
| ||
| |||
| DanSavage |
| ||
Joined: June 2012 Posts: 2303 Location: Lake Forest, CA | Progress continues.
| ||
| |||
| DanSavage |
| ||
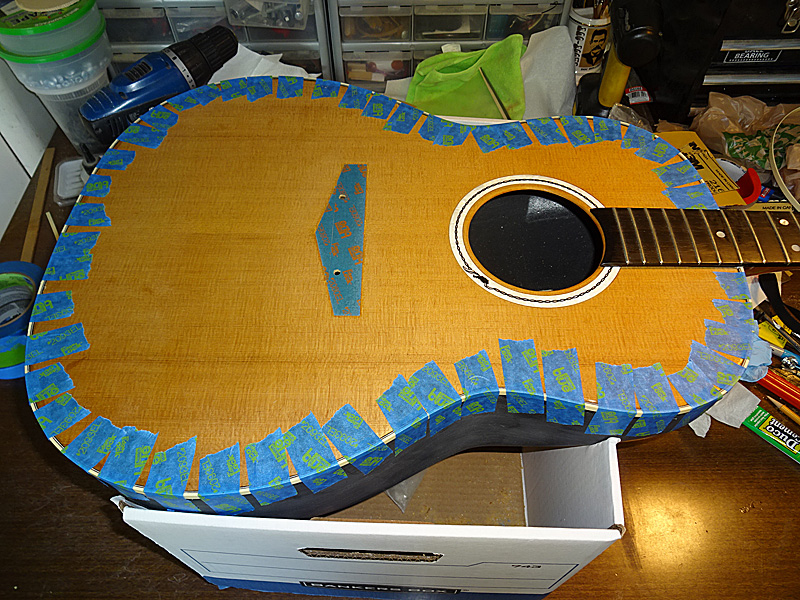
Joined: June 2012 Posts: 2303 Location: Lake Forest, CA | Binding tape pulled up. Binding and purfling are ready for scraping.
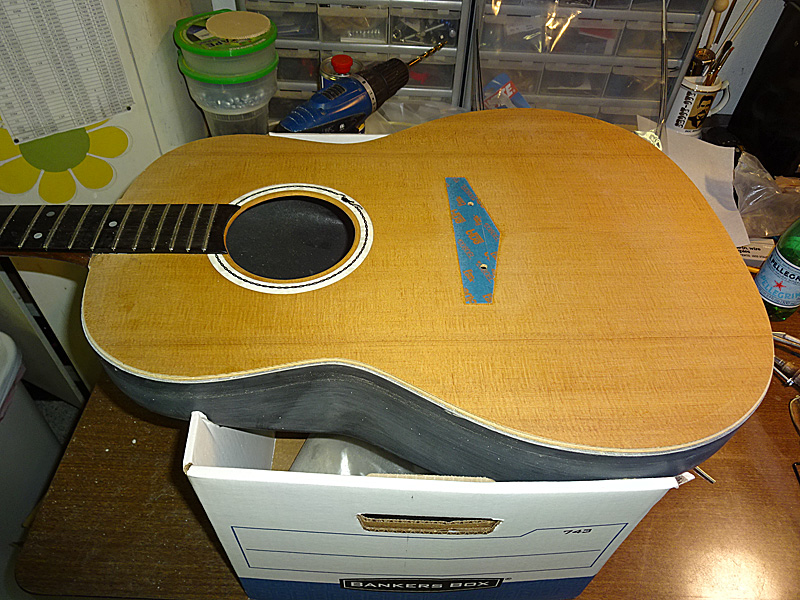
Binding and purfling have been scraped. Edges and neck are masked. Final clear coat applied and looking real purty. Once it's cured, I'll cut and polish it, then move onto the bowl.
| ||
| |||
| seesquare |
| ||
Joined: November 2002 Posts: 3599 Location: Pacific Northwest Inland Empire | Astounding. Glad the box worked out. | ||
| |||
| DanSavage |
| ||
Joined: June 2012 Posts: 2303 Location: Lake Forest, CA | Thanks. The silking on this top wood is really amazing. Photos don't do it justice. Your suggestion for the box works great. I put a small sand baggie inside bowl and a large sand baggie in the bottom of the box and the whole thing is very stable. | ||
| |||
| arumako |
| ||
Joined: October 2012 Posts: 1018 Location: Yokohama, Japan | Wow, DanSavage. Stunning work! You may be in California, but your heart sure belongs in New Hartford! | ||
| |||
| DanSavage |
| ||
Joined: June 2012 Posts: 2303 Location: Lake Forest, CA | You are too kind, Arumako.  | ||
| |||
| DanSavage |
| ||
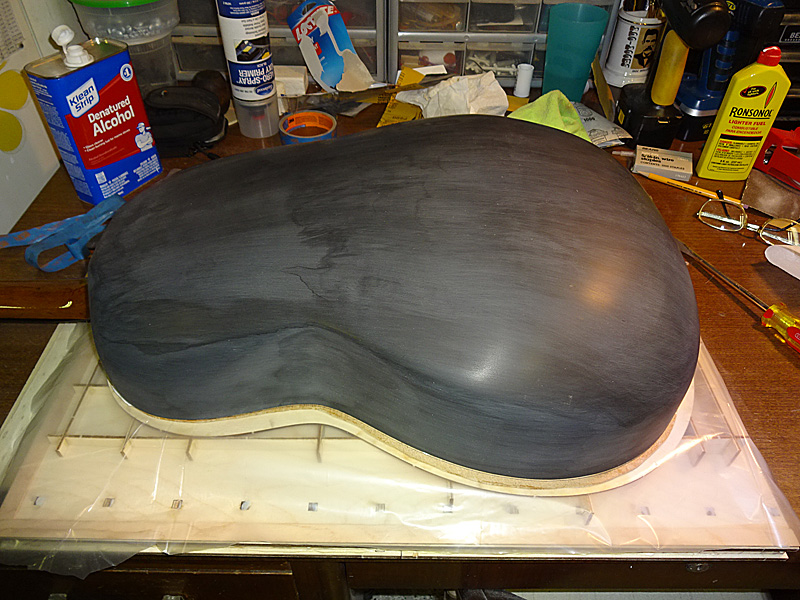
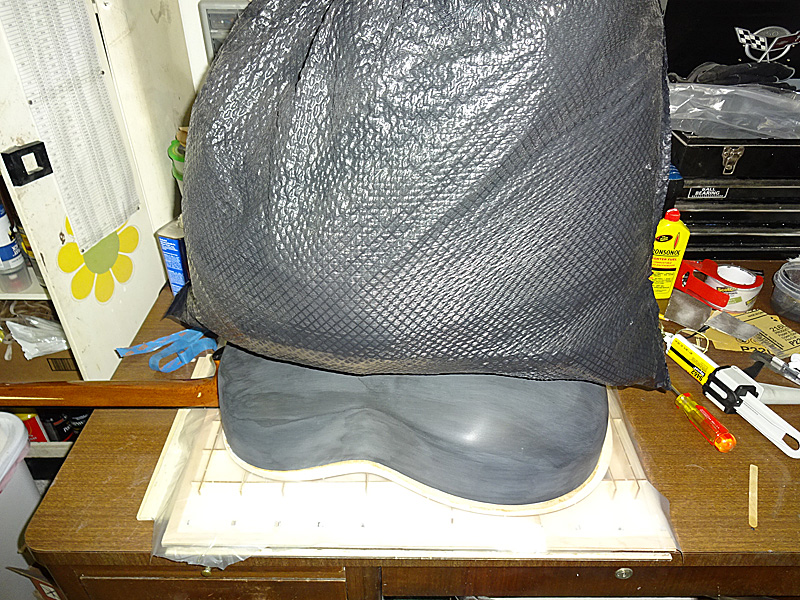
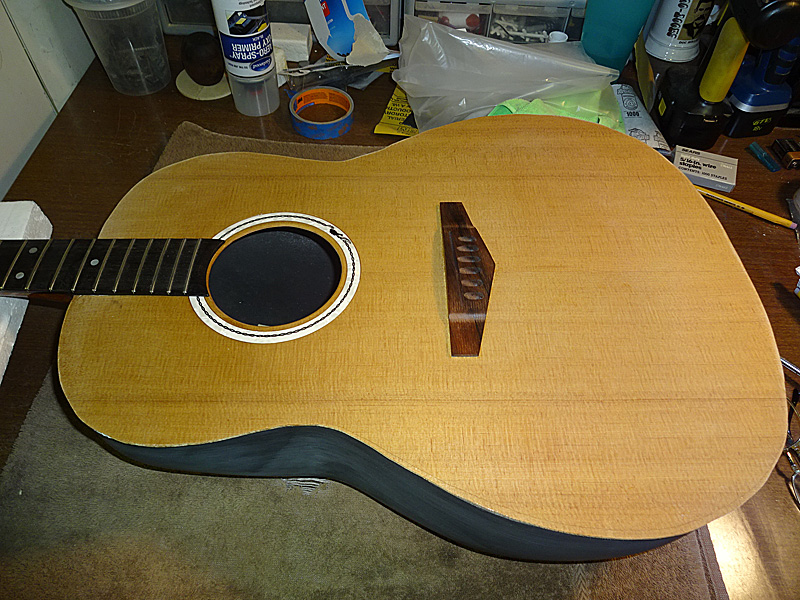
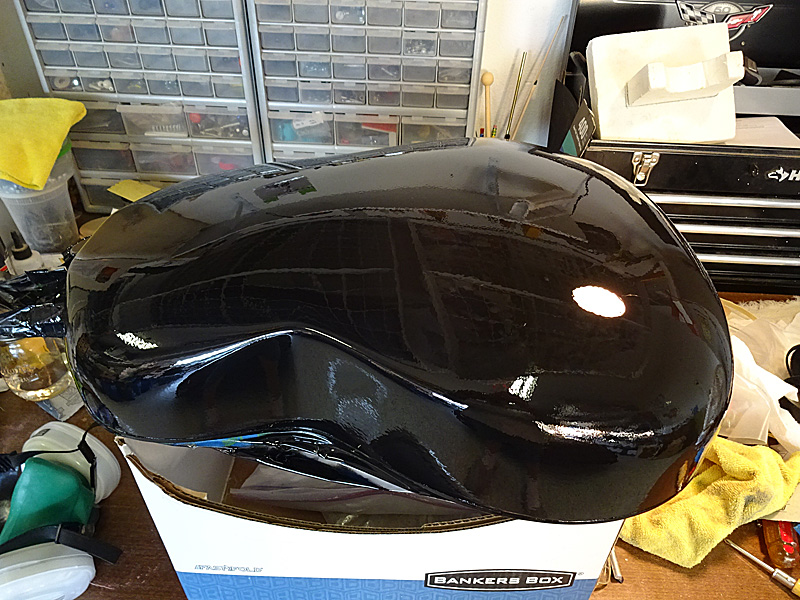
Joined: June 2012 Posts: 2303 Location: Lake Forest, CA | The top has been cut and polished, so it's time to move onto masking and painting the bowl. | ||
| |||
| DetlefMichel |
| ||
Joined: May 2011 Posts: 751 Location: Muenster/Germany | Das is´ja schlimmer als´n Fortsetzungskrimi. (Maybe someone may translate that for me) | ||
| |||
| jay |
| ||
Joined: January 2009 Posts: 1249 Location: Texas | Woof! How badly do you want to put a set of strings on it? | ||
| |||
| Mark in Boise |
| ||
Joined: March 2005 Posts: 12750 Location: Boise, Idaho | Beautiful, Dan. What do you mean by "cut and polish"? I understand the polish part, but I don't know what you mean by "cut". | ||
| |||
| DanSavage |
| ||
Joined: June 2012 Posts: 2303 Location: Lake Forest, CA | amosmoses - 2015-10-09 10:58 AM Woof! How badly do you want to put a set of strings on it? Real bad. The closer I get the faster I want to get it done. Once the bowl is done, it's time to glue on the bridge, make the saddle and the nut, mount the tuners, and string `er up. | ||
| |||
| DanSavage |
| ||
Joined: June 2012 Posts: 2303 Location: Lake Forest, CA | Mark in Boise - 2015-10-09 11:28 AM Beautiful, Dan. What do you mean by "cut and polish"? I understand the polish part, but I don't know what you mean by "cut". Thanks, Mark. The 'cut' is the wet-sanding process. I'll start with 400-grit to (gently) get rid of any orange peeling and to level the surface, then progress with 600 all the way up to 2000. After that, it's polishing with red jeweler's rouge on a buffing wheel, then white rouge for the final polish. | ||
| |||
| DanSavage |
| ||
Joined: June 2012 Posts: 2303 Location: Lake Forest, CA | DetlefMichel - 2015-10-09 10:48 AM Das is´ja schlimmer als´n Fortsetzungskrimi. (Maybe someone may translate that for me) Something about a serial novel where you only get to read a chapter a week and are kept on the edge of your seat waiting for the next installment? | ||
| |||
| Mark in Boise |
| ||
Joined: March 2005 Posts: 12750 Location: Boise, Idaho | Thanks, Dan. That's what I figured "cut" meant. I won't ask about red and white jeweler's rouge. | ||
| |||


| Jump to page : < ... 4 5 6 7 8 9 10 11 12 13 > Now viewing page 10 [25 messages per page] |
| Search this forum Printer friendly version E-mail a link to this thread |
| This message board and website is not sponsored or affiliated with Ovation® Guitars in any way. | |
| (Delete all cookies set by this site) | |