|
|
Joined:
May 2009
Posts: 325
Location: Utica, NY | OK, don't freak out here I am just gathering info.
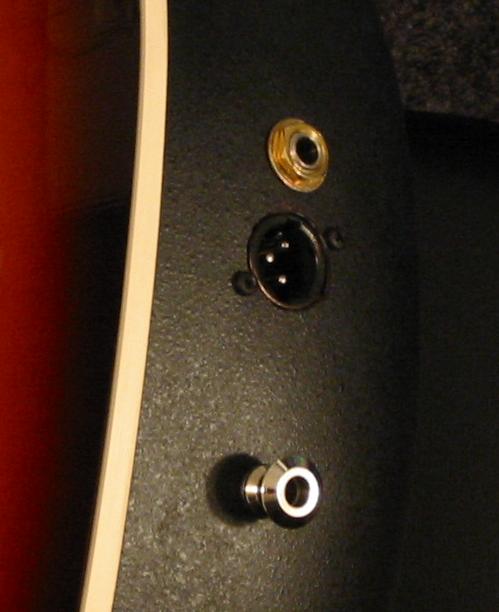
Has anyone installed the XLR-1/4" board in a guitar that just had the 1/4" jack? Is there a template available? Any tips, pitfalls or pointers? I have everything that I would need, parts, tools & (ahem) ability, but I only get one chance at it so I want to be 100% clear on my measurements and procedures before putting any odd holes anywhere.
I am planning on making as many drawings and cutouts on paper to perfect the layout and size. Once that's complete the rest should be pretty straight forward. But, I'd love some words of advice from someone that's already done this a time or two. From what I have been able to see in the archives if folks will take on the compound shapes of a preamp upgrade two small holes should be a piece of cake.
Pics are ALWAYS welcome.
Thanks. |
|
| |
|

Joined:
February 2005
Posts: 11840
Location: closely held secret | Yes. No. Make sure you get the hole for the XLR exactly where it should be, and no larger than it should be (the mounting screws are very close to the edge of the hole). Oh, and make sure you put the XLR on the correct side - opposite side of the 1/4" from the strap peg. Not the way I did...
 |
|
| |
|

Joined:
December 2003
Posts: 13997
Location: Upper Left USA | Pssst... practice on a scrap piece of anything plastic-like and if it works - use that as a direct template. If it doesn't - that's why they call it practice :rolleyes: keep at it.
And if you really mess it up - buy one of those 2 part epoxy bumper repair patch kits and fill/redrill.
To retexture the bowl use Flat Black Krylon at about a four foot distance for the texture.
I can make a tracing of one of mine if you'd like? Just go for it! |
|
| |
|

Joined:
July 2003
Posts: 3111
Location: Nashville TN. | I had the Mothership ad one.
It wasn't expensive. |
|
| |
|
Joined:
May 2009
Posts: 325
Location: Utica, NY | Thanks for the reply and sorry for posting in the wrong forum. Perhaps I will try to move it. |
|
| |
|
Joined:
November 2004
Posts: 367
Location: Eaton, Indiana | I made a template out of a 3 x 5 index card. careful use of a moto tool will do the trick. Good luck.
Scott Lamperd B C (before computers) |
|
| |
 XLR install

