|
|
Joined:
May 2011
Posts: 81
Location: Ozark, Arkansa | Greetings! I was blessed to pick up a wrecked 1581 for a mere $80 from a friend. Bowl was smashed by an irate wife. I have removed the neck and electronics. The headstock is missing an ear, and a chip missing on the other one. I have started reconditioning the fretboard for some significant divots, and it is cleaning up nicely. The rest of the neck itself looks well cared for. Electronics are tested and working.
I have started my bowl rebuild, and am planning on making my own shiny bowl. There was too much damage on the outside of the bowl to make a factory finish restoration attempt impractical, at least for someone at my level.
But I am calling this my Phoenix project because it was so badly damaged.
Dan Savage has been kind enough to offer some advice along the way. It was fun to watch him rebuild Harry Chapin's 1613 after I sent it to him. Jen was thrilled to get it back, and I was thrilled to have been part of restoring a piece of music history.
It is going to be fun to see this Phoenix fly again! |
|
| |
|

Joined:
June 2012
Posts: 2330
Location: Pueblo West, CO | Hi Steve,
To post photos, and I recommend you post photos along the way, click on the advanced reply button. At the bottom of that screen is a checkbox labeled, "Attach a photo or file after posting"
Click this checkbox and you'll be able to upload a photo to your photo album.
I upload my photos to my web server, and then hot-link to them in the Rich Text Editor screen.
Dan
|
|
| |
|
Joined:
May 2011
Posts: 81
Location: Ozark, Arkansa | Here is some of the worst damage, but there are lots of smaller dings as well.
 (Bowl 1_01.jpg) (Bowl 1_01.jpg)
 (Bowl 2.jpg) (Bowl 2.jpg)
 (Bowl 3.jpg) (Bowl 3.jpg)
 (Ring 1.jpg) (Ring 1.jpg)
 (Missing ear.jpg) (Missing ear.jpg)
Attachments
----------------
 Bowl 1_01.jpg (86KB - 1 downloads) Bowl 1_01.jpg (86KB - 1 downloads)
Bowl 2.jpg (64KB - 2 downloads)
Bowl 3.jpg (64KB - 2 downloads)
Ring 1.jpg (58KB - 2 downloads)
Missing ear.jpg (98KB - 2 downloads)
|
|
| |
|
Joined:
May 2011
Posts: 81
Location: Ozark, Arkansa | The thing that blows me away, is how really tough these bowls actually are. Even with all the cracks as bad as they appear in the pics, as I tried to pull the sections apart to line up edges, the bowl would hardly give at all, and there was no additional cracking. I could hardly move them to get the edges to overlap properly. Leaves me wondering if the gal who smashed it up hurt her herself in the process!
I don't know if she knocked the ear off or not. But I am grateful none of the tuners were damaged.
Edited by Oldvation Guy 2019-09-22 7:46 PM
|
|
| |
|
Joined:
October 2012
Posts: 1072
Location: Yokohama, Japan | Hi Oldvation Guy! Wow, you've got your work cut out for you there... Of course, you have DanSavage "the Man" and all the wisdom of the OFC at your finger tips - can't go wrong! The bowl looks bad, but it is an FR composite, and can definitely be rebuilt. Interestingly enough, once the top and kerfing (suspension ring) are off, the bowl itself is pretty flexible. Have you taken a pic of the top? If I remember correctly, I think I read in another thread that the suspension ring is resin based as well. If the top is in decent shape, with some time and care, that Adamas could sing again. Plus, all the TLC will bind your heart to the instrument, and make it all the more satisfying! I look forward to following your journey. Good luck!
Edited by arumako 2019-09-22 10:57 PM
|
|
| |
|
Joined:
May 2011
Posts: 81
Location: Ozark, Arkansa | Sorry, Arumako, the top was totally gone. The only evidence it even had a top is the epoxy around the suspension ring. I will have to get that off so I don't have to thin the top around the edge more than necessary to get it to fit. I want a wood top, rather than CF, so to make it work I will apply thin fiberglass cloth and resin on the underside of the top for about an inch around the outside of the top.
Edited by Oldvation Guy 2019-09-23 7:10 PM
|
|
| |
|
Joined:
June 2012
Posts: 2330
Location: Pueblo West, CO | Oldvation Guy - 2019-09-23 5:09 PM
I want a wood top, rather than CF, so to make it work I will apply thin fiberglass cloth and resin on the underside of the top for about an inch around the outside of the top.
What's your reasoning behind this?
By this, I mean, what are you attempting to accomplish with glassing the underside of the wood top? |
|
| |
|

Joined:
January 2009
Posts: 1249
Location: Texas | Man! If this guitar can be salvaged...any O has a chance. Thanks for taking on this project and sharing it with us. I have a couple of questions. "fretboard for some significant divots" Can those grooves in the fretboard actually be repaired? If so, how do you plan to approach that issue?
" I will apply thin fiberglass cloth and resin on the underside of the top for about an inch" Would that have an adverse effect on the tonality of the top? thanks...and good luck! jay |
|
| |
|
Joined:
May 2011
Posts: 81
Location: Ozark, Arkansa | Dan, There is limited space on top of the suspension ring for a wood top to be exposed above the decorative edge. By thinning the outside of the top for about an inch of the width of the underside, then putting a very thin later of fiberglass, or even carbon fiber, I can lower the overall profile of the top without losing strength where the top will need it. |
|
| |
|
Joined:
May 2011
Posts: 81
Location: Ozark, Arkansa | For anyone interested, there was so much crush damage separating the fiberglass between the inner and outer surfaces of the bowl, I decided I needed to use something other than epoxy or resin which might not be thin enough to wick into the fiberglass. I decided to experiment on a couple of spots with CA glue. It worked perfectly. The fiberglass soaked it up like a sponge, and then hardened like stone. I just had to keep the edges lined up to avoid misshaping the outer surface of the bowl.
I went back after 24 hours and tried to break the edges apart and could not do so. The fibers on each side locked together beyond what I had hoped. I will still back up the major cracks with fiberglass. But I have no qualms about the bowl being weak, or heavier because of the extensive repairs. |
|
| |
|
Joined:
May 2011
Posts: 81
Location: Ozark, Arkansa | Jay, I have already removed the divots from the fretboard. They look worse in the pic than they actually were for depth.
The added stiffness due to the fiberglass layer underneath, will not significantly stiffen the top beyond what traditional kerfing would do, where there would be no flex at all. In fact, it should be less stiff, since it will be on the suspension ring.
At least in theory... |
|
| |
|
Joined:
June 2012
Posts: 2330
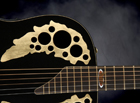
Location: Pueblo West, CO | Here's a cross-section of the suspension ring and CF top. 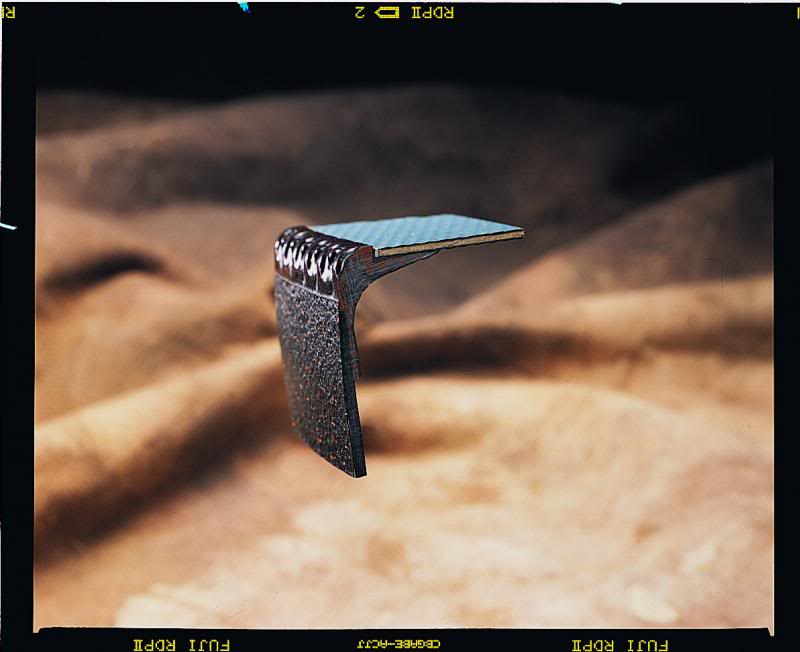
If I understand correctly, the recess on the suspension ring would cause the outer face of the top to sit proud? How deep is the recess?
Normally, Ovation wood tops are tapered from top to bottom. I sand mine down to .110" at the upper bout down to .100" for the lower. When I built Jonmark's Parlor I had to forgo the taper and sanded it down to .095" because the neck was set too close to the neck block.
I checked on Ovation Tribute and from the Adamas History Booklet, I found that the thickness of the Adamas top is .045". (two .005" layers of CF sandwiching a .035" birch veneer layer)
|
|
| |
|
Joined:
May 2011
Posts: 81
Location: Ozark, Arkansa | Excellent! Thanks for the information. I have an old guitar top I am going to take a chunk from to experiment with. If push comes to shove, I figure I could taper the top edge of the top a bit to make it less of an issue. I have a digital mic I can use to check it.
I love having the cross section for reference! I will probably have to go with CF backing to keep it thin enough.
BTW, the ring is broken in four or five places. I have a daughter who is a sculptor in grad school who has told me how to make a mould to repair the damaged trim, or I might just do it freehand.
Do you have any suggestions for removing the epoxy from the suspension ring, or do I just take it off with an Exacto knife?
Thanks, Dan.
Edited by Oldvation Guy 2019-09-24 11:37 AM
|
|
| |
|
Joined:
June 2012
Posts: 2330
Location: Pueblo West, CO | The epoxy can be removed using heat or by manually scraping it off. I've done it both ways.
The problem with the heat is you run the risk of softening the epoxy holding the suspension ring into place. OTOH, I have successfully used heat many times to remove the excess epoxy from the tops of linings on other Ovation guitars without loosening the lining joint.
To 'focus' the heat so it only hits the area I want I use a modeling heat gun that has a flat nozzle. (See: Top Flite Heat Gun) For the manual scraping method, I use an Xacto chisel. 
To keep a reinforcement layer thin, you'll want to squeeze the excess resin out of the cloth. (FG or CF) This can be done with a vacuum bag set up, a piece of visqueen or even a pane of glass. I used the visqueen method when molding the patch for my first 1619. (See: 1619-4 Rebuild...)
Personally I would use FG cloth as it's cheaper than CF and accepts resin more readily. The weight of the cloth you use will be determined by how thick you want the reinforcement layer to be.
Edited by DanSavage 2019-09-24 12:16 PM
|
|
| |
|
Joined:
February 2016
Posts: 1846
Location: When?? | As it's going with the Black Pearl, and now this, you could sell tickets to the BFLG these days! And really, who would have ever thought there could come a silver lining to the antics of an irate wife? Great stuff all around. Thanks for sharing, guys! |
|
| |
|
Joined:
May 2011
Posts: 81
Location: Ozark, Arkansa | Love, O Fair, I agree! I LOVE to repair almost anything, but especially badly damaged and abused Ovations. I call them RenOvations. This is by far the worst one I have ever tackled, but I am really excited by how I see the bowl repairs proceeding. This is going to be a GREAT guitar once again.
As far as being bashed up, this is the ONLY way I could ever have afforded to get an Adamas of the caliber of this guitar.
Having Dan's experience is a huge help too. When I saw what he was able to do with Harry Chapin's wrecked 1613, and his Black Pearl project, it really stoked my repair fires.
Pretty pumped about what I will end up with. But patience is needed. I have several projects going simultaneously, including working full time, plus writing a book. Lots on the plate these days for an old man.
Edited by Oldvation Guy 2019-09-25 9:33 AM
|
|
| |
|
Joined:
May 2011
Posts: 81
Location: Ozark, Arkansa | Dan, I am nowhere near being ready to buy a top, but what will be my best bet for finding a torrified Adi top? I have seen everything from expensive to dirt cheap. Also, where do I source parts like the molleys, bridge, epaulets (if I decide to use them)? Still wrestling with pickup options, but I will definitely be reusing the preamp and battery box. |
|
| |
|
Joined:
June 2012
Posts: 2330
Location: Pueblo West, CO | Steve,
There aren't too many choices out there for torrefied Adi tops.
I've bought torrefied Sitka spruce tops from Stewmac and had reasonably good luck. They are now selling torrefied Adi, both old growth and new growth. They're pretty pricey, however. I tried buying an old growth torrefied Adi top, but the grain was really crooked and uneven. And, quite expensive, too as I bought the AAA stuff. I tried exchanging it for another and gave them details about what I was looking for, but that top went back too. After that I just got a refund.
I have not seen Stewmac's new growth torrefied Adi tops, but those are pretty pricey, too. The problem with ordering tone wood from Stewmac is you're buying it sight-unseen, so there's no telling what you're going to get.
Most of the tops I've used came from either Colonial Tonewoods, now out of business, or from RC Tonewoods. Both are reasonably priced and decent quality. The selection at RC Tonewoods right now is okay. They also sell torrefied Englemann and Sitka. These are the guys I used for Jen's guitar and my parlor. The nice thing about these guys is they post photos of the wood, so you know what you're getting. Also, RC Tonewoods sells uncut torrefied Adi brace stock. Stewmac only sells torrefied Sitka brace stock.
There's another place that sells torrefied Adi called Wood To Works. I haven't used them, but they look like they have a decent selection and are reasonably priced. (See: Wood To Works) WTW also sells torrefied Adi brace stock, but it's a little more expensive than RC Tonewoods. For the parts like mollies, bridge, epaulets, contact the factory. If you're going to use the thin-line bridge, you'll definitely want to use the OEM bridge because the slot is angled back a few degrees. This combined with a compensated saddle fixes the intonation problem inherent in all Ovations, including, Adamas.
Edited by DanSavage 2019-09-26 4:57 PM
|
|
| |
|
Joined:
May 2011
Posts: 81
Location: Ozark, Arkansa | Sorry for the delay. It really is hard for me to carve out big chunks of time to work on this.
I have been grabbing a few moments most days to work on small sections. Here are some pics of the individual dings and cracks.
In the top pic you can see the individual fibers of the very thin fiberglass layer between the inner and outer layers of the bowl. In some spots I have to actually chip off the outer or inner surface to be sure the CA glue saturates the glass layer. Resin would not have been thin enough to soak in far enough.
In some places the fractures and surface angles were so complex I had to just do the best I could and plan to rework those places later. The suspension ring was damaged in four places, and didn't line up perfectly because of that. I will adjust them now that the glue has fully set, which for me means overnight. One whole section of the SR lip is completely missing.
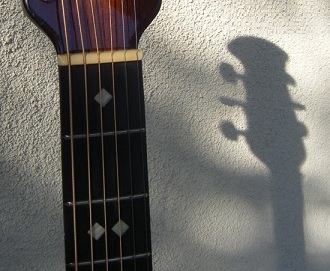
The fretboard is really looking nice, and the trilliums are blooming! They really pop now that I have done my preliminary work on the fretboard. I will dress the frets later. I might have to replace a couple. We'll see.
One change of plans is that I will be putting a CF top back on it. I am getting one from Thomas Damon, complete with the bracing installed which will dramatically speed up the rebuild process. But I will have to modify it for my cutaway bowl as it is a non-cutaway top.
Edited by Oldvation Guy 2019-10-06 10:15 AM
 (IMG_1422_01.jpg) (IMG_1422_01.jpg)
 (IMG_1424.jpg) (IMG_1424.jpg)
 (IMG_1427.jpg) (IMG_1427.jpg)
 (IMG_1428.jpg) (IMG_1428.jpg)
 (IMG_1430.jpg) (IMG_1430.jpg)
 (IMG_1431.jpg) (IMG_1431.jpg)
 (IMG_1435.jpg) (IMG_1435.jpg)
Attachments
----------------
IMG_1422_01.jpg (68KB - 1 downloads)
IMG_1424.jpg (97KB - 1 downloads)
IMG_1427.jpg (76KB - 1 downloads)
IMG_1428.jpg (79KB - 1 downloads)
IMG_1430.jpg (81KB - 1 downloads)
IMG_1431.jpg (90KB - 1 downloads)
IMG_1435.jpg (76KB - 1 downloads)
|
|
| |
|
Joined:
May 2011
Posts: 81
Location: Ozark, Arkansa | Here is the top and bracing I will be installing.
 (Top_01.jpg) (Top_01.jpg)
 (Bracing_01.jpg) (Bracing_01.jpg)
Attachments
----------------
Top_01.jpg (70KB - 1 downloads)
Bracing_01.jpg (68KB - 1 downloads)
|
|
| |
|
Joined:
May 2008
Posts: 1559
Location: Indiana | Excellent. Good to see you're going with a CF top. Only fitting.
Know you said you're not a fan but this might change your mind.
Carry on. |
|
| |
|
Joined:
February 2014
Posts: 714
Location: moline,illinois | Cool you got the Carbon Fiber top you do realize this is for a dreadnaught 1687/1681 and your mounting it to to a cutaway bowl for a 1581 so your bracing and soundholes are different from a cutaway top-hopefully you can modify it to work .. ..good luck 
|
|
| |
|
Joined:
May 2011
Posts: 81
Location: Ozark, Arkansa | Yes, 2wheeldrummer, I took a pic of a cutaway top and printed that, and then flipped it horizontally and printed that as well. Then I overlapped the images, and to my dismay saw there was no way to preserve the holes on the cutaway side. My plan is to make that side of the top distinctively my own design. I will just need to come up with adequate hole area to keep the resonance the same. I will adjust the bracing as needed. I am pretty confident I can make it work.
I picked red to go with the Phoenix theme. I don't care for the way Ovation did the pick guard section of the top, so my plan is to convert that upper quarter to a modified pick guard area down to roughly halfway down the right side. The pick guard color will match what I am going to use for the bowl color, and then I am hoping to have a Phoenix bird on the pick guard area. |
|
| |
|
Joined:
February 2016
Posts: 1846
Location: When?? | The plot continues to thicken. Why is the term "mad scientist" going through my mind right now? Definitely not the first time I've thought that on this forum.. but this one is going to be very interesting
(to say the least).
Edited by Love O Fair 2019-10-06 10:42 PM
|
|
| |
|
Joined:
May 2011
Posts: 81
Location: Ozark, Arkansa | Many thanks to Al for supplying the manhole cover, and a new rosewood Ovation bridge! I was originally going to go with an Ovation thin slot ebony bridge if I could find one, when it suddenly dawned on me. The carbon fiber top is already going to sound bright without emphasizing that even more. So, the rosewood and wide Ovation pickup may soften that a bit.
More thoughts of the mad scientist...The bridge is going to be a focal point of the Phoenix theme. I will either hand carve wings into the bridge, or use other thin pieces of wood to create the wings of the Phoenix. Then I will add a tail below, and head above the bridge. Can't wait! |
|
| |
|
Joined:
May 2011
Posts: 81
Location: Ozark, Arkansa | It just struck me, the new top is en route from the west coast, the bowl access cover and bridge are en route from the east coast, and I am in the middle of the country trying to put Humpty Dumpty back together again.
What a blast!
Dan, what do you think are the chances of removing the right side epaulet intact? Or will I just have to sand it down? As I mentioned earlier, I could only get the full dreadnaught size top from Thomas. I will be turning it into a cutaway top and then placing a custom pick guard over that area.
Basically, this pic below is what I am aiming for, with the addition of the pick guard in the upper right quarter, and then the custom woodwork at the bridge.
Edited by Oldvation Guy 2019-10-09 9:31 PM
 (1581.JPG) (1581.JPG)
Attachments
----------------
1581.JPG (55KB - 0 downloads)
|
|
| |
|
Joined:
May 2011
Posts: 81
Location: Ozark, Arkansa | LOL! I just noticed in the pic, the left ear is broken off exactly like my headstock! But I know it isn't my guitar pre-bashing, because mine has a full preamp, not the knobs. |
|
| |
|
Joined:
June 2012
Posts: 2330
Location: Pueblo West, CO | Oldvation Guy - 2019-10-09 7:06 PM
Dan, what do you think are the chances of removing the right side epaulet intact? Or will I just have to sand it down?
It's probably glued down with epoxy, so it could be heated to soften it. The CF/birch/CF is probably also epoxy.
The tricky part is to heat up the epaulet enough to soften the glue holding it to the top, but not heat up the top so much that it softens the epoxy holding the CF to the birch.
That being the case, it would be safer to sand it down. |
|
| |
|
Joined:
October 2012
Posts: 1072
Location: Yokohama, Japan | Oldvation Guy - 2019-10-08 1:33 AM
More thoughts of the mad scientist...The bridge is going to be a focal point of the Phoenix theme. I will either hand carve wings into the bridge, or use other thin pieces of wood to create the wings of the Phoenix. Then I will add a tail below, and head above the bridge. Can't wait!
Wow! That sounds exciting! Really enjoying being a spectator in the farthest eastern corner of the earth here. WRT removal of the epis...you might try putting some boiled water into a ziploc freezer bag, and place that on top of the epi. I've used the technique to remove bridges, epi's and even necks.
I'm not sure as to the type of adhesives used to keep the Adamas birch/FRP sandwich together, but I suspect they are resin based products. And if other Os are any indication, it will probably be able to withstand the heat of boiling water without separating. As long as you don't get too aggressive, you should be able to take it off pretty clean. Covering the epi's first with some masking tape has been helpful for me. Once off, the epi's will have a tendency to curl-up (the tape keeps the pieces together). Spray a little bit of water on the underside of the epis and iron at a low temperature by applying pressure slowly and the epis will flatten out. Once it flattens out, there might be a need to keep the epi pieces together with some CA or epoxy, and it can be stored for use in a different project.
However, since my experience in this regard revolves more around Celebritys and not Adamii (have never worked on an Adamas), I defer to whatever Dan says! Really enjoying your thread and definitely sending good vibes your way! Thanks for sharing!
By the way, what kind of human species keeps a stash of Adamas tops like that just sitting around? How and where you guys source your stuff is just out of this world!
Edited by arumako 2019-10-11 6:07 AM
|
|
| |
|
Joined:
May 2008
Posts: 1559
Location: Indiana | Oldvation Guy - The carbon fiber top is already going to sound bright without emphasizing that even more. So, the rosewood and wide Ovation pickup may soften that a bit. Don't know how many of these woven tops you've played before but if you're expecting it to be bright, I think you're in for a surprise. I'm enjoying your project. |
|
| |
|
Joined:
May 2011
Posts: 81
Location: Ozark, Arkansa | Thanks for the tips on removing the epaulet. I think I will try to remove it before I resort to sanding it off. I might repurpose the wood pieces for the Phoenix bird I am putting on the top. If not, I have a really good selection of wood to choose from to make the bird.
I just reached out to the Ovation repair shop for a price to put the original finish back on. They asked for pics to quote a price for repairs...I wish I could be there when they look at the devastation. Made it clear, AGAIN, that all I want is their price for painting the whole bowl. I am still leaning toward a shiny bowl finish of my own.
Al's parts should be here today, but the top won't arrive until later next week. Doesn't matter, I will be gone this weekend and I have a TON to do before I can even think of mounting the top.
I discovered I can buy pick guard material by the sheet and create my own custom pick guard. That will be fun too. I have a daughter who is a sculptor grad student who told me how to make molds to repair my battered suspension ring trim, so that will be an adventure in itself.
Jonmark, I am just going by what I have heard of carbon fiber guitars on YouTube. I have never actually played one myself. But hey, the Adamas top is just a high end laminated top, right? JK.
The bowl repairs are going better than I feared they might. This is going well. Just dragging out because of splicing it into life...
Edited by Oldvation Guy 2019-10-11 9:51 AM
|
|
| |
|
Joined:
May 2008
Posts: 1559
Location: Indiana | These textured adamas tops are real cannons. Balanced but plenty of rumble. You're going to like it.
Carry on. Fun to watch.
|
|
| |
|
Joined:
May 2011
Posts: 81
Location: Ozark, Arkansa | Decided to start smoothing some of the repairs inside the bowl. Used a Dremel tool with a beveled stone to take off the high points of the material buildup. Lots more crack repairing to go, but very encouraged so far.
I will have to make a special jig to realign at least one spot where the suspension ring broke through I had hope to use a clamp and a couple of pieces of masonite treated with mold release to flatten the spot at the cutaway. But after it had set, and I removed the pieces, it still was not as aligned as I want it to be. I will cut the crack open now that the fiberglass layer is stabilized and hardened, and line everything up with a different approach. I will get a pic when I do that.
Once I have all the cracks satisfactorily leveled on the inside of the bowl, I will put thin fiberglass over those repairs on the inside of the bowl, but not more than necessary, to try to preserve the tonal quality. If I don't take those high spots down first the repairs will be uneven, and thicker than I want.
 (IMG_1465_01.jpg) (IMG_1465_01.jpg)
 (IMG_1466.jpg) (IMG_1466.jpg)
 (IMG_1467.jpg) (IMG_1467.jpg)
 (IMG_1468.jpg) (IMG_1468.jpg)
Attachments
----------------
IMG_1465_01.jpg (91KB - 1 downloads)
IMG_1466.jpg (86KB - 1 downloads)
IMG_1467.jpg (75KB - 1 downloads)
IMG_1468.jpg (61KB - 1 downloads)
|
|
| |
|
Joined:
May 2011
Posts: 81
Location: Ozark, Arkansa | Decided to tackle the ear replacement tonight. I was blessed to discover that I had some vintage mahogany in an old end table we were getting rid of a couple of years ago. The wood is an amazing match for the mahogany in Ovation necks/headstocks.
I rough cut a chunk to check against the headstock after I trimmed the broken edge away with my bandsaw. The bits of dark brown on both are blade burn. A little light sanding removed that. The tone of the chunk is slightly darker because of the angle away from the light. It is close enough for me!
Edited by Oldvation Guy 2019-10-15 7:41 PM
 (IMG_1473.jpg) (IMG_1473.jpg)
Attachments
----------------
IMG_1473.jpg (93KB - 1 downloads)
|
|
| |
|
Joined:
May 2011
Posts: 81
Location: Ozark, Arkansa | Next, I masked off the headstock to prevent bleed over of the CA glue. I only applied glue to the headstock, not the donor piece.
After I removed the tape I could see from the bleed over to the donor piece, the finished ear should be really really close to the original finish color. Grain lined up nicely, and the little bit of end grain visible underneath the headstock should show up in the donor piece because I mounted it an an angle.
I will leave it to harden completely overnight.
Edited by Oldvation Guy 2019-10-15 7:50 PM
 (IMG_1475_01.jpg) (IMG_1475_01.jpg)
 (IMG_1478.jpg) (IMG_1478.jpg)
Attachments
----------------
IMG_1475_01.jpg (80KB - 1 downloads)
IMG_1478.jpg (55KB - 1 downloads)
|
|
| |
|
Joined:
June 2012
Posts: 2330
Location: Pueblo West, CO | It looks good.
I've always used hide glue (OBG) when repairing ears, mainly because if the piece doesn't match when sanded, it's easy to remove. |
|
| |
|
Joined:
May 2011
Posts: 81
Location: Ozark, Arkansa | I discovered I had the grain oriented wrong on my chunk and had to take it off. I took your advice, Dan, and used hide glue to put it back on. But I got what I feared as a consequence, a glue line. I think I can hide it in the end. But here is the sequence of photos of carving and sanding.
 (IMG_1483.jpg) (IMG_1483.jpg)
 (IMG_1485.jpg) (IMG_1485.jpg)
 (IMG_1486.jpg) (IMG_1486.jpg)
Attachments
----------------
IMG_1483.jpg (44KB - 1 downloads)
IMG_1485.jpg (59KB - 1 downloads)
IMG_1486.jpg (58KB - 1 downloads)
|
|
| |
|
Joined:
September 2006
Posts: 10777
Location: Keepin' It Weird in Portland, OR | Yeah... You can see the line.
But if anyone comments, you can proudly claim that YOU did that.
Then you can let them feel how smooth the Joint is, and remind them that YOU did that! 
|
|
| |
|
Joined:
May 2011
Posts: 81
Location: Ozark, Arkansa | You are so right, Art. I am too much a perfectionist for my own good. I really ought to be glad to have found so close a match of the wood, and be content!
I have a little more shaping to do, but it is pretty good. |
|
| |
|
Joined:
September 2005
Posts: 138
Location: Birmingham, AL | I think it turned out great. |
|
| |
|
Joined:
June 2012
Posts: 2330
Location: Pueblo West, CO | Me, too. |
|
| |
|

Joined:
December 2015
Posts: 287
Location: Katmandu | You followed the contour perfectly. Nice job! |
|
| |
|
Joined:
February 2016
Posts: 1846
Location: When?? | How you guys get these ear repairs to come out matched up so nice is all Greek to me. Excellent work!! |
|
| |
|
Joined:
October 2014
Posts: 270
| Nice work, lucky you had the old end table. I've found that old table leaves, often found at flea markets and junk shops can be a source for nice mahogany and other woods. |
|
| |
|
Joined:
October 2012
Posts: 1072
Location: Yokohama, Japan | clrules - 2019-10-18 8:09 PM
I think it turned out great.
+1 |
|
| |
|
Joined:
May 2008
Posts: 1559
Location: Indiana |  |
|
| |
|
Joined:
May 2011
Posts: 81
Location: Ozark, Arkansa | Decided to do something fun today on the rebuild, and fitted the top to the bowl. Cleared the old epoxy first. It is an extremely thin layer. Be careful playing with sharp things. Actually cut my finger on the edge of the suspension ring, not with the chisel.
Edited by Oldvation Guy 2019-11-02 8:38 PM
 (IMG_1525.jpg) (IMG_1525.jpg)
 (IMG_1530.jpg) (IMG_1530.jpg)
 (IMG_1531.jpg) (IMG_1531.jpg)
Attachments
----------------
IMG_1525.jpg (83KB - 1 downloads)
IMG_1530.jpg (67KB - 1 downloads)
IMG_1531.jpg (41KB - 1 downloads)
|
|
| |
|
Joined:
May 2011
Posts: 81
Location: Ozark, Arkansa | Remember it is a full dreadnaught top, going on a cutaway body. I laid the top on the bowl to figure out where to trim the bracing, then cut two of them with my Dremel tool. Rounded the ends as originally designed.
 (IMG_1532.jpg) (IMG_1532.jpg)
 (IMG_1533_01.jpg) (IMG_1533_01.jpg)
Attachments
----------------
IMG_1532.jpg (89KB - 1 downloads)
IMG_1533_01.jpg (85KB - 1 downloads)
|
|
| |
|
Joined:
May 2011
Posts: 81
Location: Ozark, Arkansa | Then I was able to lay the full top on the bowl and rough trace the outline I needed for the rough cut. After that I kept shaving it down with the sanding drum on my Dremel until I had what I wanted. I will cut carbon fiber plugs for the holes from the leftover bout material. I am not worried about a perfect fit on the edge because I am doing a pick guard on the bout to cover up where I modified the top.
 (IMG_1538_01.jpg) (IMG_1538_01.jpg)
Attachments
----------------
IMG_1538_01.jpg (93KB - 1 downloads)
|
|
| |
|
Joined:
May 2011
Posts: 81
Location: Ozark, Arkansa | And there is the unglued top on the bowl. Starting to look like an Adamas again!
 (IMG_1537_01.jpg) (IMG_1537_01.jpg)
Attachments
----------------
IMG_1537_01.jpg (81KB - 0 downloads)
|
|
| |
|
Joined:
February 2016
Posts: 1846
Location: When?? | What an amazing journey this is turning into. It could almost satisfy one's sense of morbid curiosity. Much like sitting in the observation gallery of an emergency operating room while a skilled and creative surgeon does their magic on a disfigured wreck victim. Heck, we even get to witness real blood. And seeing that chunk of cut off treble bout laying in the background makes it all that much more gory. Nice work, Doc! |
|
| |
|
Joined:
September 2005
Posts: 138
Location: Birmingham, AL | <p>Looks like the modifiied treble soundhole is going to look excellent. I like the red top also! Really a great job so far!!</p>
Edited by clrules 2019-11-05 5:15 AM
|
|
| |
|
Joined:
September 2005
Posts: 138
Location: Birmingham, AL | <p>Duplicate post</p>
Edited by clrules 2019-11-05 5:13 AM
|
|
| |
|
Joined:
May 2011
Posts: 81
Location: Ozark, Arkansa | So, I still have more work to do on the bowl repairs, but I am starting to get ready for the top. Dan, what do I need for epoxy, or will hide glue work? Is the adhesive for the bridge the same as the top? And in one of your posts, I think you mentioned using balsa wood for bracing. Obviously this top is already braced, but I am thinking about my next build. I would think balsa is too flimsy. What is up with that? |
|
| |
|
Joined:
May 2011
Posts: 81
Location: Ozark, Arkansa | BTW, my next experiment is going to be a longleaf pine (yellow) top, with no added bracing. I have an Ultra with a trash top, but a really good bowl and neck, as the recipient body.
I found a quartersawn 16' clear 6" plank at my local lumberyard. Wide grain, but I think I might like that effect. If not, I can stain or paint it.
So now you are wondering, how am I going to make a strong resonant top without adding bracing...?
Mwaaahahahah...
Edited by Oldvation Guy 2019-11-09 5:57 AM
|
|
| |
|
Joined:
May 2011
Posts: 81
Location: Ozark, Arkansa | Decided to get most of my fiberglass work done today. I will be pretty close to being finished, if not complete, by the end of the day. I will probably do some minor sanding, but hey, no one will ever see this on the inside of the bowl. I have to rein in the perfectionist in me so I can get this done!
Repairing the suspension ring has been interesting on the bass side upper bout. I will trim the excess glass after I have it up to thickness.
Edited by Oldvation Guy 2019-11-09 11:38 AM
 (IMG_1546.jpg) (IMG_1546.jpg)
 (IMG_1548.jpg) (IMG_1548.jpg)
 (IMG_1549.jpg) (IMG_1549.jpg)
Attachments
----------------
IMG_1546.jpg (41KB - 0 downloads)
IMG_1548.jpg (47KB - 0 downloads)
IMG_1549.jpg (38KB - 1 downloads)
|
|
| |
|
Joined:
June 2012
Posts: 2330
Location: Pueblo West, CO | Oldvation Guy - 2019-11-08 6:43 PM
So, I still have more work to do on the bowl repairs, but I am starting to get ready for the top. Dan, what do I need for epoxy, or will hide glue work? Is the adhesive for the bridge the same as the top? And in one of your posts, I think you mentioned using balsa wood for bracing. Obviously this top is already braced, but I am thinking about my next build. I would think balsa is too flimsy. What is up with that?
Hi Steve,
Unfortunately, hide glue only works on wood-to-wood joints.
I use Hysol 0151 for most of my Ovation work including top and bridge gluing. It works on all types of glue joints. McMaster-Carr sells it. It's a little pricey at $20/cartridge.
You'll need to buy the applicator gun (~$24) to go with it as the cartridges lack external plungers. It is sold in tubes, but the mix ratio for it is 2.7:1 by volume.
Generally speaking, the longer an epoxy takes to cure the more rigid it will be once it is cured. The faster it cures, the more rubbery it will be. Also, I like the longer working time I get from slow-cure epoxies like 0151. It makes it easier to clean up before the glue cures hard.
I use balsa for cauls, such as the bridge-clamping caul, not the braces. It's soft enough so it doesn't mark the bridge and it's easy to shape.
These days I like using torrefied Adi spruce for the braces regardless of what species of wood is used for the top. Of course, these days I only use torrefied wood for the top.
I would not use torrefied braces on a non-torrefied top, nor would I use non-torrefied braces on a torrefied top.
|
|
| |
|
Joined:
May 2011
Posts: 81
Location: Ozark, Arkansa | More of the smoothing work tonight.
I went to the body shop where I will have it painted to get advice. I figure these guys know fiberglass prep and paint better than anyone else I know. The guy there was very encouraging about what I have done so far for repairs.
He recommended that I get glazing to fill in the tiny pinholes left from the repairs and the low spots. It is very thin and goes on like buttercream frosting. The little pink specks you see are where the glazing fills the pinholes. I will probably do one more application of glaze tomorrow night. A little more fiberglass work this weekend, and possibly application of primer.
I still have repair work to do on the decorative trim on the suspension ring, but I am fairly confident I can repair it so the damaged spots will not be noticeable.
Should be in paint within two weeks!
Can't wait!
 (IMG_1566.jpg) (IMG_1566.jpg)
 (IMG_1567.jpg) (IMG_1567.jpg)
 (IMG_1568.jpg) (IMG_1568.jpg)
Attachments
----------------
IMG_1566.jpg (93KB - 0 downloads)
IMG_1567.jpg (79KB - 0 downloads)
IMG_1568.jpg (55KB - 1 downloads)
|
|
| |
|
Joined:
June 2012
Posts: 2330
Location: Pueblo West, CO | The repairs are looking really good, Steve.
Dan |
|
| |
|
Joined:
May 2011
Posts: 758
Location: Muenster/Germany | Looks good and stable. I can feel with you, I once had an Ovation that had fallen from a wall-hanger (not without dragging a second guitar...it was a terrible noise) and also I got my hands full to repair the bowl. But it was just a little crack. Your repair looks magic to me. |
|
| |
|
Joined:
May 2011
Posts: 81
Location: Ozark, Arkansa | More bowl work today, but I thought I would show the next step on the top.
The upper treble bout had to be cut away to fit the cutaway body. But that left the remaining sound holes open. Although I am covering the area with a custom pic guard, I don't want to leave the holes behind it in case they eventually show up in the pic guard material as slight depressions.
So, there is enough material that I cut off the top that I can make plugs out of it for the holes. Here is my first one.
I think I might change up how I am shaping them, so there is more resin that will flow around them when I put them in permanently. I am careful to line up the weave of the top when I cut them.
 (IMG_1581.jpg) (IMG_1581.jpg)
 (IMG_1582.jpg) (IMG_1582.jpg)
 (IMG_1583.jpg) (IMG_1583.jpg)
Attachments
----------------
IMG_1581.jpg (96KB - 0 downloads)
IMG_1582.jpg (92KB - 0 downloads)
IMG_1583.jpg (86KB - 1 downloads)
|
|
| |
|
Joined:
June 2012
Posts: 2330
Location: Pueblo West, CO | Looks good Steve.
Something to keep in mind is that as you close up these holes the bass response of the guitar will increase.
When I was building my Frankenvation, I left three of the holes on the treble bout open so the highs wouldn't disappear. 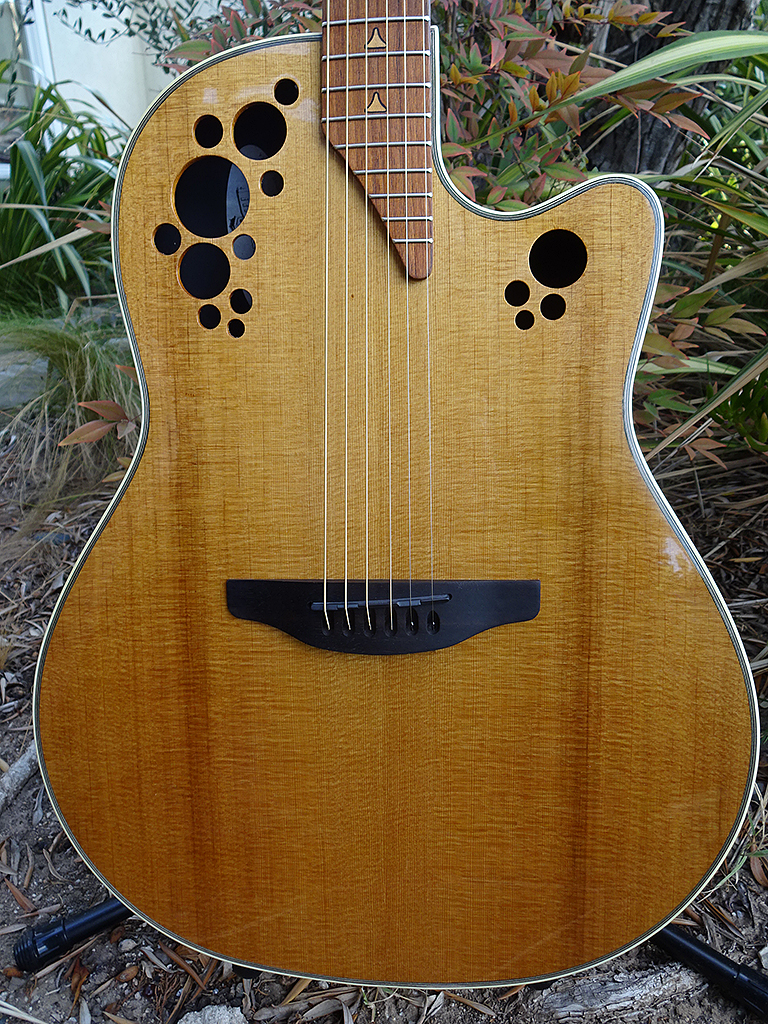
Edited by DanSavage 2019-11-25 12:48 PM
|
|
| |
|
Joined:
May 2011
Posts: 758
Location: Muenster/Germany | If you want to slightly cover the repaired holes, the color is "brown red" 53011. |
|
| |
|
Joined:
May 2011
Posts: 758
Location: Muenster/Germany | DanSavage - 2019-11-25 7:46 PM Looks good Steve.
Something to keep in mind is that as you close up these holes the bass response of the guitar will increase.
When I was building my Frankenvation, I left three of the holes on the treble bout open so the highs wouldn't disappear.
You are right, the bass response is better with the unilateral soundholes. But it is brighter and more transparent with the holes on the treble sinde, that´s why I added soundholes on the treble side on my Adamas 2008. The effect is even stronger when you play on the higher frets.

|
|
| |
|
Joined:
May 2011
Posts: 81
Location: Ozark, Arkansa | Interesting. One thing I have considered doing is adding the player port on the bass side next to the battery box so I get a better sound experience when I play.
I have also considered putting new sound holes through the pick guard, possibly in the pattern of the Phoenix bird I want on the top. This may be the encouragement I need to pursue that option. But leaving the holes as they were was not an option. Taking out the cutaway section left them poorly placed.
Another possibility would be to replace the battery box with the sound port, and move the battery with a new box to an alternate location. I might look at that seriously as well.
Edited by Oldvation Guy 2019-11-27 6:59 AM
|
|
| |
|
Joined:
February 2016
Posts: 1846
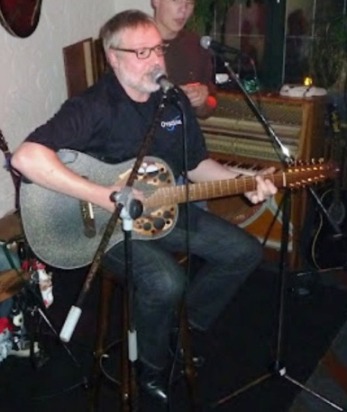
Location: When?? | Detlef.. not only did adding the holes increase your treble response, it also made your ivy grow thicker and greener. But what I'm curious to know is, what is the red spot thing on the bass side of the bridge?? |
|
| |
|
Joined:
May 2011
Posts: 758
Location: Muenster/Germany | Ha,ha, that´s a small wodden june bug that I once got from my daughter. I had it glued on my workbench for a couple of years but when I found out that the Adamas carvings are no "broccoli" but acanthus leaves I thought this could be a better place;-) |
|
| |
|
Joined:
May 2011
Posts: 81
Location: Ozark, Arkansa | LOL! I wondered the same thing about the red dot...
And with that, all the holes in the top are filled. I will back the plugs with a sheer fabric and resin to minimize mass on the top, but to give just enough reinforcement to make sure they stay put. I set them with CA glue from the top side, but I will use fiberglass resin on the bottom side.
The hardest one to fill was the sliver edge of the large sound hole which just overlapped the cutaway section. But when I am finished it will be impossible to see.
The custom pick guard will cover the entire area that the epaulet and the painted pick guard occupied. But I am still working through the final shape, and the color of the material I want to use.
To experiment I downloaded pics of all the pick guard materials offered on Ebay, and printed them off full sheet size on my color printer. That way I got the best opportunity to experiment with colors and shapes for the final pick guard.
 (IMG_1589.jpg) (IMG_1589.jpg)
Attachments
----------------
IMG_1589.jpg (80KB - 0 downloads)
|
|
| |
|
Joined:
September 2005
Posts: 138
Location: Birmingham, AL | Looking good! |
|
| |
|
Joined:
May 2011
Posts: 81
Location: Ozark, Arkansa | Finally have some time to get back on this project guitar.
I decided today to prime the whole bowl so I can hunt for defects. I have several pin holes that are driving me out of my mind. I have tried using professional glaze, high build primer, but they keep reappearing.
I went to the body shop where I will have the bowl painted, and the guy there really didn't have any suggestions beyond what I have tried already, so I may resort to taking a tiny drill and bore all the way through the bowl wall, and then fill it. Rather drastic, but I am running out of ideas.
I have included a couple of shots of what I started out with, so I guess I am pretty encouraged at this point.
 (Bowl 1_01.jpg) (Bowl 1_01.jpg)
 (Bowl 2.jpg) (Bowl 2.jpg)
 (Bowl 3.jpg) (Bowl 3.jpg)
 (IMG_1970.jpg) (IMG_1970.jpg)
 (IMG_1971.jpg) (IMG_1971.jpg)
Attachments
----------------
Bowl 1_01.jpg (86KB - 0 downloads)
Bowl 2.jpg (64KB - 0 downloads)
Bowl 3.jpg (64KB - 0 downloads)
IMG_1970.jpg (51KB - 0 downloads)
IMG_1971.jpg (55KB - 1 downloads)
|
|
| |
|
Joined:
October 2012
Posts: 1072
Location: Yokohama, Japan | WOW! That's some fine FR restoration work. Did you layup additional fiberglass sheets and smooth them out before applying the primer coat? Amazing! Carry-on! Carry-on! Thanks for sharing! |
|
| |
|
Joined:
May 2011
Posts: 81
Location: Ozark, Arkansa | Arumako, I wanted to save myself the nightmare of having uneven surface on the exterior of the bowl. I would never have gotten it as smooth as I wanted it. So I basically avoided putting anything on the outside except filler in the actual cracks and dings.
I wanted to keep the repairs as thin as possible. I used CA to glue the crack edges together to keep them as level as possible. Because of the constant curvature of the bowl, it was a challenge to do more than a small section at a time. In a lot of spots there were (for lack of a better term) flakes of finish or places where the internal fiberglass sheeting had separated. Using CA glue allowed me to wick it back into the material, and then put the outside flakes back into place without changing the wall thickness much at all.
After the edges were positioned and glued, I cut strips of fiberglass 1" wide on the bias allowing only a half inch of glass on each side of the cracks. That held down the weight of the repair, and minimized the amount of absorption of sound waves in the bowl. Hopefully the repairs will have a minimal impact on the resonance of the bowl. It still has a nice ring when I tap it.
Edited by Oldvation Guy 2020-05-03 8:45 PM
|
|
| |
|
Joined:
February 2016
Posts: 1846
Location: When?? | Amazing work!! |
|
| |
|
Joined:
May 2011
Posts: 81
Location: Ozark, Arkansa | Thanks, Love O Fair. Even as a recovering perfectionist, I am pretty pleased so far when I think of what I started with.
The real challenge is yet to come, restoring the damage to the suspension ring ornamental ridge. At least a half dozen damaged spots. I am preparing myself for "good enough" repairs on that trim. |
|
| |
|
Joined:
November 2002
Posts: 3646
Location: Pacific Northwest Inland Empire | Just a thought- can you get a piece of the trim digitized, then have a 3D printer replicate some trim for you? Dan Savage seems to be a real wizard with that kind of thing. |
|
| |
|
Joined:
May 2011
Posts: 81
Location: Ozark, Arkansa | If I was missing sections that would be a great idea. I almost had an access cover made for the back that way, and then found out that Alex Pepiak had some stashed away. I bought one from him.
No, there are only a couple of cracks and a few small chips broken out of the trim ring. This thing is astonishingly strong considering the beating it took. So I will use my magic Dremel wand, and body filler to fill a few spots and then re-form those spots.
In order to get the filled spots to stay in place, I plan to drill some tiny holes and channels with a diamond cutter bit. I am afraid if I just go surface with the repairs they won't last. Think tooth roots, and then you have the idea.
Thanks for the suggestion though, seesquare! |
|
| |
|
Joined:
November 2002
Posts: 3646
Location: Pacific Northwest Inland Empire | OMG, root canal! OK Doc, do what ya gotta do. Sounds like a better idea for stabilizing the crack. And, with a Dremel tool. You do have the hands of a surgeon. |
|
| |
|
Joined:
May 2011
Posts: 81
Location: Ozark, Arkansa | Here is the next hurdle in the project, repairing the decorative trim ring. For as much damage as the bowl sustained, the decorative trim damage was very minimal. That said, I had to rebuild the actual suspension ring ledge with fiberglass at each of these damage locations as well, but that is water under the bridge.
I tried filling the damage spots, but was not impressed with what would be the final result. Not much to adhere to. So I will use the Dremel with a diamond bit to hollow out the spots, in other words make the damage worse, to have a little more to hold the repairs in place.
 (IMG_1980.jpg) (IMG_1980.jpg)
 (IMG_1981.jpg) (IMG_1981.jpg)
 (IMG_1982.jpg) (IMG_1982.jpg)
 (IMG_1983.jpg) (IMG_1983.jpg)
 (IMG_1984.jpg) (IMG_1984.jpg)
Attachments
----------------
IMG_1980.jpg (75KB - 0 downloads)
IMG_1981.jpg (88KB - 0 downloads)
IMG_1982.jpg (78KB - 0 downloads)
IMG_1983.jpg (87KB - 0 downloads)
IMG_1984.jpg (76KB - 1 downloads)
|
|
| |
|
Joined:
May 2011
Posts: 81
Location: Ozark, Arkansa | Well, this is going better than expected, except I didn't have the diamond cutter I thought was in my box.
But two other cutters worked. I created cavities in the trim that I could fill with SteelStik, an epoxy putty that gets very hard. When it came to recreating the missing dimples in the trim, I found a tiny hollow plastic tube exactly the right size. The dimples will be close enough for me, and far better than leaving the broken pieces vacant.
Now to let it all cure.
 (IMG_1988.jpg) (IMG_1988.jpg)
 (IMG_1989.jpg) (IMG_1989.jpg)
 (IMG_1992.jpg) (IMG_1992.jpg)
 (IMG_1996.jpg) (IMG_1996.jpg)
 (IMG_1991.jpg) (IMG_1991.jpg)
Attachments
----------------
IMG_1988.jpg (98KB - 0 downloads)
IMG_1989.jpg (86KB - 0 downloads)
IMG_1992.jpg (72KB - 1 downloads)
IMG_1996.jpg (91KB - 0 downloads)
IMG_1991.jpg (82KB - 1 downloads)
|
|
| |
|
Joined:
May 2011
Posts: 758
Location: Muenster/Germany | Great improvisation! Noone will notice that later. |
|
| |
|
Joined:
May 2011
Posts: 81
Location: Ozark, Arkansa | While I am working on the trim ring repair, I decided to work on the top modification at the same time.
Way back in the project I bought an Adamas top for it. But It was a full top, not cutaway. You can go back to look at the pics of the cutaway modification. Today I added a very thin layer of resin and sheer fabric behind the carbon fiber inserts in what remained of the sound holes in the top. I had more than enough material from the part of the top I removed to make the plugs.
I wanted to keep the reinforcing layer as thin as possible, again to keep acoustic distortion of the top to a minimum, but also to allow the fabric to overlap the suspension ring contact area with the top.
I did some preliminary sanding of the top in the treble quadrant, and sprayed some high build primer to fill the imperfections. More sanding, and more spraying yet to some to get it level. Then I will use a thin layer of epoxy black paint to create the pick guard area of the top.
The project is called Phoenix, and the Phoenix decal will go in the pick guard area, and be covered with a thin coat of poly.
 (IMG_1999_01.jpg) (IMG_1999_01.jpg)
 (IMG_2005.jpg) (IMG_2005.jpg)
 (IMG_2007.jpg) (IMG_2007.jpg)
Attachments
----------------
IMG_1999_01.jpg (95KB - 0 downloads)
IMG_2005.jpg (48KB - 0 downloads)
IMG_2007.jpg (92KB - 1 downloads)
|
|
| |
|
Joined:
May 2011
Posts: 81
Location: Ozark, Arkansa | First coat of black epoxy is on. Sure makes me long for a spray booth. Even after prepping the surface I still ended up with dust specs and a tiny bit of lint from the unfiltered air. Oh, well. It is just for me, not a professional job.
Even with two coats of epoxy enamel, the pick guard area will still only be a few thousandths thick. Much better than applying an adhesive pick guard. The backing of resin and sheer fabric worked perfectly under this area of the top.
The Phoenix firebird decal will go on this epoxied surface, and then have a thin coat of poly to protect it. I am thinking I might use a satin finish poly to minimize the appearance of surface deformities.
Edited by Oldvation Guy 2020-05-14 6:44 AM
 (IMG_2011.jpg) (IMG_2011.jpg)
Attachments
----------------
IMG_2011.jpg (66KB - 1 downloads)
|
|
| |