|
|

Joined:
June 2012
Posts: 2340
Location: Pueblo West, CO | I found this sad 1974 1111-4 Balladeer on eBay a few months ago. It was pretty beat up. 
The top was cracked in several spots, 


One of the ears is mangled. 
And, the neck needs stripping and refinishing. 

I looked inside the guitar after I got it and found it had an early modified Ovation X-brace pattern, which is very similar to the original X-brace found on the 1960s Balladeers. The only really difference is the addition of the three scalloped tone bars between the lower X-braces. Before stripping all the hardware off the guitar and pulling the top, I decided to string it up to hear what it sounded like. Even though I prefer 80/20s on the Ovation deep bowls all I had on hand was PBs. So, that's what I used. As I expected, the guitar has a rich sound that seems to be unaffected by the numerous cracks in the top. Because of this, I'm going to re-do this brace pattern in torrefied Sitka spruce. (naturally) First order of business was to de-string it and strip all the hardware off it. 
Next, pull the binding. 
Now, separate the top from the bowl. Unfortunatley, the original silver foil label is long gone. I may have to forge one using Photoshop and my ALPS printer. :D
The neck angle is pretty good, so I don' think this will need a bowl bend. I'll check it more closely once clean all the old wood off the lining and get the remnants of the top out from between the fretboard extension and the neck block. 
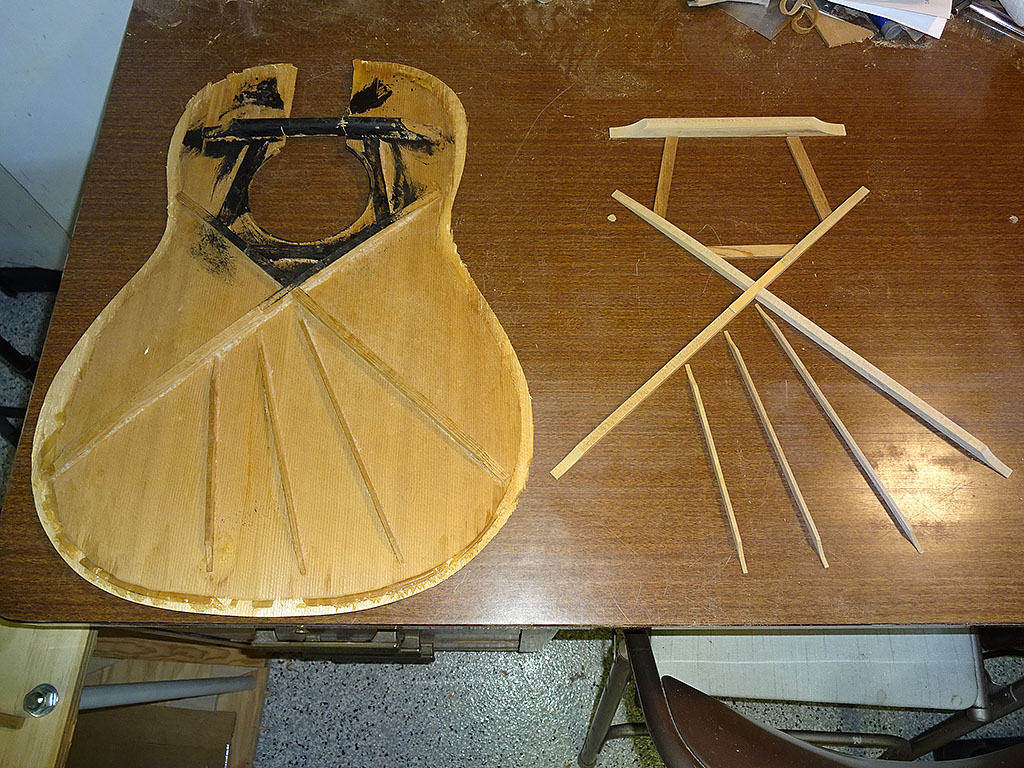
And, here's what the underside of the top looks like. It's pretty similar to the 1967 Balladeer I did for Jay with a couple of minor changes. First, instead of a 1/16" birch ply star joining the X-braces, it's got a single 1/16" strip that reinforces the notch in the bottom X-brace. And, as I noted previously, it's got the addtional three tone bars. I'm not sure how much these contribute to the sound, so if I were to hazard a guess I'd say these were added to help keep the top from bellying. 

|
|
| |
|
Joined:
November 2002
Posts: 3654
Location: Pacific Northwest Inland Empire | So, "We're Off to See The Wizard", again. Great news! Probably can't get much more "vanilla" than an early 1111, with a natural top. Let the transformation commence! |
|
| |
|

Joined:
August 2002
Posts: 668
Location: Ottawa, Ontario, CANADA | Hi, Dan,
This " vanilla", model, the Ovation Standard Balladeer in Natural Finish,#1111-4, was the very first Ovation guitar I ever played. The one I played was made way back in 1969, though. Boy, oh, boy, let me tell you what, does seeing this one, even as beat up as it is, ever bring back some great memories. I'll be looking forward to seeing it again, fully restored, by you, of course! The bracing pattern is Ovations' own patent. They called this a,"Modified Fan", I do believe, but you can correct me on this, because you are a luthier, and I am not. Thanks so much for resurrecting this great guitar, because the sound on this guitar is just fantastic. This was BEFORE they invented their pickup! It will be a keeper when your work is completed.
Mike S.
Ottawa, ON. CANADA
Edited by Mike S. 2016-09-25 1:03 AM
|
|
| |
|

Joined:
June 2012
Posts: 2340
Location: Pueblo West, CO | seesquare - 2016-09-24 7:40 PM
So, "We're Off to See The Wizard", again. Great news! Probably can't get much more "vanilla" than an early 1111, with a natural top. Let the transformation commence!
Yep. In addition to this one, I'm going to be rebuilding a 1985 1717 at the same time. Since most of the work can be done in tandem, it almost as easy to do two guitars as it is to do one.
I'm going to wait to start on the 1717 until I get this one in the same condition and ready to accept the top. |
|
| |
|

Joined:
June 2012
Posts: 2340
Location: Pueblo West, CO | Hi Mike, At first I thought this guitar had the Ovation X seen below. But it's got a standard upper transverse brace which is perpendicular to the centerline rather than angled as shown below. Other than that, it's pretty similar. Yeah, if it sounds anything close to how good Jay's Balladeer sounds, I'll be really happy with it. Intead of it using a walnut bridge, I'm going to be using an ebony bridge I got off a 1778 T. I'll also use a bone nut and bridge saddle. 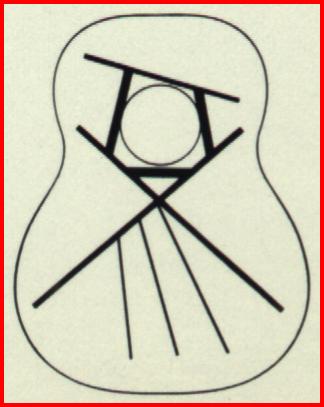
Mike S. - 2016-09-24 10:54 PM
Hi, Dan,
This " vanilla", model, the Ovation Standard Balladeer in Natural Finish,#1111-4, was the very first Ovation guitar I ever played. The one I played was made way back in 1969, though. Boy, oh, boy, let me tell you what, does seeing this one, even as beat up as it is, ever bring back some great memories. I'll be looking forward to seeing it again, fully restored, by you, of course! The bracing pattern is Ovations' own patent. They called this a,"Modified Fan", I do believe, but you can correct me on this, because you are a luthier, and I am not. Thanks so much for resurrecting this great guitar, because the sound on this guitar is just fantastic. This was BEFORE they invented their pickup! It will be a keeper when your work is completed.
Mike S.
Ottawa, ON. CANADA |
|
| |
|

Joined:
August 2002
Posts: 668
Location: Ottawa, Ontario, CANADA | Hi, Dan,
Thanks for the kind reply. and new information about your work on these guitars. Wow, two at once, eh? I'm Canada's worst handyman, and I have trouble just changing the strings on my guitars sometimes! I'm looking forward to seeing these two beauties restored to their full guitar glory real soon.
Best regards,
Mike S.
Ottawa, ON. CANADA |
|
| |
|

Joined:
June 2012
Posts: 2340
Location: Pueblo West, CO | Hi Mike,
Yeah, once the guitars get to a certain point, it's just as easy to work on two at a time as it is to work on one. The 1717 is at the point where it's ready for the new top, so I've got to get the 1111 to the same point.
Prior obligations have kept me from working on these two guitars this week, but I was able to get back to this one today.
First job was to scrape the lining clean of the remnants of the old top and to clear out the area between the neck block and the fretboard extension. 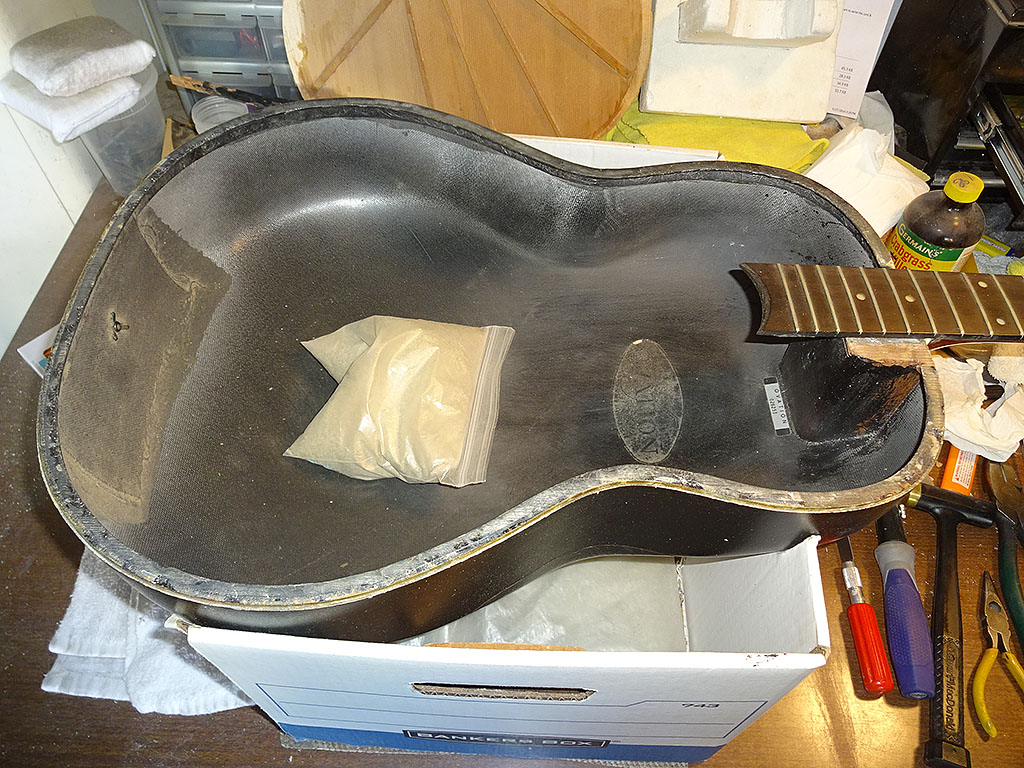
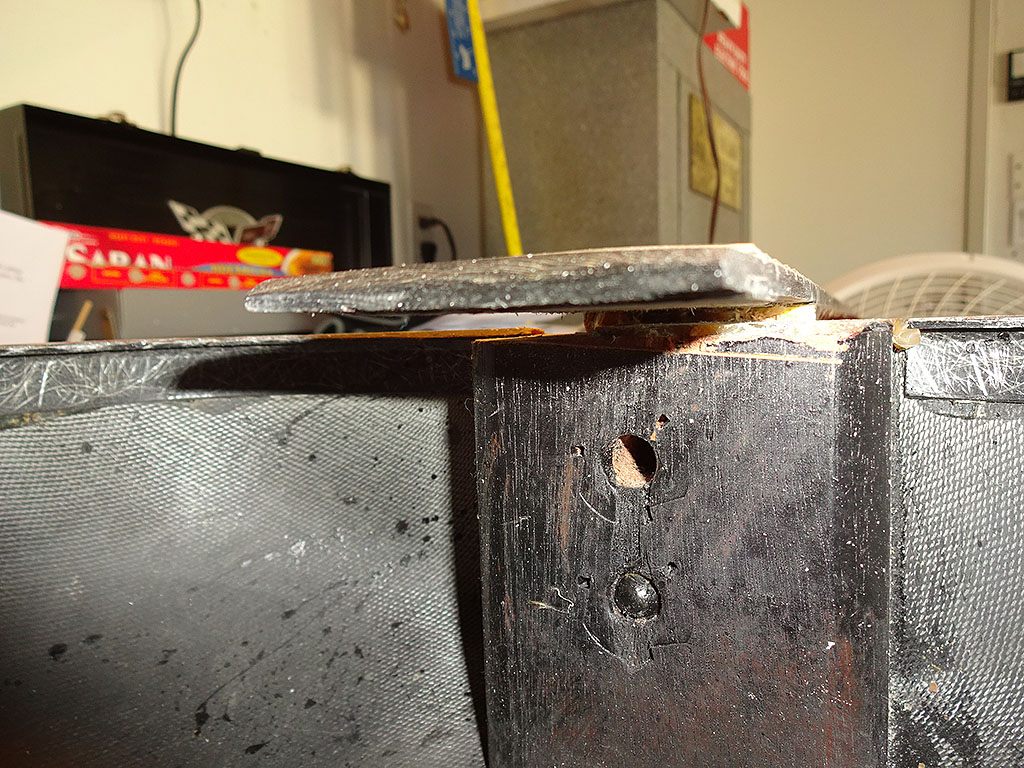
Once this was done I was able to slip an old top into place and drop a bridge into place to check the neck alignment. 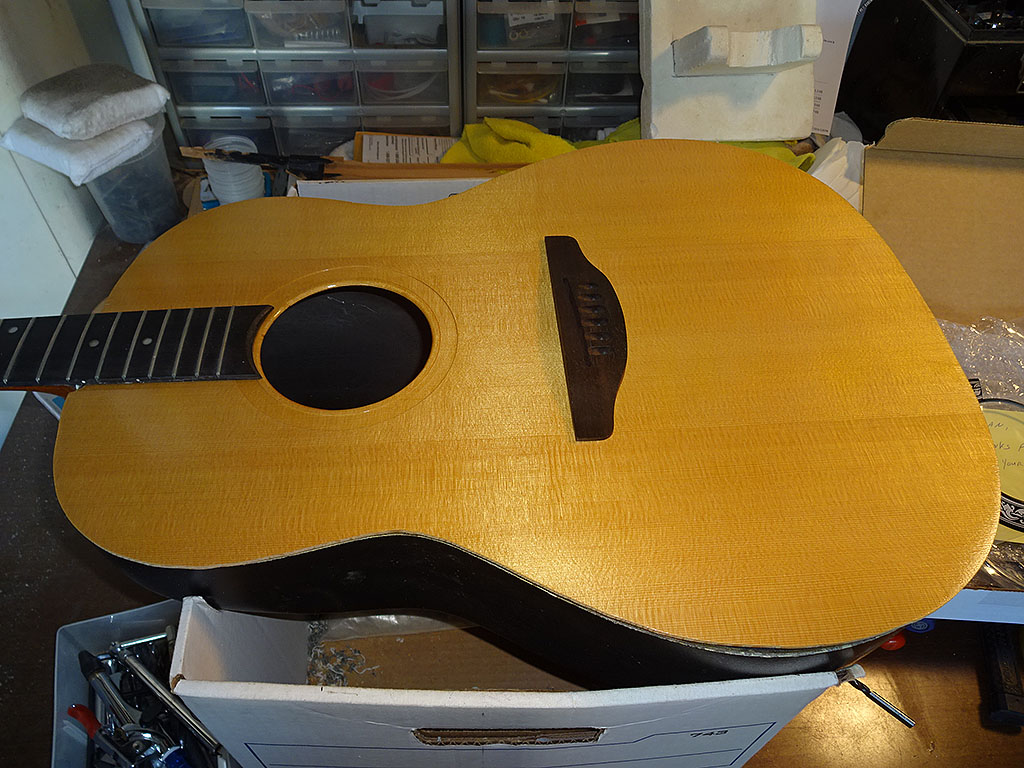
Looks good. No bowl bend will be necessary. (Yay!) 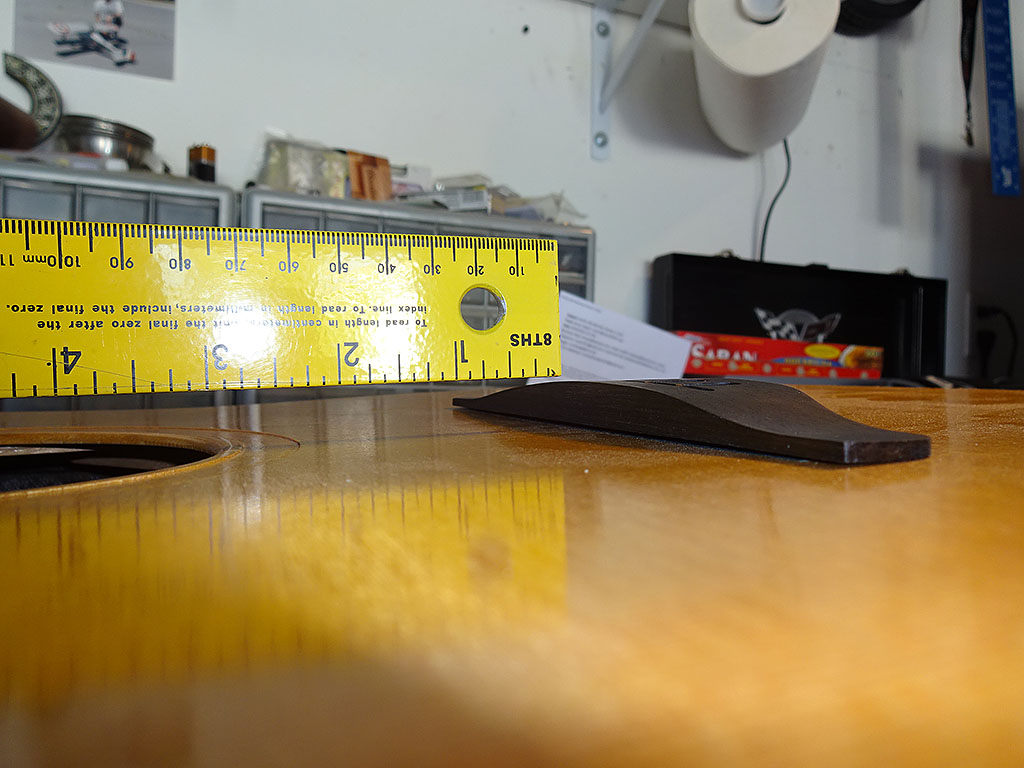
I got some new rosettes from the MS which use a light grey background instead of pearloid. 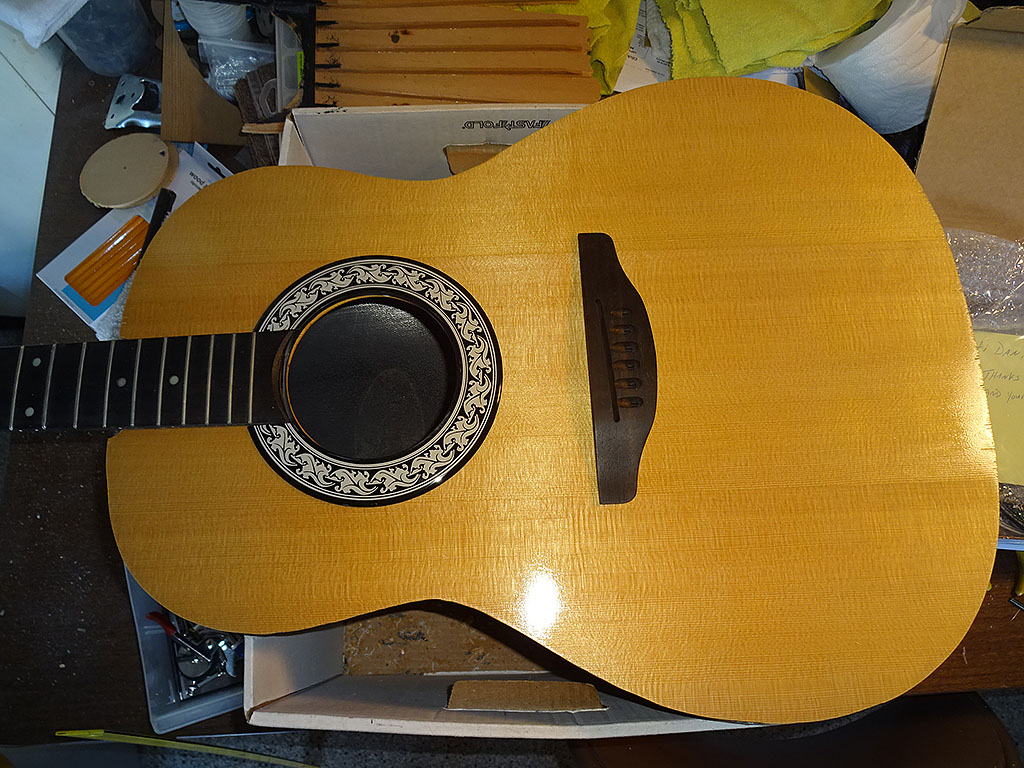
To keep the vintage feel of the guitar I used a heat gun to soften the epoxy holding the original rosette. For the most part, it came off pretty cleanly. I'll need to glue the pearloid and use to black paint to touch up the parts that stayed stuck to the top. I'm not sure if I'll use these or the rosette I pulled off the top. It depends on how the original one looks when I get done with it. The pearloid is pretty yellowed and doesn't really show that much 'pearl' any more. 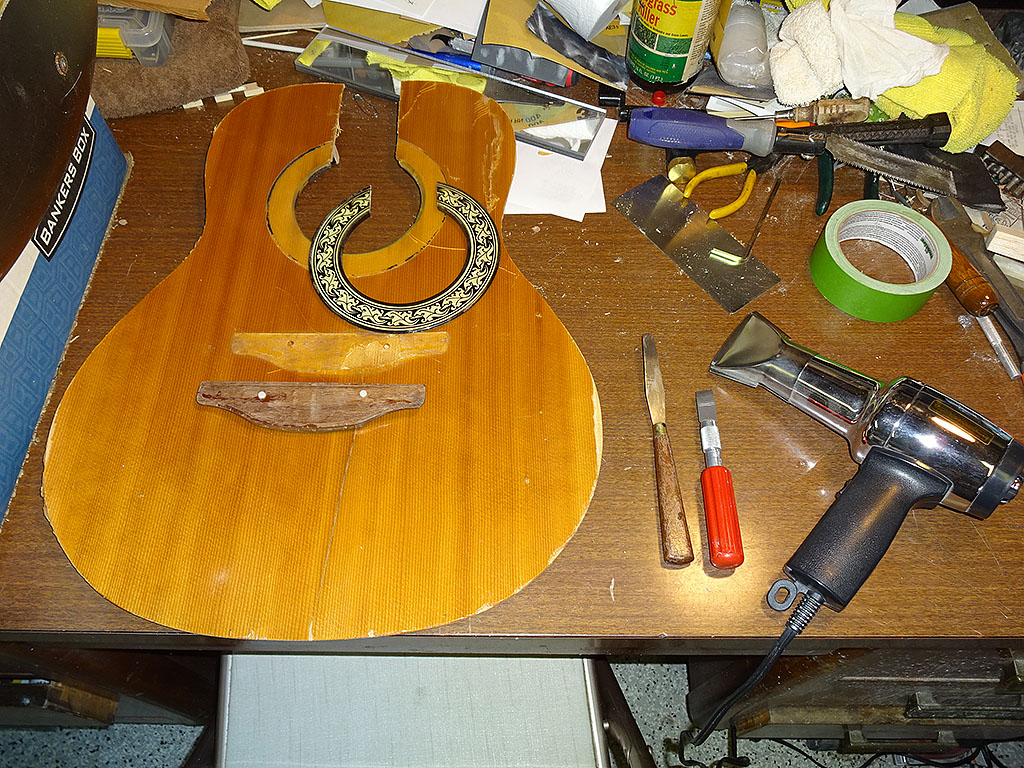
I used Ken's (arumako) technique of boiling hot water in a ziplock baggie to soften the epoxy holding the bridge down. I'm very impressed with how well it worked. The bridge came off the top without any damage at all. Even the original routing groove remained intact. 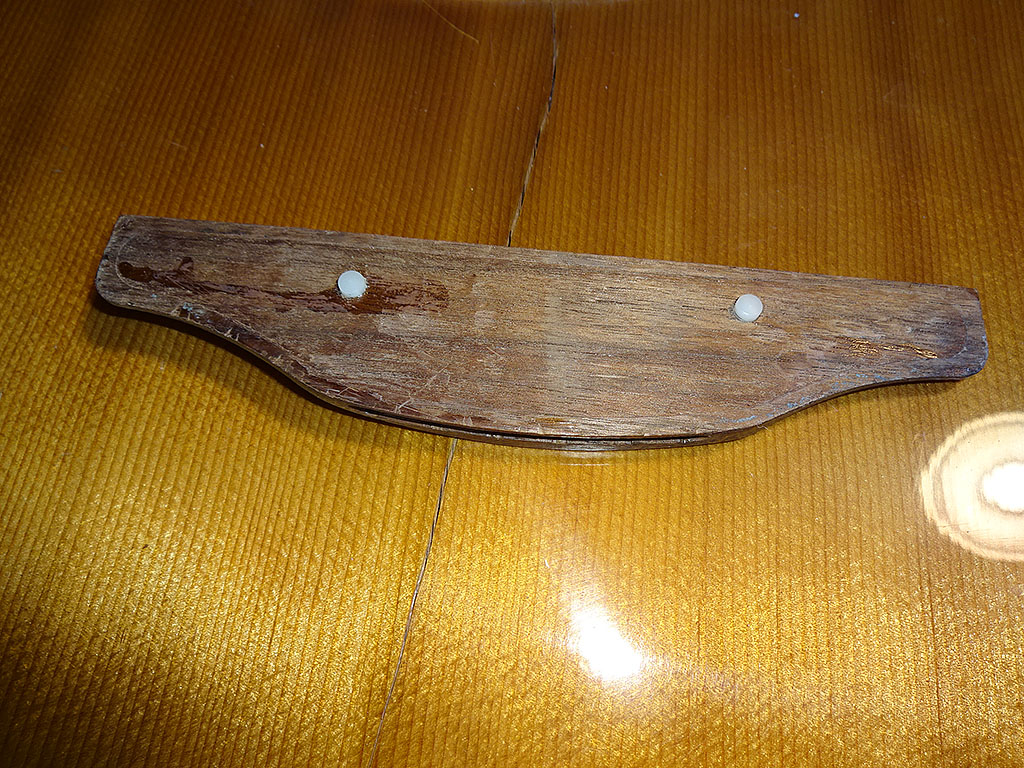
Some of the glue separated from the top and stayed stuck to the bridge, but the use of more boiling hot water softened the epoxy enough that I was able to use my Xacto chisel to remove it.
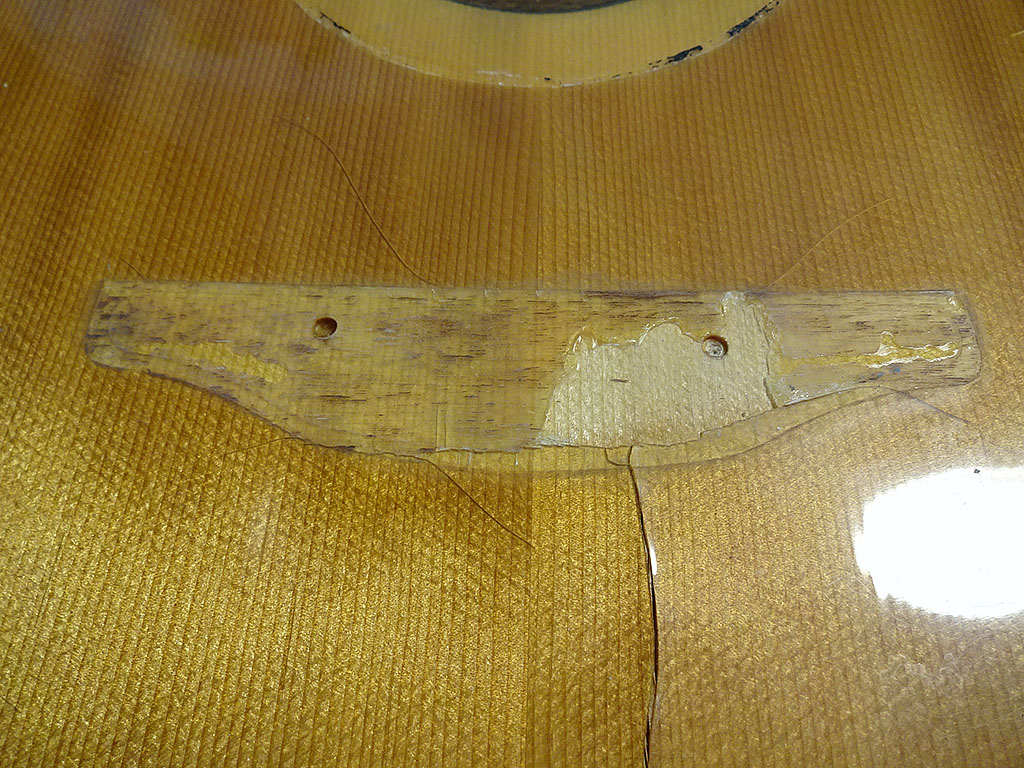
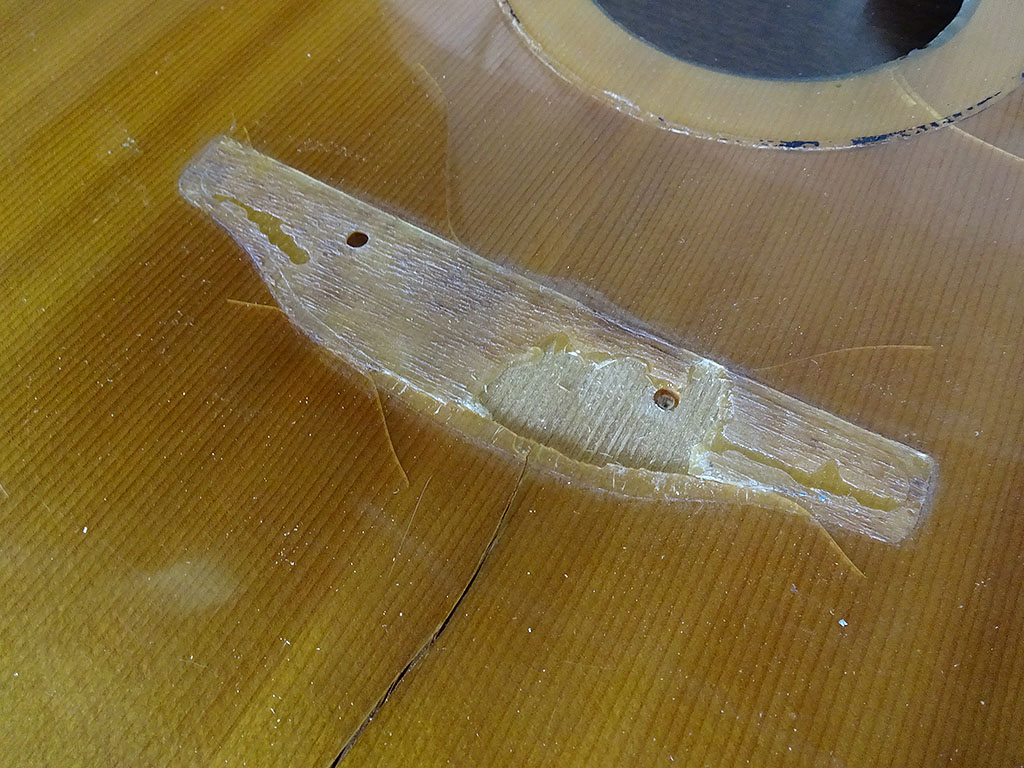
Next job is to remove the finish from the neck and head stock, then start repair the broken ear.
Edited by DanSavage 2016-10-03 8:25 PM
|
|
| |
|
Joined:
February 2016
Posts: 1881
Location: When?? | I may have said this before.. but in addition to the awesome stories you let us witness unfold on your guitar projects, I sometimes enjoy finding a secondary interest in the nifty tools and gadgets seen laying on the bench (okay, so I'm into details), and it all seems to fit the rhyme and reason, though I have to say that the bottle of crabgrass killer has definitely piqued my curiosity on this one. |
|
| |
|

Joined:
June 2012
Posts: 2340
Location: Pueblo West, CO | Haha!
The crabgrass killer is on my desk/workbench because I was going to use it on the front and back lawn until I found out that what I thought was crabgrass was really kikuyugrass. Unfortunately, normal methods of weed control don't work on kikuyugrass. |
|
| |
|

Joined:
June 2012
Posts: 2340
Location: Pueblo West, CO | I sanded the finish off the head stock and neck today. 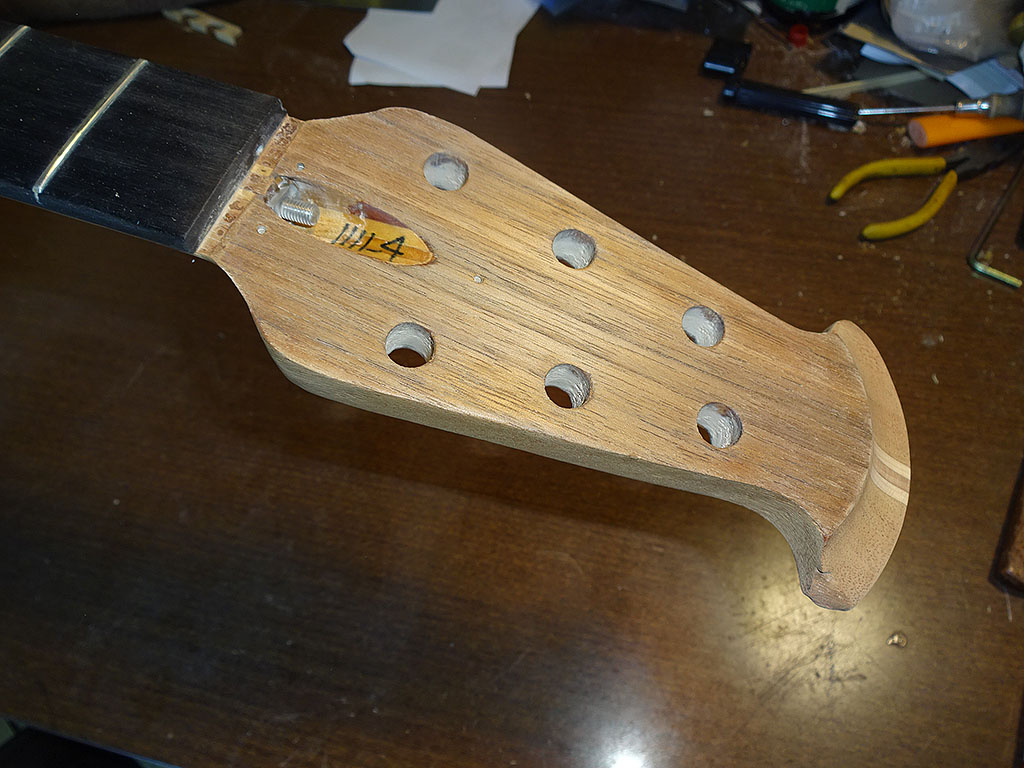
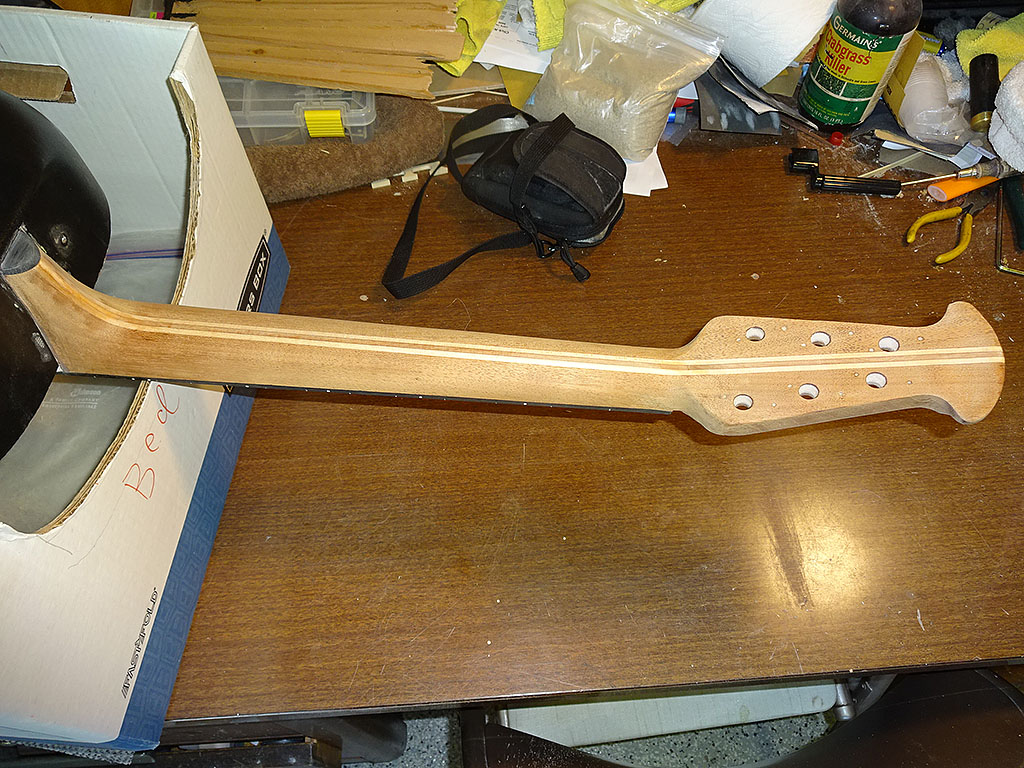
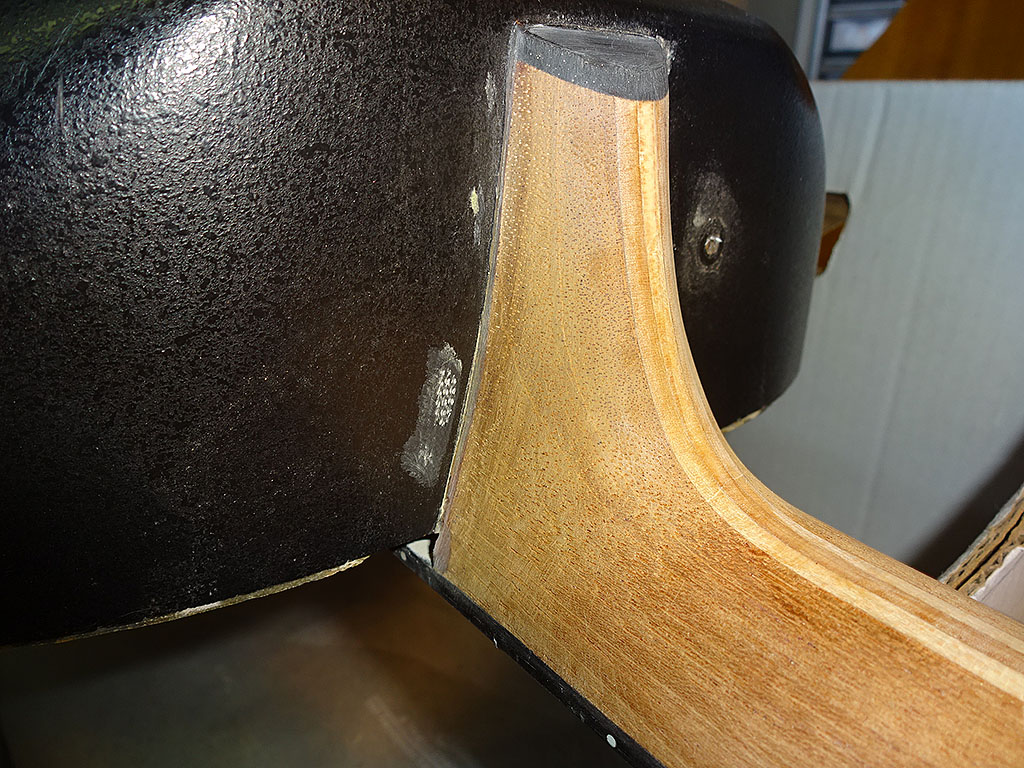
Unfortunately, I got a little too over-exuberant and burned through the finish on the bowl. (oopsie!) This will be repaired later.
Next job is to get a small chunk of matching mahogany and repair the broken ear. But, before I start the ear-repair, I'll prepare the top wood and braces for both this guitar and the 1717. Then, while the top wood joint(s) are drying I'll repair the ear. 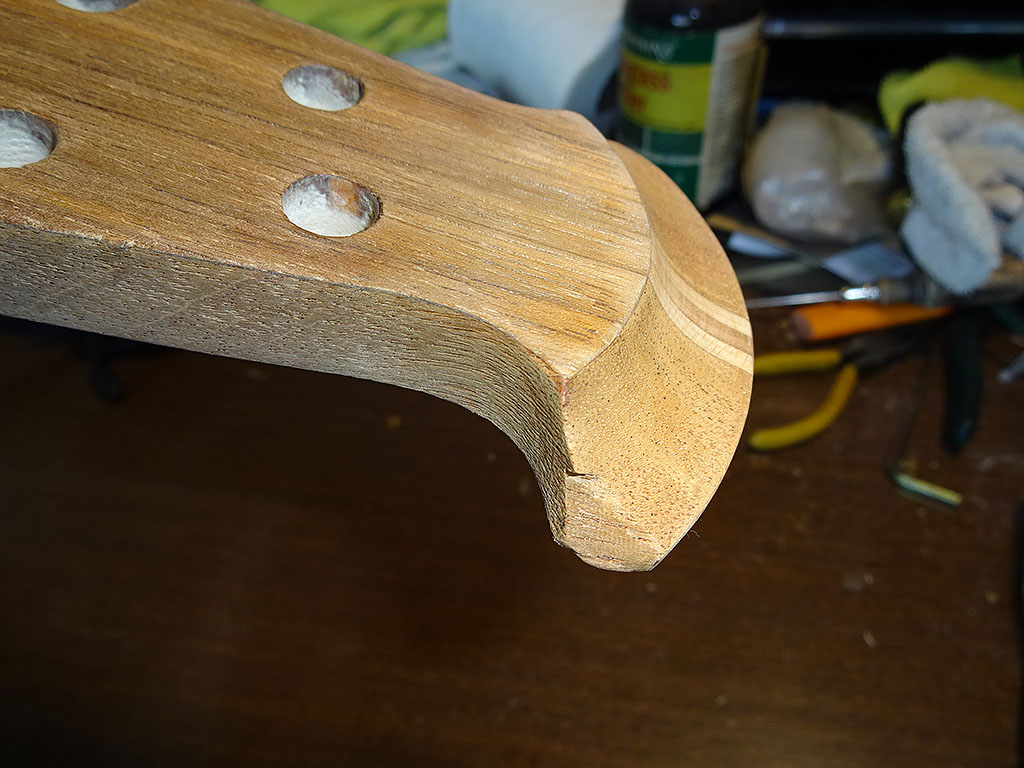
|
|
| |
|

Joined:
June 2012
Posts: 2340
Location: Pueblo West, CO | I got the top wood jointed this morning. I'll take this top with me to the sanders Monday morning and get both the 1717 and this one done at the same time.
Next job was to make the braces. Everything shown is in its approximate position. 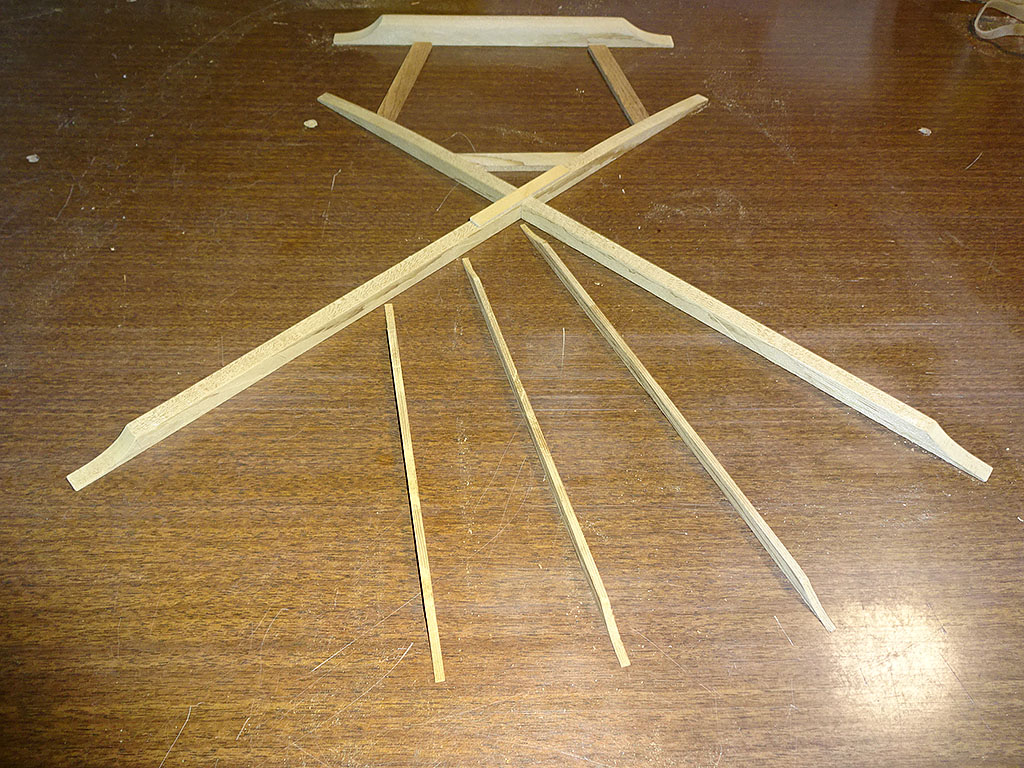
Here the braces are shown next to the old top.
I was able to clean up the mangled ear and glue a mahogany block to it using OBG. But, when I shaped the block, I found that the color and grain of the patch piece didn't even come close to matching the head stock wood, even with staining. I'm really glad now I used OBG instead of epoxy or CYA as I was able to steam it off. I'll search around to see if I can find a piece that matches a little bit better. I'll also contact the MS to see if JB can grab a piece of scrap off the shop floor, drop it into an envelope and mail it to me. 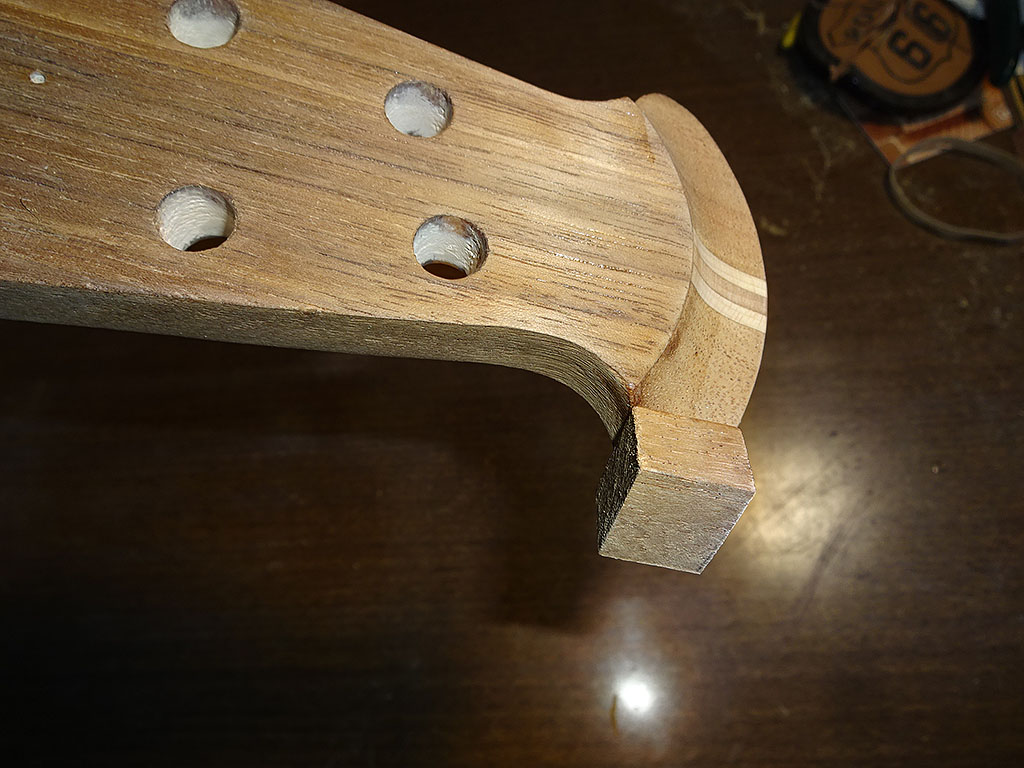
|
|
| |
|

Joined:
June 2012
Posts: 2340
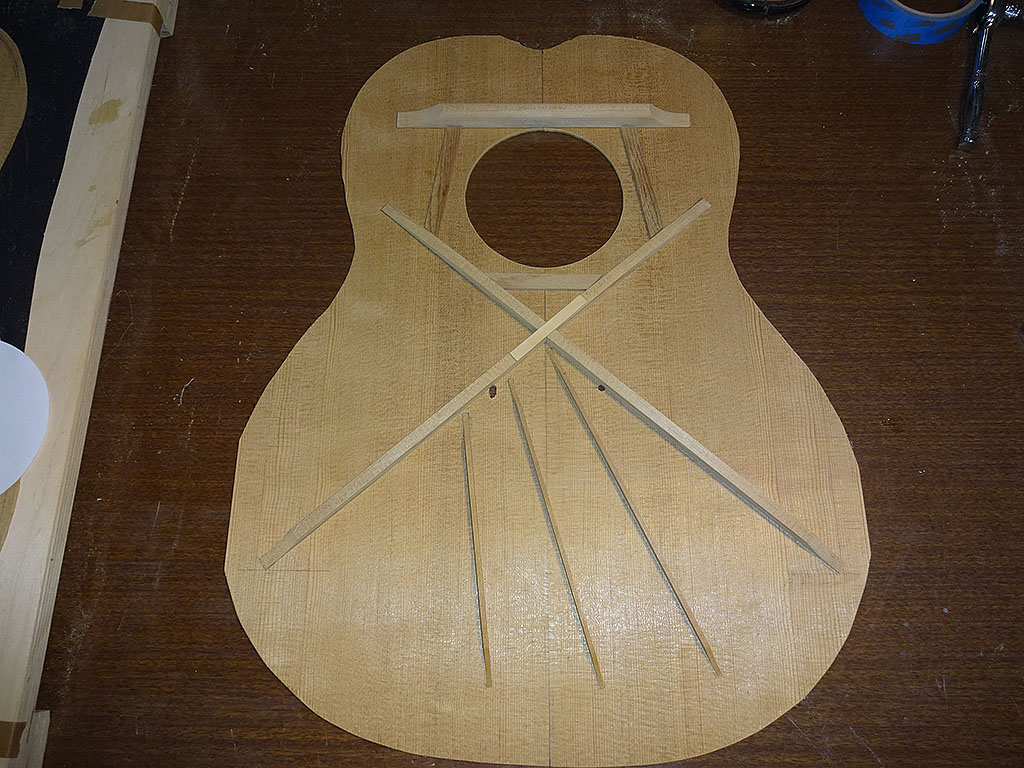
Location: Pueblo West, CO | I got the top cut out. Drilled the bridge locating pins (more on that below) and cut the sound hole.
This wood has some figuring that almost makes it look like bearclaw. It also has some nice silking. It should make for a pretty guitar. 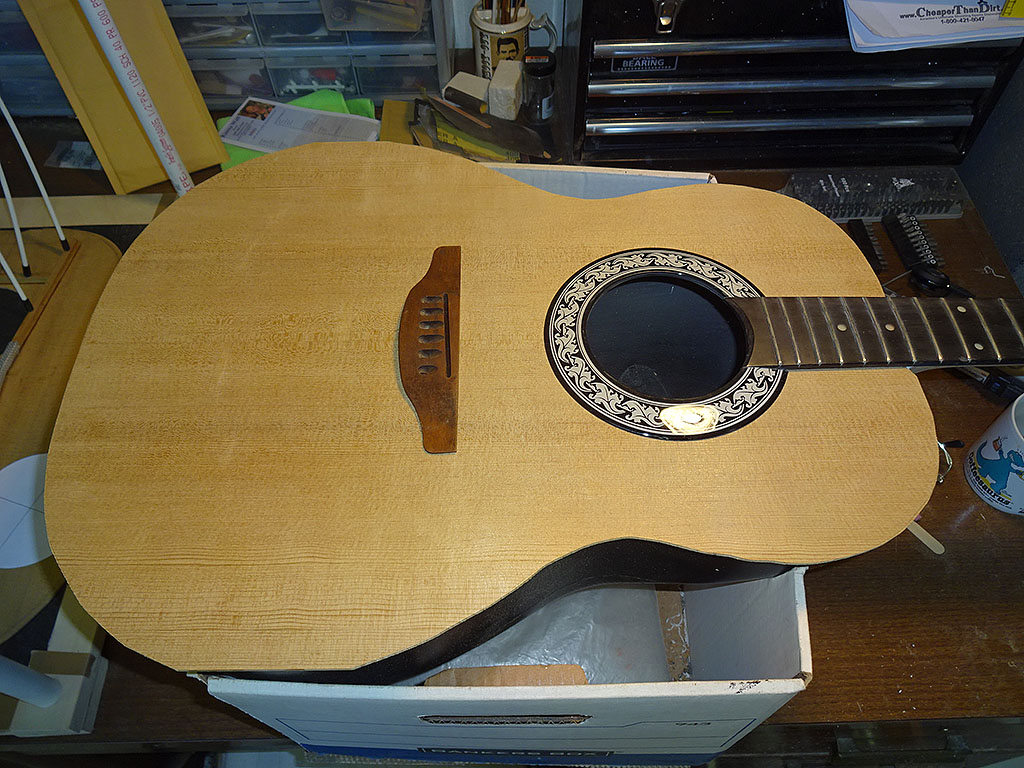
Brace pattern is laid out on the underside. You'll notice that one of the bridge pin holes is oblong. That's because I measured one and assumed that both were the same distance from the front of the bridge. Wrong! This means I'll have to carefully align the bridge when I lay the masking tape down prior to finishing.
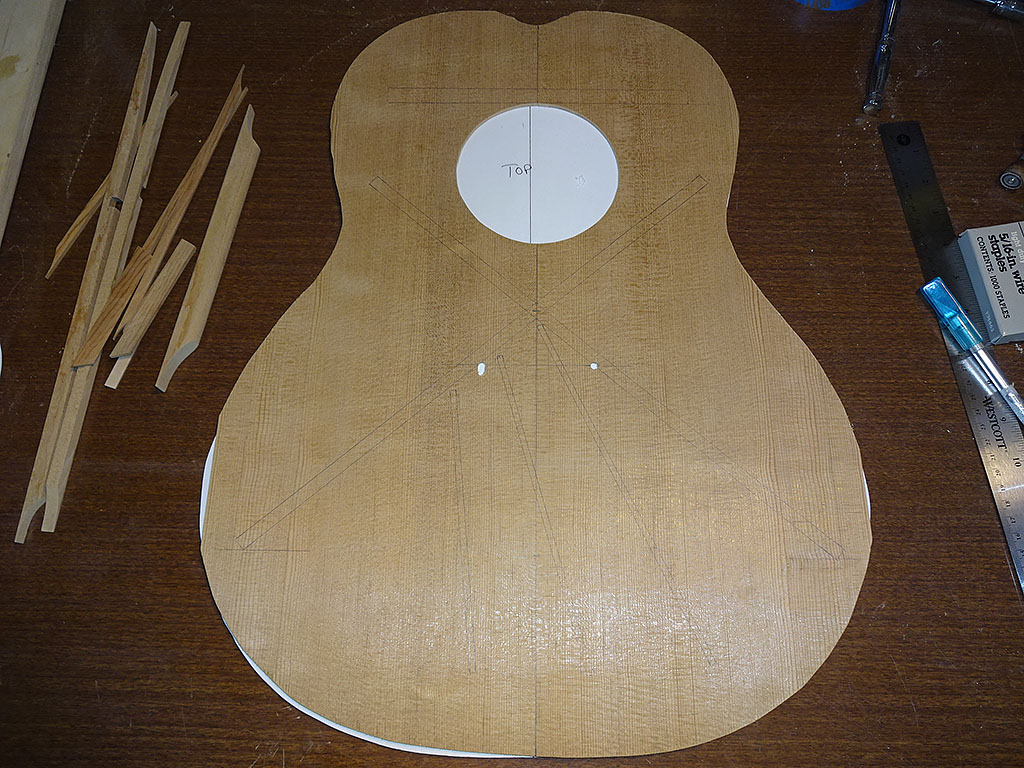
Braces ready to be glued down. Once I take the 1717 soundboard out of the gobar deck this afternoon, I'll glue down the braces with OBG.
|
|
| |
|
Joined:
September 2012
Posts: 815
Location: Thredbo, NSW, Australia | Thanks Dan. I'm loving this and the 1717 story. Keep em coming! |
|
| |
|
Joined:
March 2002
Posts: 15679
Location: SoCal | If you ever played one, you'd love them even more. My Savage 1113 is the one guitar that gets played every day..... |
|
| |
|

Joined:
June 2012
Posts: 2340
Location: Pueblo West, CO | Thanks, guys. Braces are glued. I'll pull this out of the gobar deck later this afternoon, then it's time to glue the top to the bowl of both this one and the 1717. 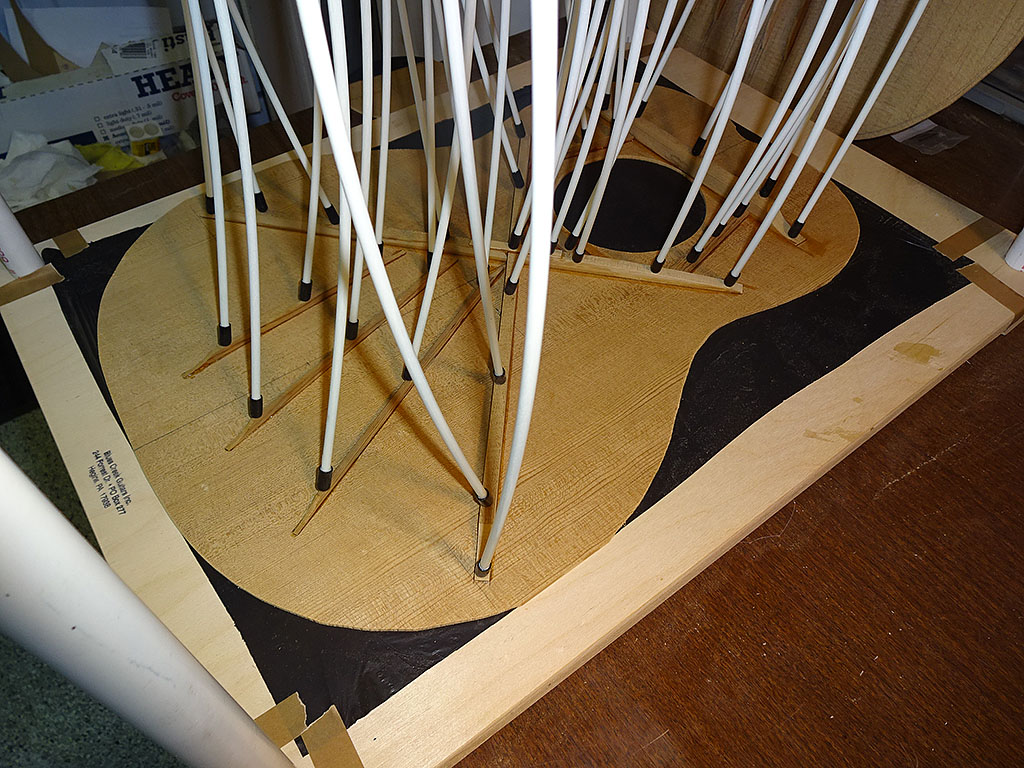
|
|
| |
|

Joined:
June 2012
Posts: 2340
Location: Pueblo West, CO | Faux foil label. I was able to print it using my Alps printer foil cartridge and it looked great under certain angles, but this looks better under all angles. It's not reflective like real foil, but this is better than no label at all. 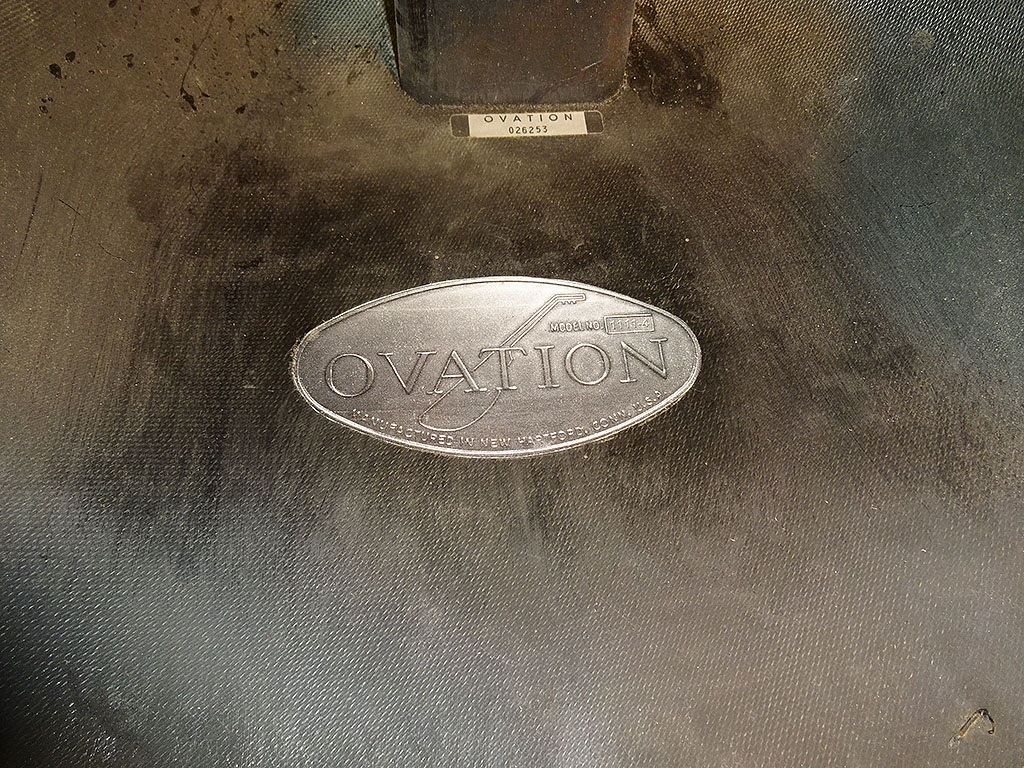
Top being glued to bowl. 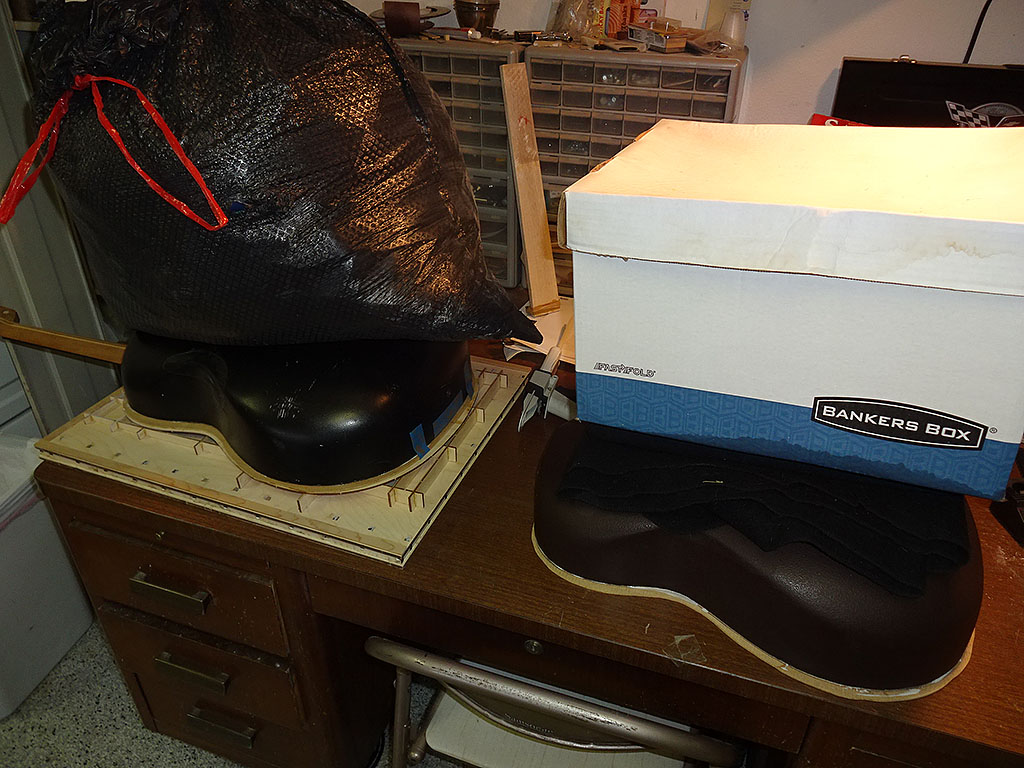
Edited by DanSavage 2016-10-12 8:43 PM
|
|
| |
|

Joined:
June 2012
Posts: 2340
Location: Pueblo West, CO | The glue joint between bowl and top was hard enough to pull the weights off.
Gluing fretboard extention to soundboard.
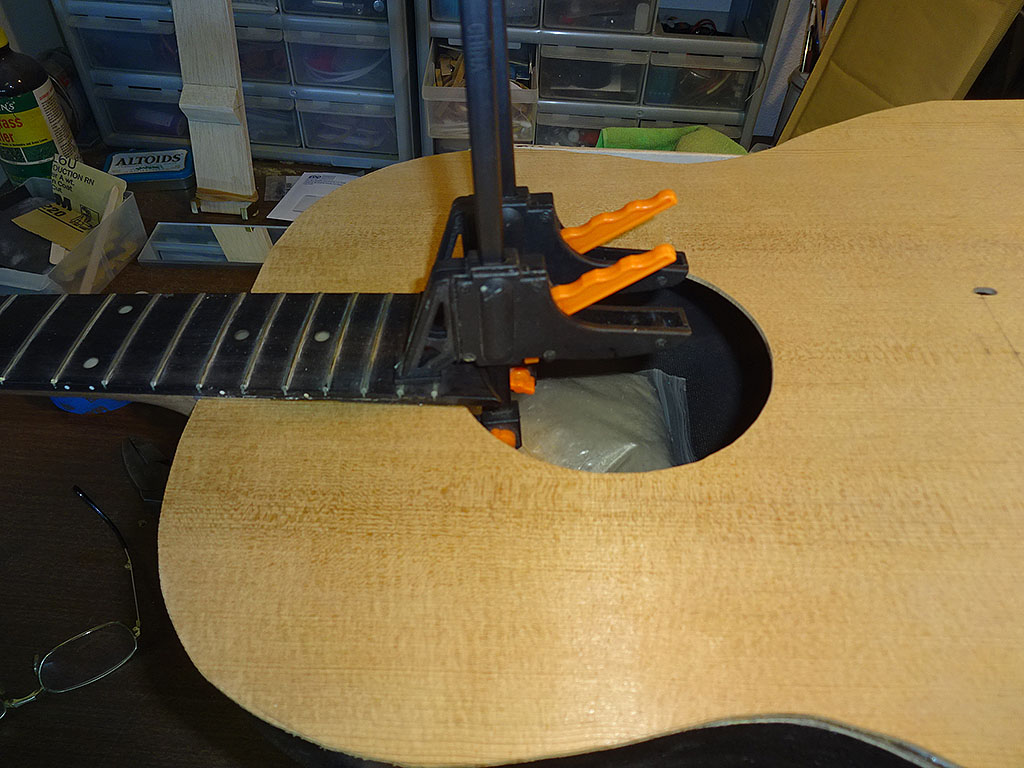 I'll sand down the excess top material from around the bowl tomorrow once the fret extension glue has had a chance to cure. Once that's done the top will be ready for routing for binding and purfling.
Edited by DanSavage 2016-10-13 12:44 PM
|
|
| |
|

Joined:
June 2012
Posts: 2340
Location: Pueblo West, CO | Binding and purfling channels are routed. 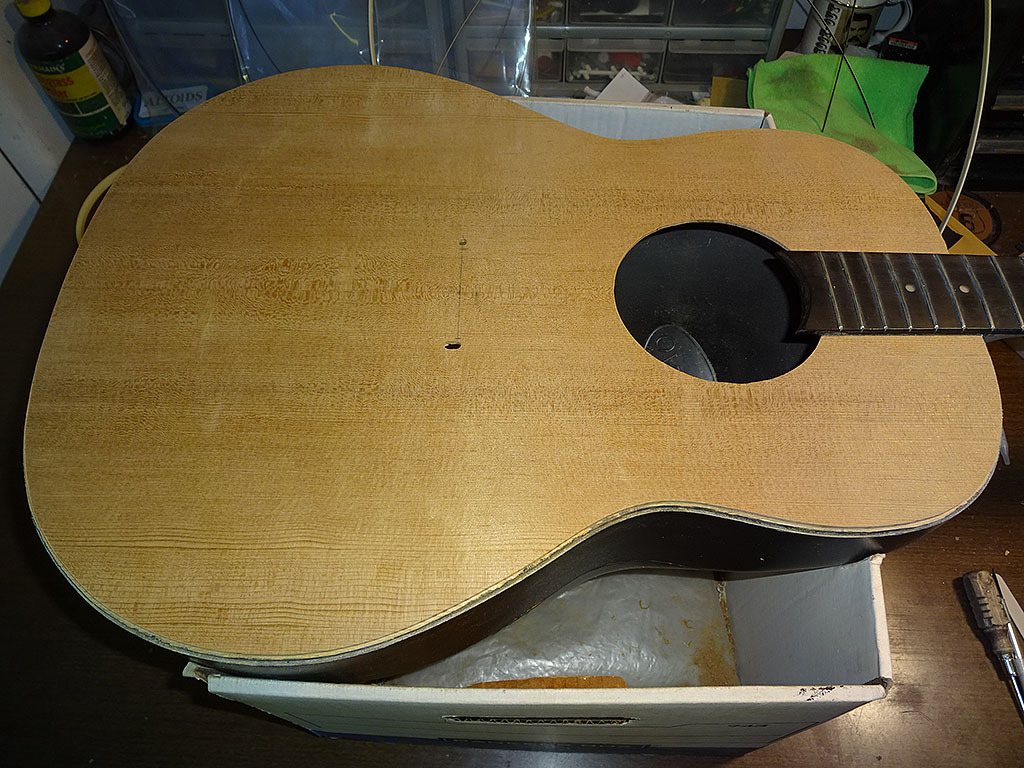
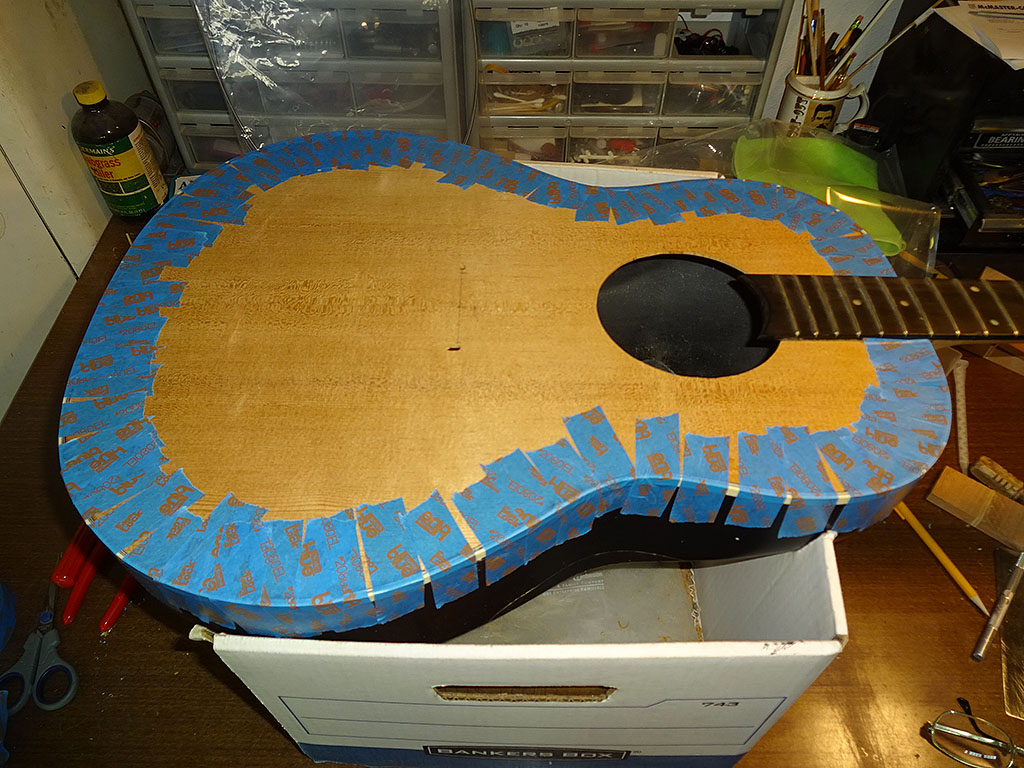
And, glued into place. I'll let the glue dry until tomorrow, then start scraping.
|
|
| |
|
Joined:
October 2012
Posts: 1093
Location: Yokohama, Japan | WOW! Coming along nicely...again! Shiny Bowl? |
|
| |
|

Joined:
June 2012
Posts: 2340
Location: Pueblo West, CO | Thanks, Ken. Not a shiny bowl. I think they stopped making shiny bowls in the late 1960s. |
|
| |
|

Joined:
June 2012
Posts: 2340
Location: Pueblo West, CO | Binding tape pulled up. 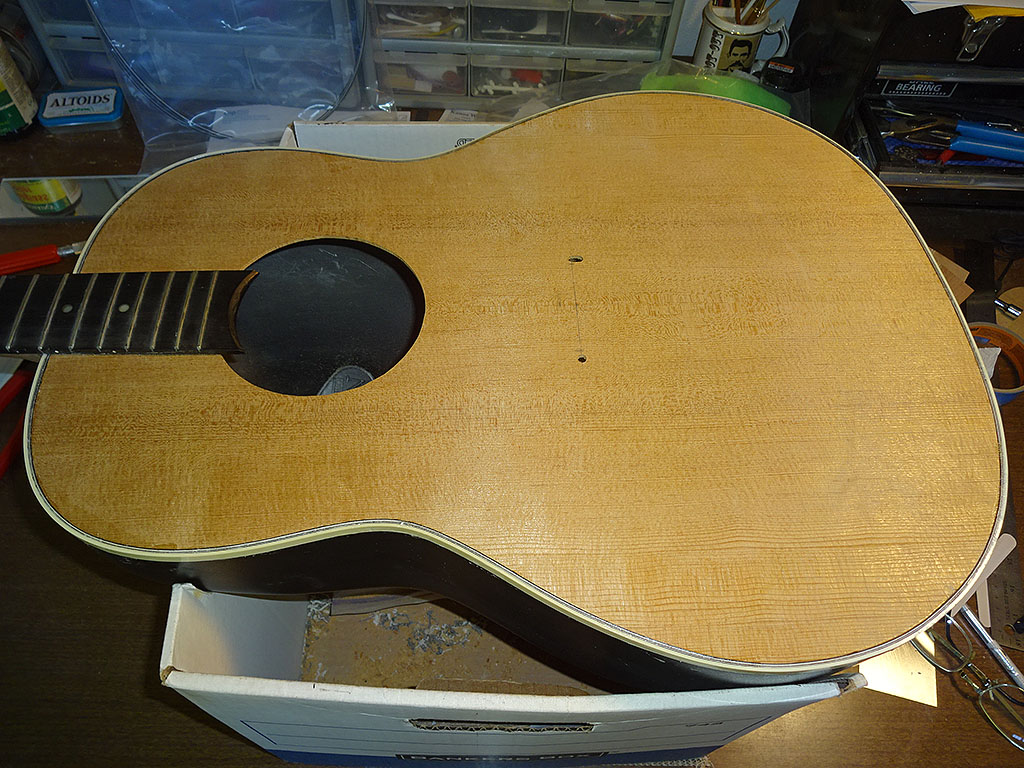
Binding and purfling scraped level. Top is ready for finishing. But, before I start that I need to turn my attention to the headstock repair. As with the other guitars, I'll finish the neck first, then do the body. 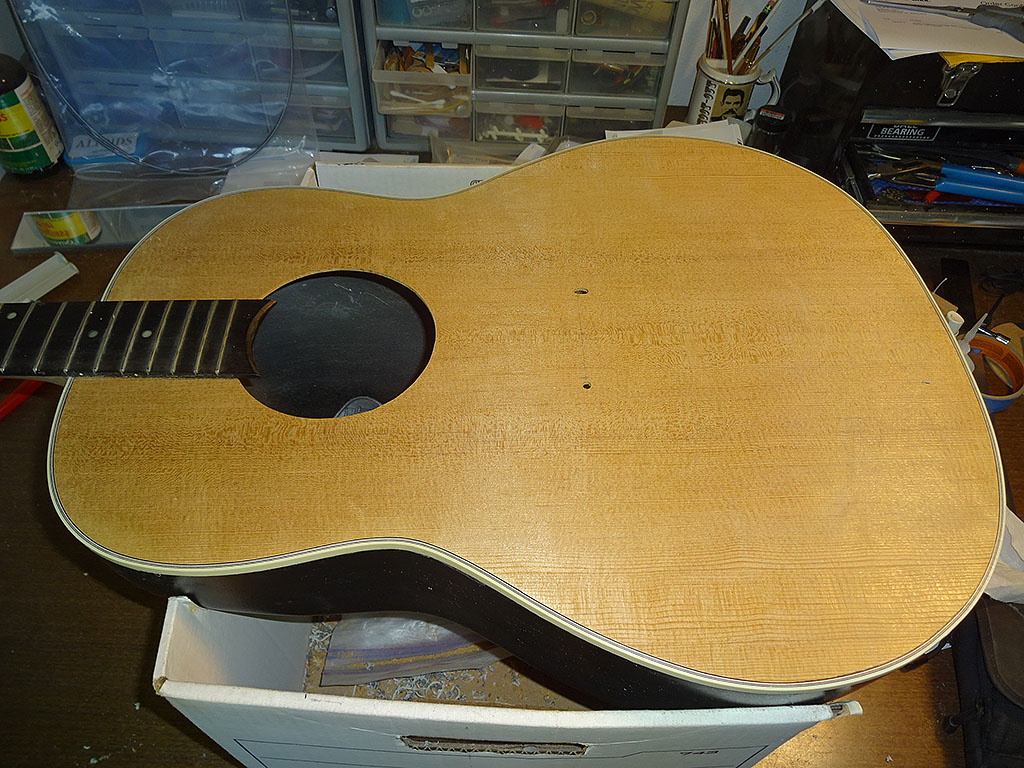
|
|
| |
|

Joined:
June 2012
Posts: 2340
Location: Pueblo West, CO | Time to turn my attention to the broken headstock. Here's what it looked like before I started. 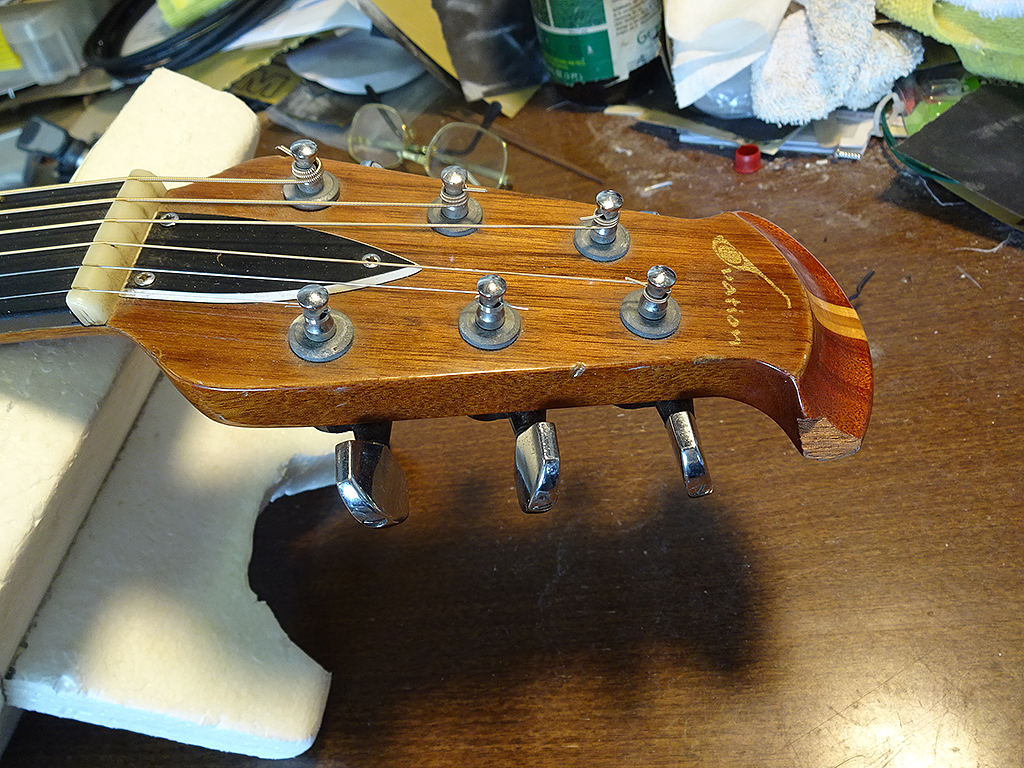
After I sanded the finish off, I sanded the broken section flat to prepare it for gluing the patch piece. I bought some mahogany planks locally, and made several attempts, but they didn't come close to matching the grain pattern of the head stock. Thankfully, I followed my first instinct and glued the patches on with OBG, so they were easy to steam off and try again. So, I sent an email to JB at the MS and asked him if he could send some scraps. Here's what I got back. The darker pieces are from the sealer applied to ends of the raw stock that they used to laminate. The actual wood is the same color as the lighter wood on the other side of the laminations. (they're bookmatched) 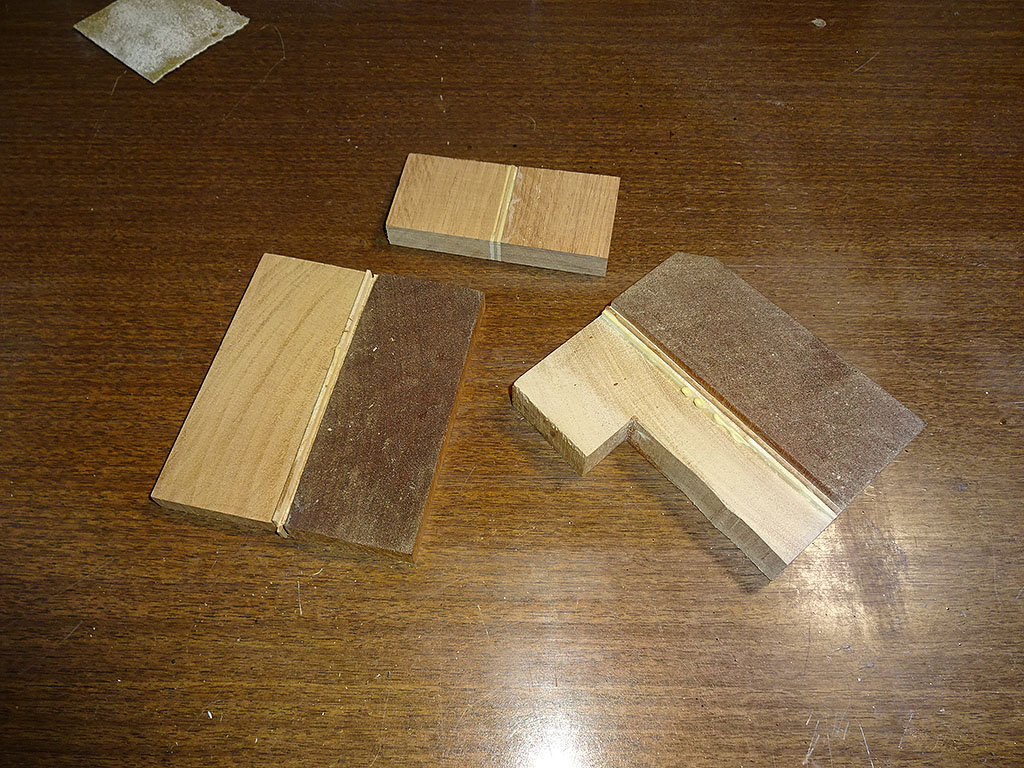
But, when I oriented the grain to match that of the head stock, I had the same problem as the locally-sourced wood -- the grain pattern didn't match. The solution was to turn the piece 90 degrees and use the end-grain, instead. Here's a shot of final patch piece glued into place and sanded to shape. The existing head stock wood is quite a but darker than the patch piece. 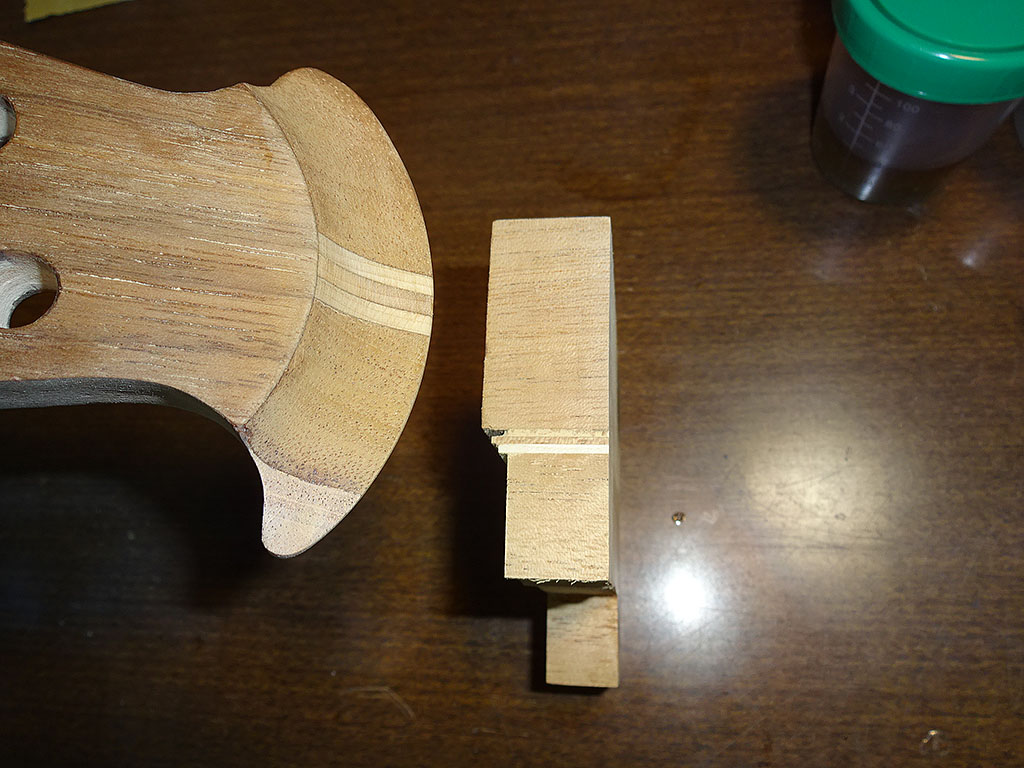
When it's wet out, you can see the difference in color between the old wood and the new wood. The grain matches pretty good, but it's quite a bit lighter in color. So, the next job was to find a way to stain the patch to get it to match the coloration of the head stock wood when it's wetted out. 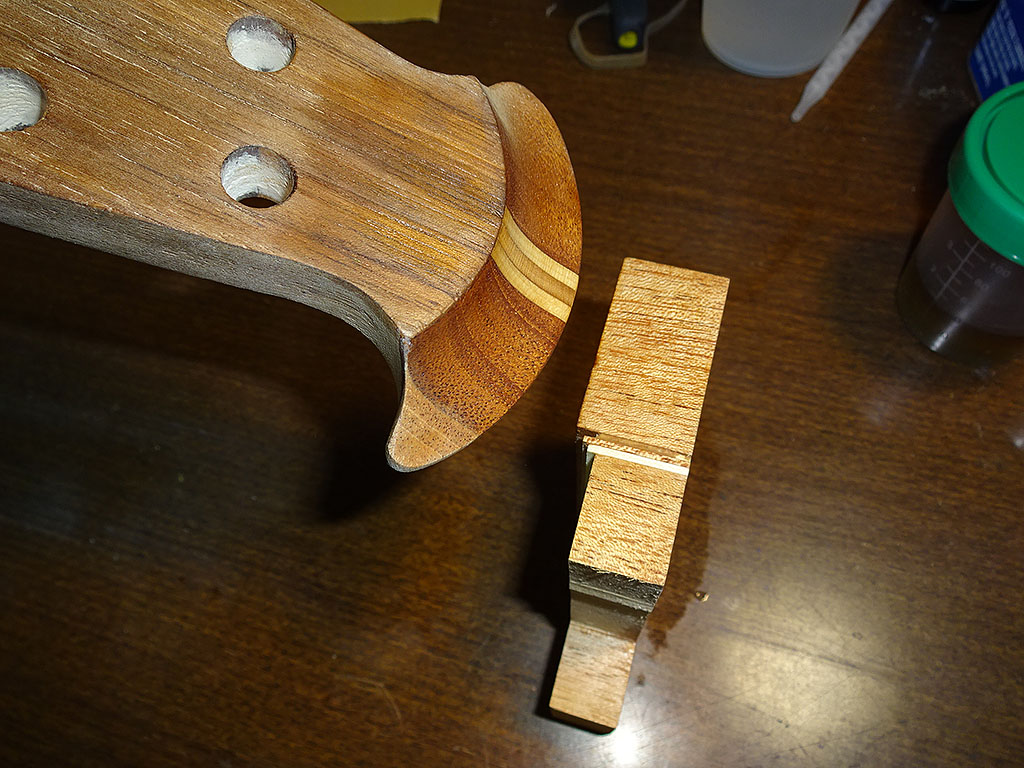
I used the scrap wood JB sent as test pieces so I could find out what worked best. I ended up using alternating coats of thinned Minwax red oak stain and shellac tinted with burnt sienna and raw umber dry artists pigment to build up the finish to get the best match without overshooting the tint and making it too dark. 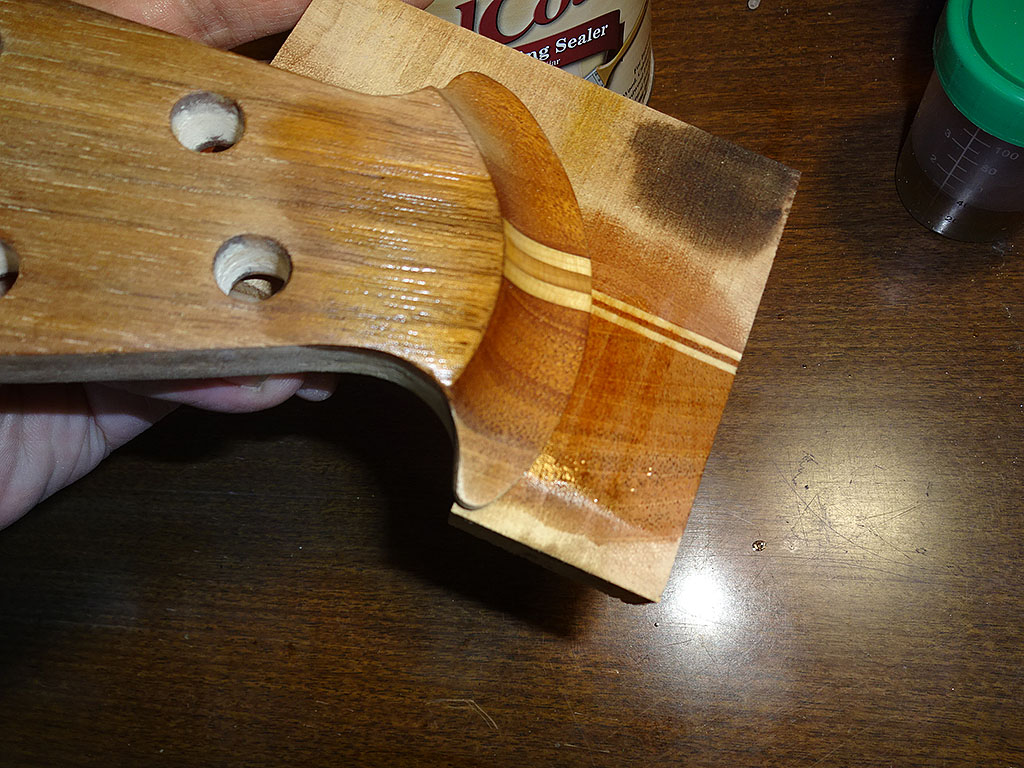
Here's what the finished patch looks like when it's dry. 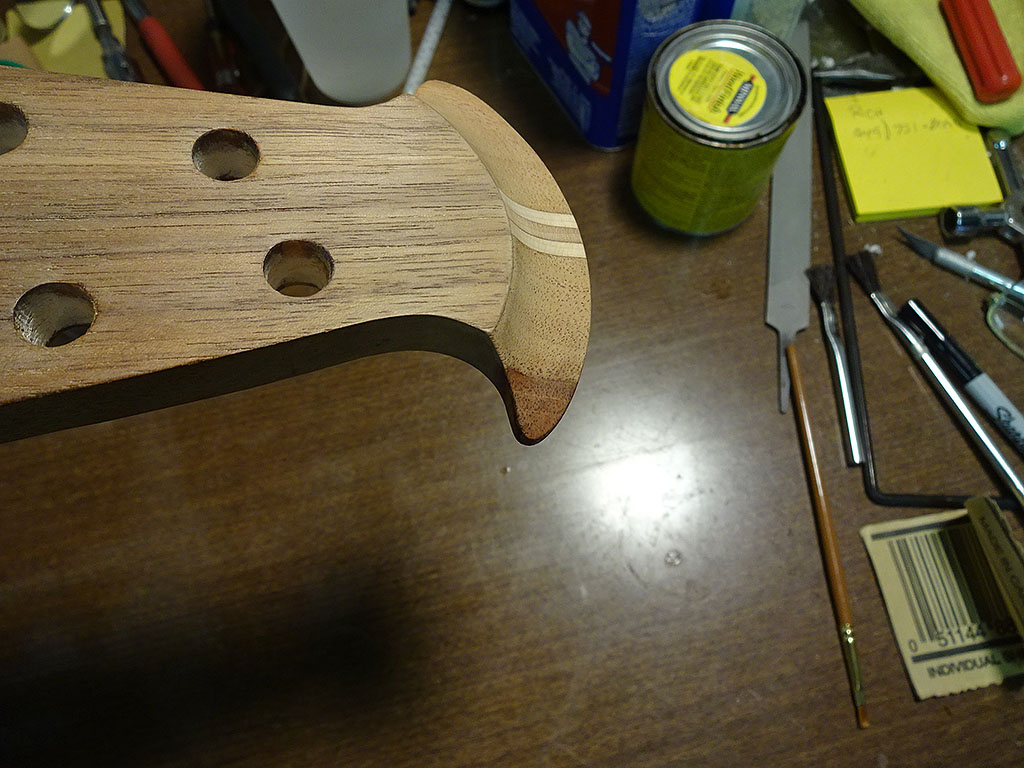
And, when it's wetted out with naptha to simulate how the clear coat will look. The direction of the grain is slightly off, but it's close enough that it will pass all but the closest inspection. 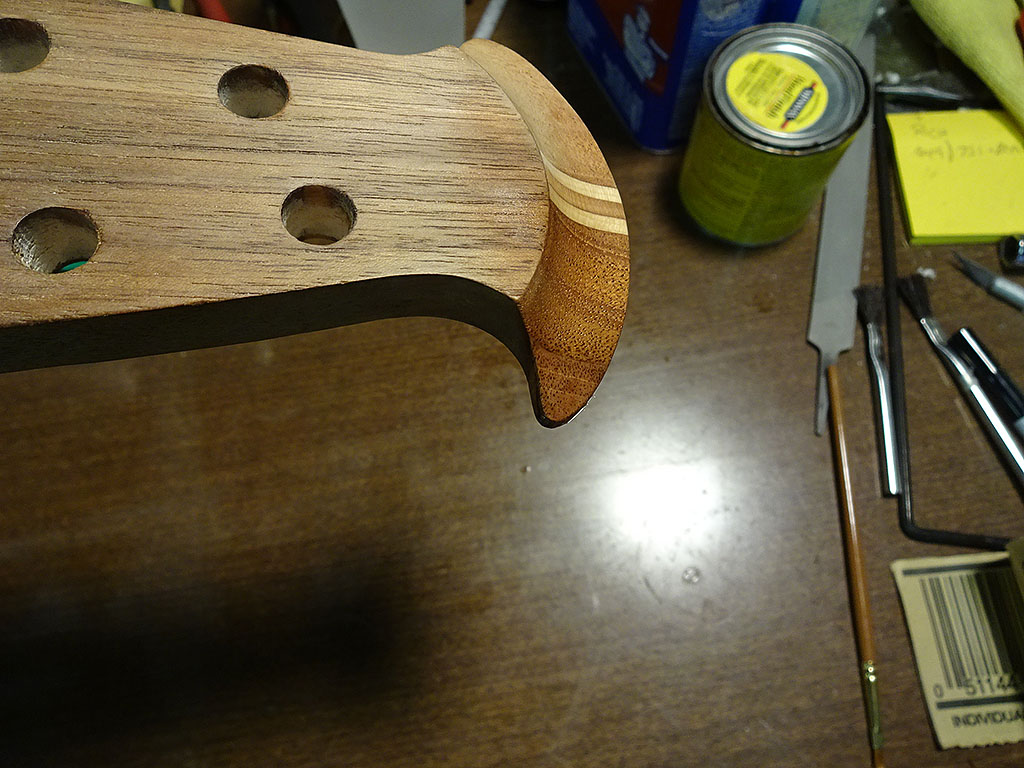
Now that this job is done, it's time to mask off the neck and start applying the clear coat.
Edited by DanSavage 2016-10-25 11:28 AM
|
|
| |
|

Joined:
January 2009
Posts: 1249
Location: Texas | We need "Like" buttons!
Dan, just saying it again....Thank you for taking the time in documenting these rebuilds. The journey is always different and each post is tremendously interesting. |
|
| |
|
Joined:
September 2006
Posts: 10777
Location: Keepin' It Weird in Portland, OR | Really, Really, impressive. 
|
|
| |
|

Joined:
September 2012
Posts: 815
Location: Thredbo, NSW, Australia | jay - 2016-10-26 5:32 AM
We need "Like" buttons!
Dan, just saying it again....Thank you for taking the time in documenting these rebuilds. The journey is always different and each post is tremendously interesting.
+1
I'm loving this one. Very interesting. |
|
| |
|
Joined:
March 2002
Posts: 15679
Location: SoCal | My first Ovation, a 1972 Artist was knocked down in price because an ear was knocked off. A friend fixed it the same way Dan is doing this one. I look at every Artist in SoCal on ebay to see if I can find it. |
|
| |
|

Joined:
February 2016
Posts: 1881
Location: When?? | I've especially been waiting for the headstock repair (that cube you had stuck on there was cracking me up). I, too, was thinking that you would have to find a specific angle for the end grain to match with the way the traditional Ovation shape is carved (I call it the Ovation "cow catcher" since it's kinda-sorta shaped like a cow catcher on an old locomotive nose). Anyway, I am, as usual, bowled-over impressed by your results! Very nice match! |
|
| |
|

Joined:
June 2012
Posts: 2340
Location: Pueblo West, CO | Thanks, guys. I'm just glad I was able to get a piece that more-or-less matched so I can keep moving forward. It was getting really old to glue on a cube, grind it down to shape, then find out the grain didn't match. Like I say, I'd done it three or four times. (Ugh!)
moody, p.i. - 2016-10-25 1:34 PM
My first Ovation, a 1972 Artist was knocked down in price because an ear was knocked off. A friend fixed it the same way Dan is doing this one. I look at every Artist in SoCal on ebay to see if I can find it.
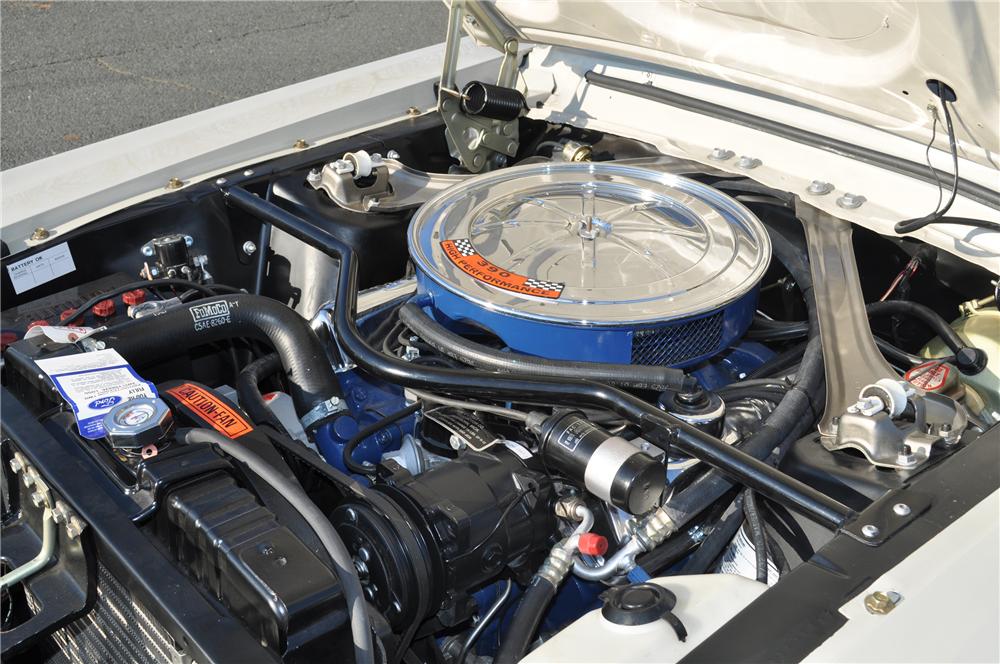
Ha! I keep looking on Craigslist, etc. trying to find my first car, a 1967 390 c.i. Mustang coupe. It looked like this: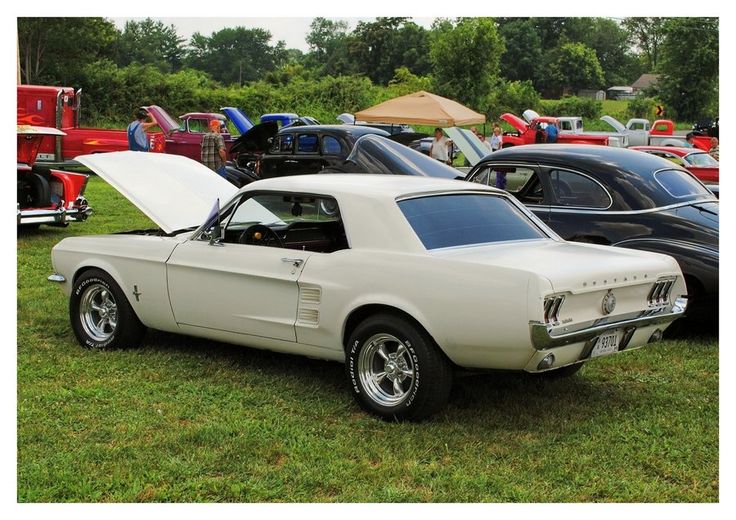
|
|
| |
|
Joined:
October 2016
Posts: 6
| Factory air? Pretty rare on one of those.
Enjoying your Ovation projects-thanks for documenting. |
|
| |
|

Joined:
February 2016
Posts: 1881
Location: When?? | I once went looking for my first car, too (very clean '65 Chevelle SS), and I eventually found it. Wish I hadn't, though, because you can't un-see things that turn ugly. |
|
| |
|
Joined:
October 2016
Posts: 6
| Still have mine-a '76 Camaro RS in yellow with a 4 speed. |
|
| |
|

Joined:
June 2012
Posts: 2340
Location: Pueblo West, CO | Thanks!
Love O Fair - 2016-10-25 3:58 PM
I've especially been waiting for the headstock repair (that cube you had stuck on there was cracking me up). I, too, was thinking that you would have to find a specific angle for the end grain to match with the way the traditional Ovation shape is carved (I call it the Ovation "cow catcher" since it's kinda-sorta shaped like a cow catcher on an old locomotive nose). Anyway, I am, as usual, bowled-over impressed by your results! Very nice match! |
|
| |
|

Joined:
October 2012
Posts: 1093
Location: Yokohama, Japan | DanSavage - 2016-10-25 9:36 AM Thanks, guys. I'm just glad I was able to get a piece that more-or-less matched so I can keep moving forward. It was getting really old to glue on a cube, grind it down to shape, then find out the grain didn't match. Like I say, I'd done it three or four times. (Ugh!)
moody, p.i. - 2016-10-25 1:34 PM
My first Ovation, a 1972 Artist was knocked down in price because an ear was knocked off. A friend fixed it the same way Dan is doing this one. I look at every Artist in SoCal on ebay to see if I can find it. Ha! I keep looking on Craigslist, etc. trying to find my first car, a 1967 390 c.i. Mustang coupe. It looked like this: Just amazing work on the headstock repair Dan. So cool that the Mother Ship was willing to send some scraps your way. A great idea for sure, but the amount of care and detail that is going into this rebuild is just incredible! You get the Patient Luthier Award for this one! Hope you find that '67 Mustang - best year! |
|
| |
|

Joined:
June 2012
Posts: 2340
Location: Pueblo West, CO | Updates have been a little slow in coming because there's only so much that can be said about repeatedly spraying clear on, letting it dry, then sanding it off. To make the head stock logo look more authentic, I bought a metallic gold cartridge for my Alps 5000 printer. Here's what the new logo looks like in metallic gold. IMO, it does look better than the gold foil. The later logo with the black outline needs to be done in gold foil, but these earlier logos used metallic gold. 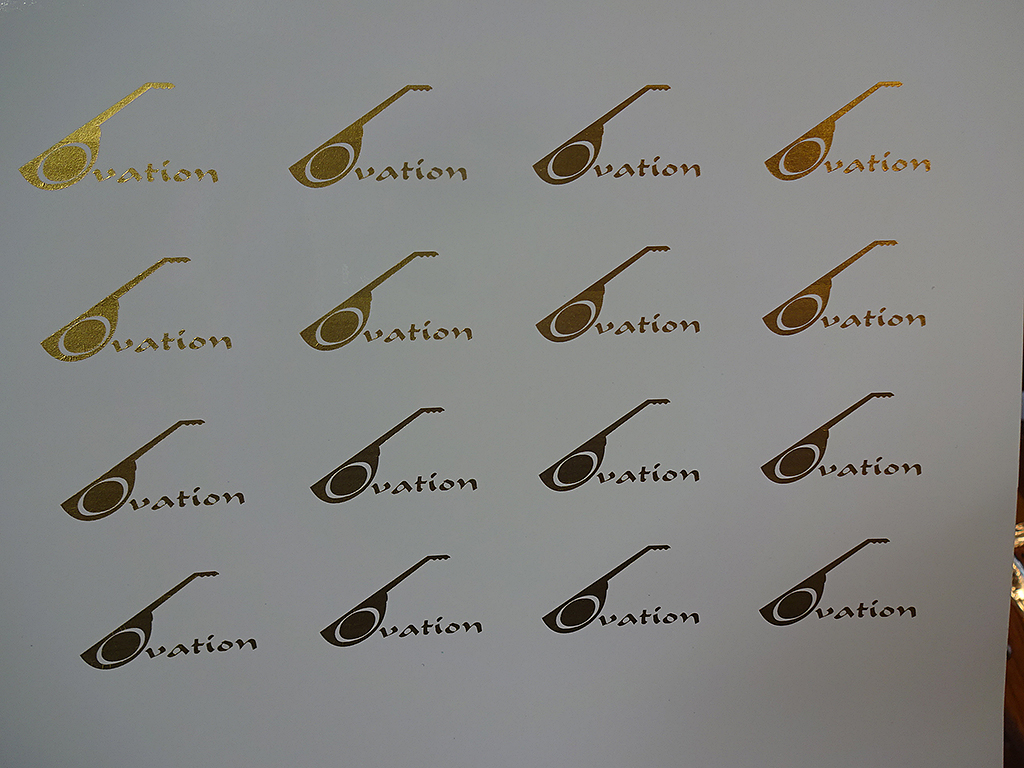
I decided to experiment with the metallic gold cartridge and print up an early foil label. Wow! I've cracked the code on how to get a printer to create a faux foil label and have it look like a foil label from all angles. The resampling process to reduce the size of the images introduced a graininess to the texture of the label. This is an artifact of the image processing and is not present in real life. In real life, this looks like a foil label. 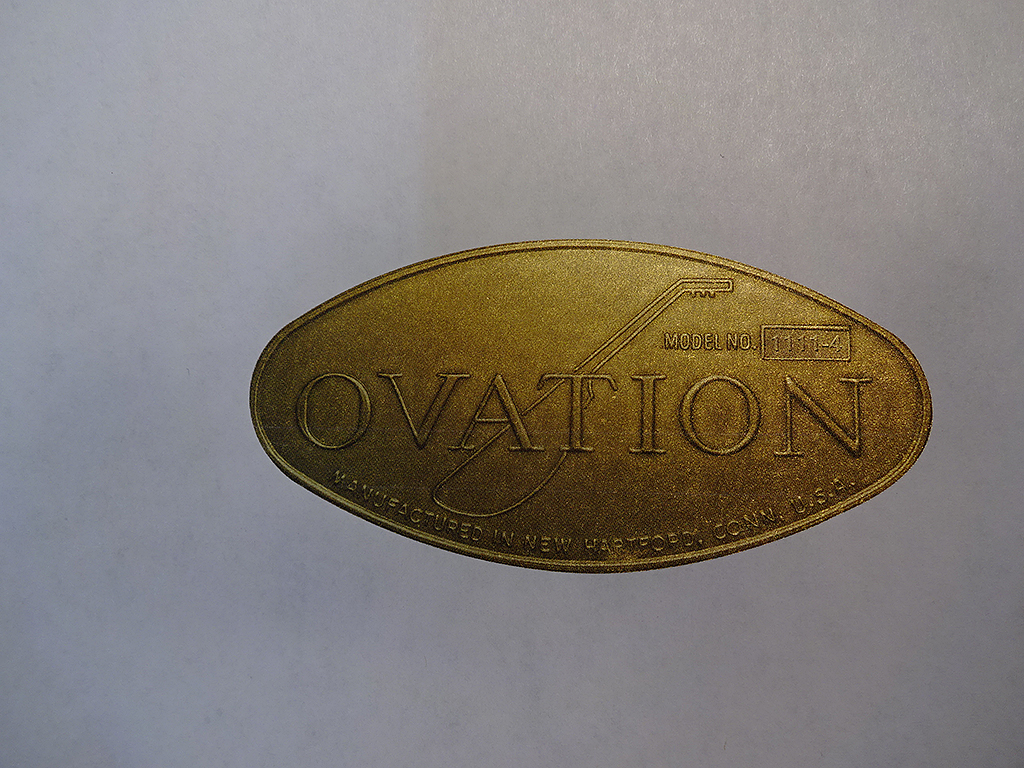
Here's a slightly different angle. Notice how the sheen on the label changes. 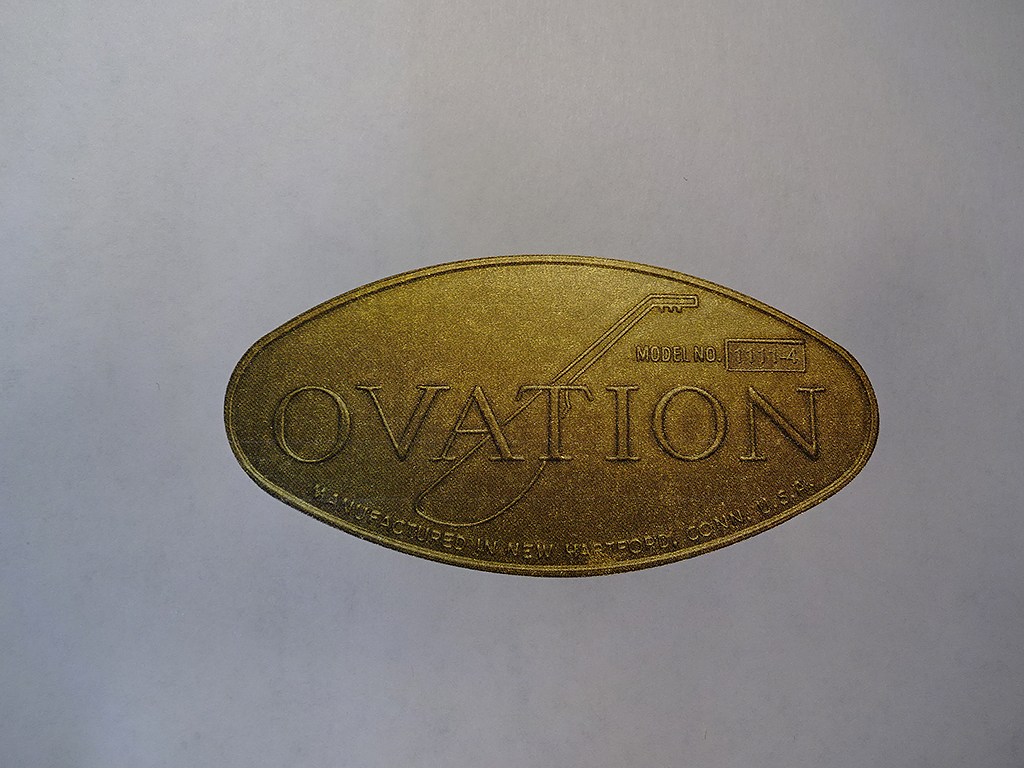
Here's a shallower angle. 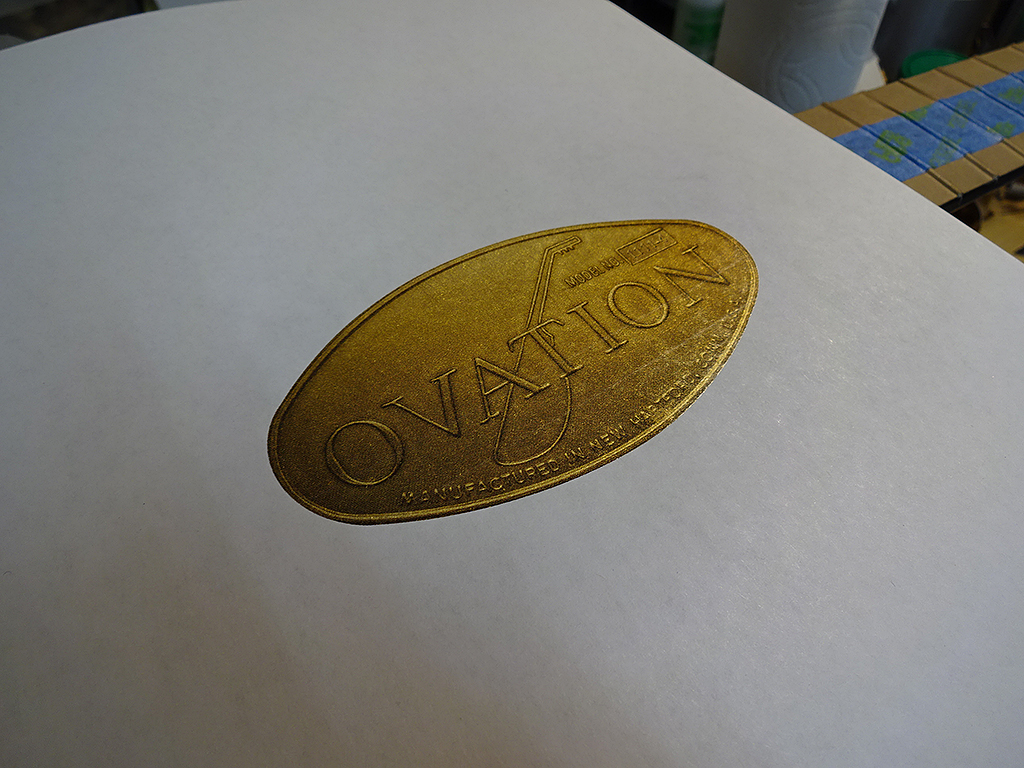
And a shallower angle still. 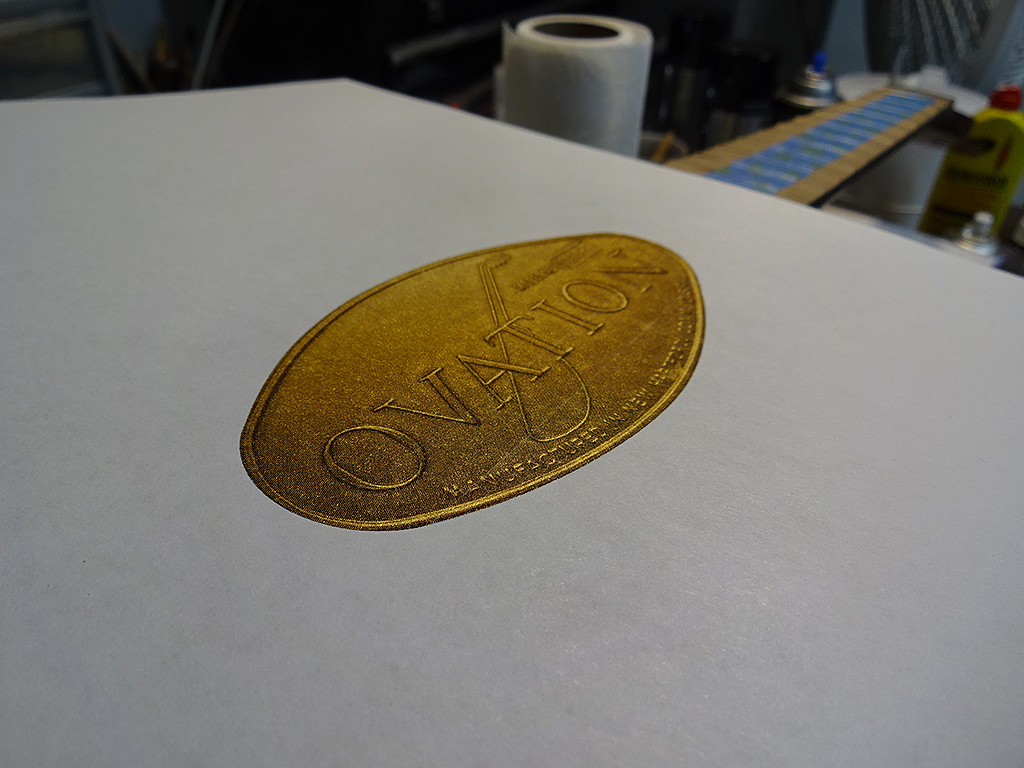
The cool thing about this printing process is that the raised lettering always keeps the 3D effect and I'm able to insert any model number I want. I'm going to order a silver metallic cartridge so I can re-do the label I already stuck down to the inside of the bowl. It'll be a bit of a pain, but the results are worth it. |
|
| |
|

Joined:
February 2016
Posts: 1881
Location: When?? | Very nice on both counts! I've never worked with metallic or foil printing on a home printer, so I am curious as to how the logo image comes off the printed page. Since it prints as a positive, does it simply peel off and attach as one piece directly onto the headstock? Is it adhesive on the back? If so, it would be kinda cool to be able to sport them on other things as well.. studio glass, car window, guitar strap, etc. |
|
| |
|

Joined:
June 2012
Posts: 2340
Location: Pueblo West, CO | Thanks.
The head stock logo is printed on water-slide decal paper -- the same kind as used on plastic model car and airplane kits.
These wouldn't be very good candidates for sticking on the surfaces you mention because they're not waterproof. A couple of years ago, I drew an Ovation and an Adamas logos and created files that can be used to cut out vinyl stickers, which do work for the surfaces you mentioned.
Here's the logos shown cut out.
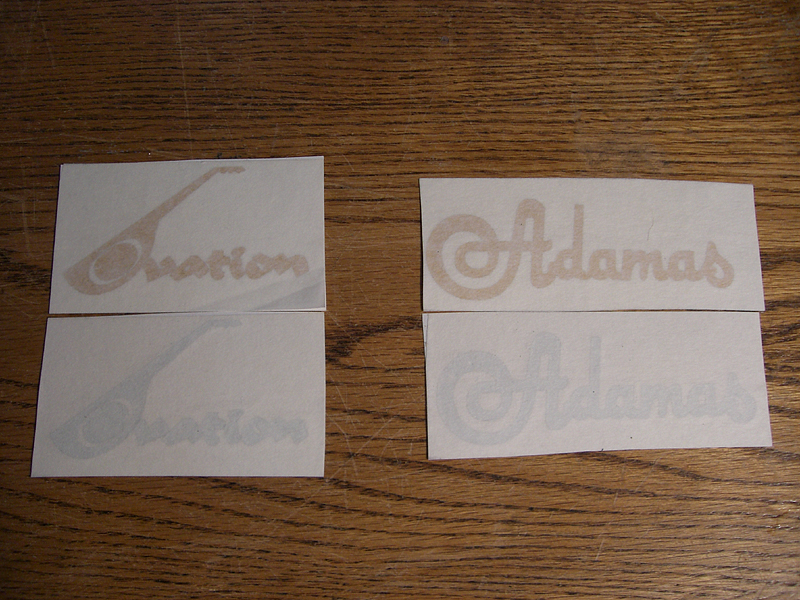
Here's the Ovation logo stuck down on my RoadRunner case. 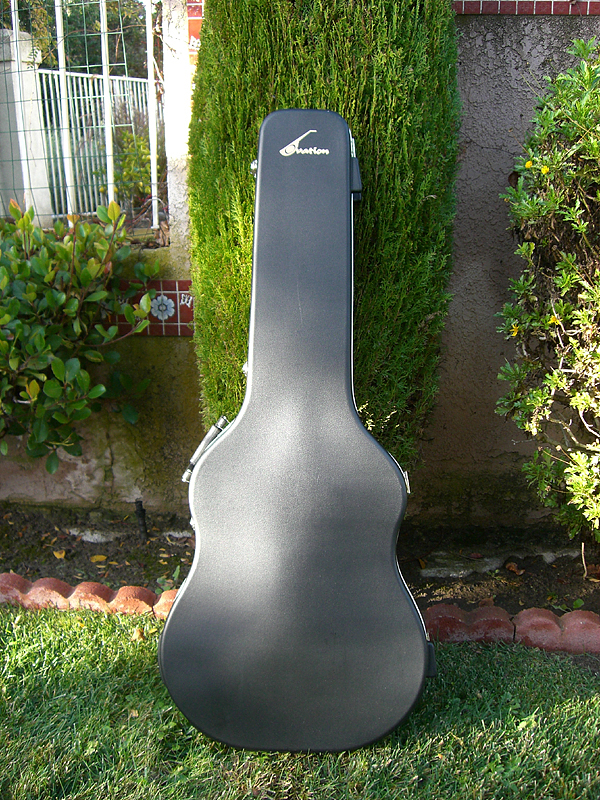
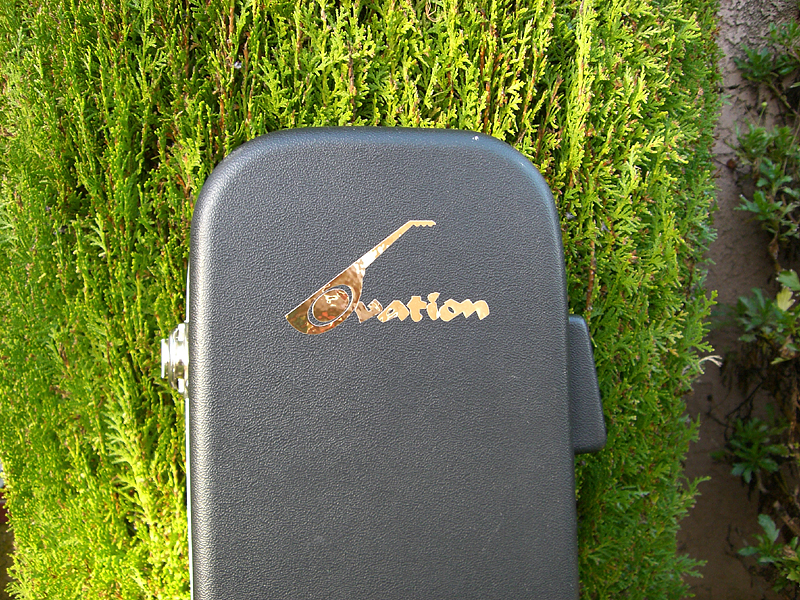
If you want to use them, here's the links to the files. You should be able to take the .EPS files to any printer and they can cut them out of any color vinyl you want.
Adamas.pdf
Adamas.eps
Ovation.pdf
Ovation.eps
|
|
| |
|

Joined:
October 2012
Posts: 1093
Location: Yokohama, Japan | WOW! Amazing. I'm going to need the O logo for my iDea Rebuild. Thanks Dan! Your foil label is incredible! This 1111 is going to be about as authentic as you can get. Really impressive stuff! |
|
| |
|

Joined:
June 2012
Posts: 2340
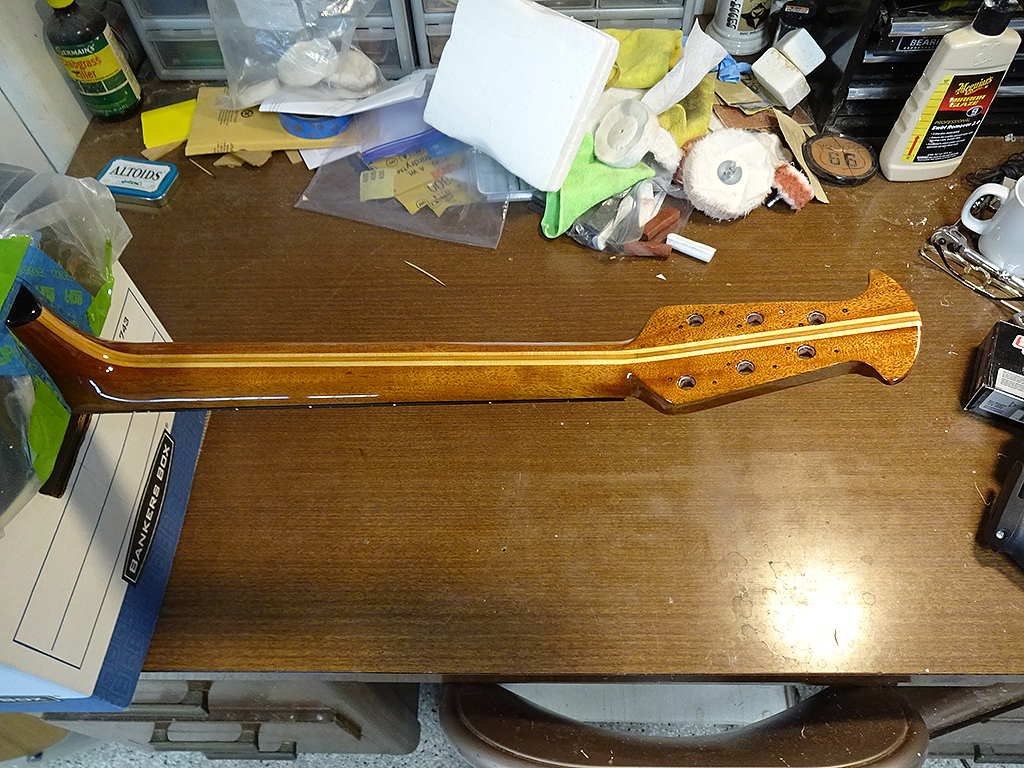
Location: Pueblo West, CO | The neck and head stock finishing is done.
Gold foil logo. 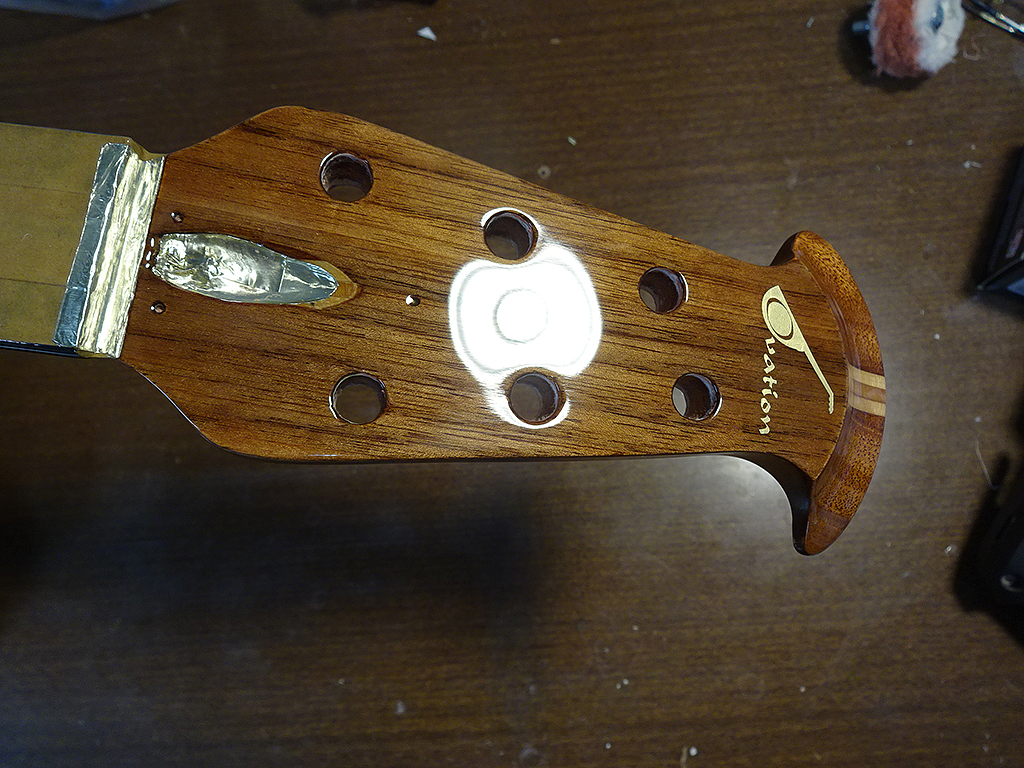
Back of neck.
Back of head stock. 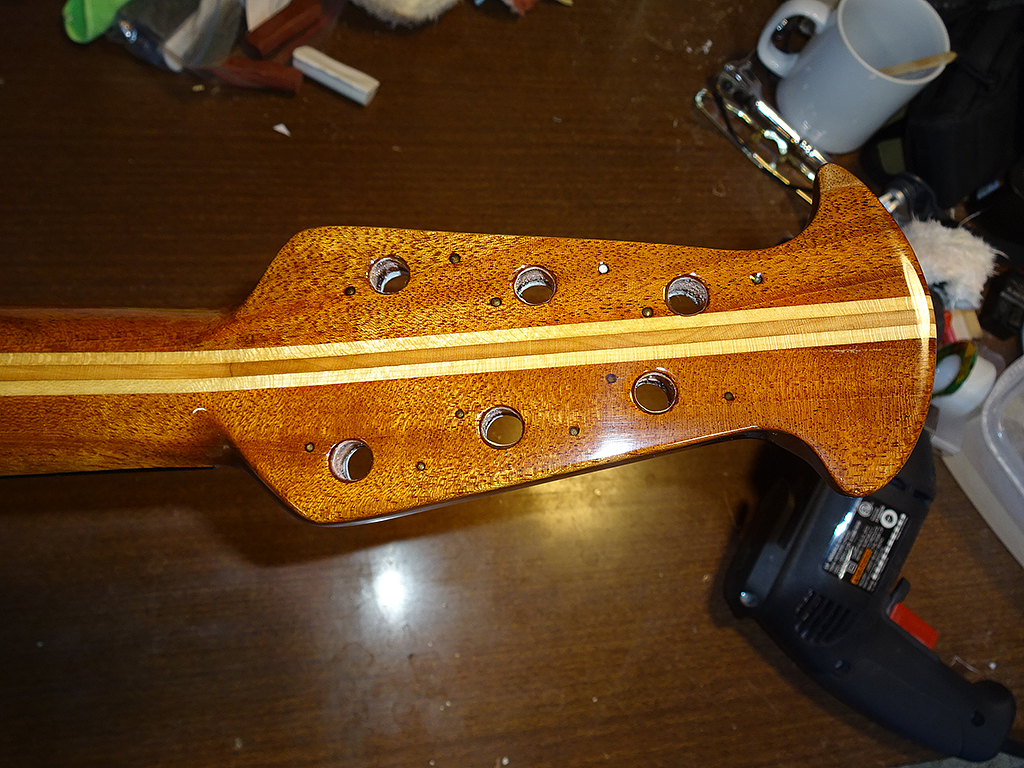
Next job is to finish the top, which I've already started. |
|
| |
|
Joined:
May 2008
Posts: 1564
Location: Indiana | Great work as usual, Dan. That Alps label looks nifty. |
|
| |
|

Joined:
June 2012
Posts: 2340
Location: Pueblo West, CO | Thanks, Jonmark. I actually had several logo decals that didn't work. Turns out the problem was the brand of decal paper I was using. Once I went back to my tried and true brand, the logo decal went on like I expected. |
|
| |
|

Joined:
June 2012
Posts: 2340
Location: Pueblo West, CO | Moving right along. Top is finished and polished. 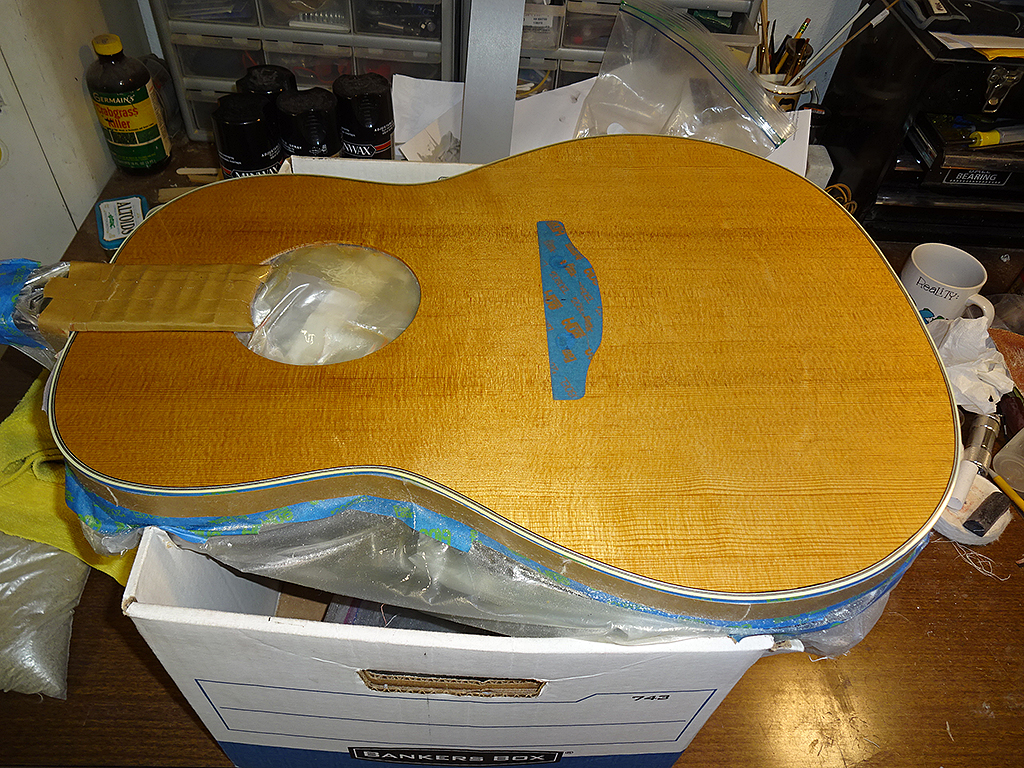
Bridge masking removed. 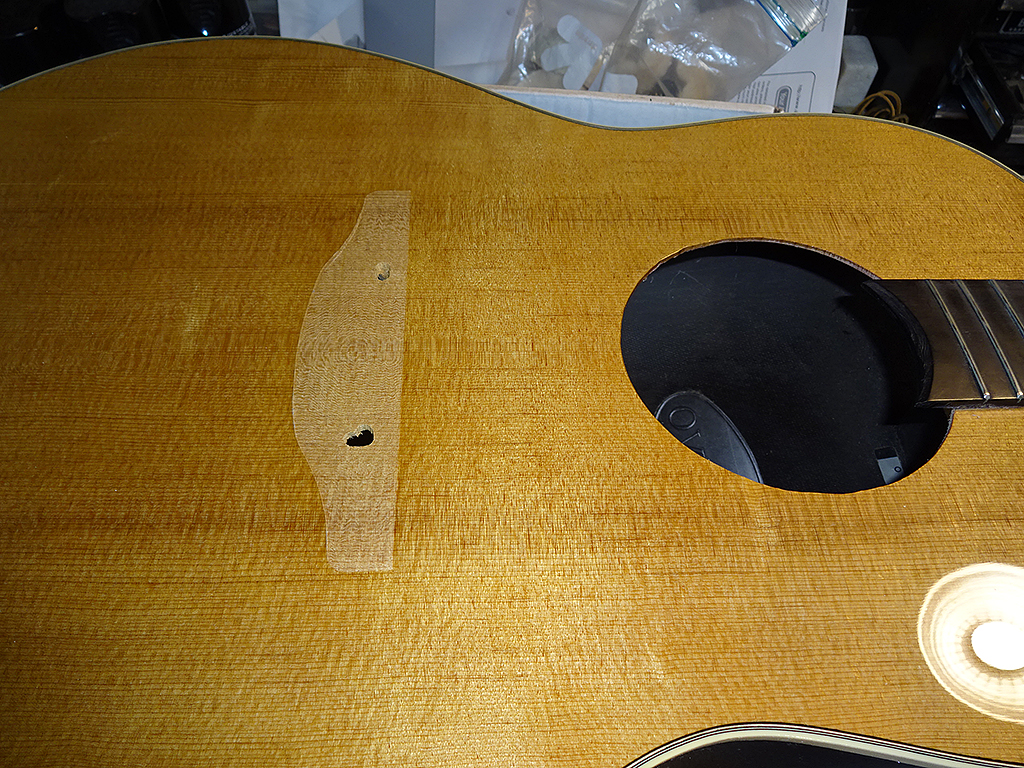
Bridge glued and clamped. I'll pull the clamps off this afternoon, then glue on the rosette. 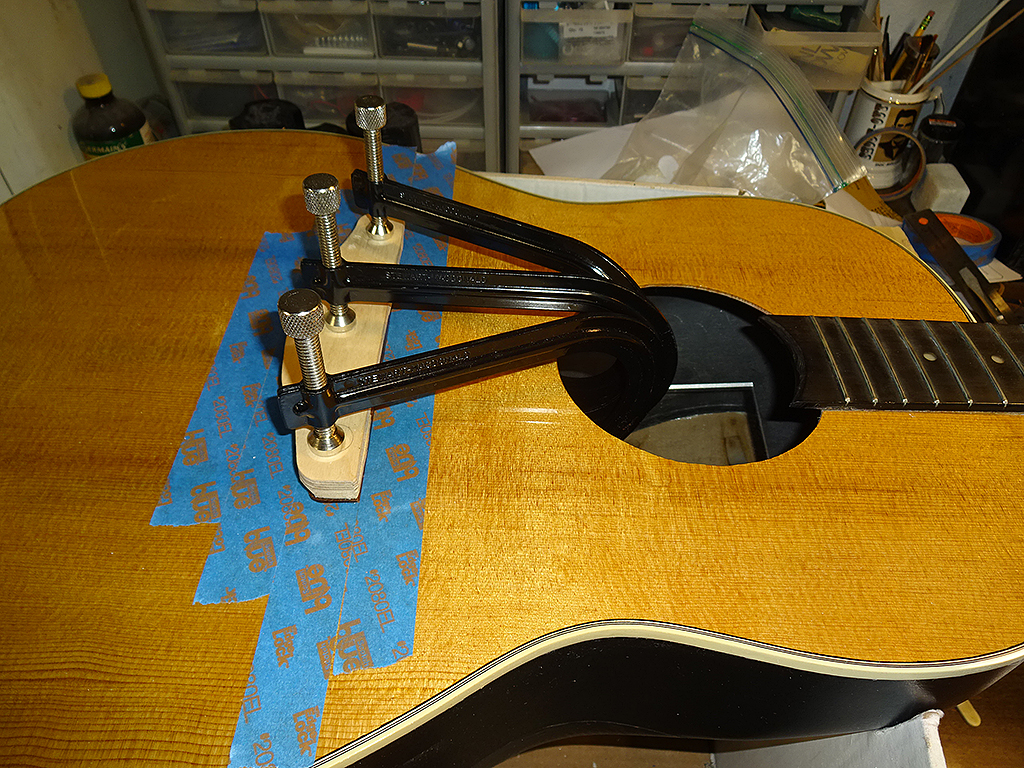
|
|
| |
|

Joined:
June 2012
Posts: 2340
Location: Pueblo West, CO | Bridge is done. Rosette is glued. I've done a touch-up to the binding/body joint. After it's dry, I'll glue the nut and adjust the fit of the saddle. Then, it's time to mount the tuners and string `er up and see how it sounds.  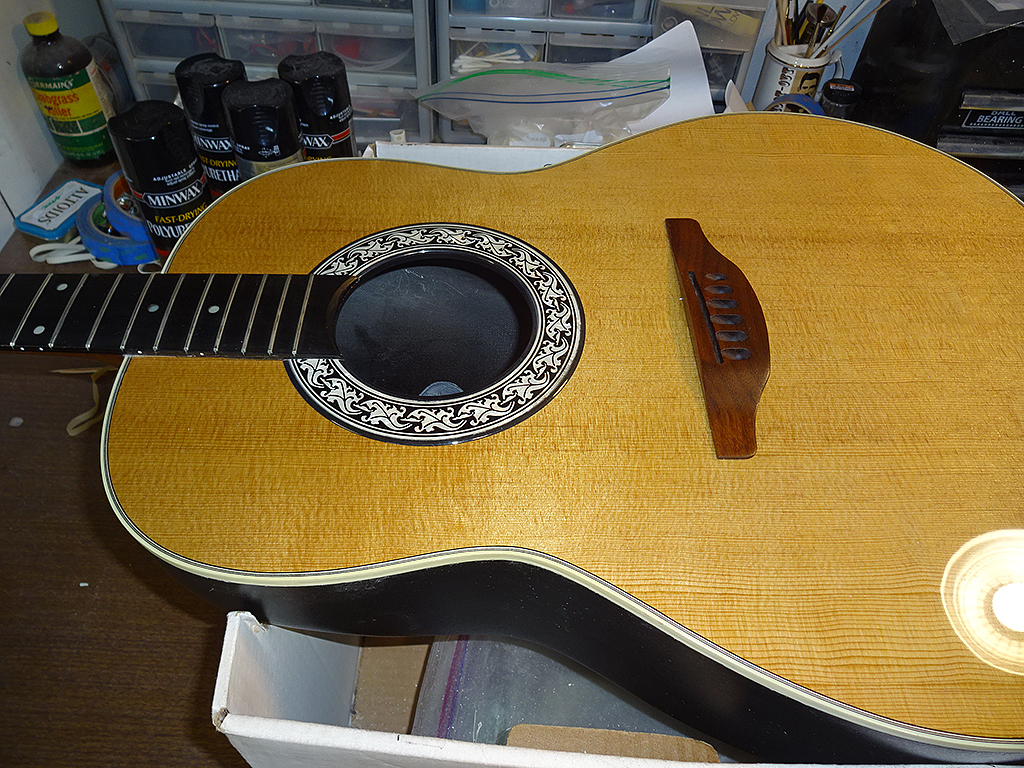
|
|
| |
|

Joined:
February 2016
Posts: 1881
Location: When?? | Another extraordinary product from the Dan lab! I have always had a partiality for the older -4 naturals, but also have a definite 'love-o-fair' with my only sunhurst, a '81 1112 CB. Your eye and taste are obviously well dialed in for wood selections in natural grain presentation; though I'm curious if you ever do restorations with new top wood finished in a burst. |
|
| |
|

Joined:
June 2012
Posts: 2340
Location: Pueblo West, CO | Hi Al,
Thanks for the kind words. No, I've never done a burst on a guitar. (I've done numerous bursts on model airplanes, but that's a different subject entirely)
I do a burst someday, but that would only be if someone for whom I was restoring a guitar specifically requested it. I used to have a `96 1719 CL with a burst, but I sold it. |
|
| |
|

Joined:
February 2016
Posts: 1881
Location: When?? | @DanSavage - "I've done numerous bursts on model airplanes...."
Hmmm.. for some reason the term "impacted with terrain" is going through my mind right now. |
|
| |
|

Joined:
June 2012
Posts: 2340
Location: Pueblo West, CO | Love O Fair - 2016-11-29 4:41 PM
@DanSavage - "I've done numerous bursts on model airplanes...."
Hmmm.. for some reason the term "impacted with terrain" is going through my mind right now.
Ha hahahahahahaha!!
Yeah. That's one of the 'aspects' of model building that got me out of the hobby.
There's an expression or two for that hobby.
'If you haven't crashed, you haven't flown.'
'There's two types of model airplanes, those that have crashed and those that will.'
'Model airplane crashes: it's not a matter of if, it's a matter of when.'
Imagine, you've finished your dream guitar. You walk out on stage to play it for the first time. Then, inexplicably, in the middle of your opening piece, you raise it over your head and smash it on the floor like Pete Townsend.
That's model airplane flying. You never know how many flights a model has in it. Some last for years. Others, are destroyed on their maiden voyage.Guitars last much longer. |
|
| |
|

Joined:
June 2012
Posts: 2340
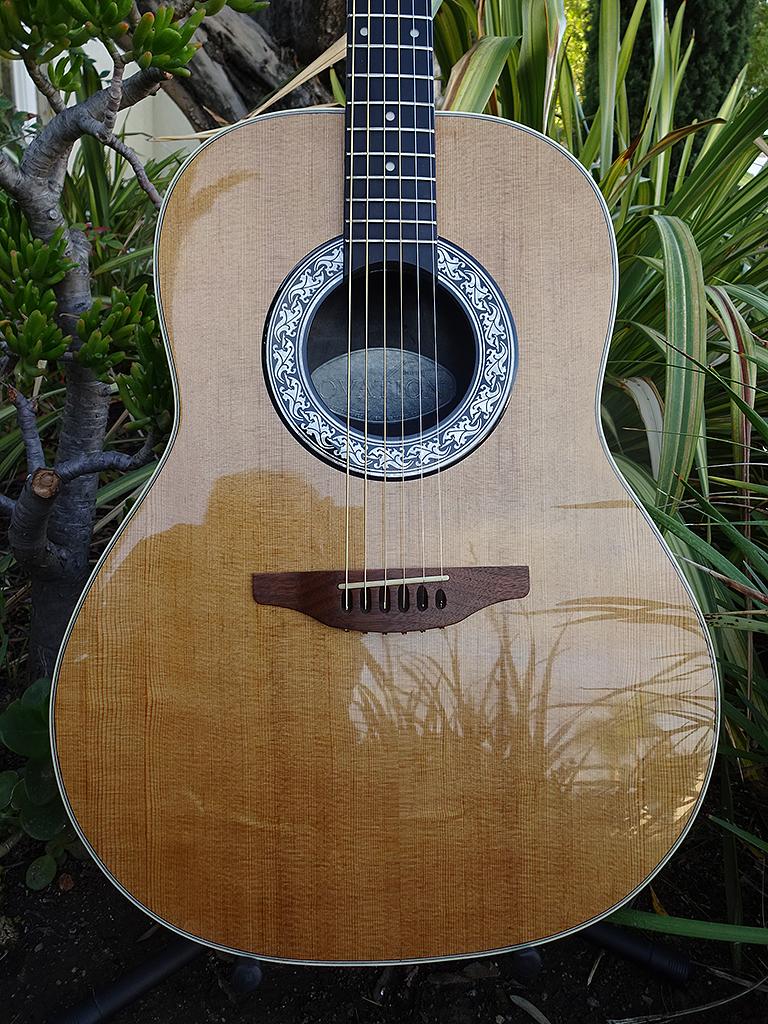
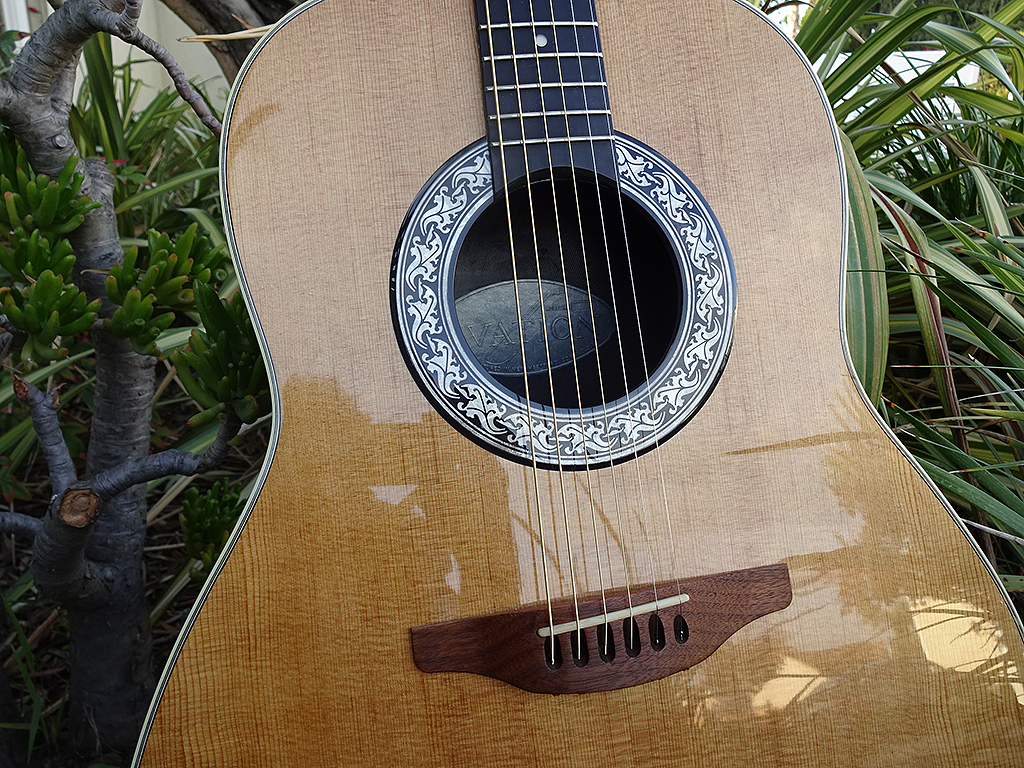
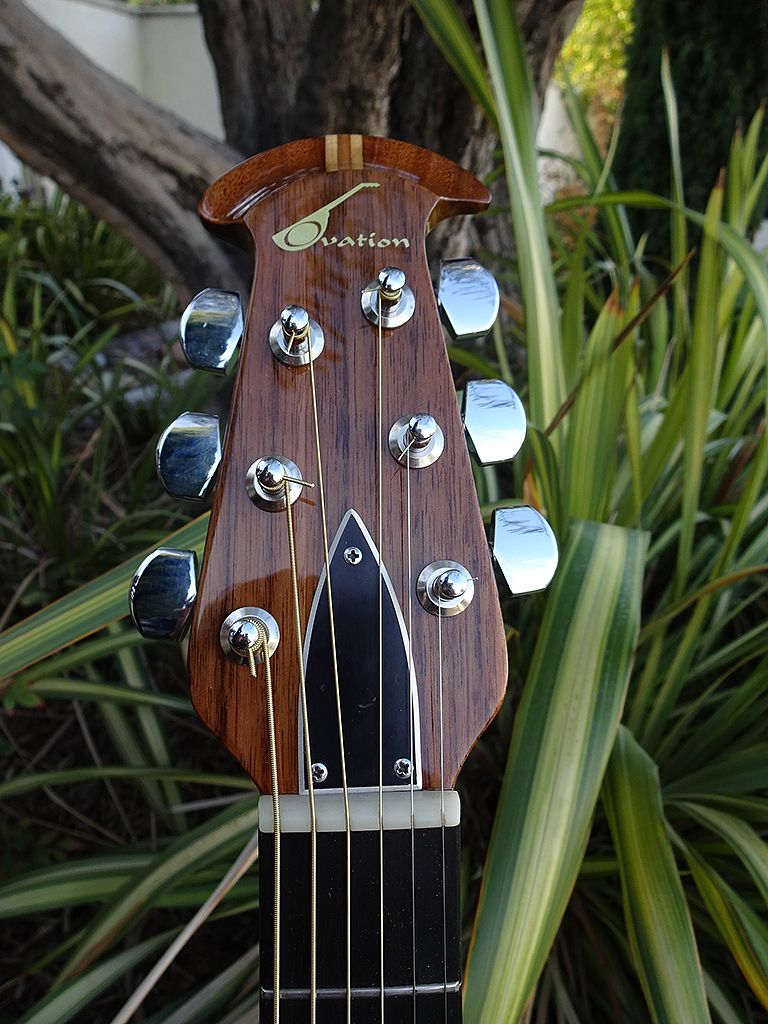
Location: Pueblo West, CO | All done. As usual, it sounds every bit as good as it looks. 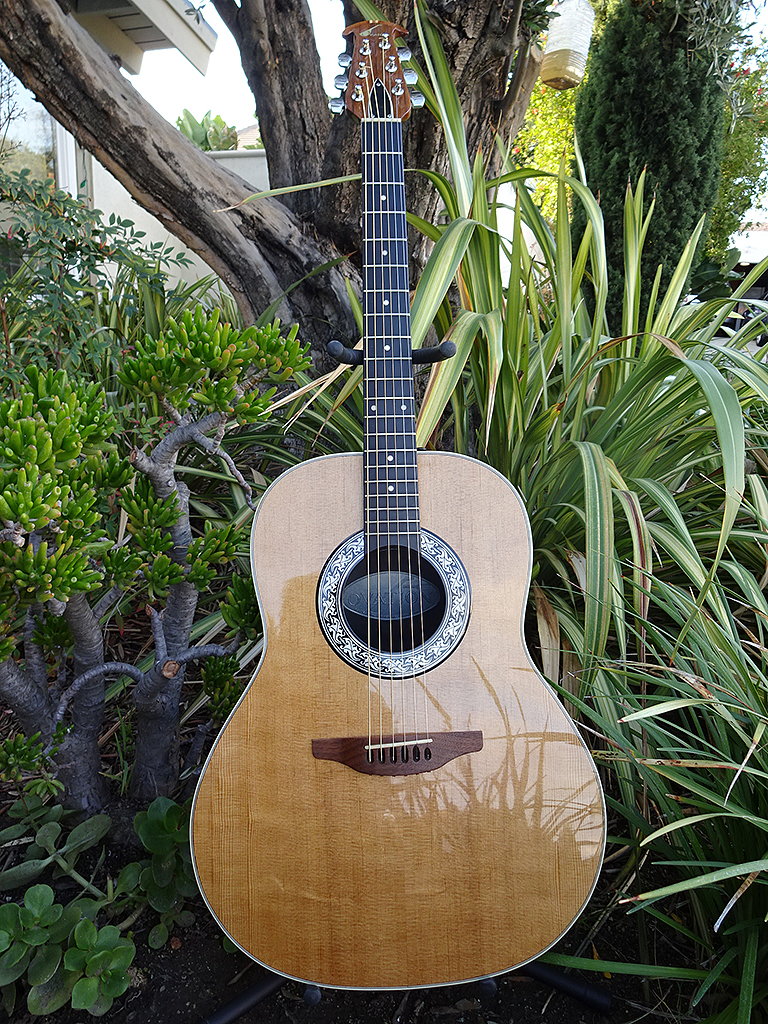
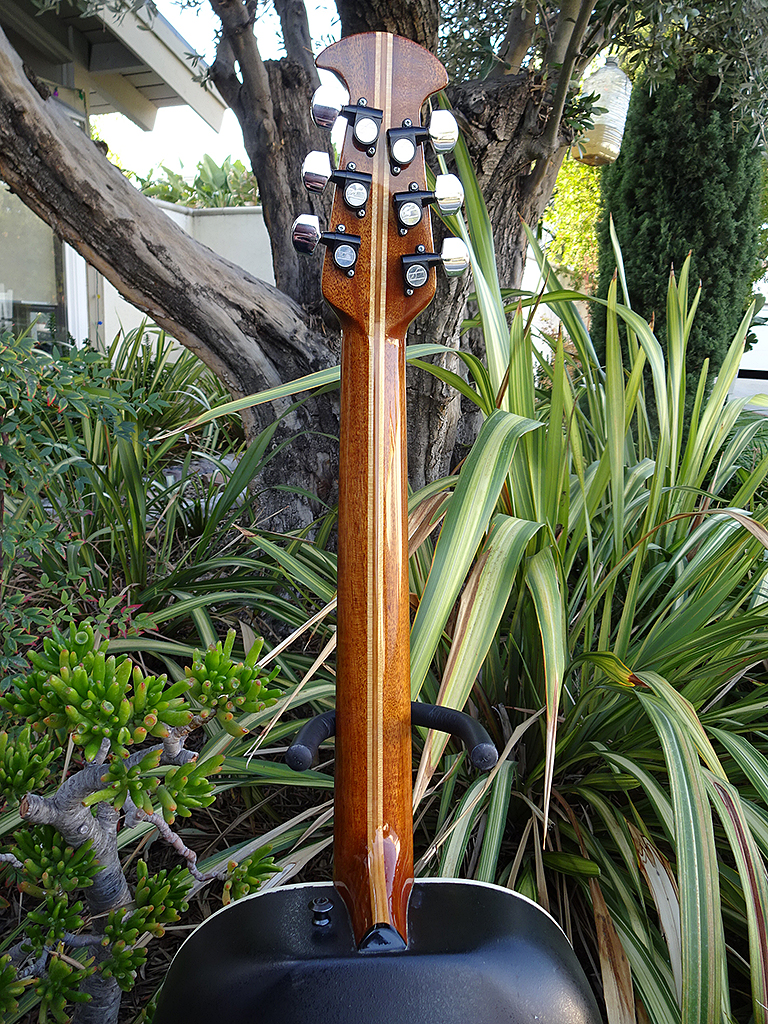
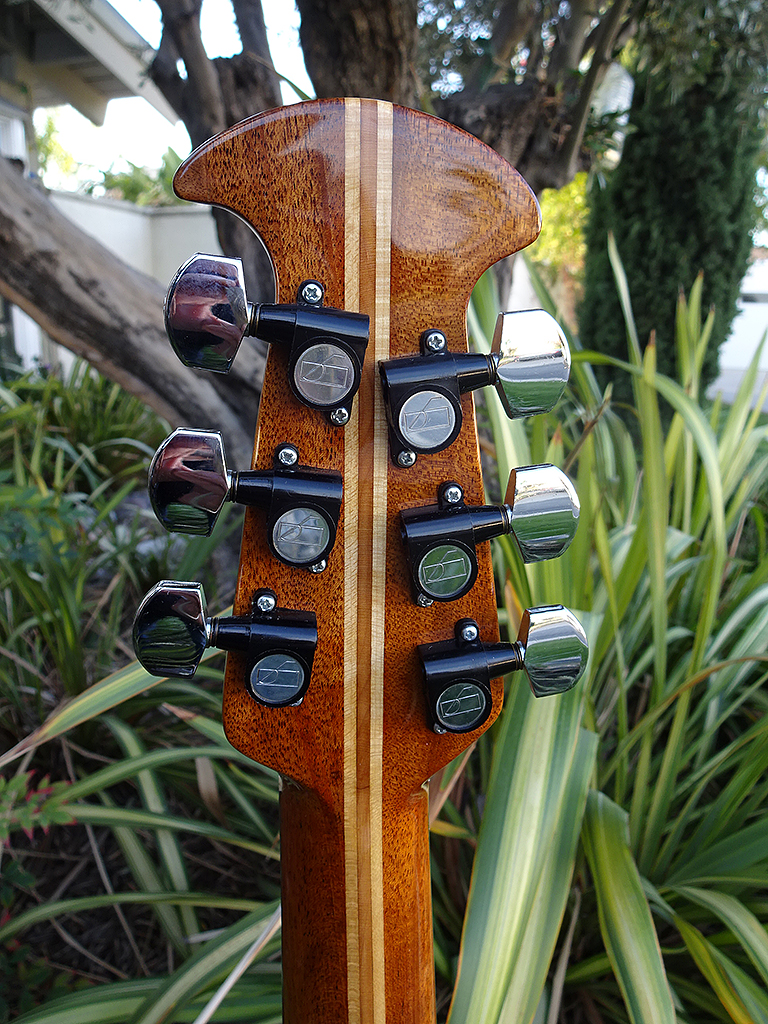
|
|
| |
|

Joined:
June 2012
Posts: 2340
Location: Pueblo West, CO | And, a shot of the two stable-mates together. Oh, Pa-ul... 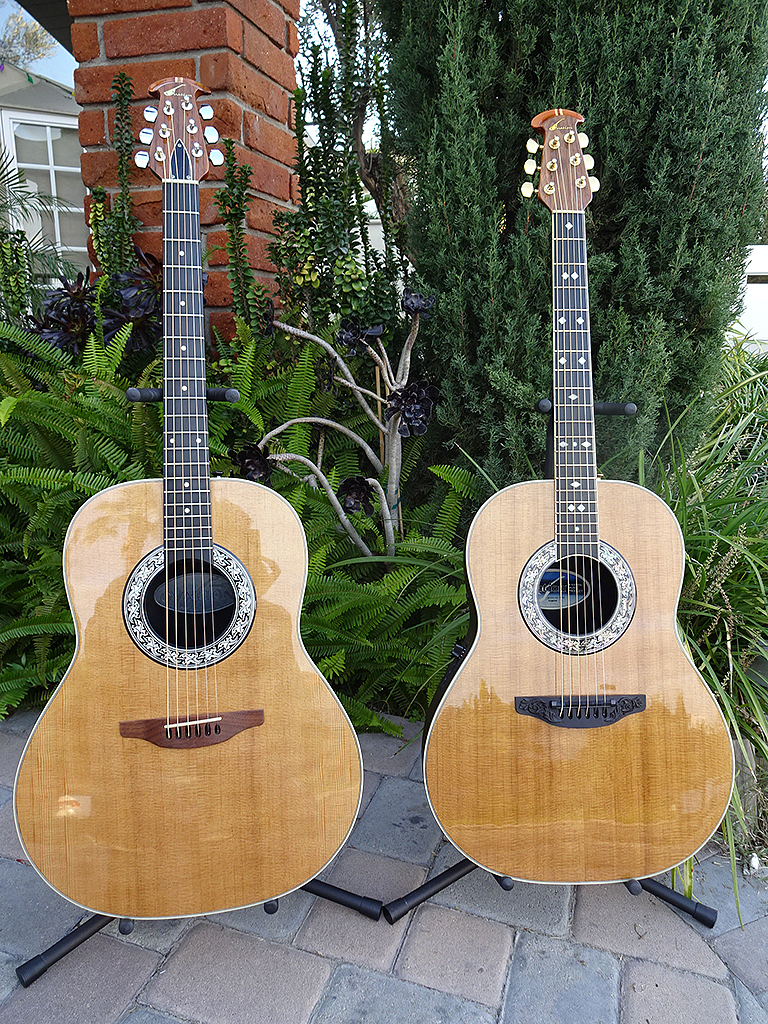
|
|
| |
|

Joined:
September 2012
Posts: 815
Location: Thredbo, NSW, Australia | Absolutely superb! Well done Dan. |
|
| |
|

Joined:
June 2012
Posts: 2340
Location: Pueblo West, CO | BanjoJ - 2016-12-01 4:48 PM
Absolutely superb! Well done Dan.
Thanks, Paul. |
|
| |
|

Joined:
June 2012
Posts: 2340
Location: Pueblo West, CO | BanjoJ - 2016-12-01 4:48 PM
Absolutely superb! Well done Dan.
Thanks, Paul. |
|
| |
|

Joined:
October 2012
Posts: 1093
Location: Yokohama, Japan | Oh Dan...just stunning...the head stock repair is completely unnoticeable. The finish is superb. Can't wait to hear the sound bytes! Thanks for sharing and documenting your journey so immaculately! WOW!
Edited by arumako 2016-12-02 7:44 AM
|
|
| |
|

Joined:
June 2012
Posts: 2340
Location: Pueblo West, CO | Thanks, Ken. I'll be recording clips in a couple of days. |
|
| |
|
Joined:
March 2002
Posts: 15679
Location: SoCal | I was over at Dan's late this afternoon to pick up Patch's redwood parlor nylon string (mouthful) and brought along my 1117, on which he put an addy torrefied top (A braced), a year ago. With nickel strings on it, it's a canon. Dan pulled out this Balladeer and let me play it. Dan likes extra light strings (which give me a lot of room to tease him), but I suspect that with mediums on it, it would be a canon tone meister! I might have to talk him into letting me borrow it to try that out this summer for the canyon.
Somehow, the older I get, the less fancy guitars are catching my eye...... |
|
| |
|

Joined:
June 2012
Posts: 2340
Location: Pueblo West, CO | Any time you want to borrow the 1111, you're more than welcome to do so. |
|
| |
|
Joined:
March 2002
Posts: 15679
Location: SoCal | Even if I put mediums on it?
|
|
| |
|

Joined:
June 2012
Posts: 2340
Location: Pueblo West, CO | No. |
|
| |
|
Joined:
May 2008
Posts: 1564
Location: Indiana | I'm an Xlight player, too, Dan. I think PM's mitts are bigger than ours.
Course, we know what that means... |
|
| |
|
Joined:
March 2002
Posts: 15679
Location: SoCal | Jonmark Stone - 2018-04-11 8:42 AM
I'm an Xlight player, too, Dan. I think PM's mitts are bigger than ours.
Course, we know what that means...
Bigger gloves..... |
|
| |
|

Joined:
February 2016
Posts: 1881
Location: When?? | @Jonmark Stone - >>I think PM's mitts are bigger than ours. Course, we know what that means...<<
I've heard that using heavier strings can also cause bulging between the lower bouts.
Edited by Love O Fair 2018-04-11 7:38 PM
|
|
| |
 1974 1111 Balladeer Rebuild...
 1974 1111 Balladeer Rebuild...