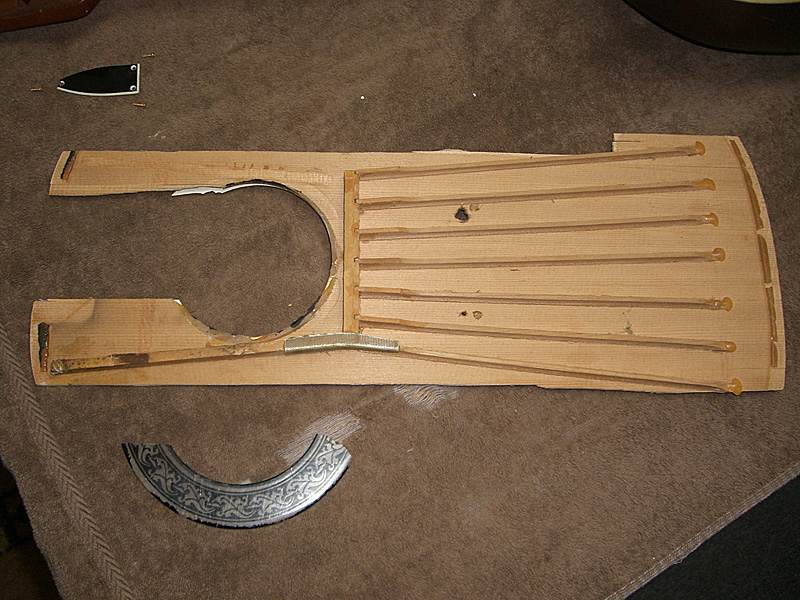
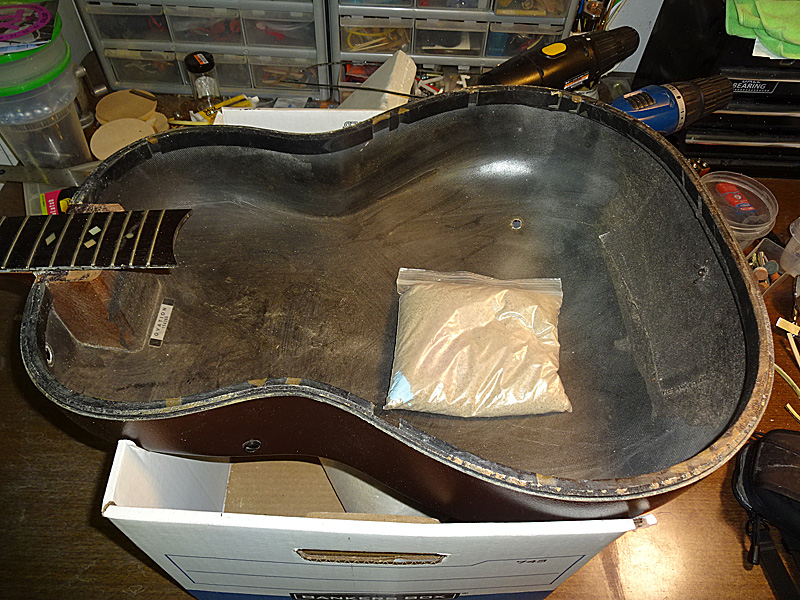
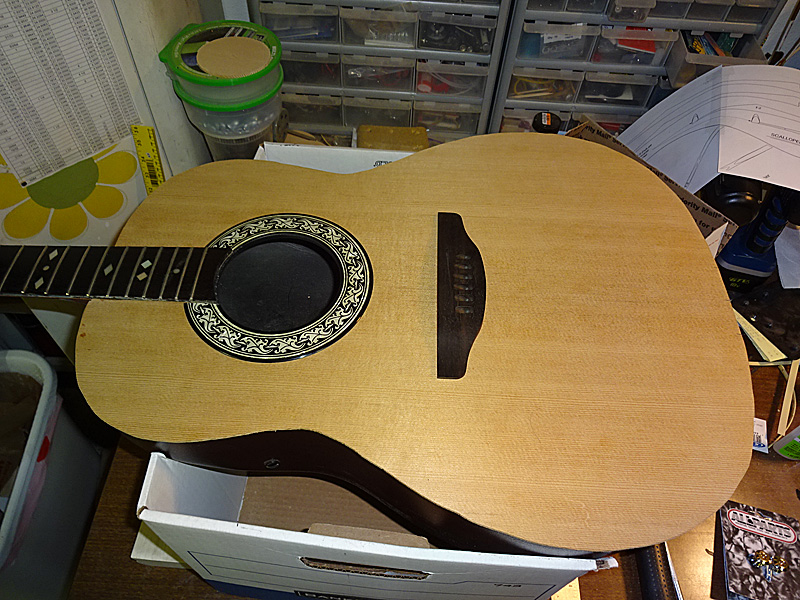
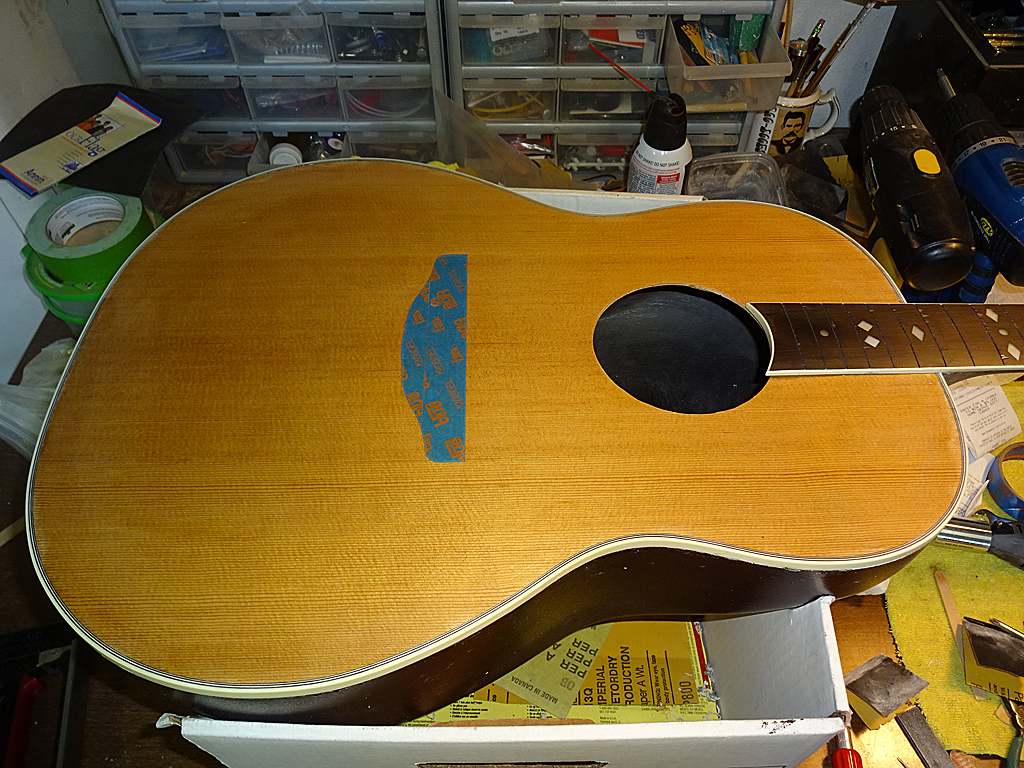
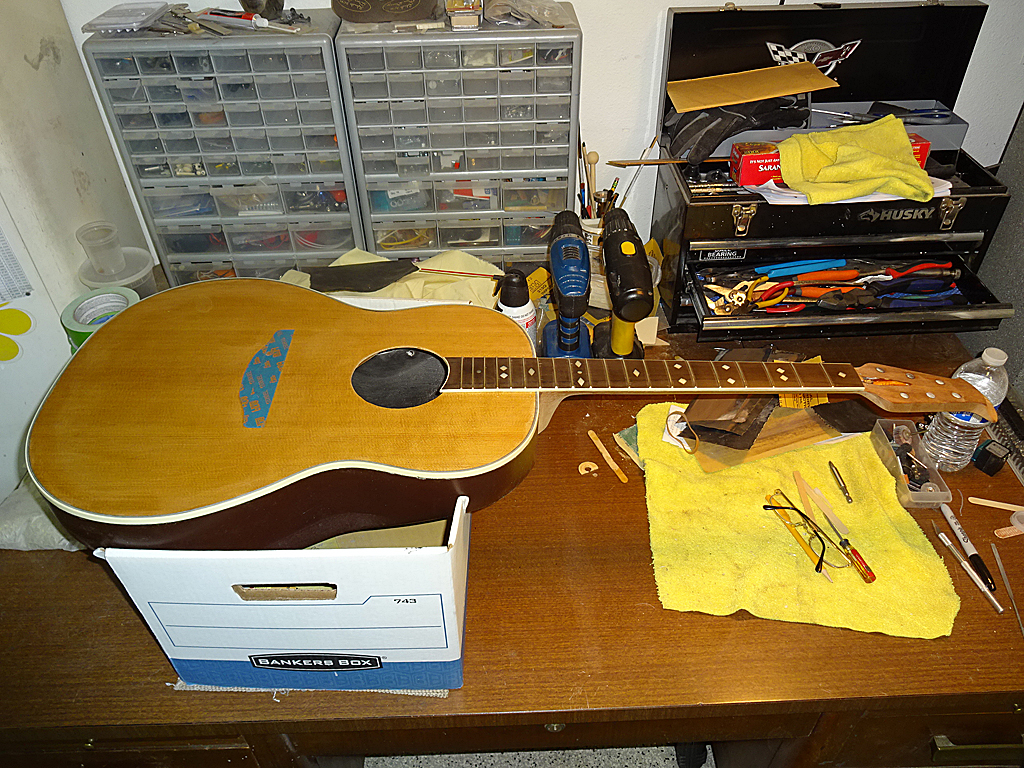
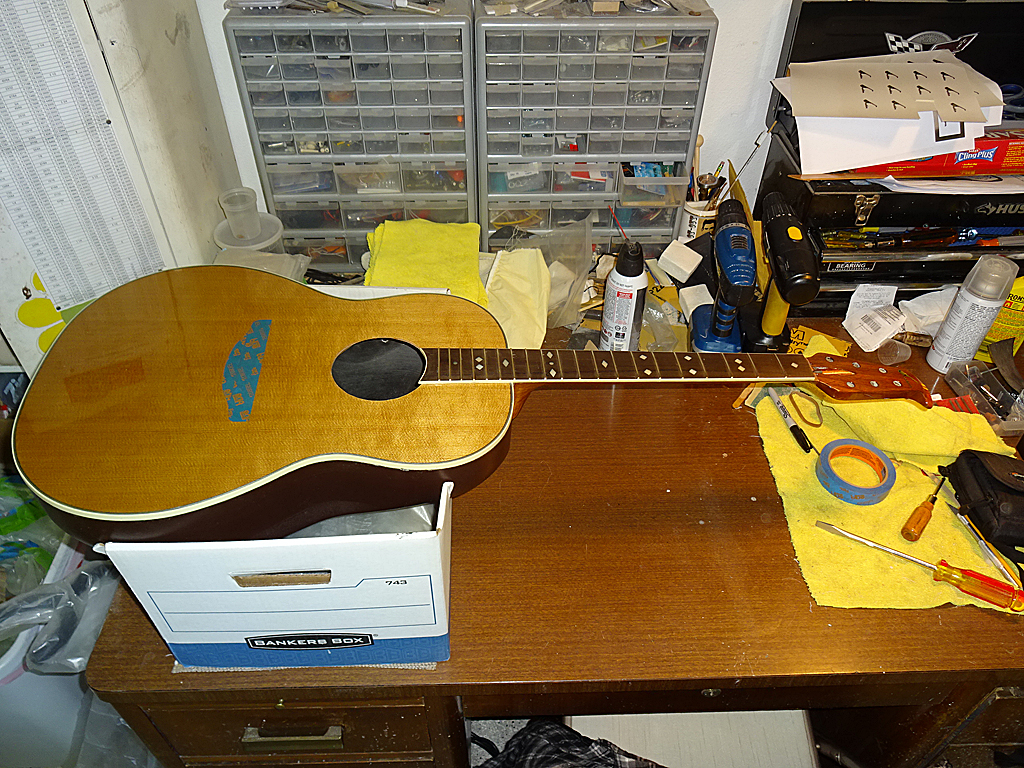
At the time I didn't really have any plans for it other than to rebuild it and save another Ovation from the scrap heap. This baby has definitely seen some action.
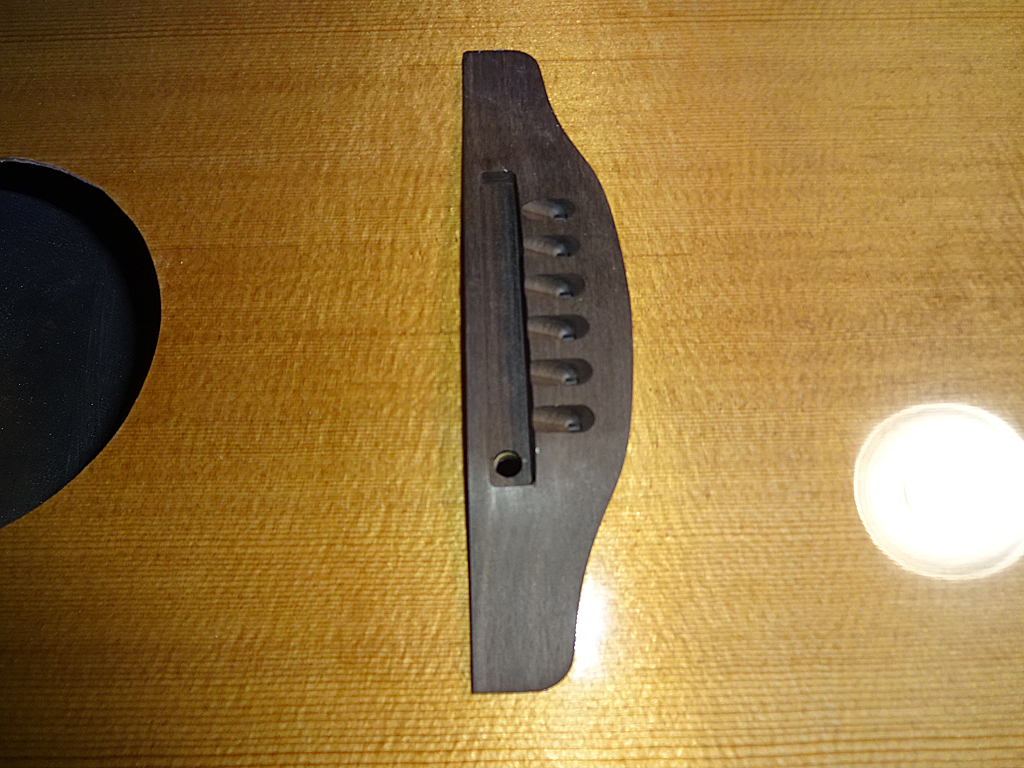
The top was completely off the guitar and broken into several pieces. Luckily, it came with an intact bridge, still attached to the sound board. I'm not sure if I'll be using this one or not. I've got an ebony bridge that came with another BFLG gutiar I bought and I really like how the bridge matches the fret board.
The new top will be made from torrefied Sitka spruce for both the sound board and the brace stock.
The binding and purfling are intact, but these will be removed because it's easier to replace these than to try to fit the sound board into the place inside them. The only reason why I fit the sound board inside on my 1619 was because I wanted to save the original abalone purfling. BWB, etc., purfling --meh.
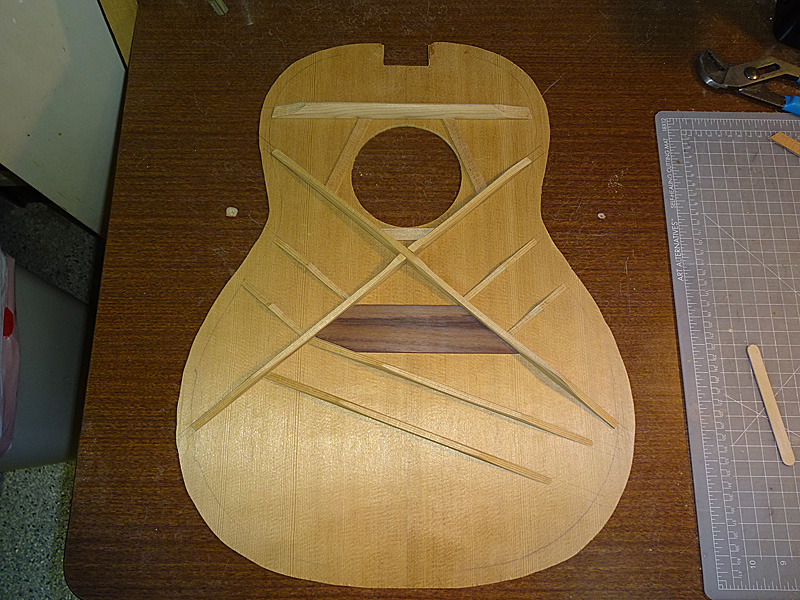
Even though the original had A-braces, I'm going to use the custom forward X-bracing I used on my 1619. I really like how it sounds and I want to compare it to a torrefied guitar of the same era that uses the same braces. I'm going to try to make this guitar as identically to that one as I can.
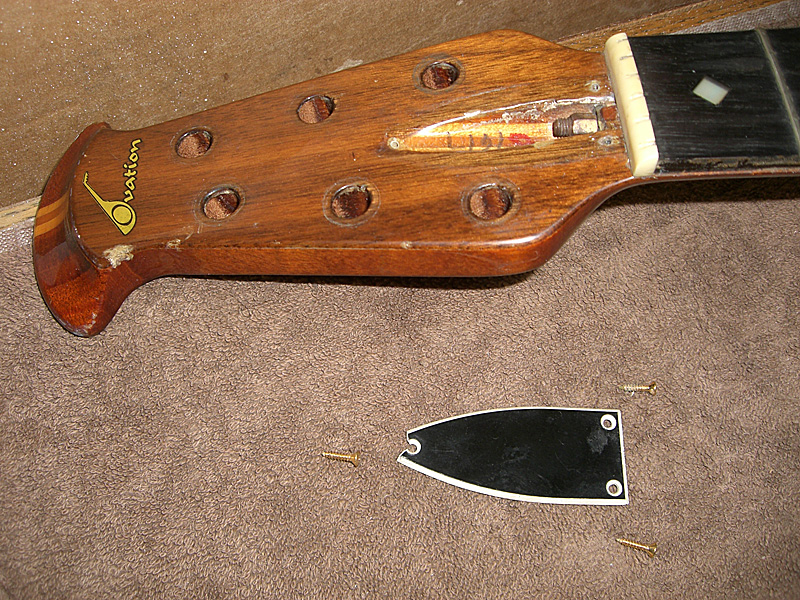
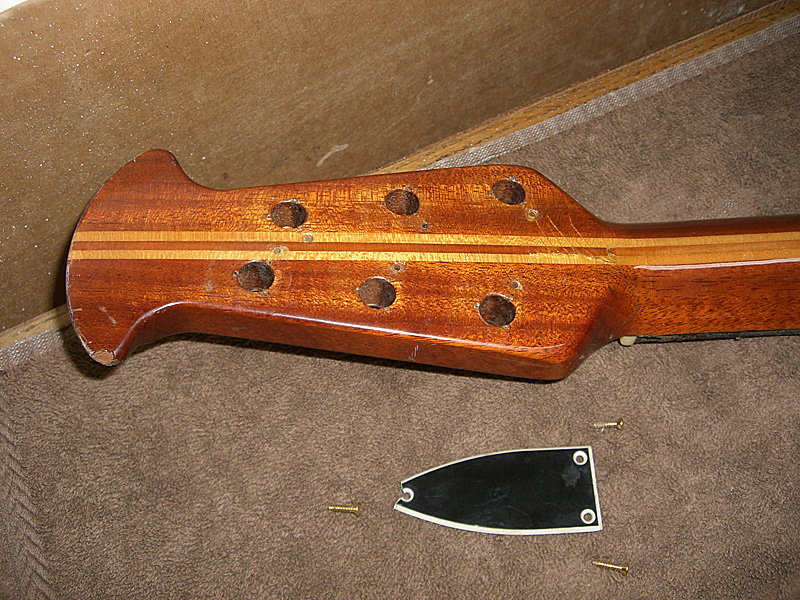
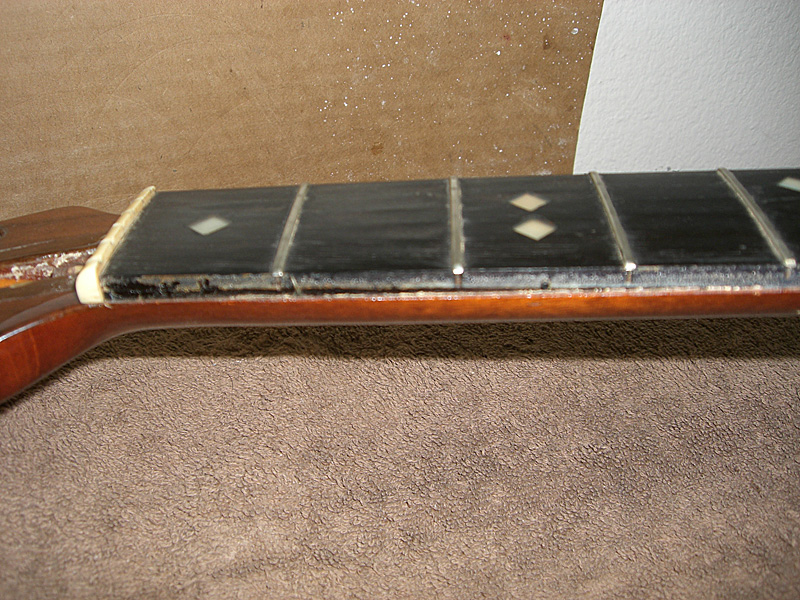
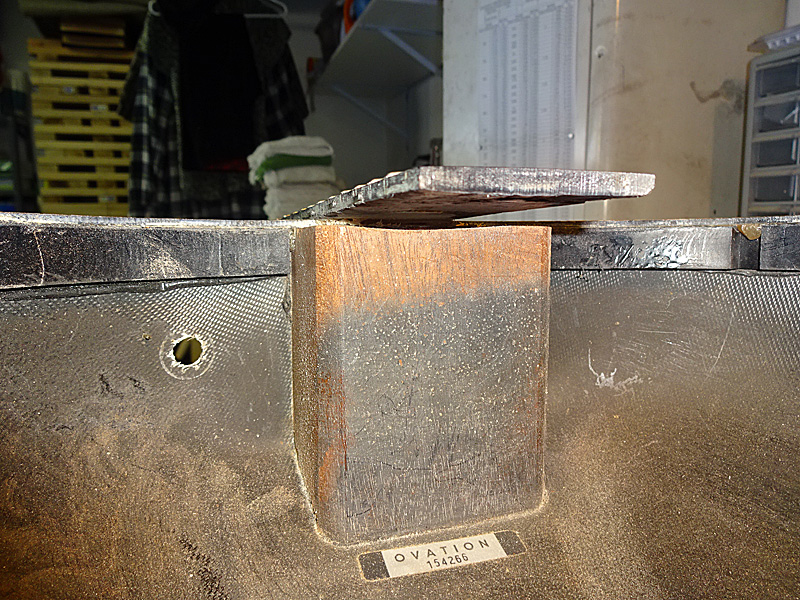
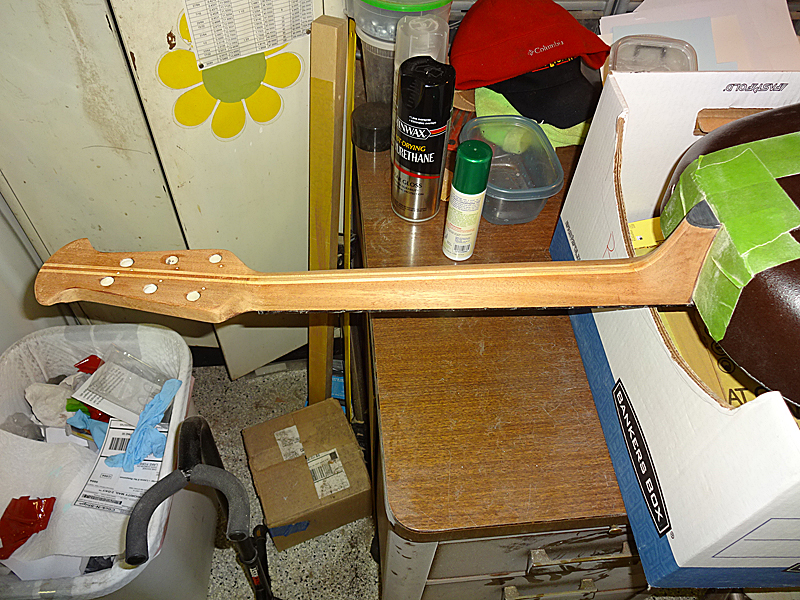
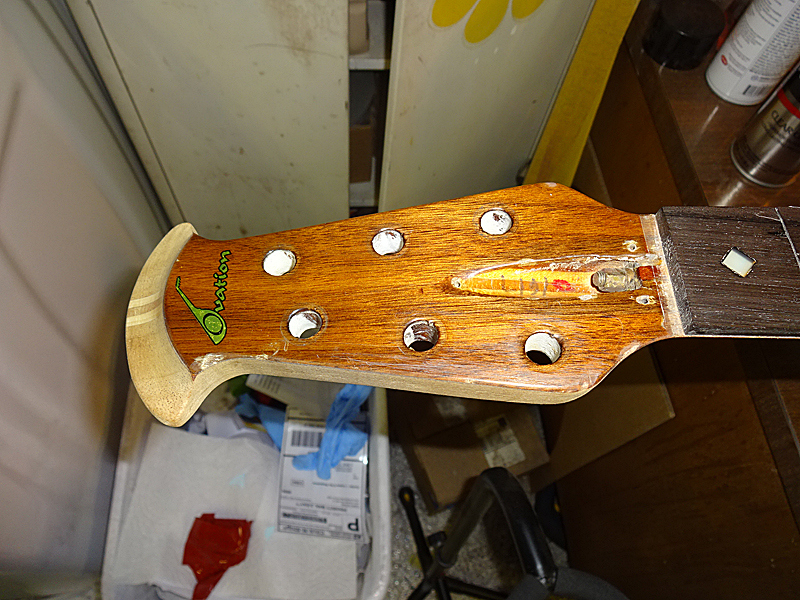
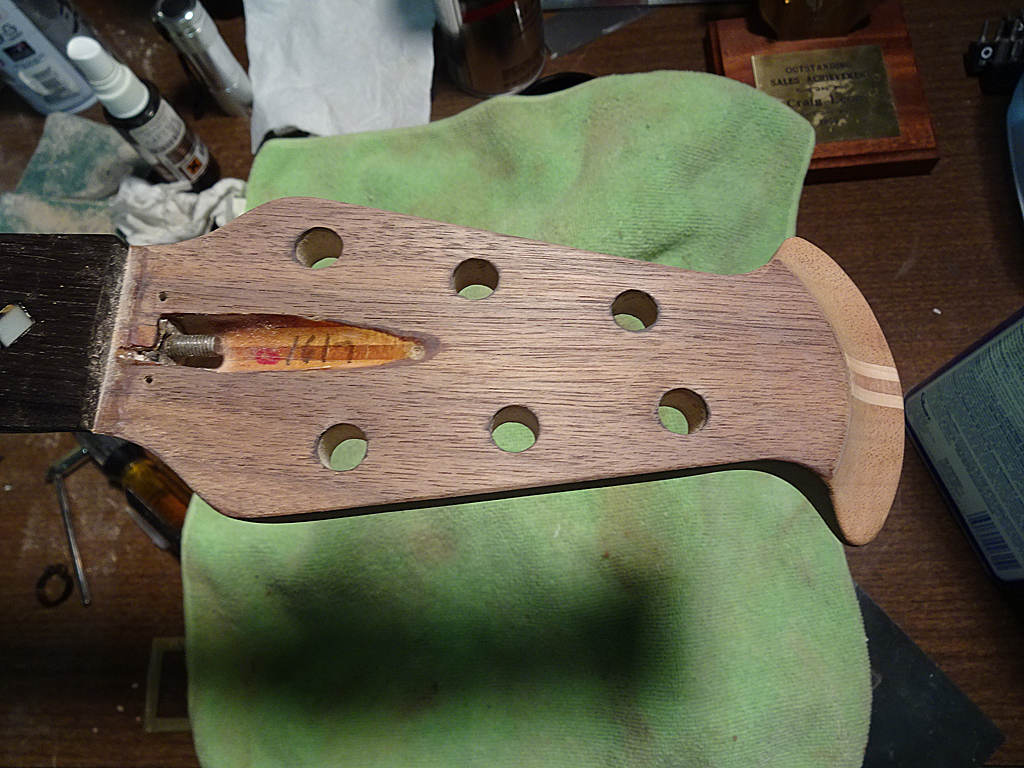
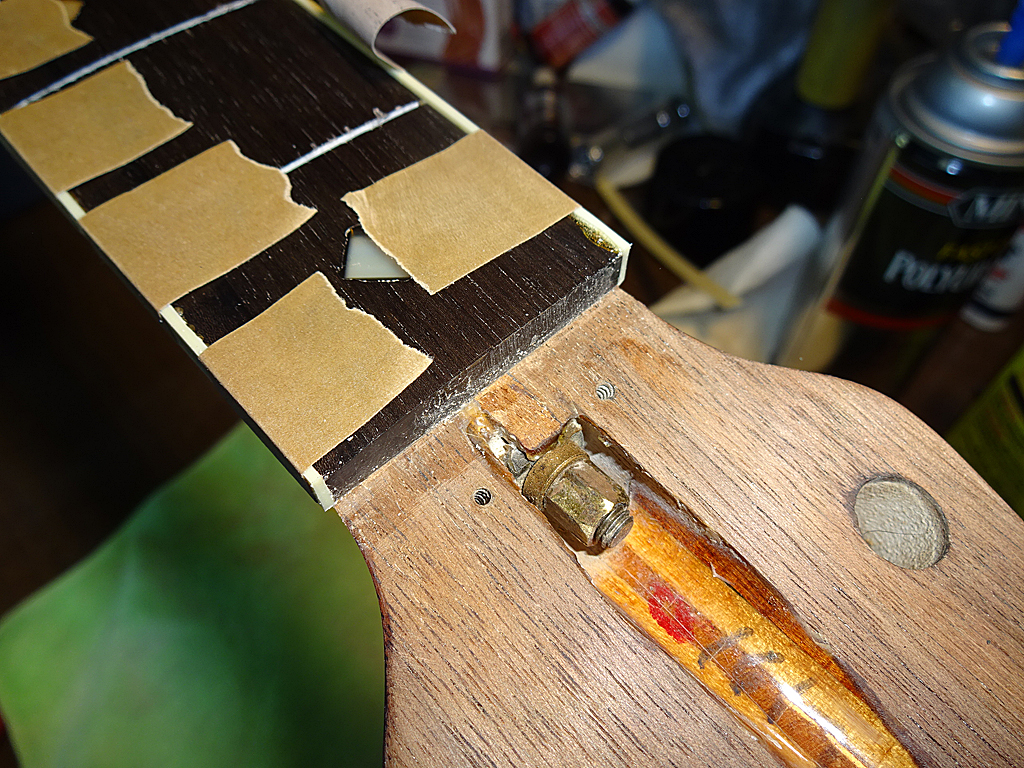
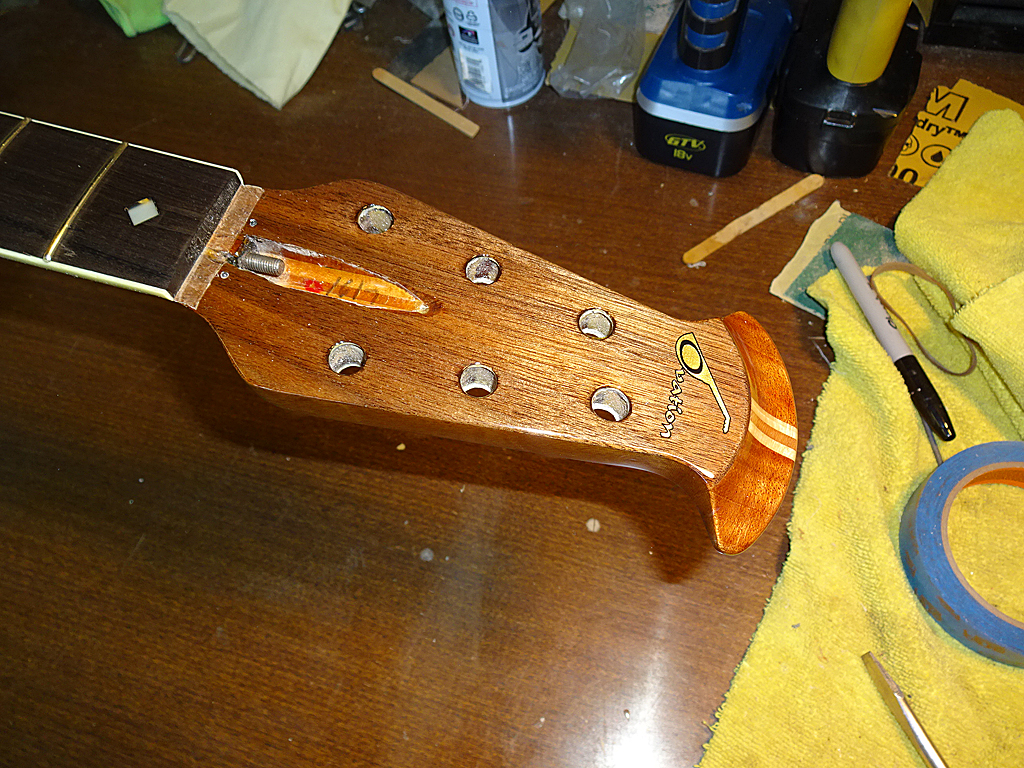
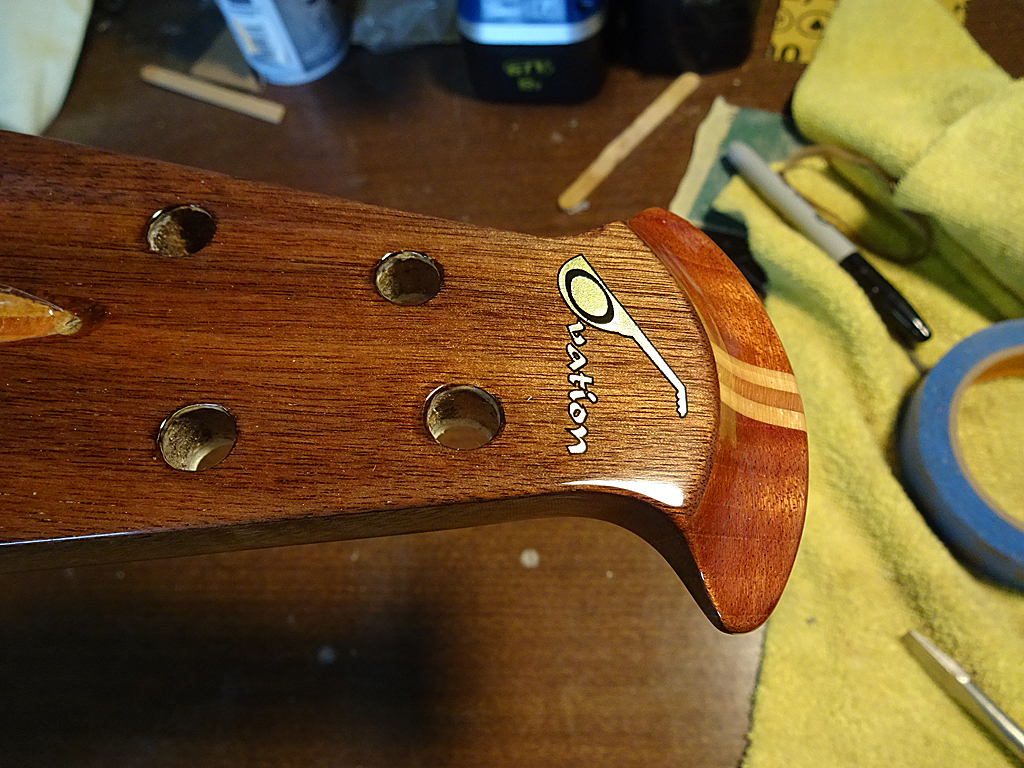
The head stock and neck are in pretty rough shape. These will probably need to be sanded down to bare wood and refinished. The front of the head stock is in good enough shape that I think I can preserve the original decal.
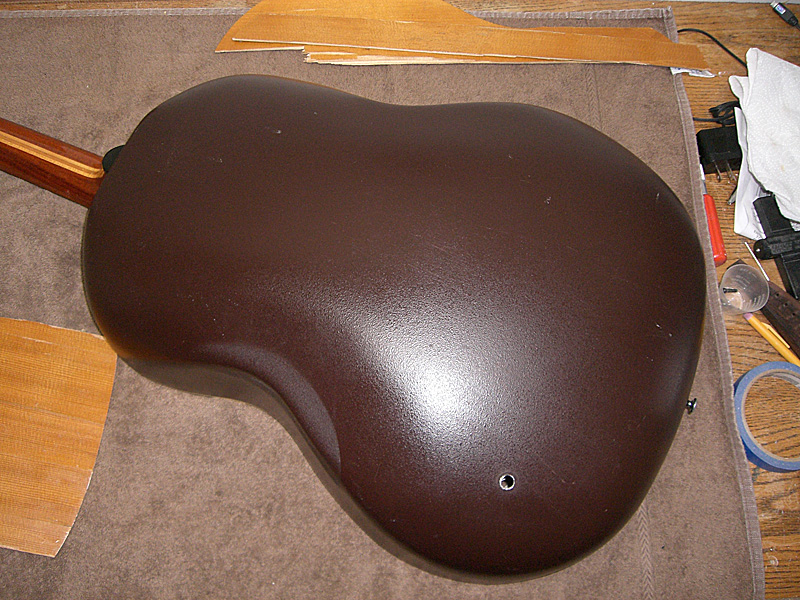
The back of the bowl is in pretty good shape, so there's nothing to do here.
The binding on the neck is missing, so this will need to be replaced. There's also some pretty serious finger grooves in the ebony. The frets will need to be removed to fix the fret board and put new binding in place. I will be using EVO gold frets.
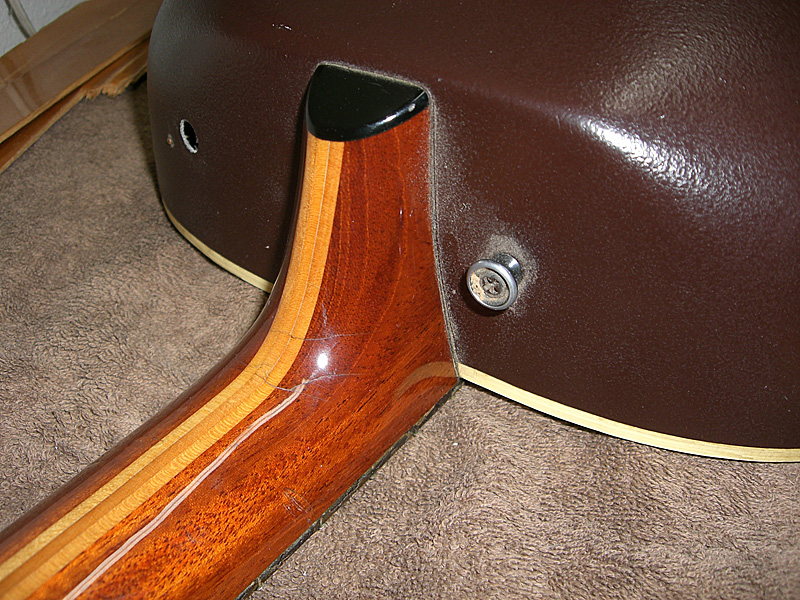
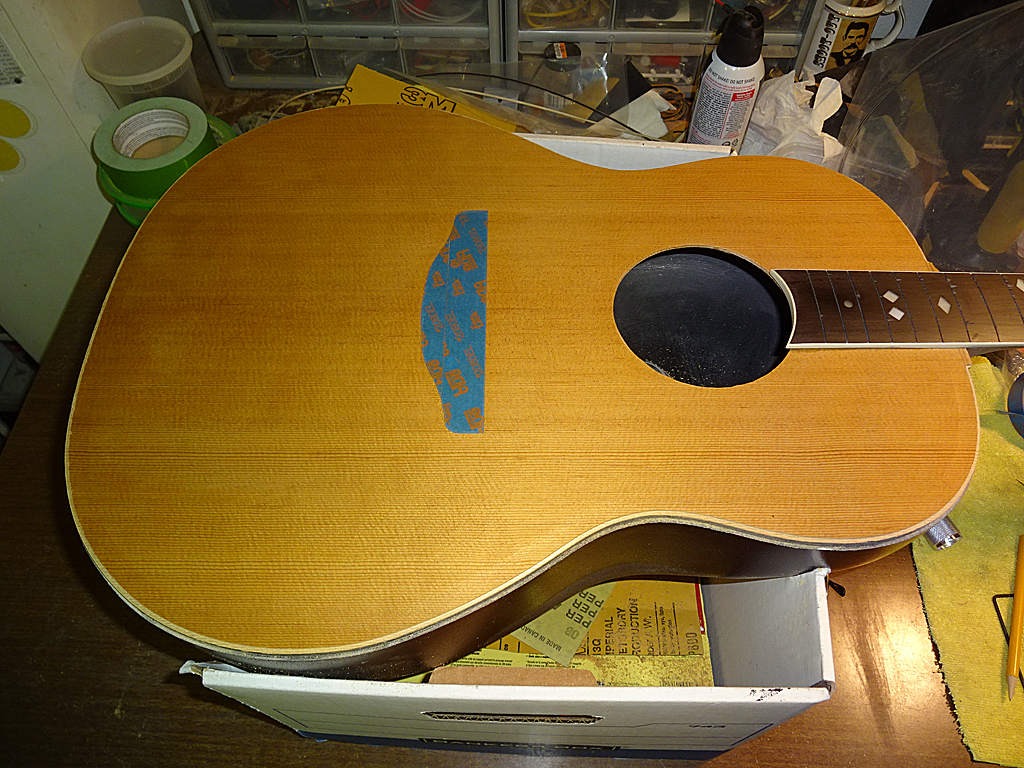
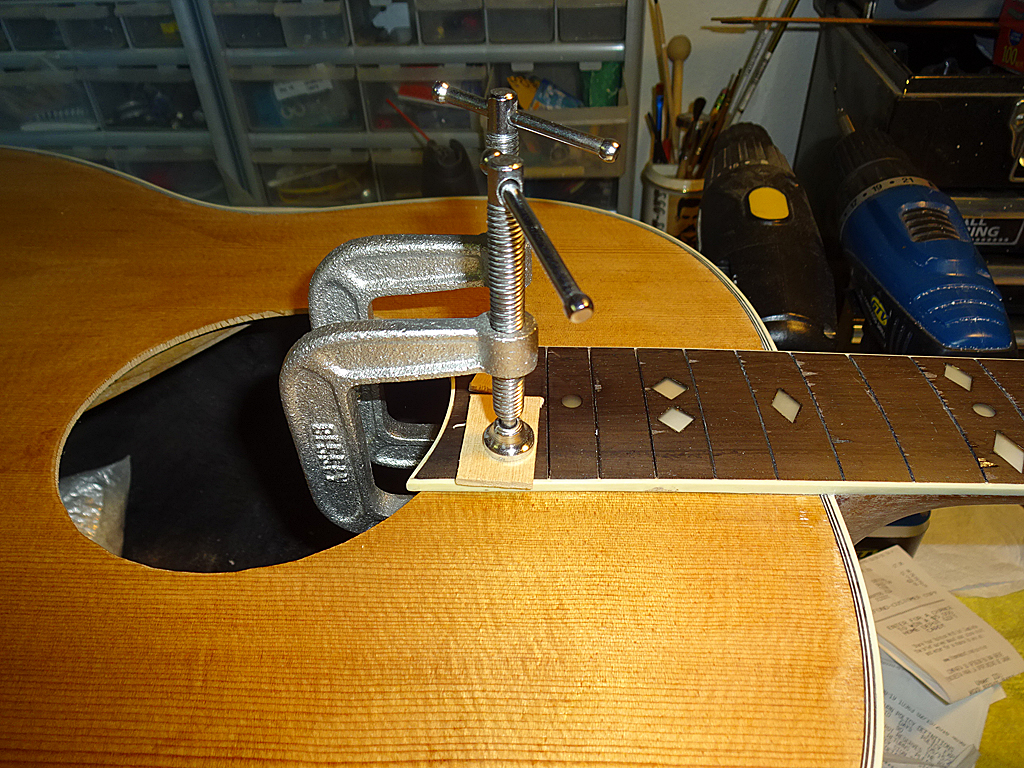
I puy my 1619 brace pattern mock-up into place so I could check the neck angle --looks good. No need for a neck reset here.
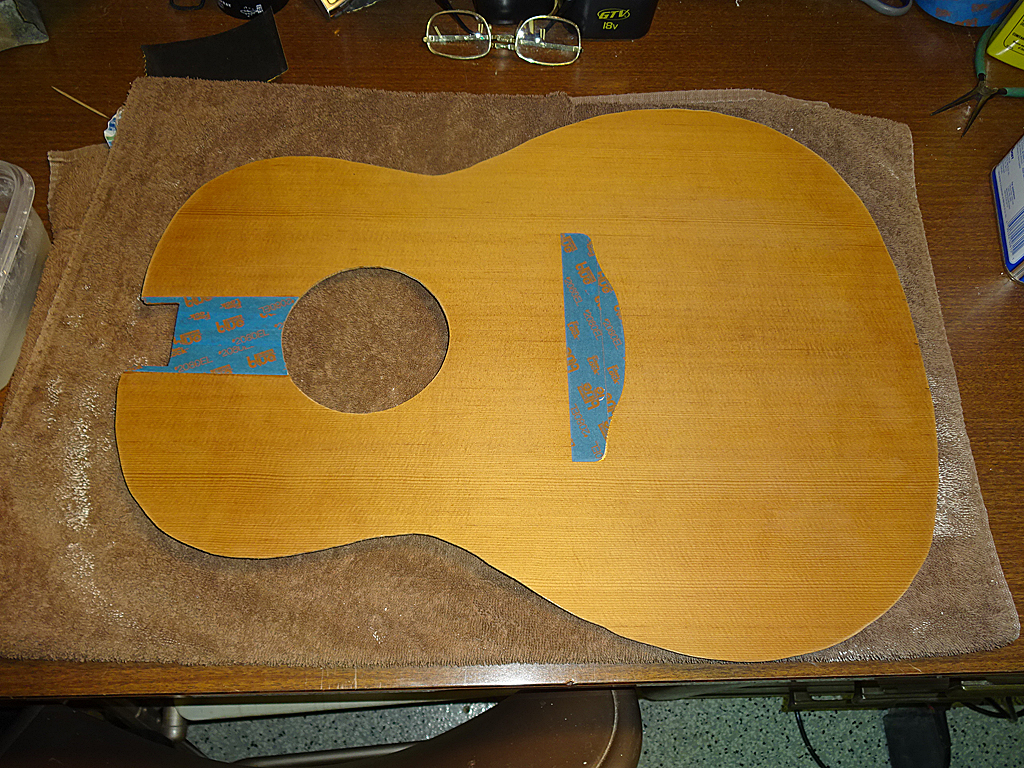
First step is to remove all traces of the top from under the fret board.
Next, remove the binding and purfling and clean up the excess glue and wood.
Posted 2015-11-29 9:25 PM (#518944 - in reply to #518943) Subject: Re: 1978 1617 Legend Rebuild...
Joined: February 2014 Posts: 699
Location: moline,illinois
Seeing you rebuild guitars is really cool and allows views of the inside that would not be possible in an intact guitar,so out of curiosity how is the neck attached I don't see any bolts so were these glued in?Good luck and we're all looking forward to your progress updates!
Posted 2015-11-30 8:50 AM (#518957 - in reply to #518944) Subject: Re: 1978 1617 Legend Rebuild...
Joined: June 2012 Posts: 2303
Location: Lake Forest, CA
Hi Kevin,
Yes. The necks were glued into the block using epoxy. I did think about using Ken's (arumako) technique for removing the neck and converting it to a bolt-on neck. Since the neck angle is acceptable, I decided to add the top with the neck in place.
Posted 2015-12-07 9:12 AM (#519172 - in reply to #518943) Subject: RE: 1978 1617 Legend Rebuild...
Joined: June 2012 Posts: 2303
Location: Lake Forest, CA
While I'm waiting for the tools to come in that I need to remove the frets and sand the fingerboard I decided to start working on the new top wood.
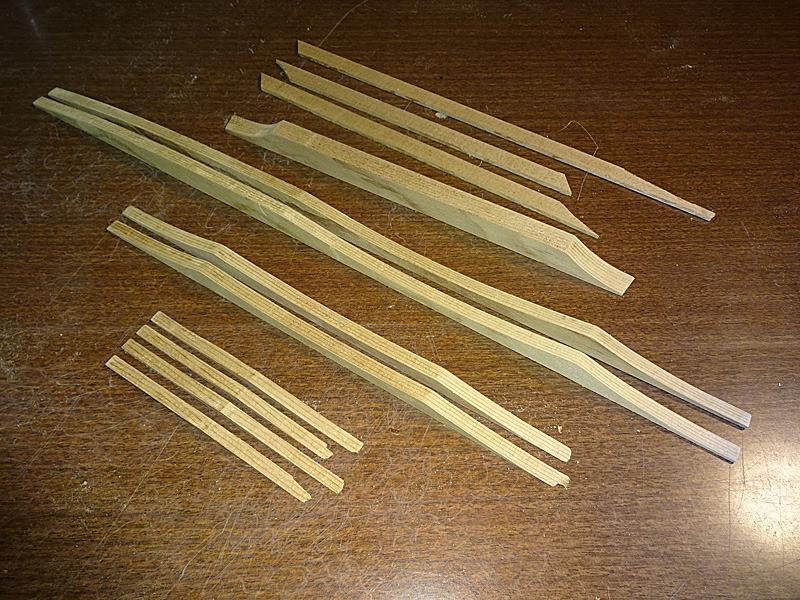
This top will be made from torrefied Sitka spruce with torrefied Sitka spruce braces. The braces will be glued to the top using Old Brown Glue. (hide glue)
Here are the braces, ripped to size and scallops cut and sanded. I am going to hold off tapering them until I get the top cut out and I know how much needs to be removed from the length.
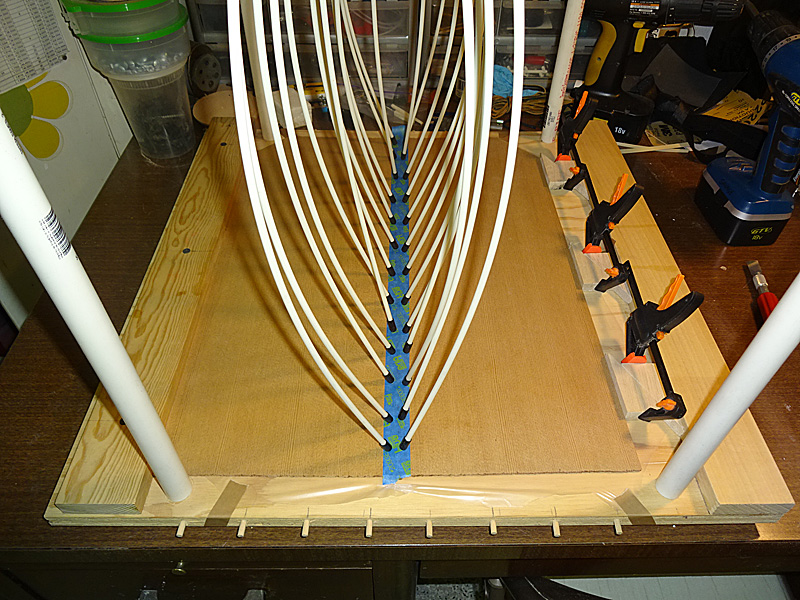
The top has been jointed and is being glued together using OBG. I'll pull it out of the go bar deck tonight.
Posted 2015-12-16 12:09 AM (#519397 - in reply to #518943) Subject: RE: 1978 1617 Legend Rebuild...
Joined: June 2012 Posts: 2303
Location: Lake Forest, CA
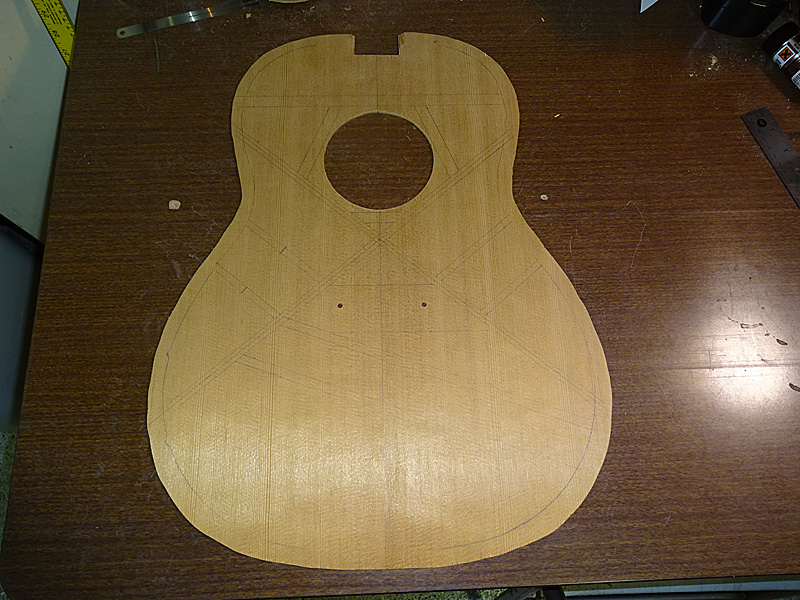
Top wood is jointed, rough cut, thickness sanded and the sound hole is cut out and fitted to the bowl.
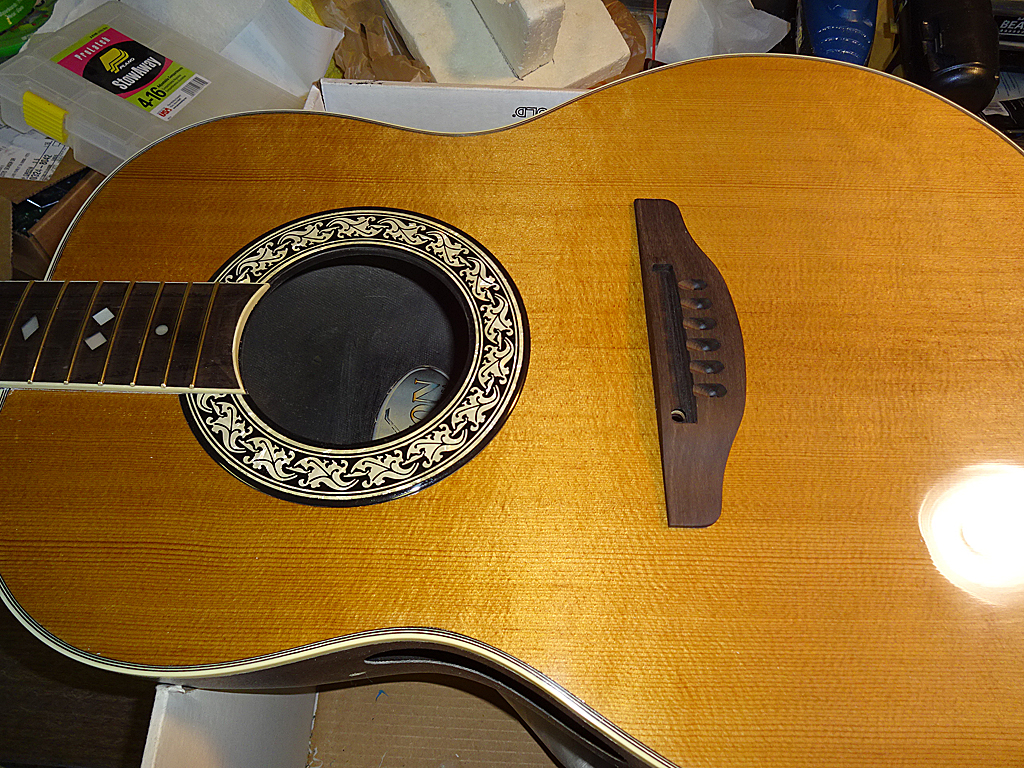
I've decided to revert this guitar from a 1617 to a 1117, meaning it'll be an acoustic-only instead of an acoustic-electric. I've got an ebony bridge that came with another project guitar I acquired that I'll be using on this guitar instead of the bridge that was mounted to the soundboard. I like how the bridge matches the fretboard. I'll be using a bone bridge saddle and nut on this guitar.
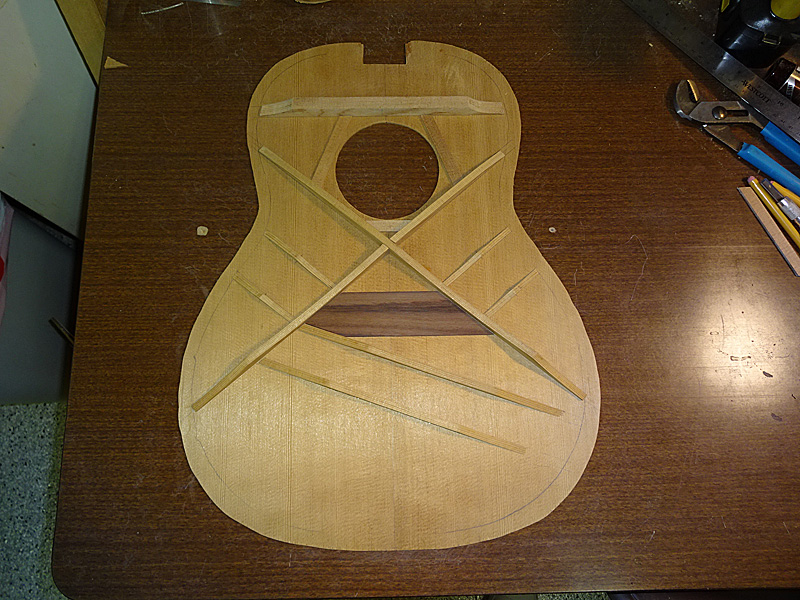
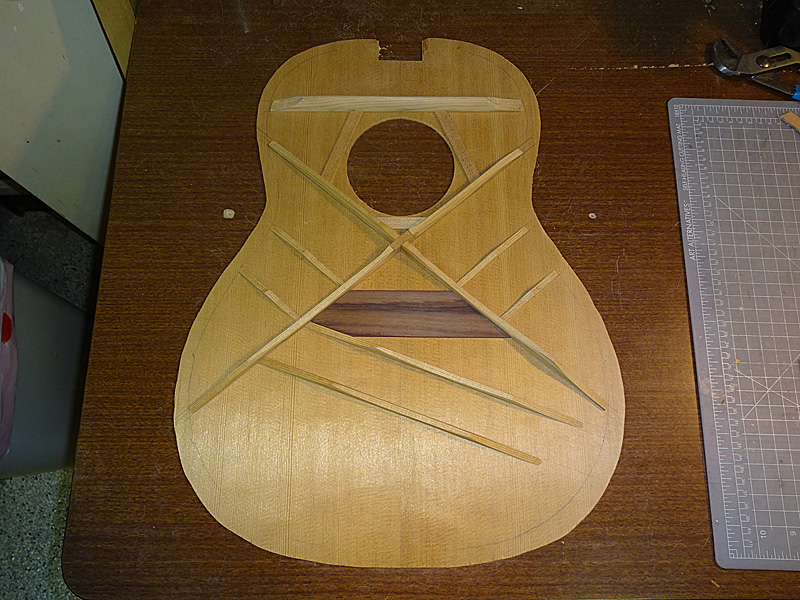
I'm going to use the same custom forward X-brace pattern on this guitar that I used on my 1619. Brace locations are traced onto the back of the sound board.
Braces have been fitted into place. Next step is to taper the braces. Once they're tapered, I'll be ready to glue the braces to the sound board.
Posted 2015-12-16 4:04 AM (#519405 - in reply to #519397) Subject: Re: 1978 1617 Legend Rebuild...
Joined: May 2011 Posts: 751
Location: Muenster/Germany
And again your work is really stunning. But did you ever consider to re-build an A-bracing? For me only these guitars have the real Ovation sound. The x-braced guitars sound like Martin (never mind Martin guitars, I have a lovely D 45, but I love my old custom legends as well-because of their mellow sound).
Posted 2015-12-16 9:57 AM (#519415 - in reply to #519397) Subject: RE: 1978 1617 Legend Rebuild...
Joined: October 2012 Posts: 1018
Location: Yokohama, Japan
DanSavage - 2015-12-15 2:09 PM
I've decided to revert this guitar from a 1617 to a 1117, meaning it'll be an acoustic-only instead of an acoustic-electric.
Another great project DanSavage! Looking forward to following your progress and learning a bunch more from you. Thanks again for sharing! I was wondering why you decided to turn this one into an acoustic only 1117-4?
Posted 2015-12-16 10:10 AM (#519416 - in reply to #519405) Subject: Re: 1978 1617 Legend Rebuild...
Joined: June 2012 Posts: 2303
Location: Lake Forest, CA
DetlefMichel - 2015-12-16 2:04 AM
And again your work is really stunning. But did you ever consider to re-build an A-bracing? For me only these guitars have the real Ovation sound. The x-braced guitars sound like Martin (never mind Martin guitars, I have a lovely D 45, but I love my old custom legends as well-because of their mellow sound).
Thanks! I'm one of the few Ovation owners who's not really a fan of the A-brace pattern. They have a balanced sound which does sound nice. But, I prefer the brighter sound of X-braced guitars. The forward X-brace I'm using sounds similar to an Ovation LX brace guitar.
Posted 2015-12-16 10:12 AM (#519417 - in reply to #519406) Subject: RE: 1978 1617 Legend Rebuild...
Joined: June 2012 Posts: 2303
Location: Lake Forest, CA
BanjoJ - 2015-12-16 2:12 AM
Lovely work Dan, and thanks again for going to so much trouble documenting it for us.
Thanks, Paul. I probably won't go into all the details of the build because much of it will be similar to previous threads. But, I will highlight areas which I haven't done before, such as replacing the missing binding around the neck.
Posted 2015-12-16 10:23 AM (#519419 - in reply to #519415) Subject: RE: 1978 1617 Legend Rebuild...
Joined: June 2012 Posts: 2303
Location: Lake Forest, CA
arumako - 2015-12-16 7:57 AM
Another great project DanSavage! Looking forward to following your progress and learning a bunch more from you. Thanks again for sharing! I was wondering why you decided to turn this one into an acoustic only 1117-4?
Thanks, Ken.
My original plan was to make it into an A/E with an OP-Pro like I did with the 1619. I was reading a recent post by Old Man Arthur about how when you plug an acoustic into the amp, you're not really hearing the acoustic. What you're hearing is the pickup.
Since the top on this guitar is torrefied, none of the great sound it makes would come through the pickup. If you watch all of the online videos of torrefied guitars, none are amplified. They're all being played into a mic of some sort.
Plus, I've already got a bunch of A/E Ovation guitars I could plug into an amp, so I really don't need another one, especially since the torrefied sound can only really be heard naturally. If I do decide to give this guitar the ability to plug in, I could always install a thin-line bridge pickup system.
I've been thinking about scratch-building a wood-backed Ovation-clone and I'd rather save the money for that project instead of amplifying this guitar.
Posted 2015-12-16 5:49 PM (#519451 - in reply to #519419) Subject: RE: 1978 1617 Legend Rebuild...
Joined: October 2012 Posts: 1018
Location: Yokohama, Japan
DanSavage - 2015-12-16 12:23 AM
I've been thinking about scratch-building a wood-backed Ovation-clone and I'd rather save the money for that project instead of amplifying this guitar.
Now, that would be something to behold! I'm sure you've already seen this on FB, but I was just astonished by this...
Ovation has verified the material as "wood" on their FB page in the comments under this photo! No response on "what kind of wood" yet though. Just some really cool creative stuff happening at the new O! I'm pretty sure a wood backed O will sound incredibly spectacular...like a woodback O with a torrefied top? Yikes...Pretty soon, you're going to have to start your own brand, Dan!
Posted 2015-12-16 11:10 PM (#519473 - in reply to #519451) Subject: RE: 1978 1617 Legend Rebuild...
Joined: June 2012 Posts: 2303
Location: Lake Forest, CA
arumako - 2015-12-16 3:49 PM
Ovation has verified the material as "wood" on their FB page in the comments under this photo! No response on "what kind of wood" yet though. Just some really cool creative stuff happening at the new O! I'm pretty sure a wood backed O will sound incredibly spectacular...like a woodback O with a torrefied top? Yikes...Pretty soon, you're going to have to start your own brand, Dan!
WRT my own brand, we'll have to see how the first one turns out.
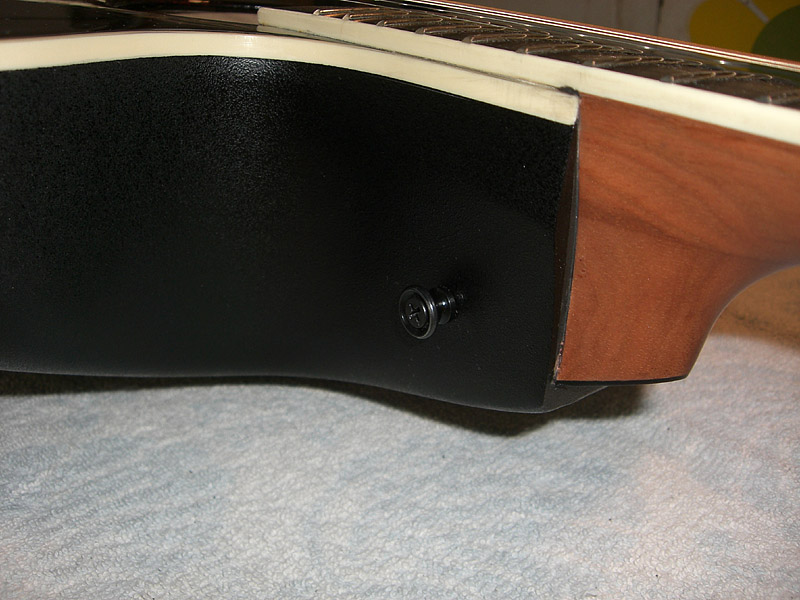
I just noticed something interesting in that photo Ovation posted. They put the strap button inside the cut-away where I suggested. Kewl!
Posted 2015-12-17 3:12 AM (#519481 - in reply to #518943) Subject: Re: 1978 1617 Legend Rebuild...
Joined: October 2012 Posts: 1018
Location: Yokohama, Japan
Whoa! I missed that one. "Kewl" is right. I really love the creative R&D spirit that DW is bringing to Ovation! Looking forward to following your progress again!
Posted 2015-12-19 9:45 AM (#519550 - in reply to #518943) Subject: RE: 1978 1617 Legend Rebuild...
Joined: June 2012 Posts: 2303
Location: Lake Forest, CA
Thanks, Tennessee.
I glued the braces down last night. I'll pull them out tonight and verify the neck angle.
Assuming the neck angle is good, the next steps are to pull the remaining frets and start sanding the neck. First to be sanded will be the fret board to remove the fingernail grooves and then, clean up the fret slots.
After that, it'll be time to sand the finish off the back of the neck and head. Once all the finish is off, I'll put new binding on the sides of the fret board.
Posted 2015-12-21 9:39 AM (#519601 - in reply to #518943) Subject: RE: 1978 1617 Legend Rebuild...
Joined: June 2012 Posts: 2303
Location: Lake Forest, CA
Pulled the sound board up from the go bar deck. Checked the neck angle. Everything looks good.
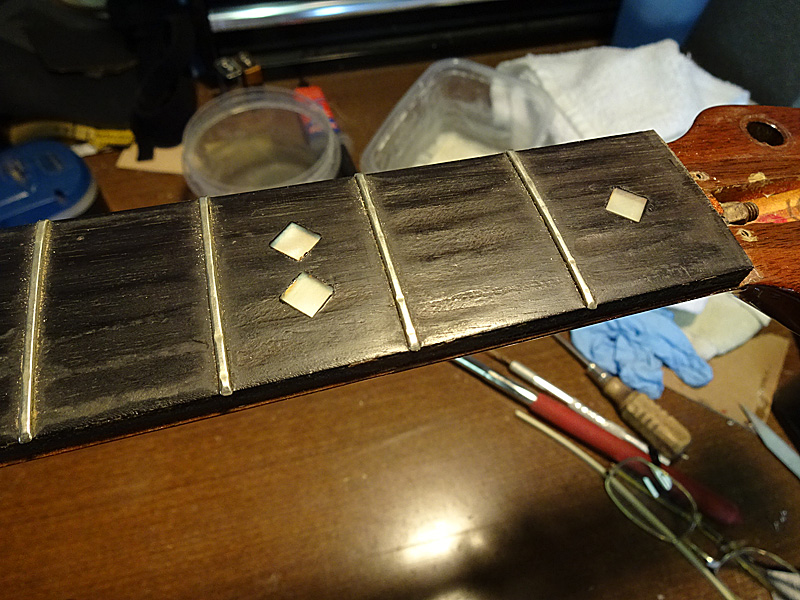
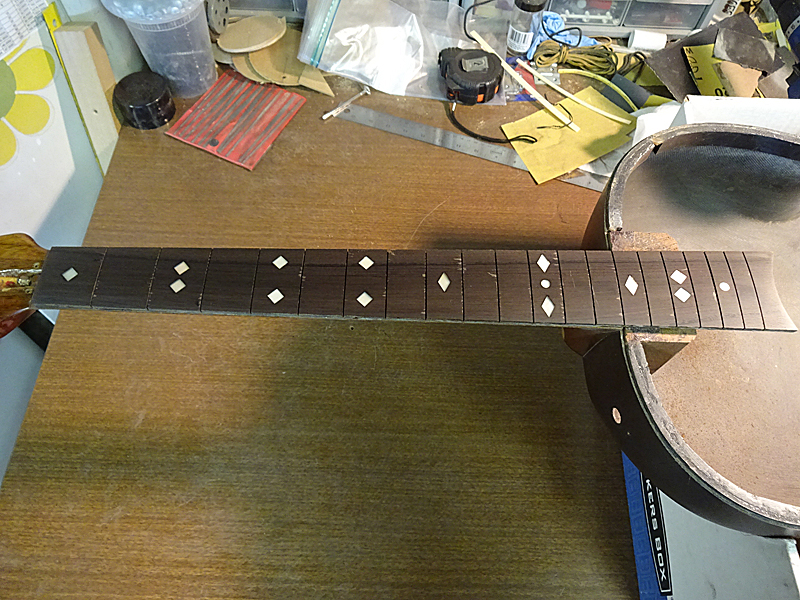
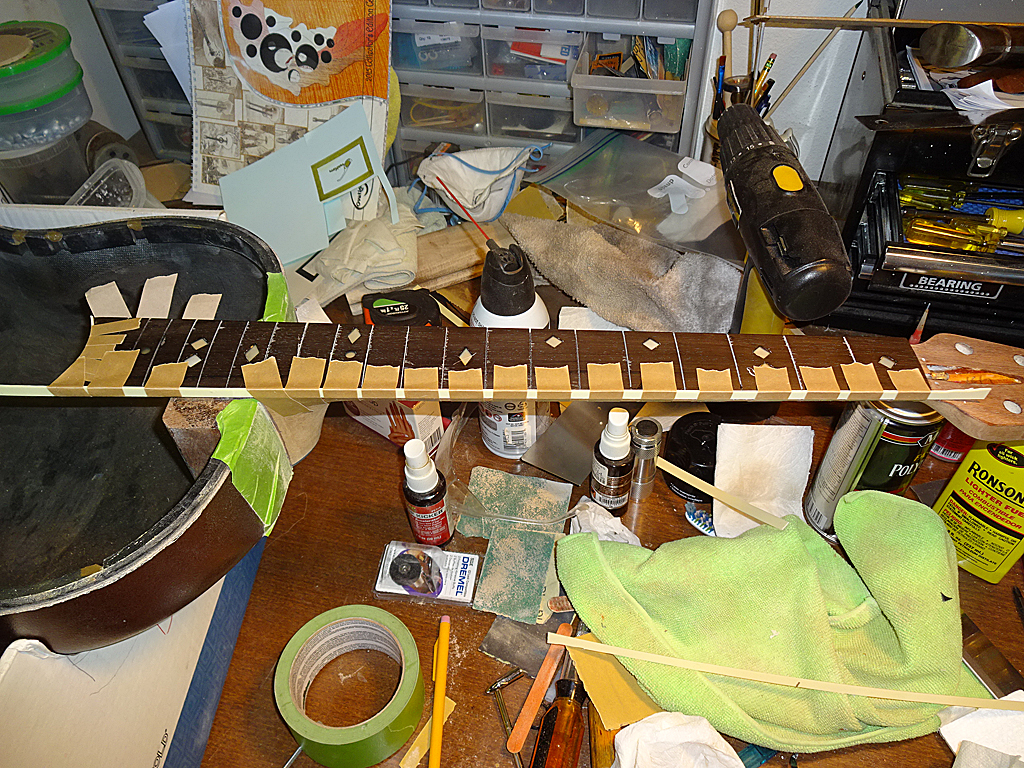
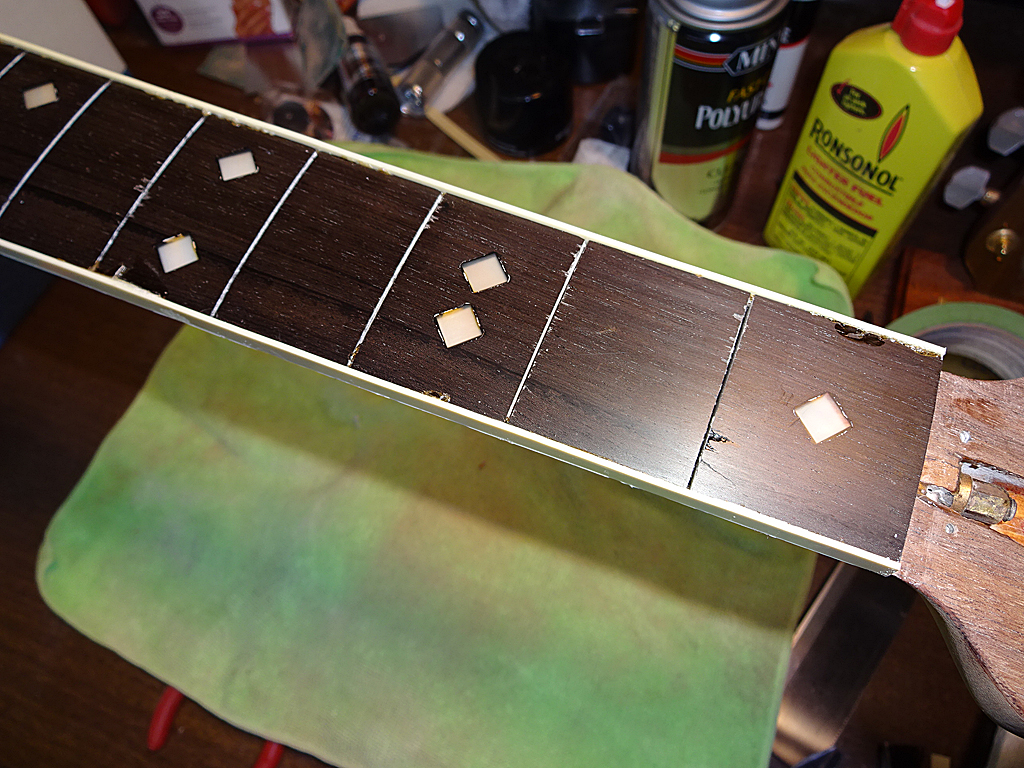
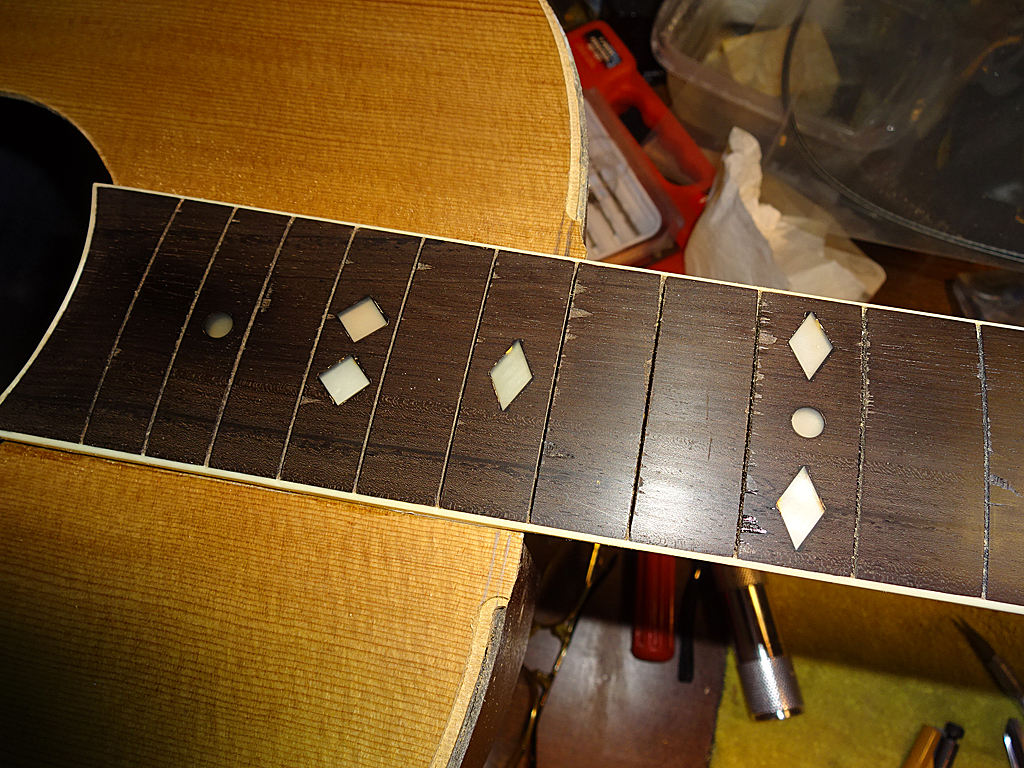
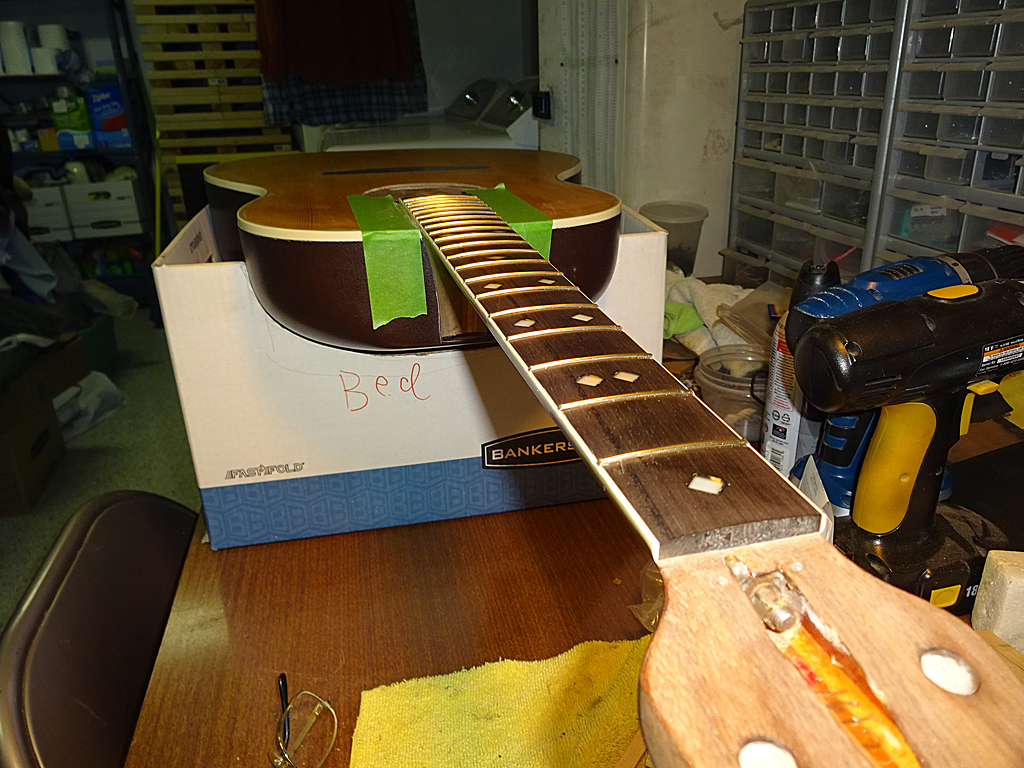
Removed the remaining frets from the fingerboard. Cleaned the glue from the fret slots and rough sanded with 80-grit to 10" radius using my *new* Stewmac 8" Radius Block. All the fingernail grooves are gone.
Before:
After:
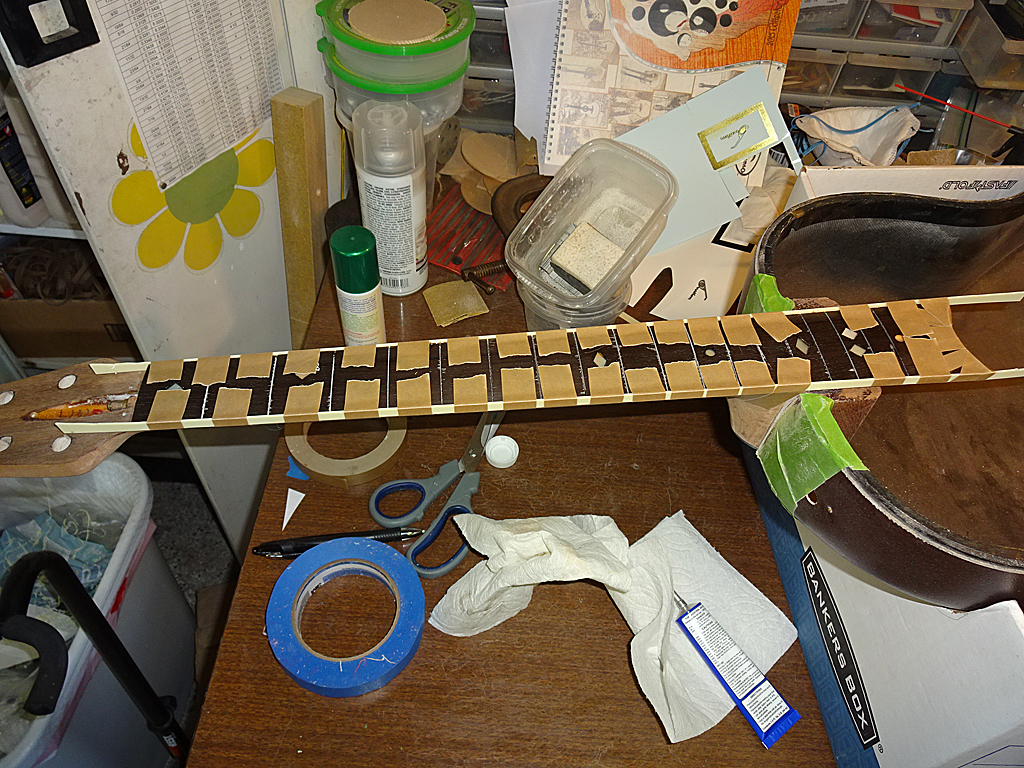
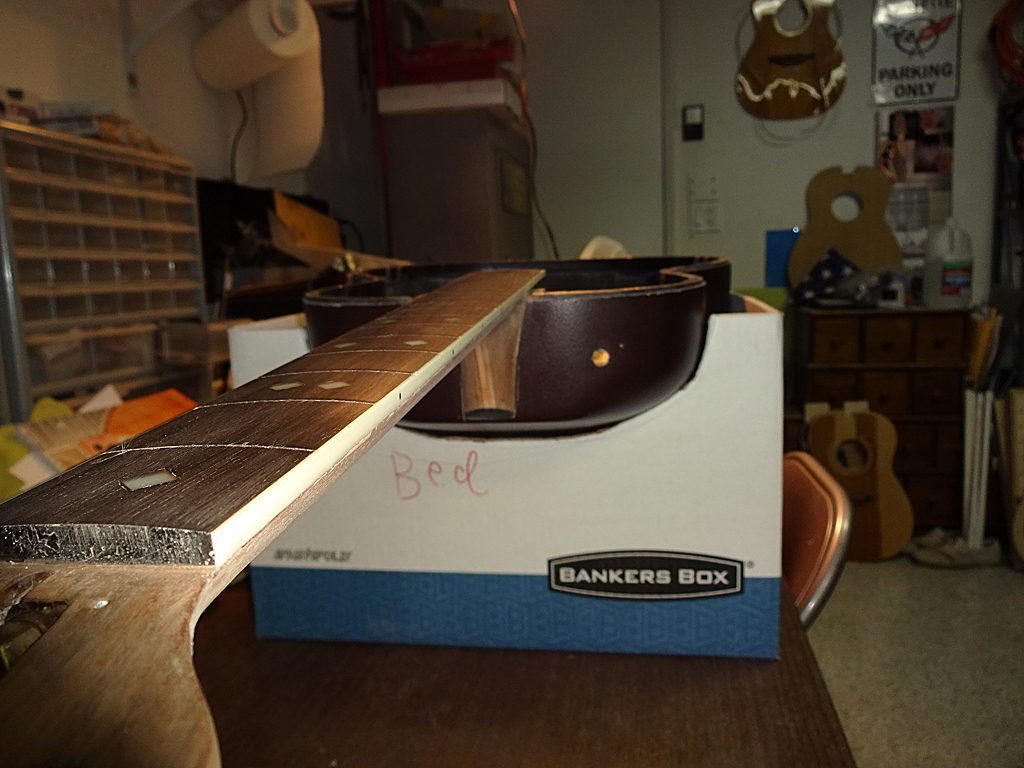
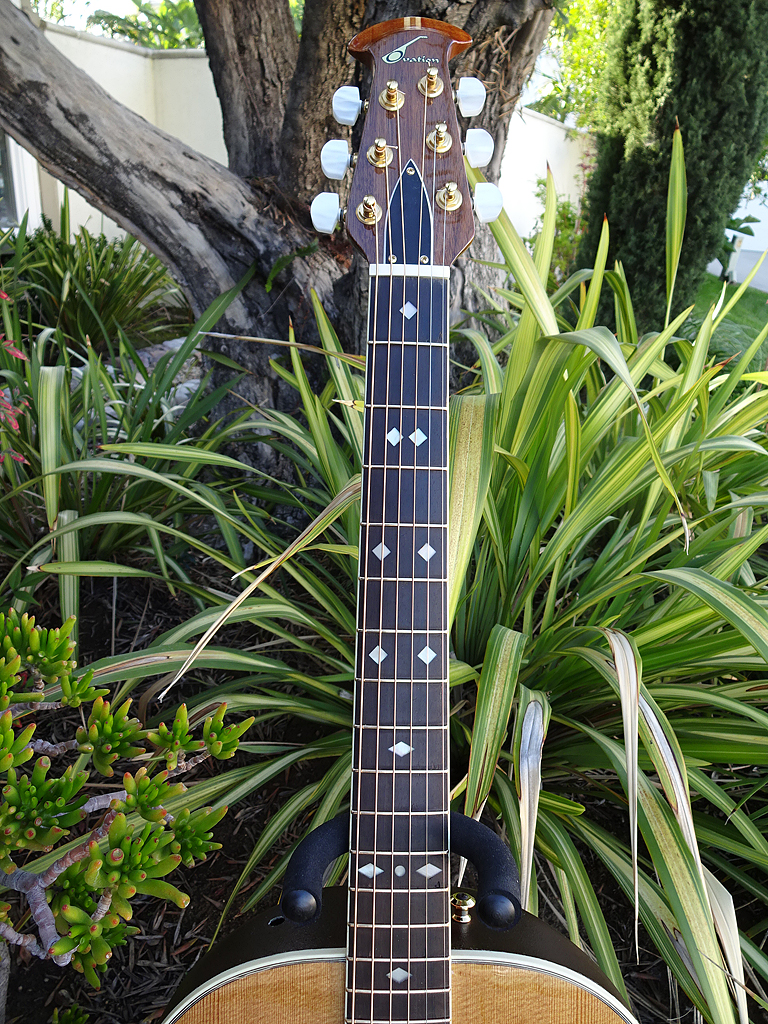
Sanded the fingerboard with progressively finer grades of sandpaper. I stopped at 800-grit. There's a few chip-outs, but I can live with these. They look a lot worse in the photo than they do in person and will be even less visible once I oil the fingerboard after the guitar is finished.
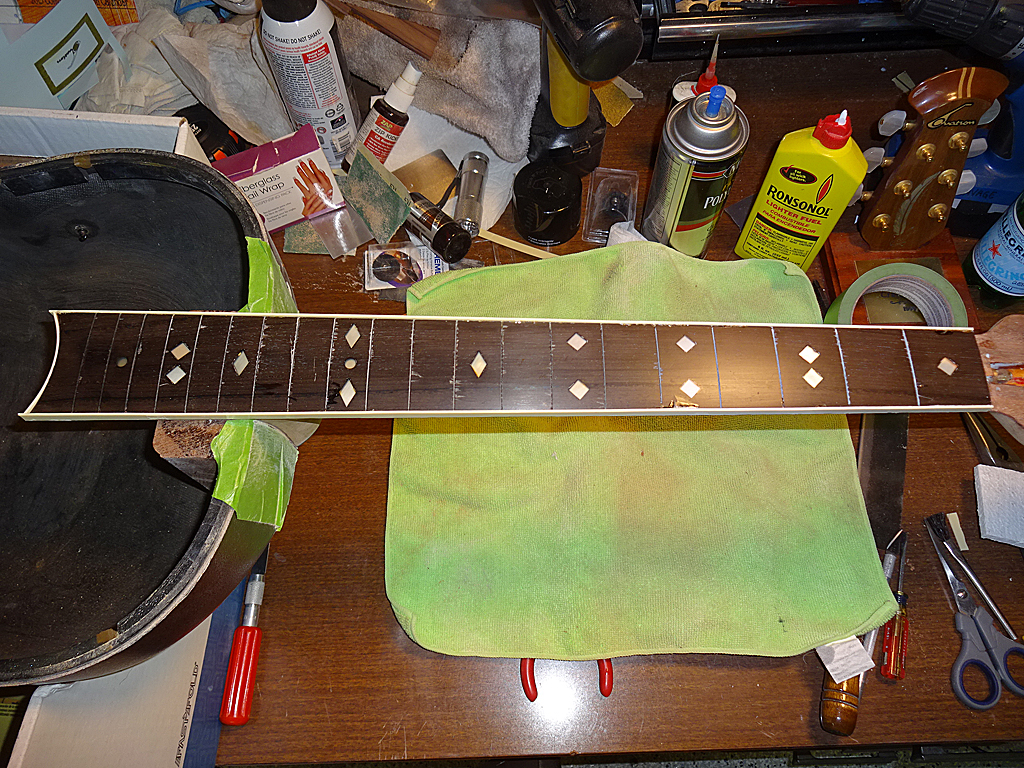
Looking down along the length of the fingerboard reveals a glossy surface.
Next job is to sand the finish off the back of the neck and head stock and sand the front of the head stock to flatten it. Once that's done, I'll add the binding back to the sides of the fingerboard and shape them down to match the neck profile.
Posted 2015-12-21 10:44 AM (#519603 - in reply to #518943) Subject: Re: 1978 1617 Legend Rebuild...
Joined: February 2014 Posts: 699
Location: moline,illinois
Nice shiny fretboard there,when you were sanding did you just avoid the inlays or put something on them to protect them from scratches.
As always very cool to see your work!!
Posted 2015-12-21 11:46 AM (#519608 - in reply to #518943) Subject: Re: 1978 1617 Legend Rebuild...
Joined: June 2012 Posts: 2303
Location: Lake Forest, CA
Thanks!
Nope. Sanded right over them, starting with 80-grit and ending with 800-grit. This is how inlays are done. They usually stand slightly proud of the surrounding wood when they're first inlaid and are sanded flush.
When I first started sanding with the 80-grit, the inlays dulled down, naturally. But, as I got to the higher grits their luster and depth came back so they're looking real purty again.
Posted 2015-12-21 11:51 AM (#519610 - in reply to #519405) Subject: Re: 1978 1617 Legend Rebuild...
Joined: June 2012 Posts: 2303
Location: Lake Forest, CA
DetlefMichel - 2015-12-16 2:04 AM
And again your work is really stunning. But did you ever consider to re-build an A-bracing? For me only these guitars have the real Ovation sound. The x-braced guitars sound like Martin (never mind Martin guitars, I have a lovely D 45, but I love my old custom legends as well-because of their mellow sound).
I've been thinking about this and I think it would be interesting to some day re-do a Legend or Custom Legend with torrefied Sitka spruce top and A-braces just to see how a 75-100 year-old Ovation A-brace guitar would sound.
Posted 2015-12-21 4:38 PM (#519633 - in reply to #519608) Subject: Re: 1978 1617 Legend Rebuild...
Joined: February 2014 Posts: 699
Location: moline,illinois
DanSavage - 2015-12-21 11:46 AM
Thanks!
Nope. Sanded right over them, starting with 80-grit and ending with 800-grit. This is how inlays are done. They usually stand slightly proud of the surrounding wood when they're first inlaid and are sanded flush.
When I first started sanding with the 80-grit, the inlays dulled down, naturally. But, as I got to the higher grits their luster and depth came back so they're looking real purty again.
So I have a couple Custom Legends where the abalone inlays appear to have dulled out over time(someone suggested to me UV fading) would it be possible to sand these progressively to bring back there luster?
Posted 2015-12-21 6:08 PM (#519637 - in reply to #519601) Subject: RE: 1978 1617 Legend Rebuild...
Joined: September 2012 Posts: 809
Location: Thredbo, NSW, Australia
DanSavage - 2015-12-22 2:39 AM
Cleaned the glue from the fret slots and rough sanded with 80-grit to 10" radius using my *new* Stewmac 8" Radius Block.
Am I missing something here? How do you get a 10" radius with an 8" radius block?
Posted 2015-12-21 7:56 PM (#519645 - in reply to #519633) Subject: Re: 1978 1617 Legend Rebuild...
Joined: June 2012 Posts: 2303
Location: Lake Forest, CA
2wheeldrummer - 2015-12-21 2:38 PM
So I have a couple Custom Legends where the abalone inlays appear to have dulled out over time(someone suggested to me UV fading) would it be possible to sand these progressively to bring back there luster?
Unless you want to remove all the frets, then replace them, I would use something like 0000 steel wool to polish the abalone inlays.
I was able to start with 80-grit and work my way up to 800-grit only because the frets didn't get in the way. And, the only reason I did that was because of the fingernail divots. Had the fingerboard and frets been in better shape I would have left them alone.
Posted 2015-12-22 1:03 AM (#519659 - in reply to #519656) Subject: RE: 1978 1617 Legend Rebuild...
Joined: June 2012 Posts: 2303
Location: Lake Forest, CA
BanjoJ - 2015-12-21 10:04 PM I'm now wondering if there would be enough wood to change a flat fingerboard to a 10" radius.
CAD to the rescue.
Assuming a radius of 10", a fretboard width of 2" and a thickness of 1/4", which is the nominal thickness of my fretboard at the center, I would say that there would be enough wood. See below.
The center is .25" and the edges are just under .2" (.1999")
Posted 2015-12-22 1:19 AM (#519660 - in reply to #518943) Subject: Re: 1978 1617 Legend Rebuild...
Joined: October 2012 Posts: 1018
Location: Yokohama, Japan
Just awesome, Dan. You're making quick progress on this one! Interesting point about the pick-ups not being able to catch the torrefied quality of the sound board. If Ovation really is going to make a wood backed bowl, a "Cool Tube" style pre-amp is really going to be necessary in the future. The work you're doing on the neck is really educational too. Looking forward to your choice of finish on the sound board and the neck too.
Posted 2015-12-22 1:45 AM (#519661 - in reply to #519659) Subject: RE: 1978 1617 Legend Rebuild...
Joined: September 2012 Posts: 809
Location: Thredbo, NSW, Australia
DanSavage - 2015-12-22 6:03 PM
CAD to the rescue.
Assuming a radius of 10", a fretboard width of 2" and a thickness of 1/4", which is the nominal thickness of my fretboard at the center, I would say that there would be enough wood. See below.
The center is .25" and the edges are just under .2" (.1999")
Cool!
With a lot of work removing and replacing the frets (probably too much work) I could make a nylon stringer more comfortable to play. I'm just not used to the flat fingerboard when playing barre chords. Alternatively, I could just practice more.
Posted 2015-12-22 12:09 PM (#519679 - in reply to #519661) Subject: RE: 1978 1617 Legend Rebuild...
Joined: June 2012 Posts: 2303
Location: Lake Forest, CA
BanjoJ - 2015-12-21 11:45 PM
With a lot of work removing and replacing the frets (probably too much work) I could make a nylon stringer more comfortable to play. I'm just not used to the flat fingerboard when playing barre chords. Alternatively, I could just practice more.
That, or if you want to play nylon stringed Ovation with a curved fretboard, you could get a Country Artist.
Posted 2015-12-29 10:09 AM (#519852 - in reply to #518943) Subject: RE: 1978 1617 Legend Rebuild...
Joined: June 2012 Posts: 2303
Location: Lake Forest, CA
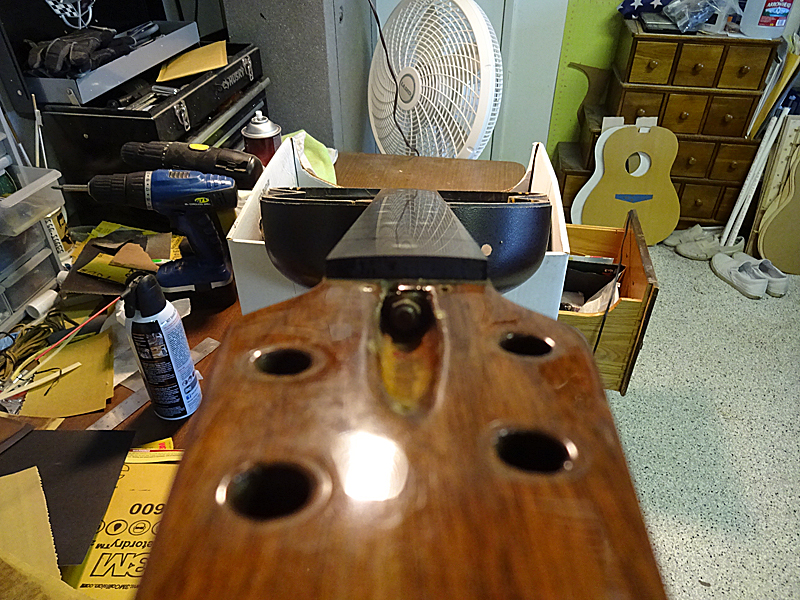
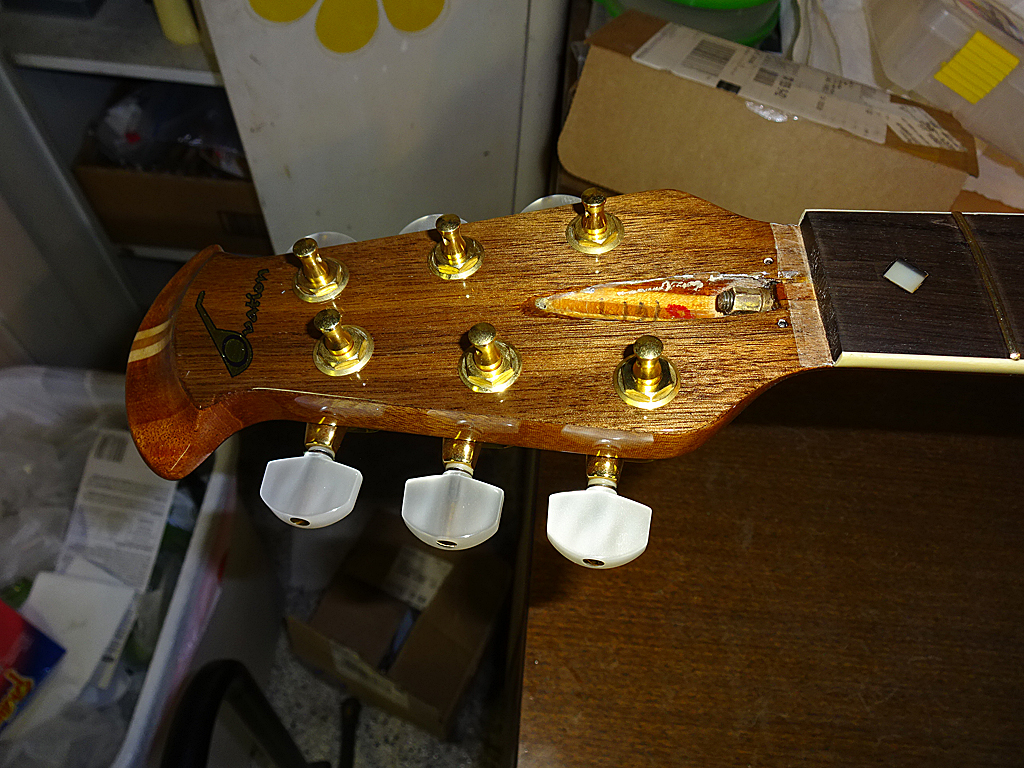
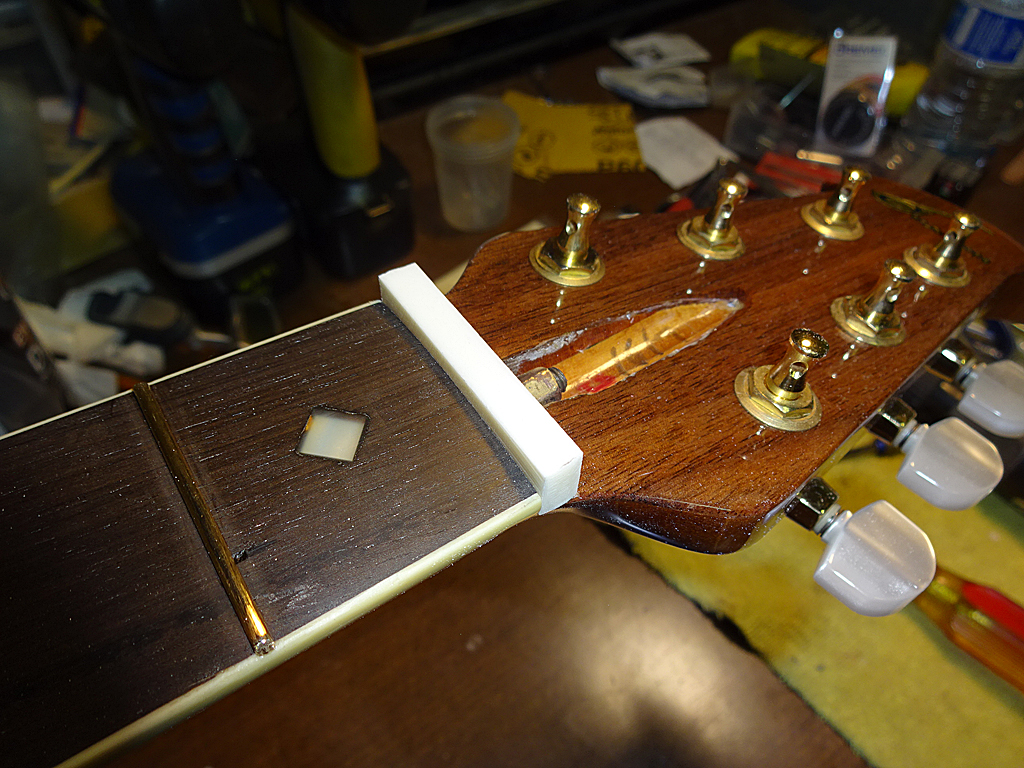
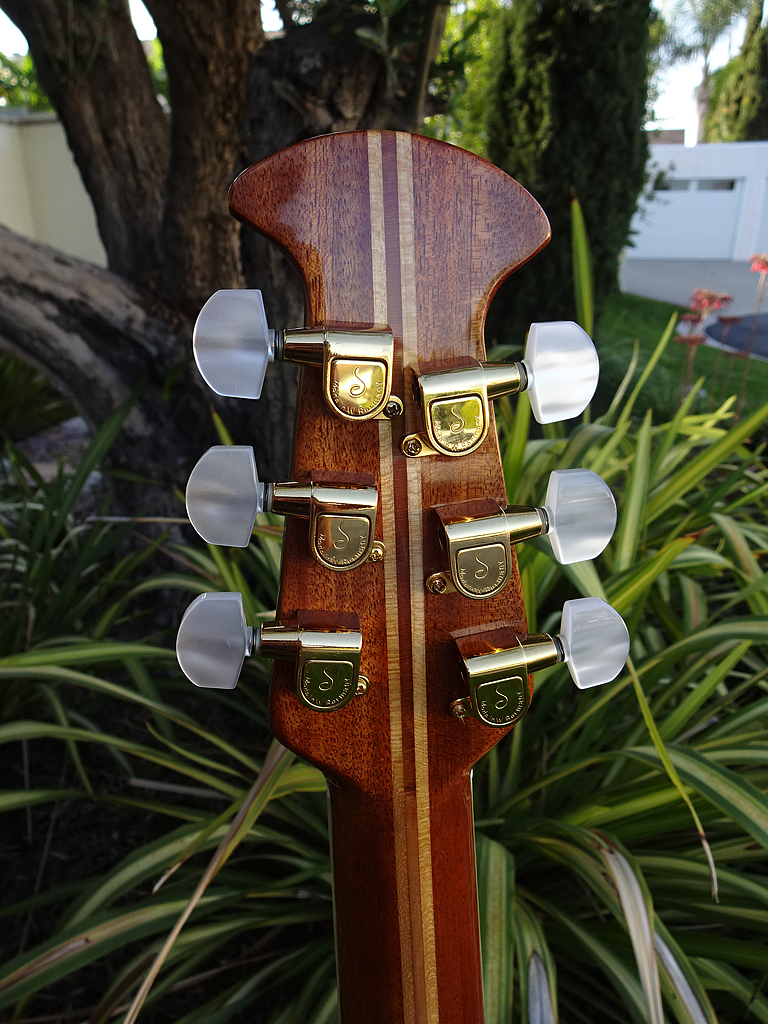
So, I sanded the finish off the neck and headstock.
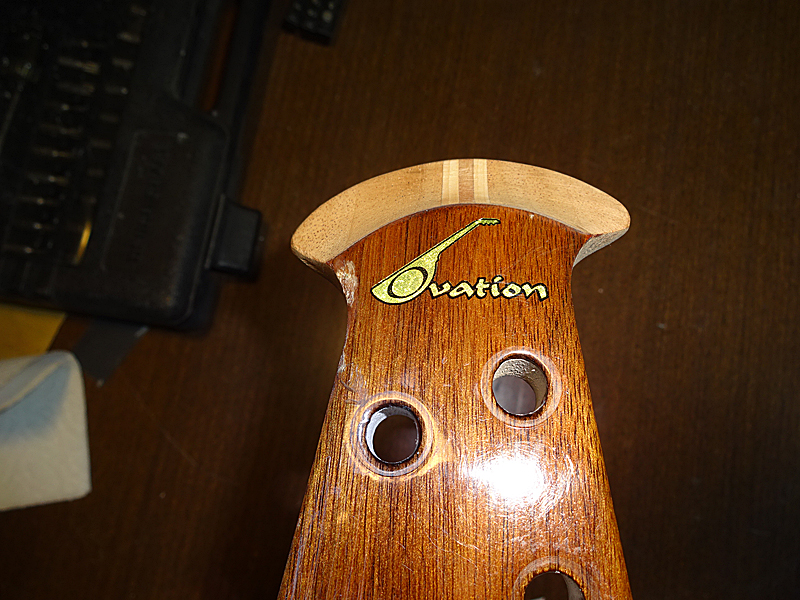
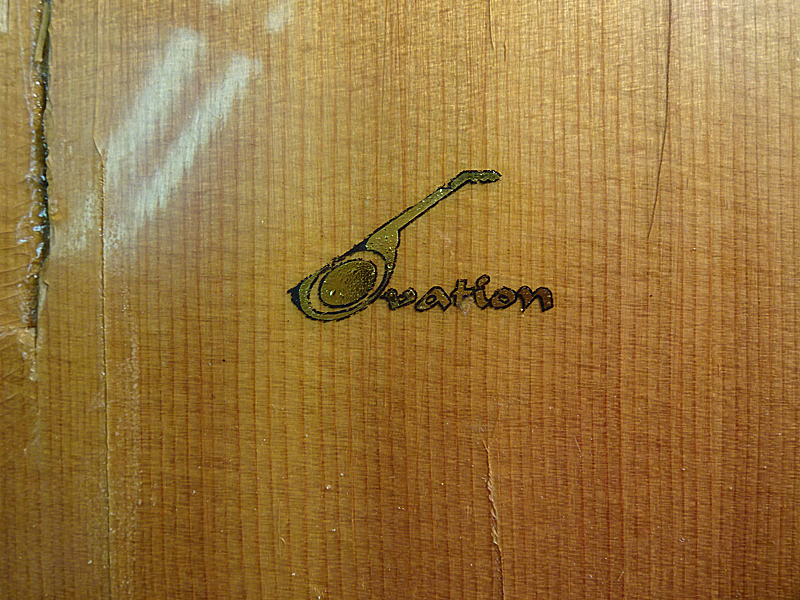
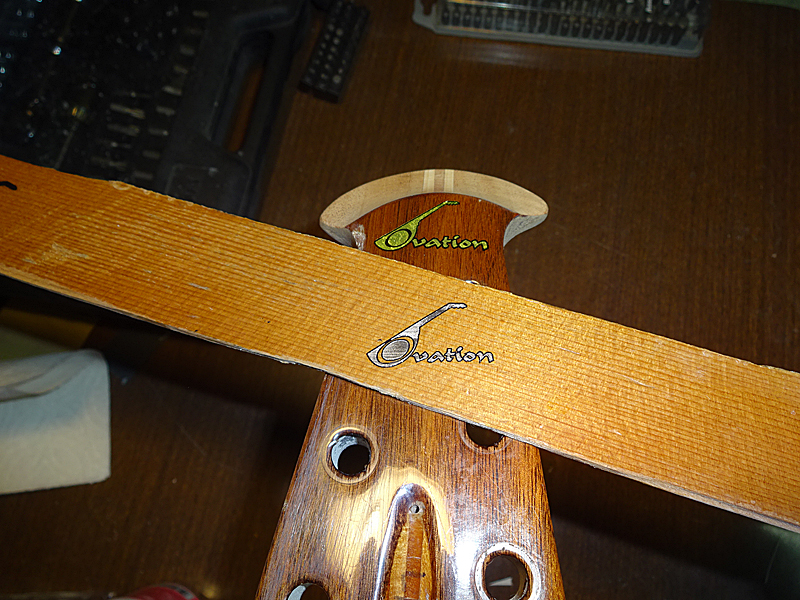
The original plan was to sand level the finish on the front of the headstock to preserve the original decal. But, the pre-existing gouge in the crook of the headstock up near the bottom of the guitar in the logo, along with a couple of new gouges I made with the Dremel when I was taking the finish off the sides of the headstock, had my pondering making a new decal.
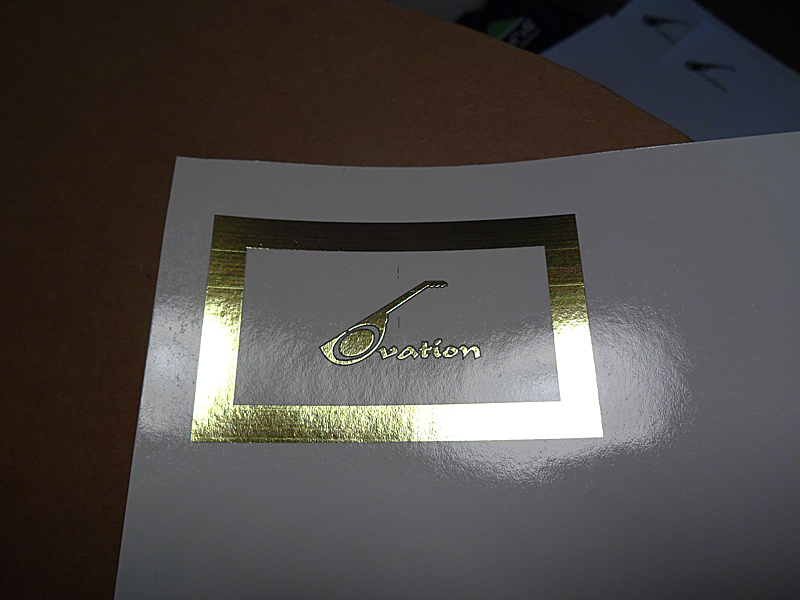
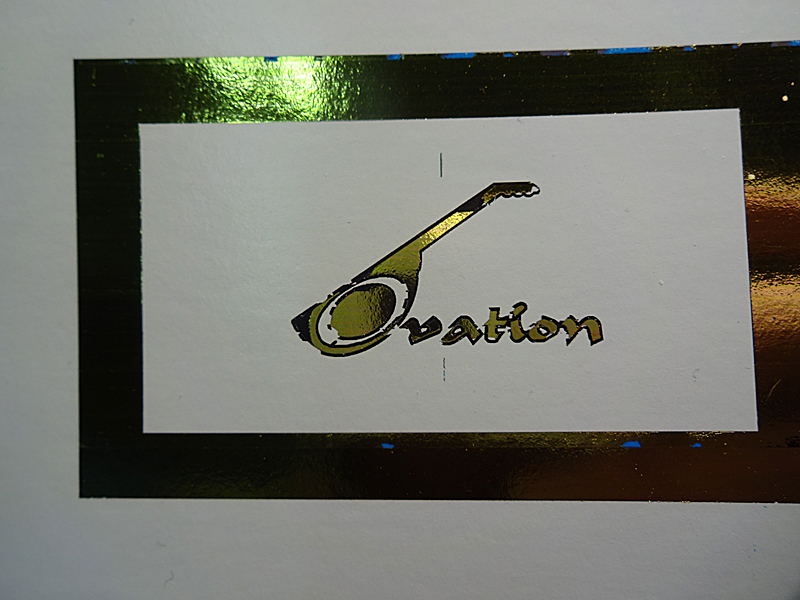
This logo artwork is slightly different from what I did for Jay's guitar. This artwork has a black outline around the gold. The original logos were just the gold.
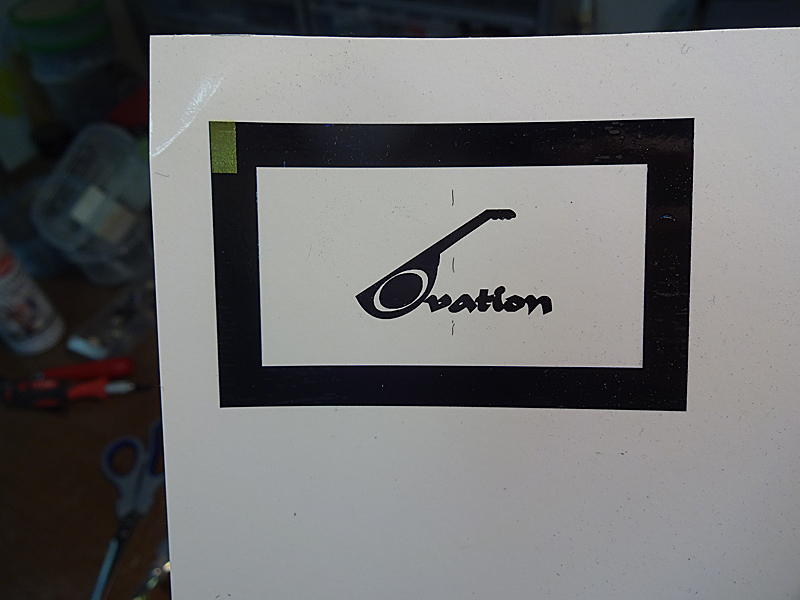
I have an Alps MD-5000 dry transfer printer that has the ability to print gold and silver foil, as well as metallics. Here's sample of the final artwork, printed on water-transfer decal paper, ready for the transfer process.
There were some bumps along the road. At first, I used the decal paper that came with the PulsarPro dry transfer system. The Alps foils didn't really stick too well to that paper. The artwork above was printed on Alps-specific decal paper. The gold border is necessary for the PulsarPro transfer system.
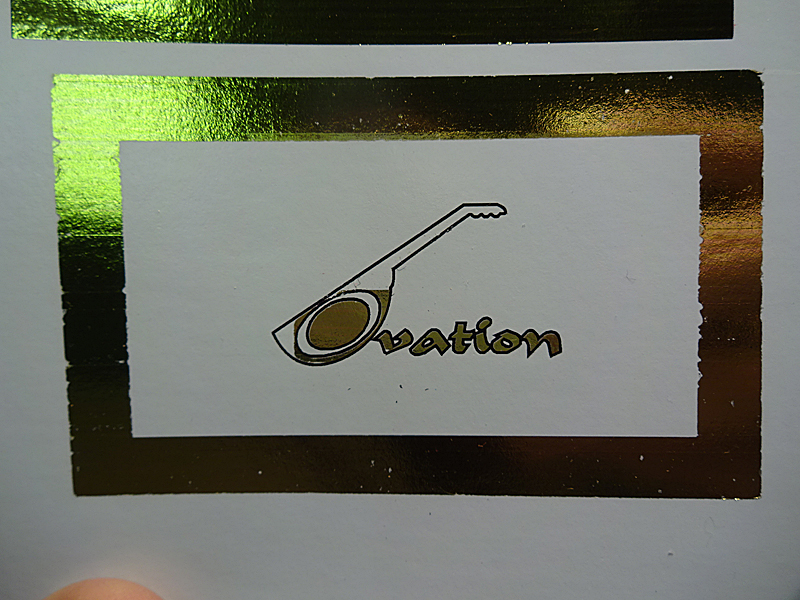
When I got this artwork below, I decided it was time to move onto the next step.
The decal paper with the artwork is covered with thin mylar and is run through a laminating machine to form a light bond between the artwork and mylar so the mylar acts like a carrier sheet. Afterward, the decal paper/mylar carrier is soaked in warm water until the decal releases. So far, so good. Onto the next step.
Whoops! Unfortunately, the heat and pressure from the laminator causes the artwork and mylar to form too strong of a bond for a reliable release. So, it's back to the drawing board.
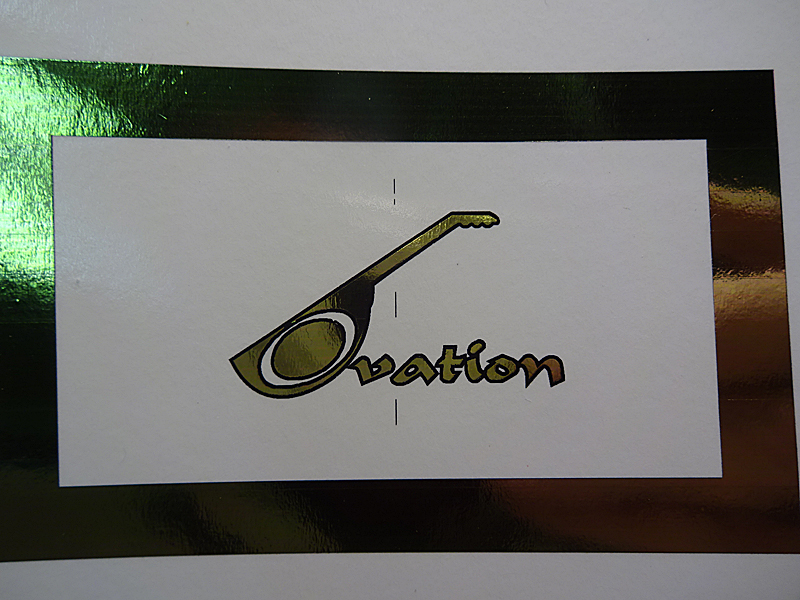
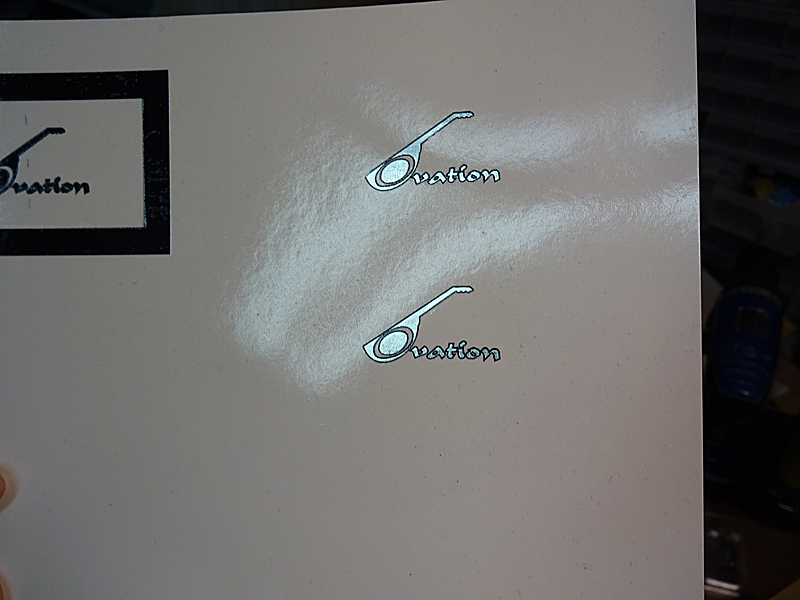
Not really. Just onto another system of decal preparation. About this time, I ran out of gold foil. So, I decided to use silver foil as a substitute. This time, I'm going old-school water transfer decals. First, the artwork is printed onto the decal paper, then sprayed with a thin coat of Krylon Krystal Klear acryllic paint. The clear paint seals the artwork in and acts as a carrier sheet when the decal paper coating is dissolved in water.
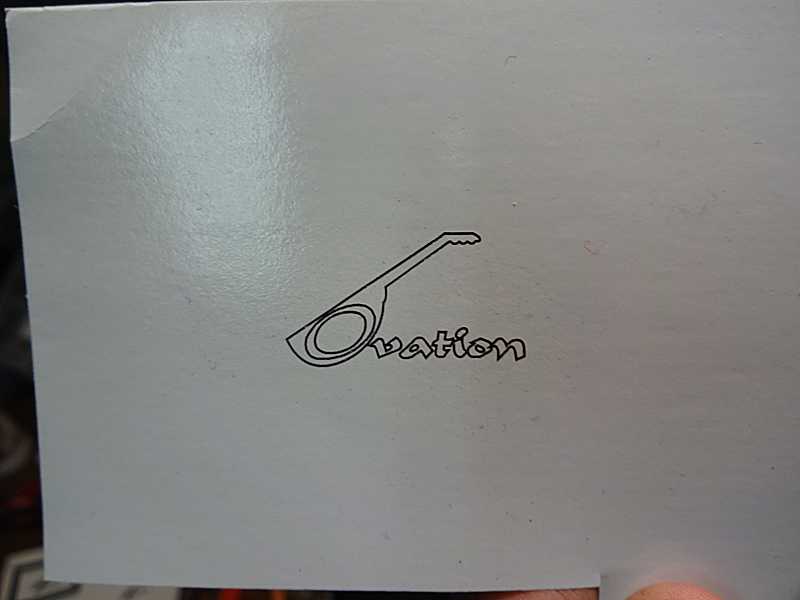
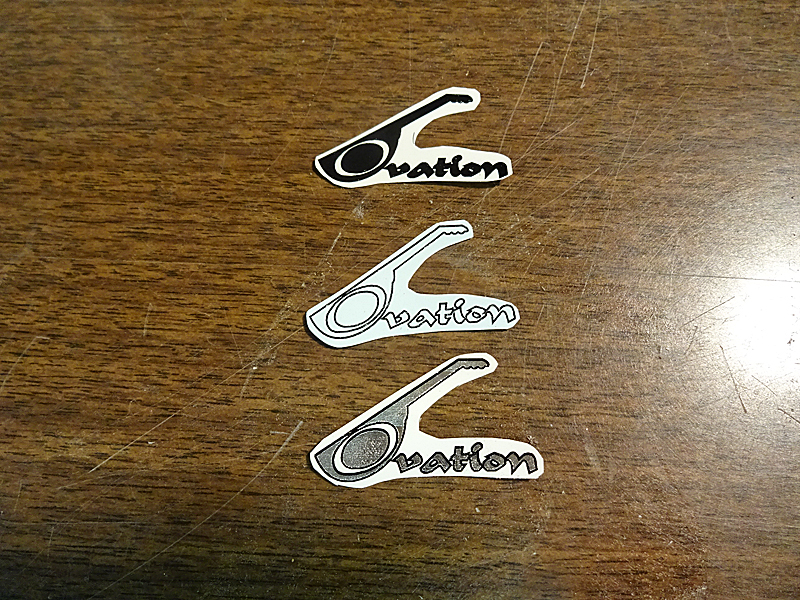
I'm also testing a solid-color mono-chromatic logo. This was a failure. This was the artwork I was printing when I ran out of gold foil.
An outline logo.
All three are cut out with a pair of scissors, very close to the artwork to minimize the amount of carrier sheet showing through.
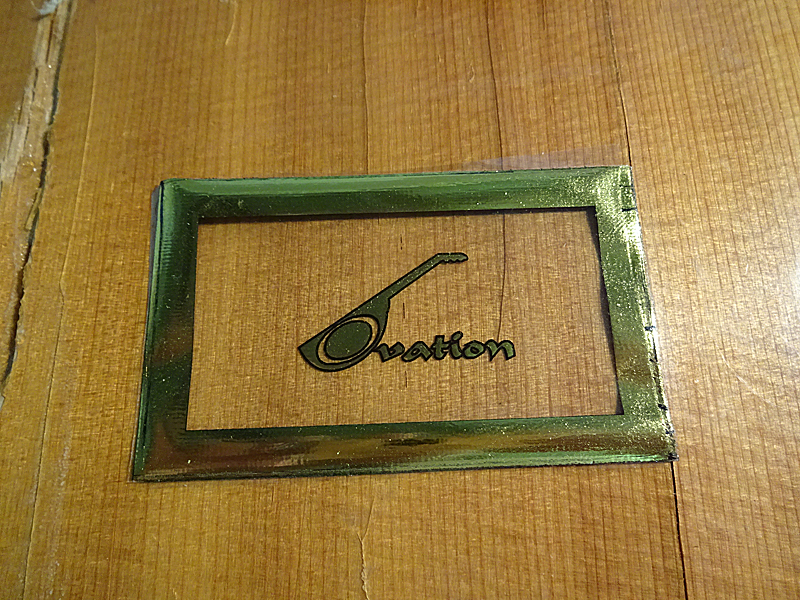
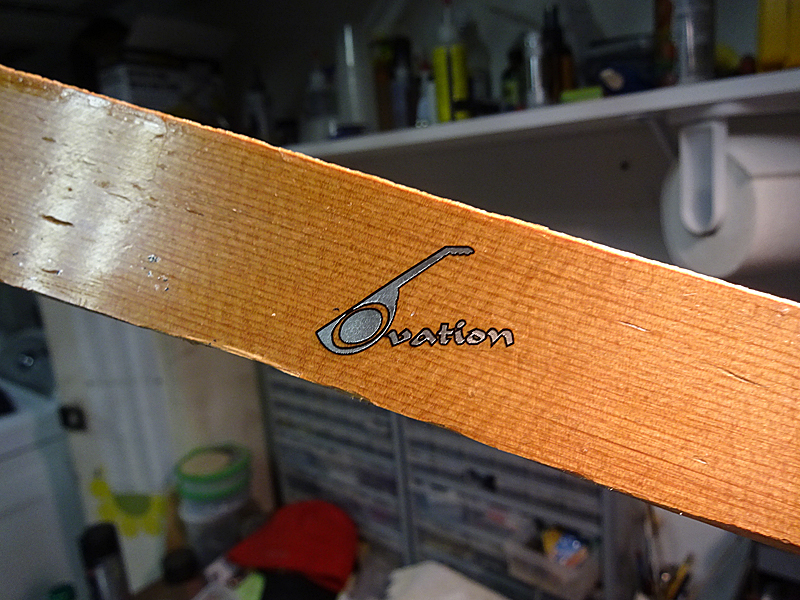
And, here's the silver logo stuck to a scrap of spruce that came from the 1617 top. I used this wood because it provides a smooth surface as a base and so I'd be able to see the wood grain showing through the artwork.
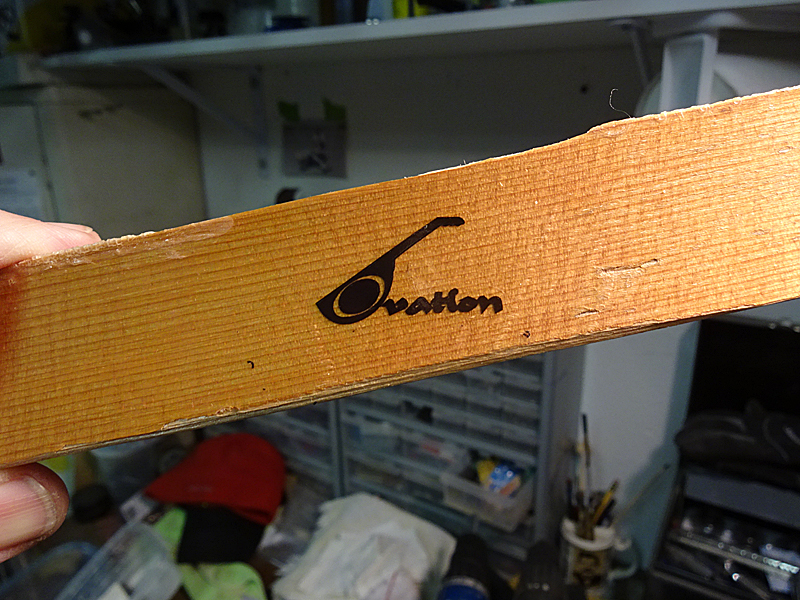
Here's the solid color logo. Unfortunately, the coat of Krylon was too thin on the outline logo and it fell apart when it released from the backing paper.
And, here's the silver logo next to the headstock logo. One change that will have to be made is to close in the "O" in the guitar. I thought is was hollow, but it's actually solid black. The rest looks pretty good.
Next, I'll spray some Minwax clear polyurethane over the decals to make sure the carrier sheet disappears.
Posted 2015-12-30 9:32 AM (#519871 - in reply to #519608) Subject: Re: 1978 1617 Legend Rebuild...
Joined: December 2014 Posts: 1713
Location: Frozen Tundra of Minnesota
DanSavage - 2015-12-21 11:46 AM
Thanks!
Nope. Sanded right over them, starting with 80-grit and ending with 800-grit. This is how inlays are done. They usually stand slightly proud of the surrounding wood when they're first inlaid and are sanded flush.
When I first started sanding with the 80-grit, the inlays dulled down, naturally. But, as I got to the higher grits their luster and depth came back so they're looking real purty again.
As Always Dan, Thank You!!!! I love your Journals into rebuilding these Beauties!
And Thank You for telling us about the inlays, I know the Center Hole Inlay I bought is not very shiny, and I was wondering if that was all the better it would ever look, but now I know better, and am very excited!!
I can't wait until you do a full wood-round back, that is going to be Fascinating to watch each step too! I Love these projects!!
Posted 2016-01-01 1:01 PM (#519942 - in reply to #518943) Subject: RE: 1978 1617 Legend Rebuild...
Joined: June 2012 Posts: 2303
Location: Lake Forest, CA
Happy New Year!
I sprayed the decals with the clear polyurethane and they will work fine. Based upon this, I moved ahead with removing the finish from the front of the head stock, including the decal. So, I'm pretty much committed.
Here's a time-lapse video of me taking the polyester finish off with a Dremel finishing/sanding buff. Actual time in the video sequence shown was about 20 minutes.
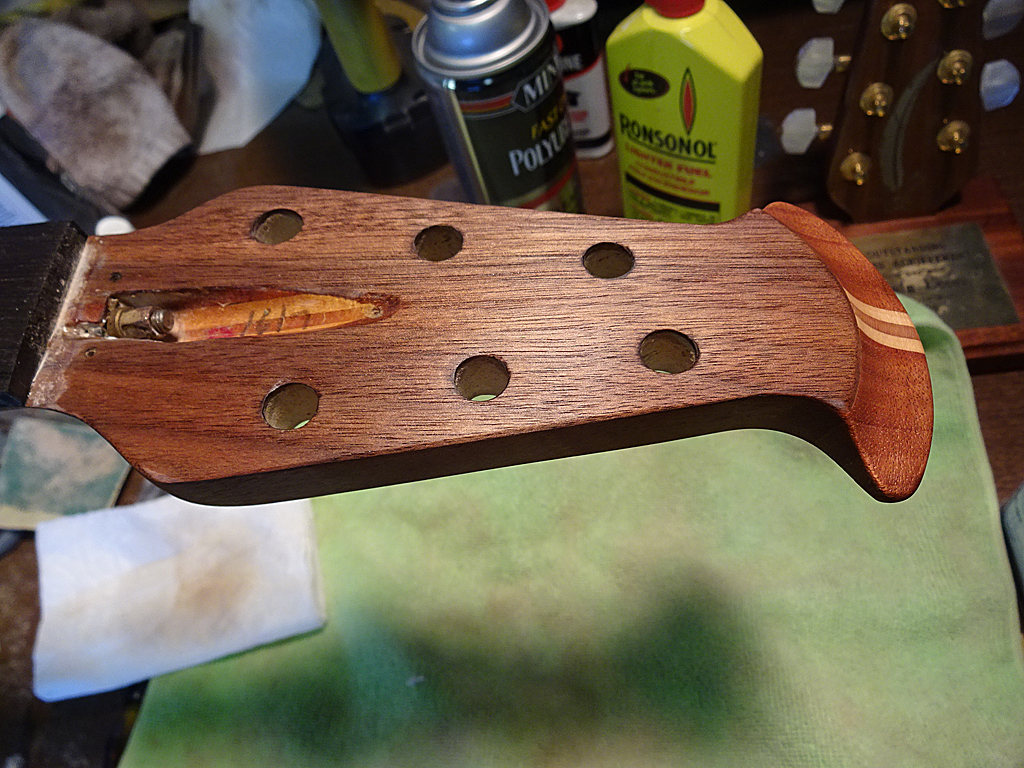
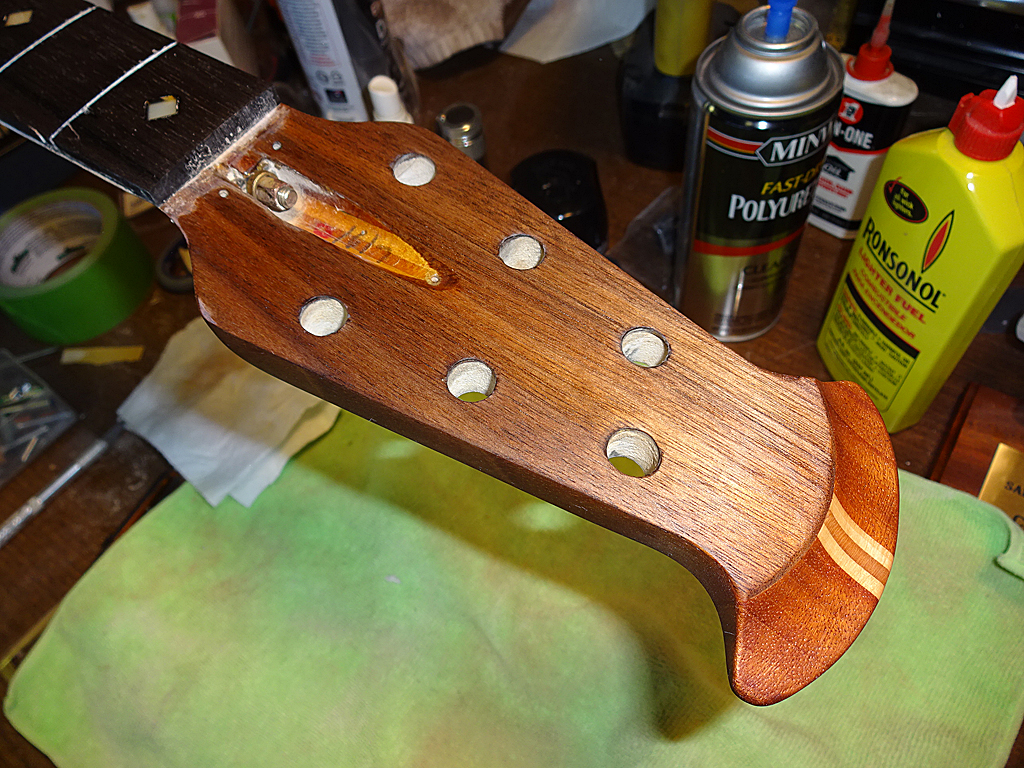
Here's the head stock after scraping and sanding.
And, I wet the head stock with naptha so I could see what it will it look like under the new clear finish. The walnut is a nice contrast.
Next job is to glue the binding to the sides of the fret board.
Posted 2016-01-02 5:27 PM (#519967 - in reply to #518943) Subject: RE: 1978 1617 Legend Rebuild...
Joined: June 2012 Posts: 2303
Location: Lake Forest, CA
Thanks for the kind words, everyone.
I'm using .040" cream binding from AllParts.com for the the neck binding. I used my binding shaving holder to reduce the width of the neck binding strips from 1/2" to just over 1/4".
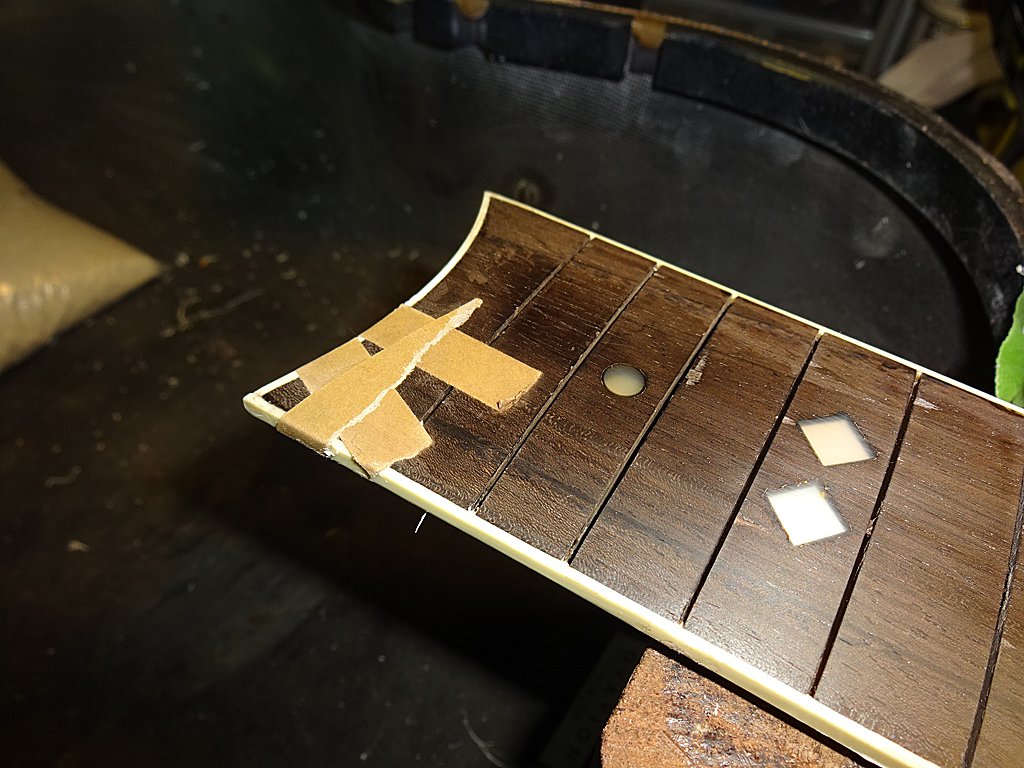
First, the center part of the binding is cut to size, then beveled to match the sides of the fingerboard. Glue is applied to the wood, then the part is squeezed and taped into place.
Strips of binding tape are pre-applied to the bottom of the fretboard to help keep the side bindings in alignment while they'r being glued.
Working in about 9" segments the binding is glued and taped into place with binding tape.
Now, the binding for the other side is glued and taped into place.
I'll let the glue dry 24 hours, then peel off the tape tomorrow afternoon to see how it looks and, hopefully, start scraping the binding down to the shape of the neck.
Posted 2016-01-03 4:39 AM (#519972 - in reply to #518943) Subject: Re: 1978 1617 Legend Rebuild...
Joined: December 2004 Posts: 553
Location: Denmark
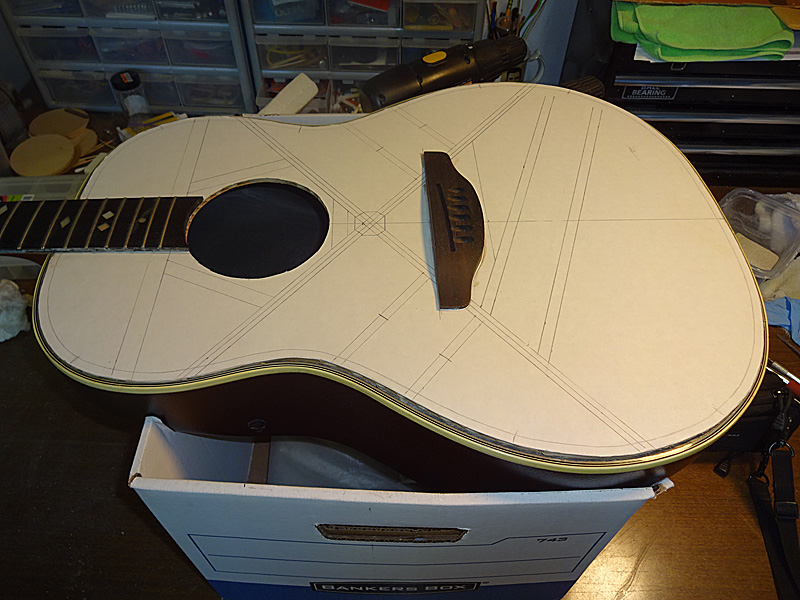
That box has earned its value a few times :-) While my wife is watching the Downton Abbey series on TV I totally prefer to follow your works. And I often wonder what the production time for a mass produced guitar actually is. CNC machining has probably cut the actual machining time and reduced the reject ratio to almost nil. But gluing and finish still take some time, I should think. Even with more sophisticated fixtures and tooling.
Posted 2016-01-03 10:18 AM (#519973 - in reply to #519972) Subject: Re: 1978 1617 Legend Rebuild...
Joined: January 2009 Posts: 1249
Location: Texas
TPA..I often wondered that, especially when everything was hand made. How many man hours went into making a shiny bowl Balladeer...I am assuming that the bowl was actually a cost saving measure over wood boxes, both in time and money, then as well as today.
Posted 2016-01-03 10:57 AM (#519975 - in reply to #519973) Subject: Re: 1978 1617 Legend Rebuild...
Joined: November 2002 Posts: 3599
Location: Pacific Northwest Inland Empire
"the bowl was actually a cost saving measure over wood boxes, both in time and money, then as well as today."
And, it still works better. Pure genius.......
Posted 2016-01-03 9:14 PM (#519986 - in reply to #519972) Subject: Re: 1978 1617 Legend Rebuild...
Joined: June 2012 Posts: 2303
Location: Lake Forest, CA
tpa - 2016-01-03 2:39 AM
That box has earned its value a few times :-) While my wife is watching the Downton Abbey series on TV I totally prefer to follow your works. And I often wonder what the production time for a mass produced guitar actually is. CNC machining has probably cut the actual machining time and reduced the reject ratio to almost nil. But gluing and finish still take some time, I should think. Even with more sophisticated fixtures and tooling.
Thanks.
If I were 'mass-producing' a guitar, I could see building in batches of 5-6 guitars and perform each step to all the guitars in the batch before proceeding to the next step. It would add a little to the overall build time, but not nearly as much as building each guitar sequentially.
Posted 2016-01-03 11:59 PM (#519988 - in reply to #518943) Subject: Re: 1978 1617 Legend Rebuild...
Joined: October 2012 Posts: 1018
Location: Yokohama, Japan
Your projects are always so full of ingenuity, Dan! That Banker's Box has got to be one of the most versatile tools in your guitar repair arsenal. Just incredible detail (especially on the decal) and documentation!
Posted 2016-01-04 2:40 PM (#519994 - in reply to #518943) Subject: RE: 1978 1617 Legend Rebuild...
Joined: June 2012 Posts: 2303
Location: Lake Forest, CA
So, the work continues.
The binding glue has dried. I used diagonal cutters (wire cutters) to snip off the excess side neck binding and started removing the tape.
I used a razor saw to cut the binding flush with the end of the fingerboard.
And, removed the rest of the binding tape. There were a few areas where the tape had too good of a grip on the ebony fingerboard and pulled some chips out. These were glued with thin CA.
Lots O' glue-globs along the glue joint.
Binding has been scraped down so it's flush with the top of the fingerboard.
A little boo-boo happened when I got a little too exuberant with the scraping and pulled some of the binding away from the lower corner. This was re-glued and taped.
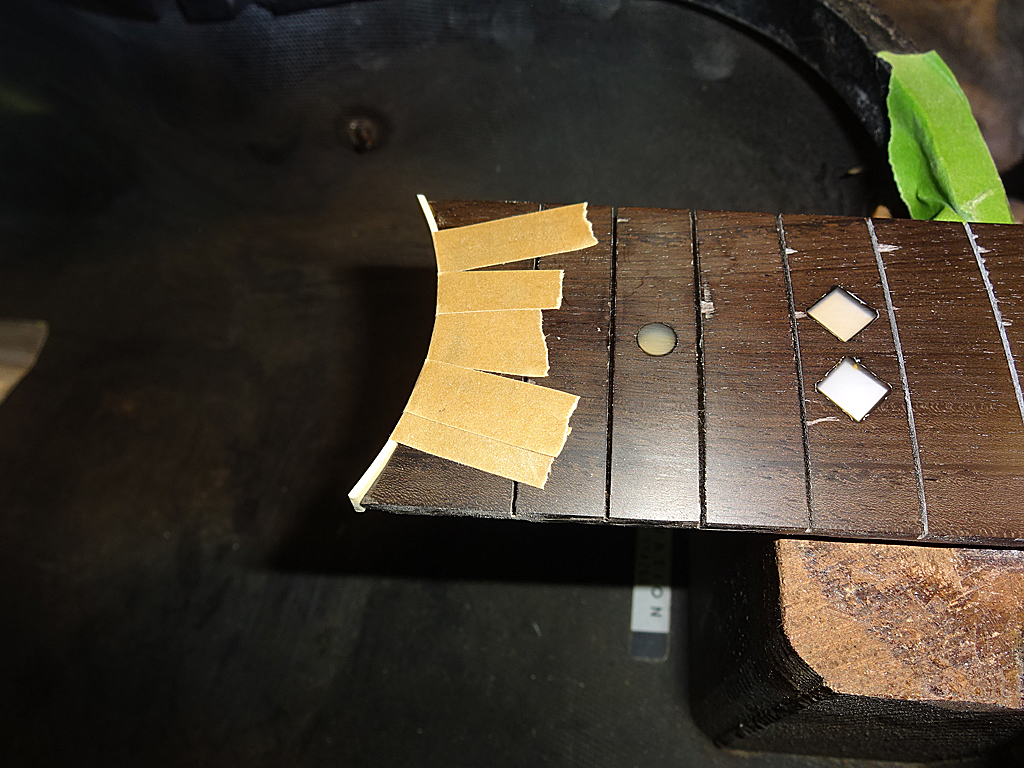
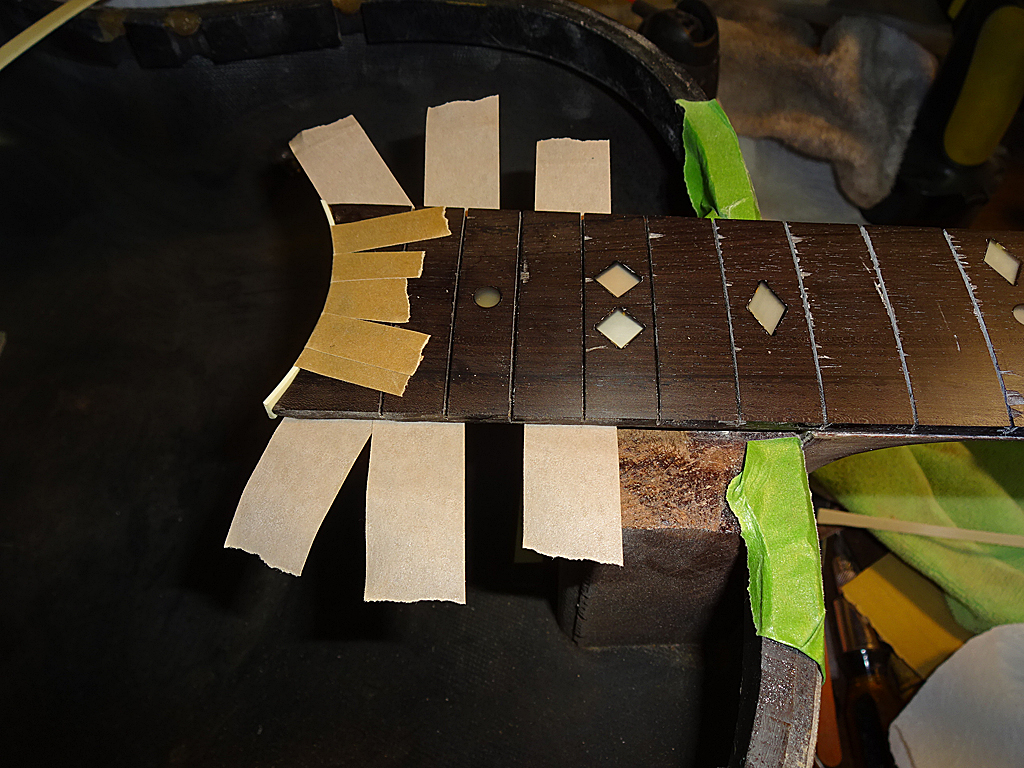
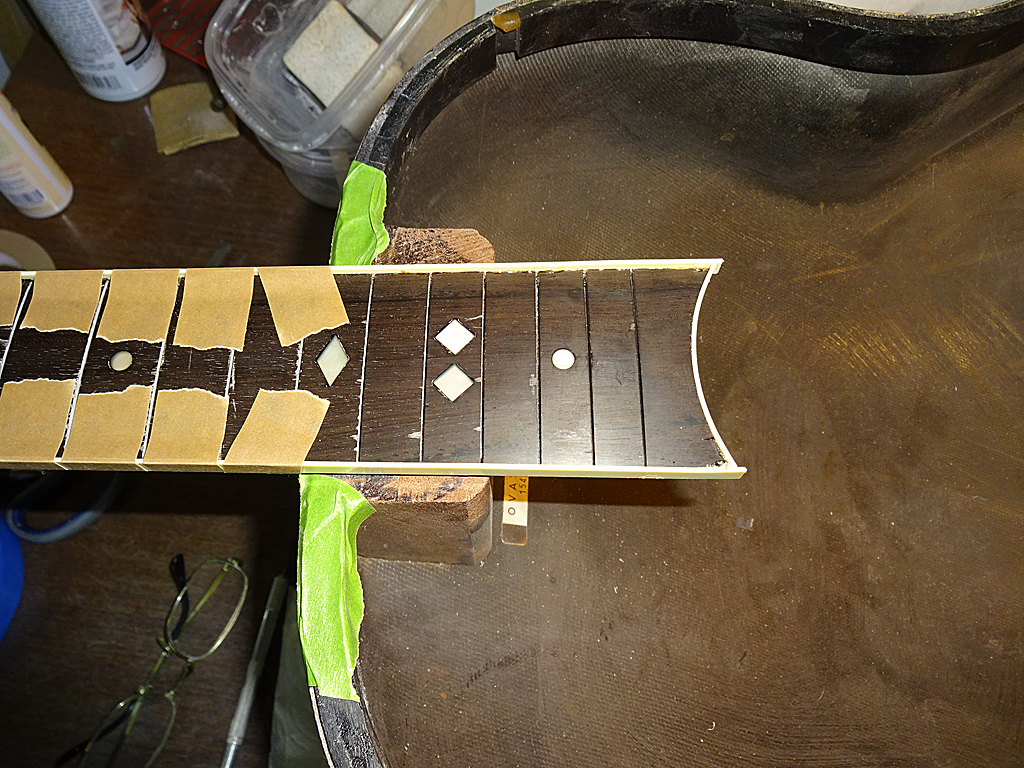
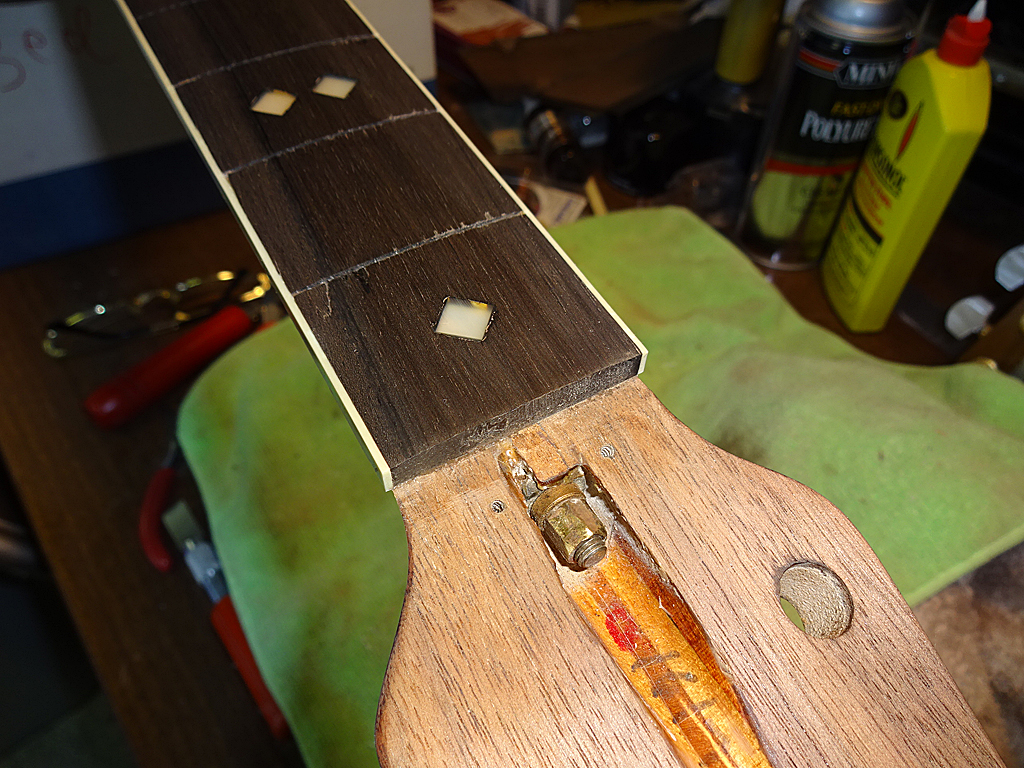
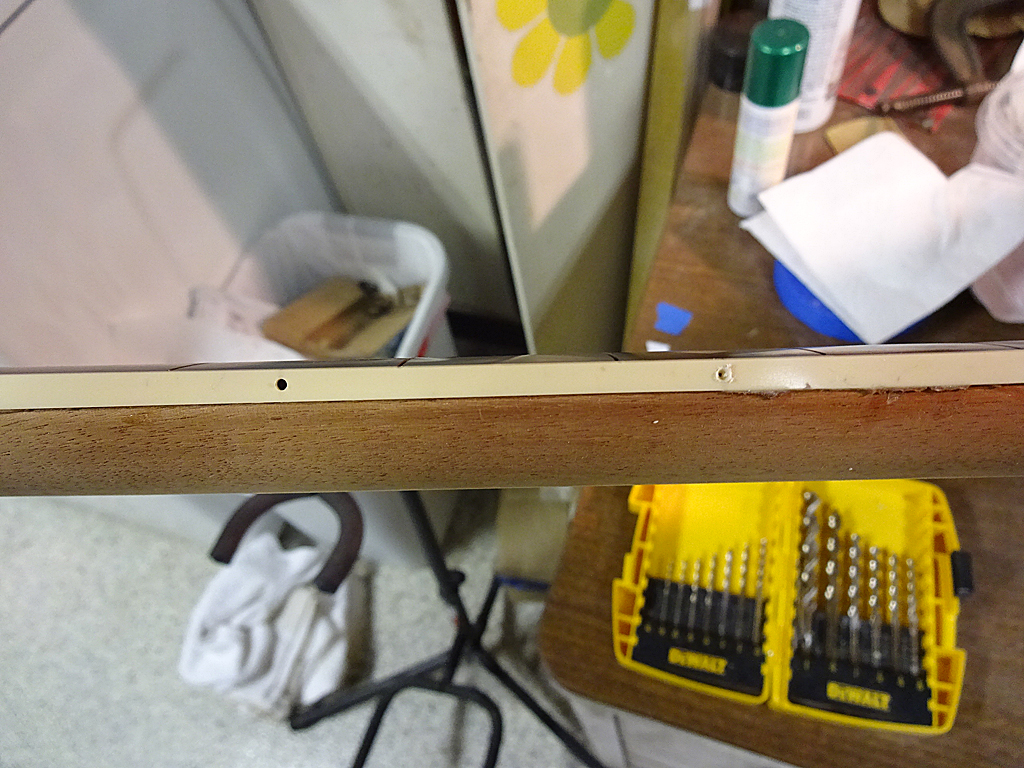
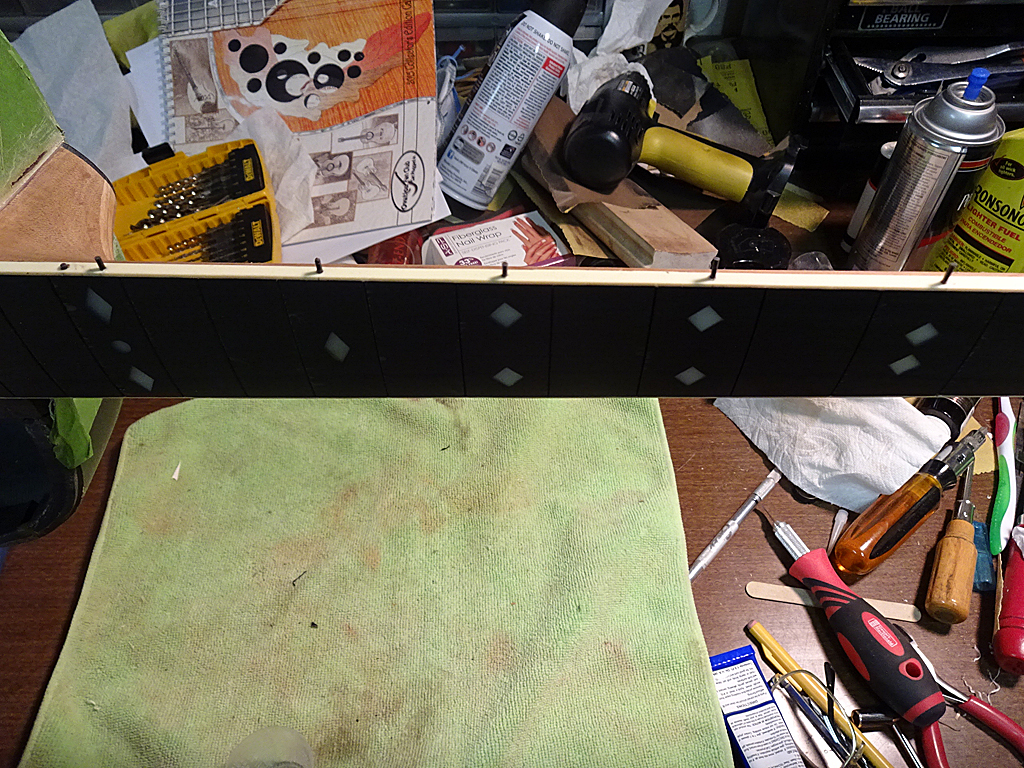
Next job is to drill the holes for the fret side marker dots. All hole locations were measured, then I used the point of a brad point bit to pre-drill the locations so the high-speed bit doesn't wander. The hole at the 3rd fret has been drilled and the 5th fret is next.
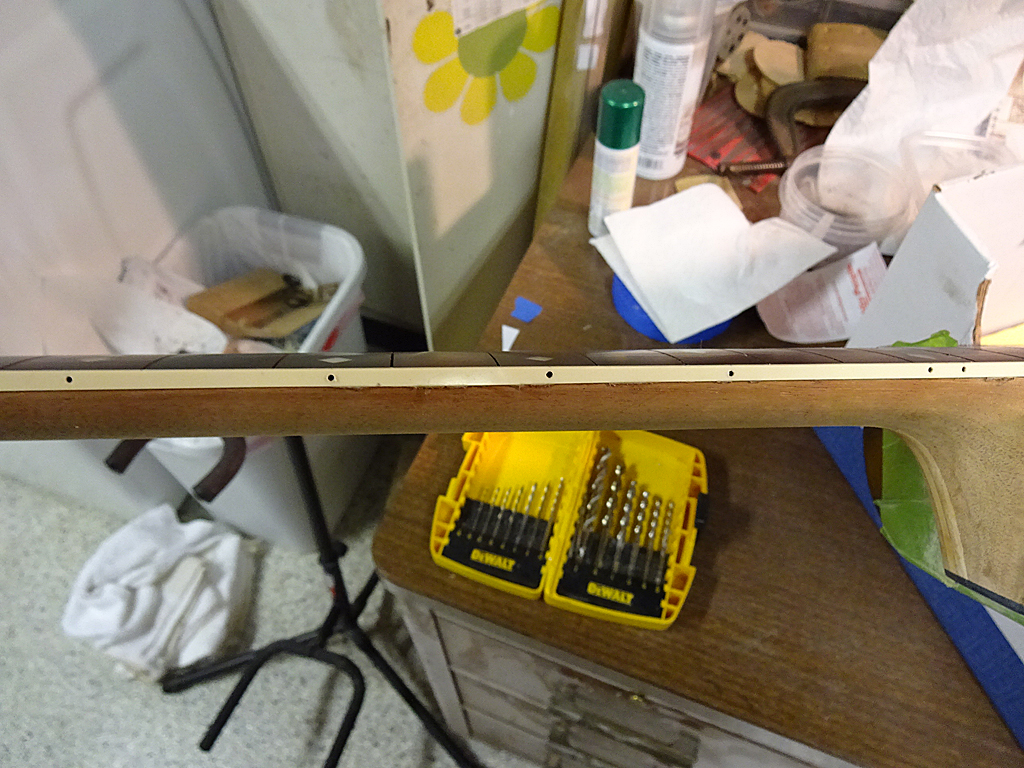
All the holes have been drilled. Ovation usually carries the fret side marker dots all the way to the sound hole, but I decided to stop at the 12th fret, mainly because the body gets in the way of playing the higher frets, and more importantly to me, anything above the 12th fret is no man's land.
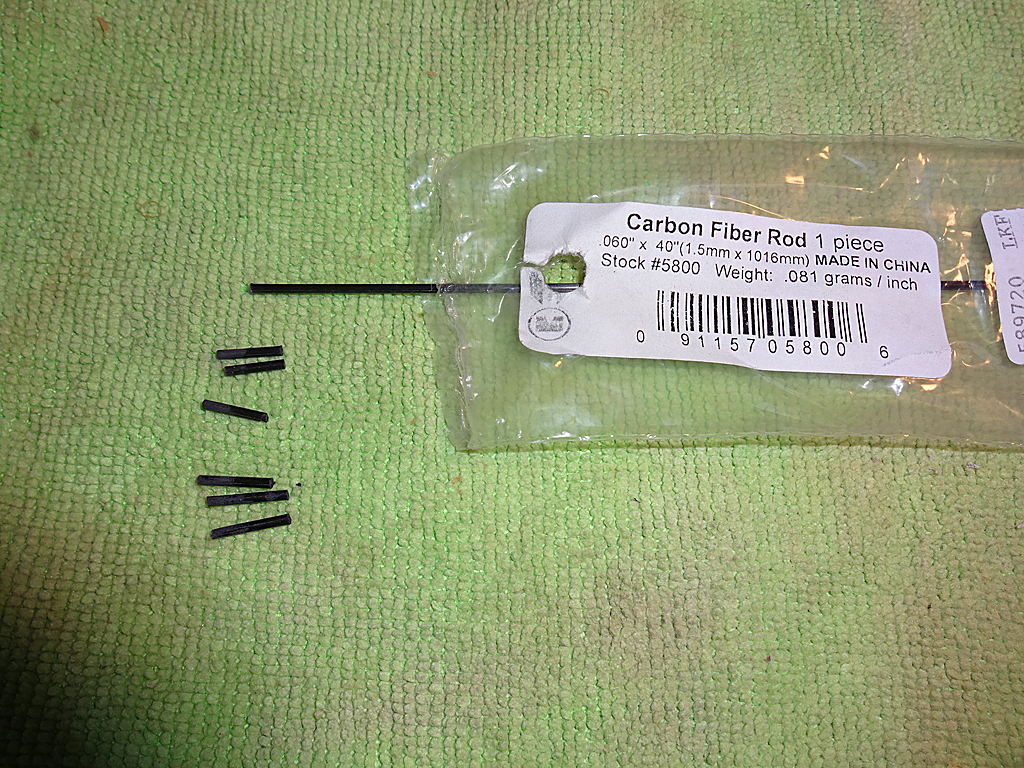
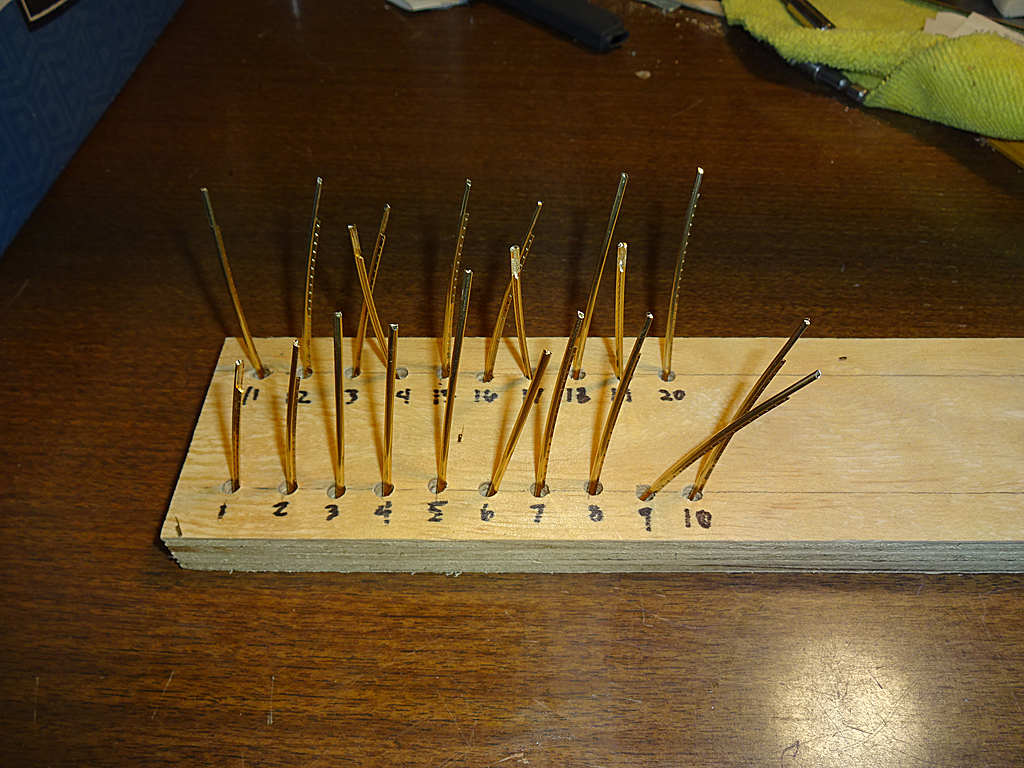
I tried to buy some fret marker material from the local Guitar Center, but the luthier behind the repair bench told me it was a special-order item. So, I went down to my local Hobby Sheeple, er, People and bought some 1/16" carbon fiber rod. It's harder to work with than the regular side fret marker material, (styrene or ABS) but it's still workable.
Here I've cut some lengths of CF rod.
I sanded one end of each to give the glue some bite to hold the rods in place.
I applied a little daub of glue to the end of the rod, then stuffed it into the hole.
After the glue is dry, I'll cut the rods close with the binding with a razor saw, then sand them flush.
Posted 2016-01-04 4:49 PM (#519995 - in reply to #518943) Subject: Re: 1978 1617 Legend Rebuild...
Joined: March 2005 Posts: 12750
Location: Boise, Idaho
Pretty amazing, Dan. I don't even know what a razor saw is. I was happy to finally replace the nut on my UKII with a brass one, as it was originally built, this weekend while watching bowl games. I didn't screw anything up as far as I can tell, so that's a success in my book.
Posted 2016-01-05 9:57 AM (#520006 - in reply to #519995) Subject: Re: 1978 1617 Legend Rebuild...
Joined: June 2012 Posts: 2303
Location: Lake Forest, CA
Mark in Boise - 2016-01-04 2:49 PM
Pretty amazing, Dan. I don't even know what a razor saw is. I was happy to finally replace the nut on my UKII with a brass one, as it was originally built, this weekend while watching bowl games. I didn't screw anything up as far as I can tell, so that's a success in my book.
Yup. That's how I measure success, too. Or, at least I screwed it up as little as possible.
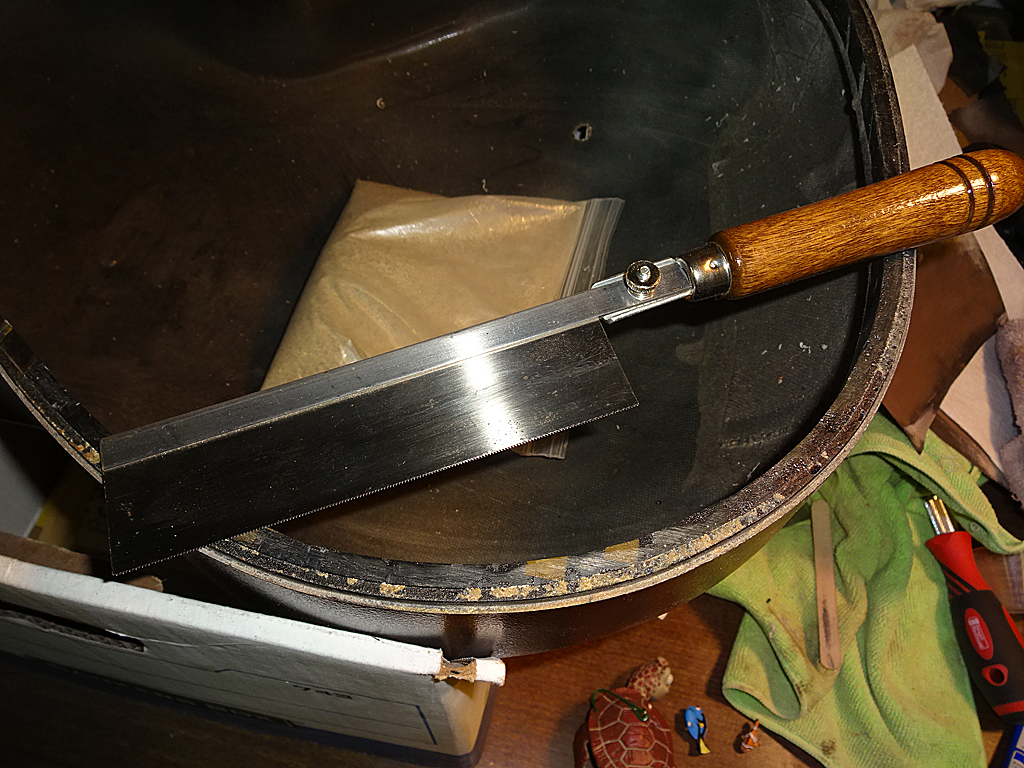
Here's a pic of a razor saw. This particular one is manufactured by Zona, but there are other manufacturers such as Xacto, etc. The blade is only .010" thick and has 100 or so teeth per inch. As a point of reference, the fret slots are .020", or twice as thick as this blade. This one is a back saw, but they also sell different shape blades.
Posted 2016-01-05 11:07 AM (#520008 - in reply to #518943) Subject: RE: 1978 1617 Legend Rebuild...
Joined: June 2012 Posts: 2303
Location: Lake Forest, CA
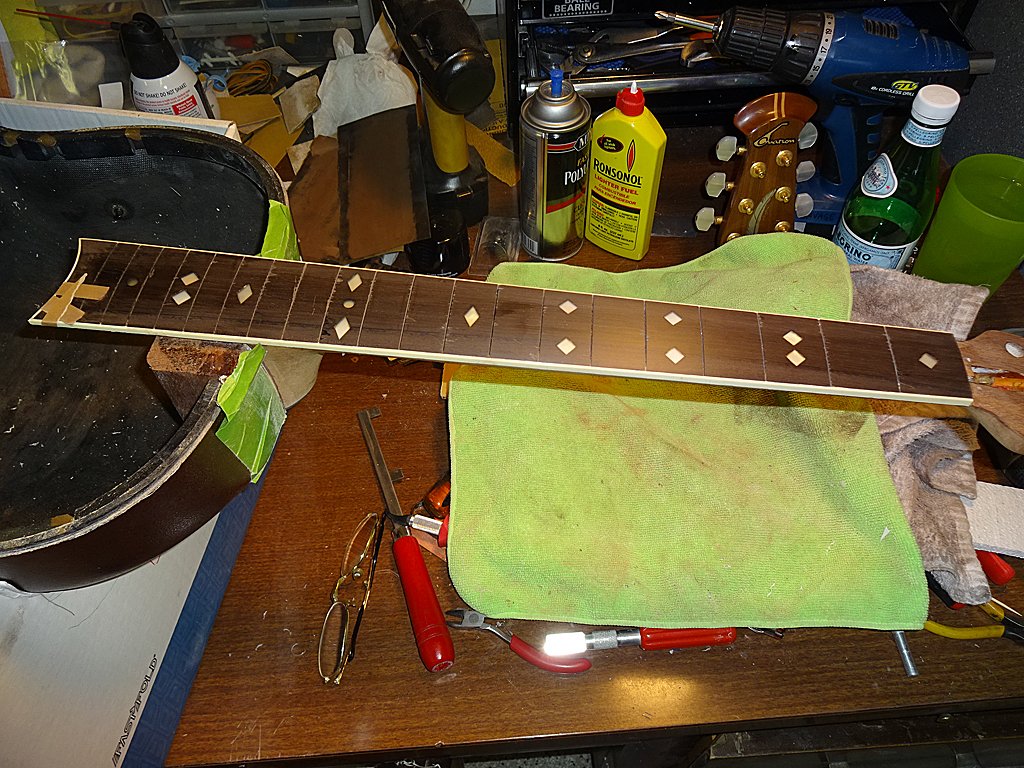
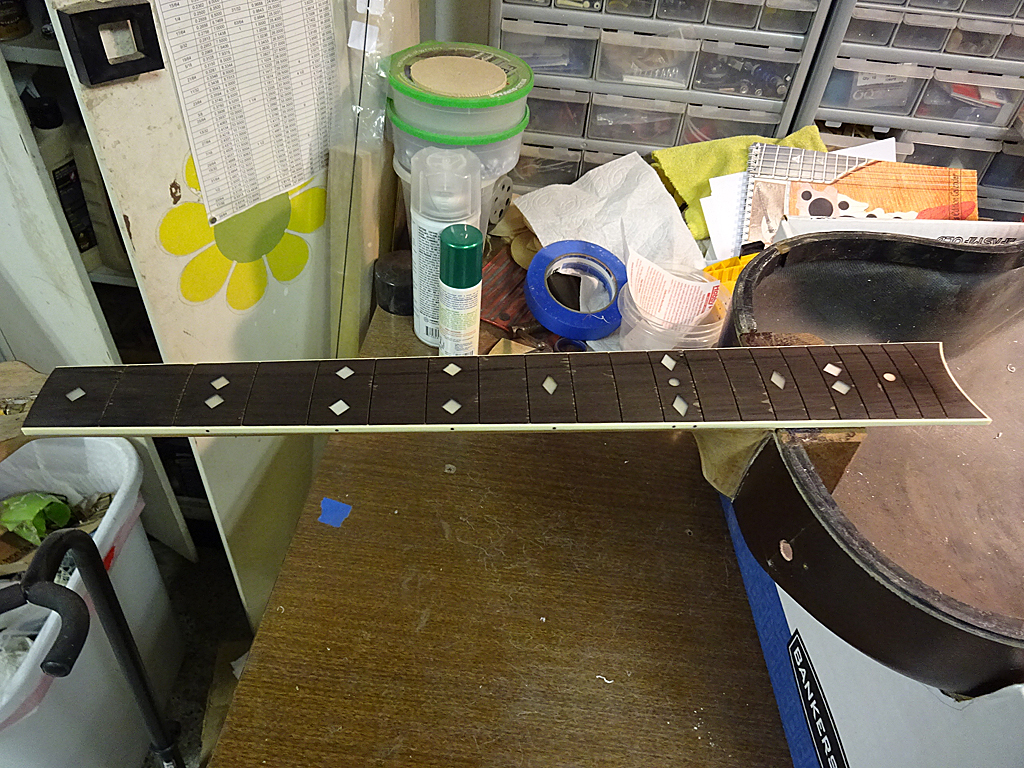
I used the razor saw to cut off the excess side markers, then shaped down the bindings.
Here's the bridge end of the fingerboard.
Looking down the side of the neck.
For the most part, the neck is done. It still needs frets, but I'll add those after I finish the work on the top.
Next job is to start prepping the top for gluing to the body. Since I've covered this in detail on other threads I'll only post when I reach the major steps
Posted 2016-01-05 1:47 PM (#520012 - in reply to #518943) Subject: Re: 1978 1617 Legend Rebuild...
Joined: December 2008 Posts: 1453
Location: Texas
Dan,
Your repair/rebuild skills and ingenuity are indisputably impressive, but, I'm also very impressed by the quality of your photos and your thorough documentation. I envy the discipline it must take to stop working at each step and take photos. (I, for one, don't multi-task well enough to do that.)
Thanks for putting in the extra effort of documenting each step, it's very informative, and provides invaluable resource/reference material for the rest of us.
Posted 2016-01-11 10:16 PM (#520163 - in reply to #520057) Subject: Re: 1978 1617 Legend Rebuild...
Joined: June 2012 Posts: 2303
Location: Lake Forest, CA
DetlefMichel - 2016-01-08 3:47 AM
Your "re"-builds appear to me to be "improved"-builds.....
Thanks!
This gets back to my model airplane building days where I would be building a kit designed by someone else and found structures or construction features that I didn't like and so I changed the design to suit my own preferences or in ways that I knew to be better.
In fact, after a while it became more work to change the design of someone else so I started designing my own models that didn't have the shortcomings I found in others' kits and stopped entirely building other peoples' designs.
One thing about model airplane builders is that they want to see how a model is built in excruciating detail.
If anyone's interested, I'd be happy to post links to the construction guides for the models I've designed. They're quite illustrative of the amount of detail I go into on the build threads here on the OFC.
Posted 2016-01-13 4:26 PM (#520248 - in reply to #520247) Subject: Re: 1978 1617 Legend Rebuild...
Joined: September 2012 Posts: 809
Location: Thredbo, NSW, Australia
Your projects have inspired me Dan, so I check Aussie eBay and Gumtree every day looking for a project Ovation.
I got my 1614 Folklore from Gumtree that had both main x braces broken at the join. I repaired that and two years on it's still going fine. Unfortunately I didn't get enough photos to document it fully. Maybe I should try with the photos that I have?
Posted 2016-01-13 5:16 PM (#520251 - in reply to #518943) Subject: Re: 1978 1617 Legend Rebuild...
Joined: March 2005 Posts: 12750
Location: Boise, Idaho
I totally forgot that my pristine 1614 came to me with a broken brace where the hole for the saddle was drilled right through it. It had a bad buzz, but a little glue and a makeshift clamp seemed to have fixed it for about 10 years so far. That was my kind of project. Buy problem guitar cheap. Fix problem easily and cheaply. I wish I could find more of those. Dan's require a lot more skill and patience.
Posted 2016-01-13 8:12 PM (#520258 - in reply to #520248) Subject: Re: 1978 1617 Legend Rebuild...
Joined: June 2012 Posts: 2303
Location: Lake Forest, CA
BanjoJ - 2016-01-13 2:26 PM
Your projects have inspired me Dan, so I check Aussie eBay and Gumtree every day looking for a project Ovation.
I got my 1614 Folklore from Gumtree that had both main x braces broken at the join. I repaired that and two years on it's still going fine. Unfortunately I didn't get enough photos to document it fully. Maybe I should try with the photos that I have?
Thanks! Yeah, guitar repairs aren't really all that hard, so there's no reason to be intimidated. While some people are hesitant to work on their guitar because of the money they spent, consider the model airplane flyer. Some of those folks will spend up to $10,000 or more on a model, then fling it into the air which sometimes results in the Gods smiting them out of the sky.
Absolutely! I'd love to see the pics you've got of your repair.
Posted 2016-01-13 8:18 PM (#520259 - in reply to #520251) Subject: Re: 1978 1617 Legend Rebuild...
Joined: June 2012 Posts: 2303
Location: Lake Forest, CA
Mark in Boise - 2016-01-13 3:16 PM
I totally forgot that my pristine 1614 came to me with a broken brace where the hole for the saddle was drilled right through it. It had a bad buzz, but a little glue and a makeshift clamp seemed to have fixed it for about 10 years so far. That was my kind of project. Buy problem guitar cheap. Fix problem easily and cheaply. I wish I could find more of those. Dan's require a lot more skill and patience.
The guitar repairs you see me doing are nothing compared to building a balsa and plywood model airplane with, literally, a couple of hundred parts.
Cheap is why I was hoping to get my hands on the 197x Balladeer. It needed a new top, but the guy was only asking $45 for it. I was a little disappointed he didn't return my calls or emails. But, I figured in the end, I'd save the money for my wood-backed O knock-off.
Posted 2016-01-26 11:19 AM (#520679 - in reply to #518943) Subject: RE: 1978 1617 Legend Rebuild...
Joined: June 2012 Posts: 2303
Location: Lake Forest, CA
I was away on business so I haven't done anything for the last couple of weeks.
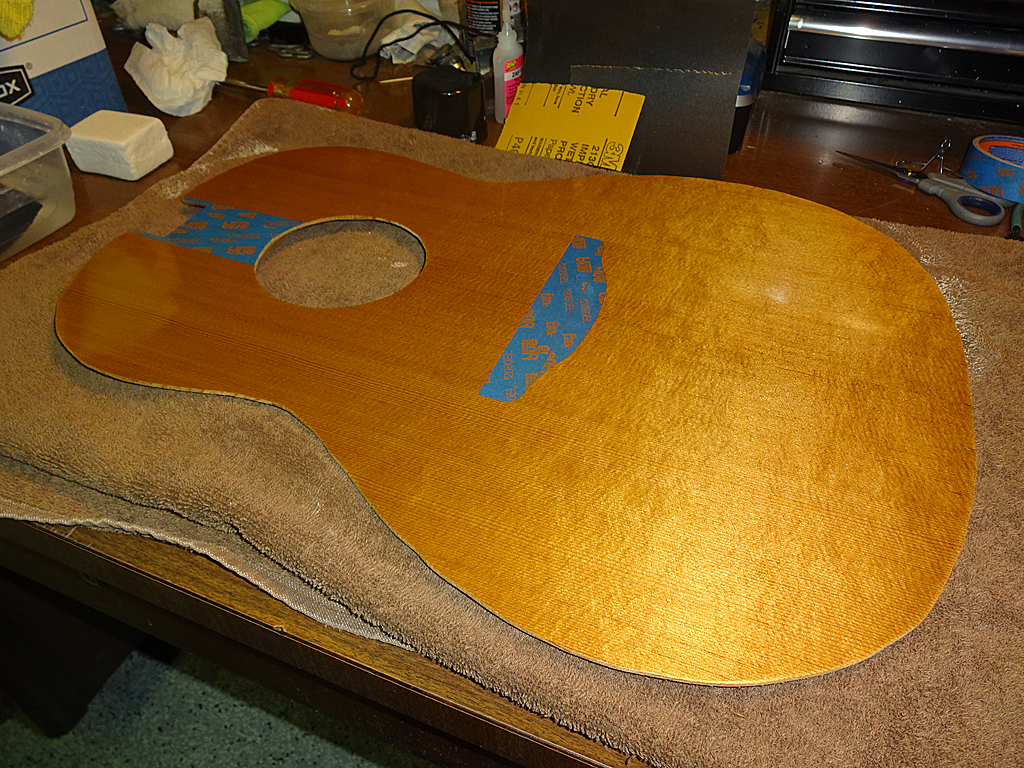
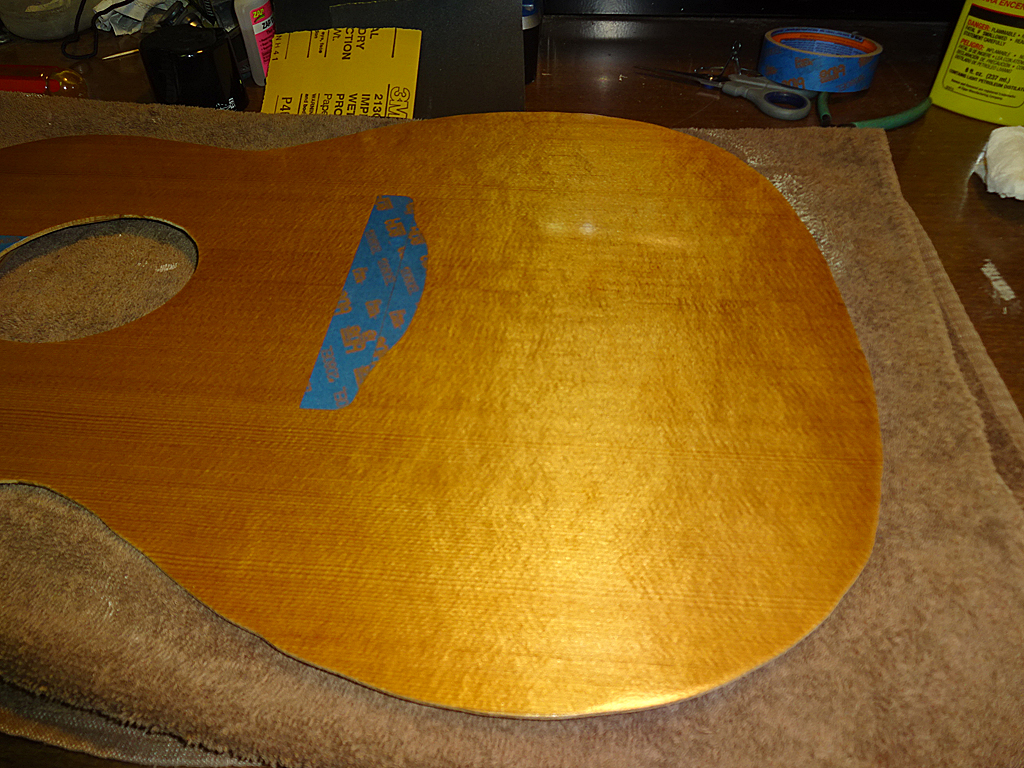
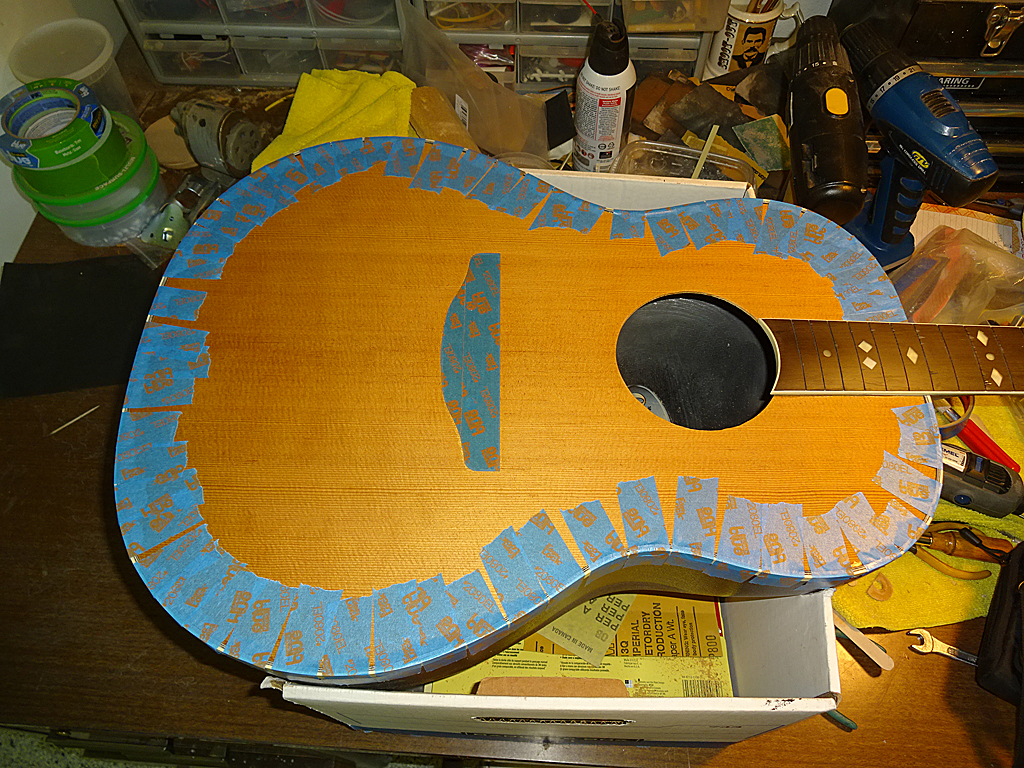
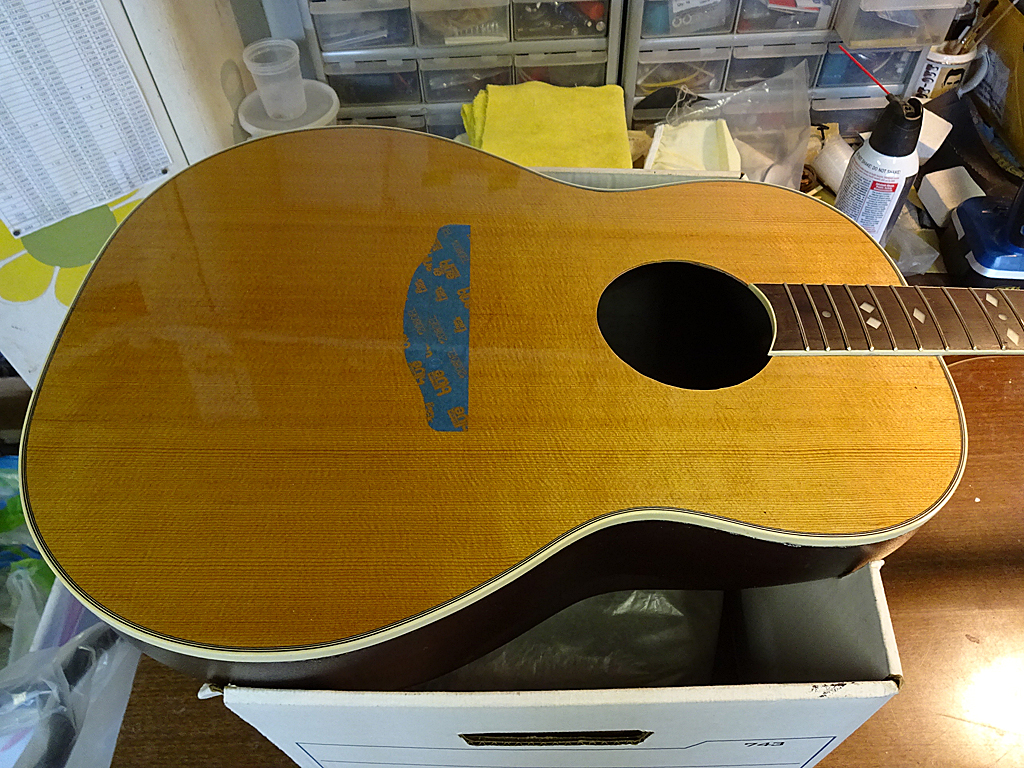
I masked off the fretboard extension and bridge location. I sprayed a couple of coats of Minwax polyurethane clear gloss to act as a sanding sealer/primer in preparation for gluing the top to the body.
The wood is highly figured. It can't really be called bear-claw. More like bear-gnawed spruce.
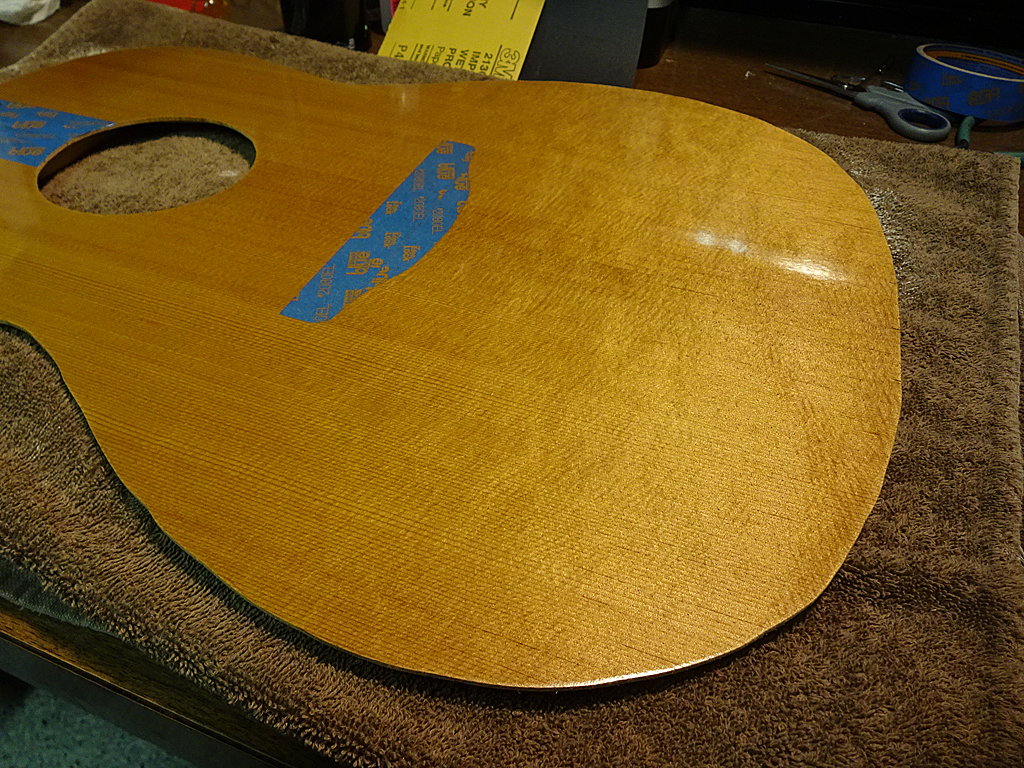
The top has been wet-sanded with 400-grit to level the surface in preparation for the final coat.
Posted 2016-02-18 9:29 AM (#522314 - in reply to #518943) Subject: RE: 1978 1617 Legend Rebuild...
Joined: June 2012 Posts: 2303
Location: Lake Forest, CA
Moving right along. The top is glued to the bowl. Binding/purfling channels have been routed.
Need to do a little whittling to finish the channels.
Binding/purfling glued into place.
Binding/purfling scraped level.
Fret board extension glued to the top.
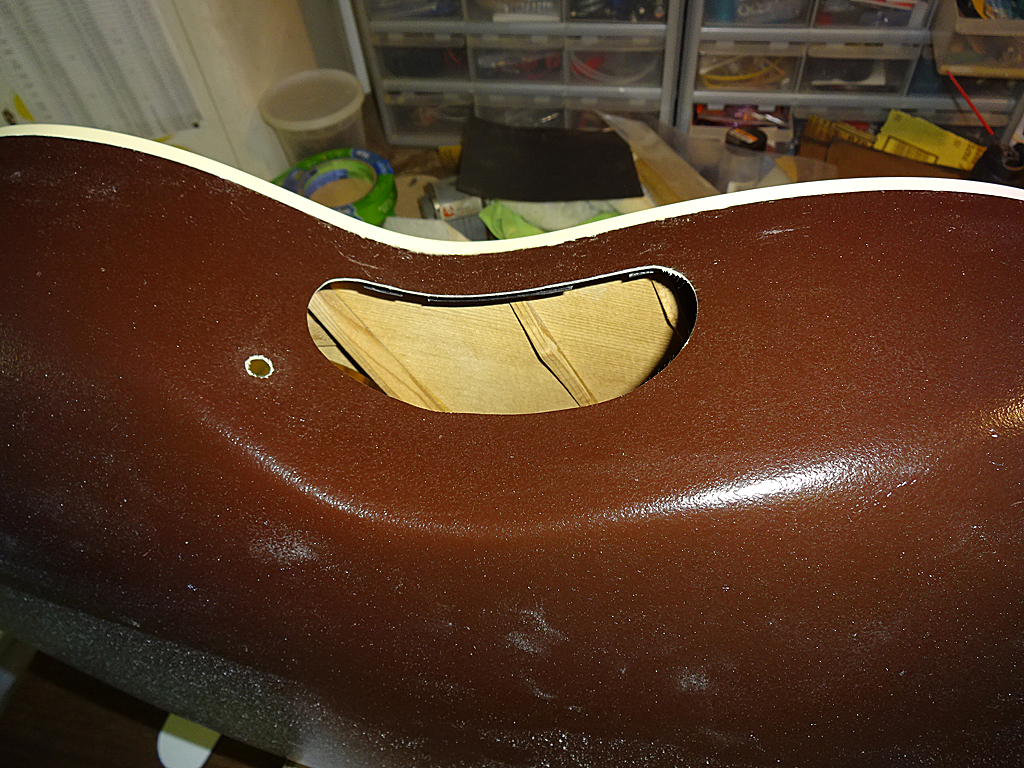
Big ol' hole cut into the side for the OP-Pro. (I've decided to keep it a 1617 instead of downgrading to an 1117)
Fret wires cut, tangs nipped and ground. Ready for installation.
Fret wires hammered into the fret board.
The Stewmac fret tang nipper was worth the $65. Next job is to trim the frets even with the sides of the fret board, then bevel, level, crown and polish them.
Posted 2016-02-19 11:20 AM (#522350 - in reply to #518943) Subject: Re: 1978 1617 Legend Rebuild...
Joined: October 2012 Posts: 1018
Location: Yokohama, Japan
As the Inspector Gadget would say, "Wowsers"! DanSavage. You are awe inspiring! Really precise work. So many things I want to ask... when you do the rough cut of the sound board, how large do you cut it (like Xcm larger than the bowl?). Did you do the "whittling" of the binding channels with a chisel? What kind of adhesive did you use to glue down the fret board (probably didn't use much)? Are the frets EVO Golds? They sure look nice! Oh pester, pester, pester, sorry Dan...inquiring minds want to know...oh and thanks for sharing!
Posted 2016-02-19 11:46 AM (#522351 - in reply to #522350) Subject: Re: 1978 1617 Legend Rebuild...
Joined: June 2012 Posts: 2303
Location: Lake Forest, CA
Hi Ken,
You're welcome.
1) Not a specific amount. I just make sure it is wider then the sides of the bowl. Once it's glued down, I use a Dremel sanding drum to take off the excess so I can route the channels.
2) Binding channels were whittled with Xacto #11 and Xacto chisel. I use the #11 to score/cut the lines drawn to the necessary depth, then use the chisel to finish the cuts. When routing the channels, I start with the binding channel, then route the purfling. When whittling, I do the opposite; cut the purfling, then the binding.
3) Before gluing the top, I used OBG to coat the underside of the fretboard and the area on the top where the fretboard would be glued. I let both dry, then glued the top. To reactivate the glue, I slid a piece of linen wet with hot water between the two for a minute or so, then clamped the fretboard extension.
4) Yes, they're EVO gold frets. Very hard and springy. IOW, they're of a very high temper, almost like spring steel.
arumako - 2016-02-19 9:20 AM
As the Inspector Gadget would say, "Wowsers"! DanSavage. You are awe inspiring! Really precise work. So many things I want to ask... when you do the rough cut of the sound board, how large do you cut it (like Xcm larger than the bowl?). Did you do the "whittling" of the binding channels with a chisel? What kind of adhesive did you use to glue down the fret board (probably didn't use much)? Are the frets EVO Golds? They sure look nice! Oh pester, pester, pester, sorry Dan...inquiring minds want to know...oh and thanks for sharing!
Posted 2016-03-12 2:02 PM (#522874 - in reply to #518943) Subject: RE: 1978 1617 Legend Rebuild...
Joined: June 2012 Posts: 2303
Location: Lake Forest, CA
Frets are trimmed, leveled, beveled & crowned. Masking tape on the body is to protect the wood from the files.
At this point the guitar is ready for finishing. I'll do the neck and head stock first so that I can put the decal down.
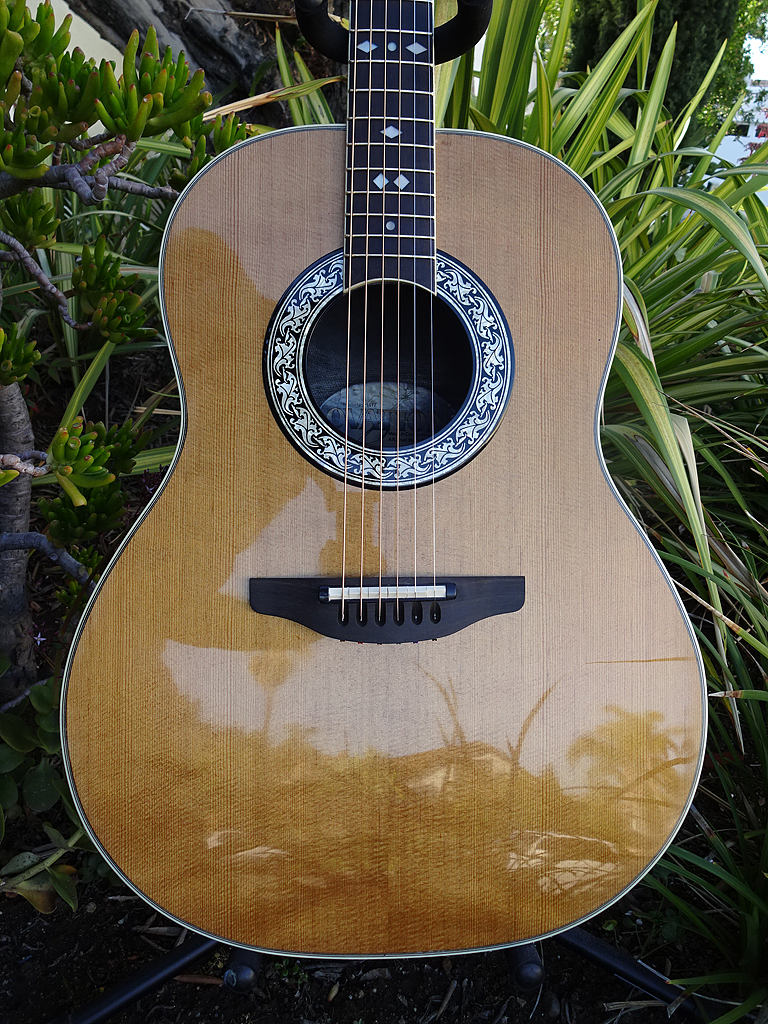
And... The finish is done.
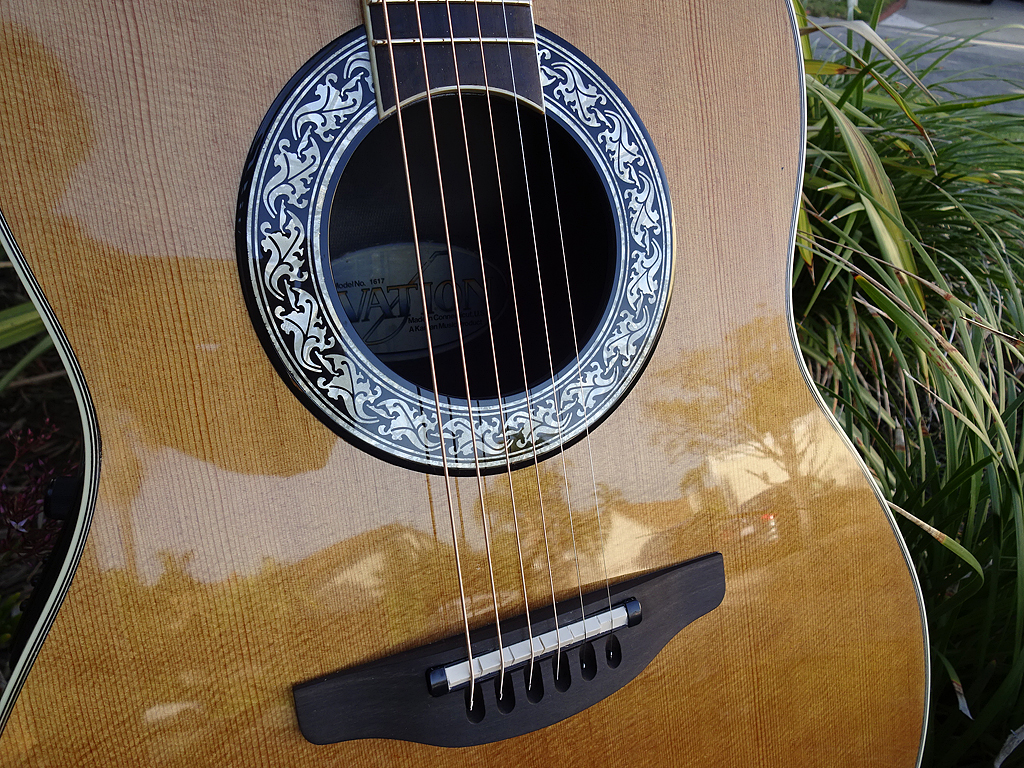
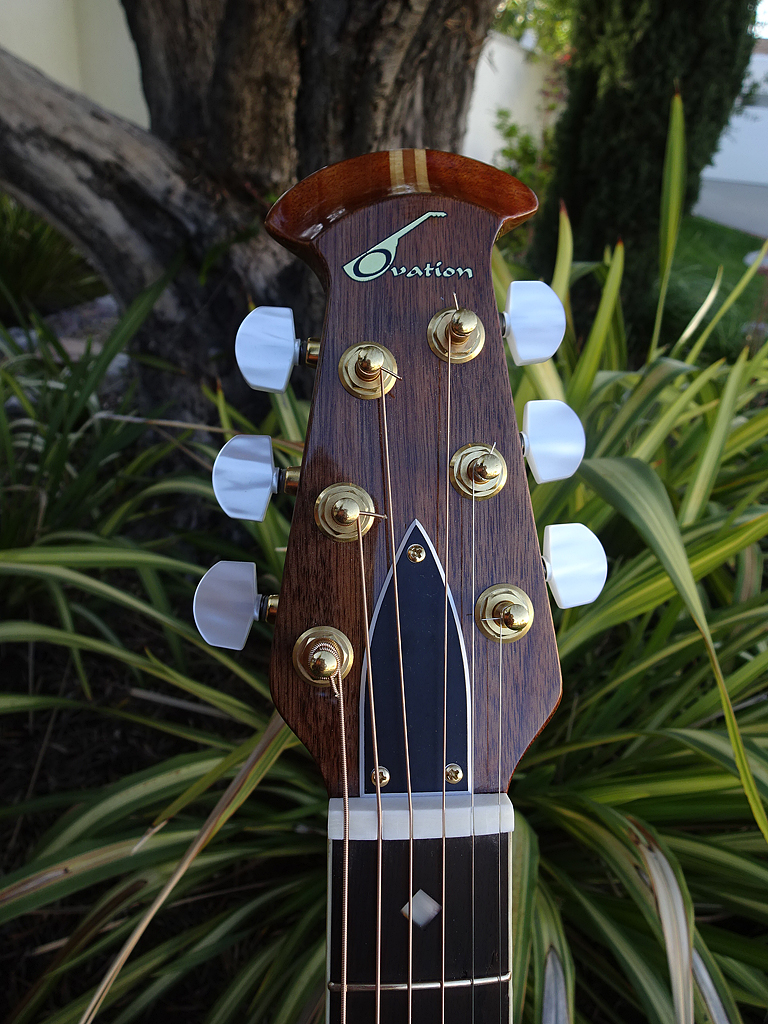
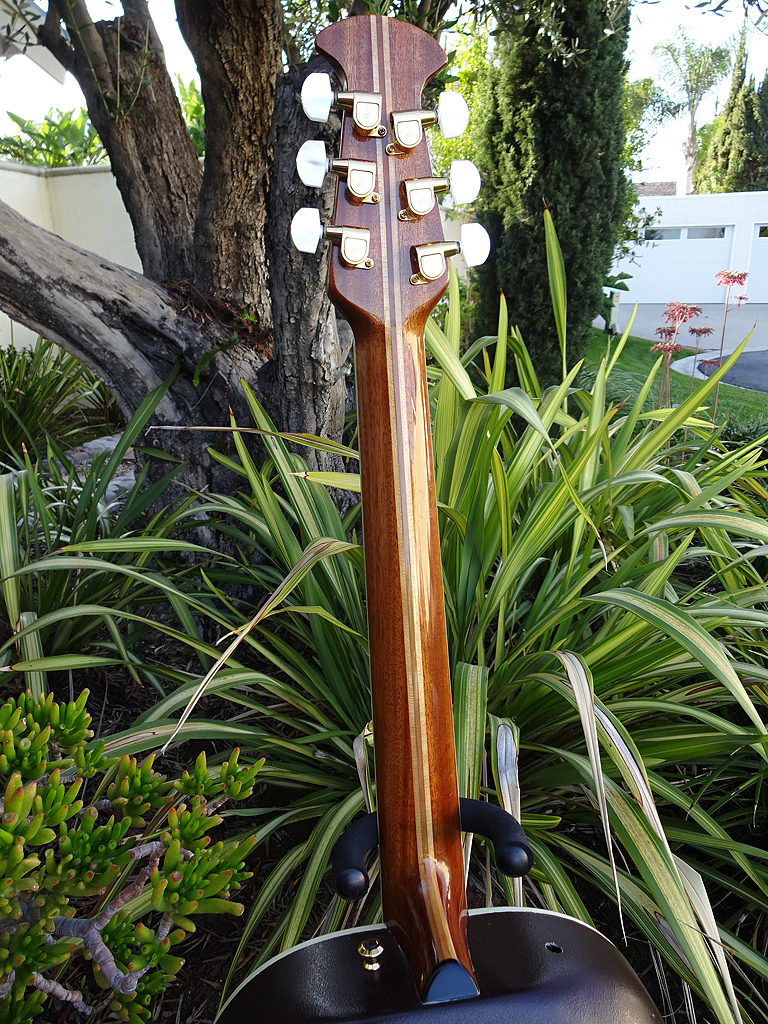
Head stock with decal. The neck and headstock wood is real purty.
Close-up of decal. It turned out great. You can't see the carrier sheet at all.
And, the body is done and polished. Ready for gluing the bridge down.
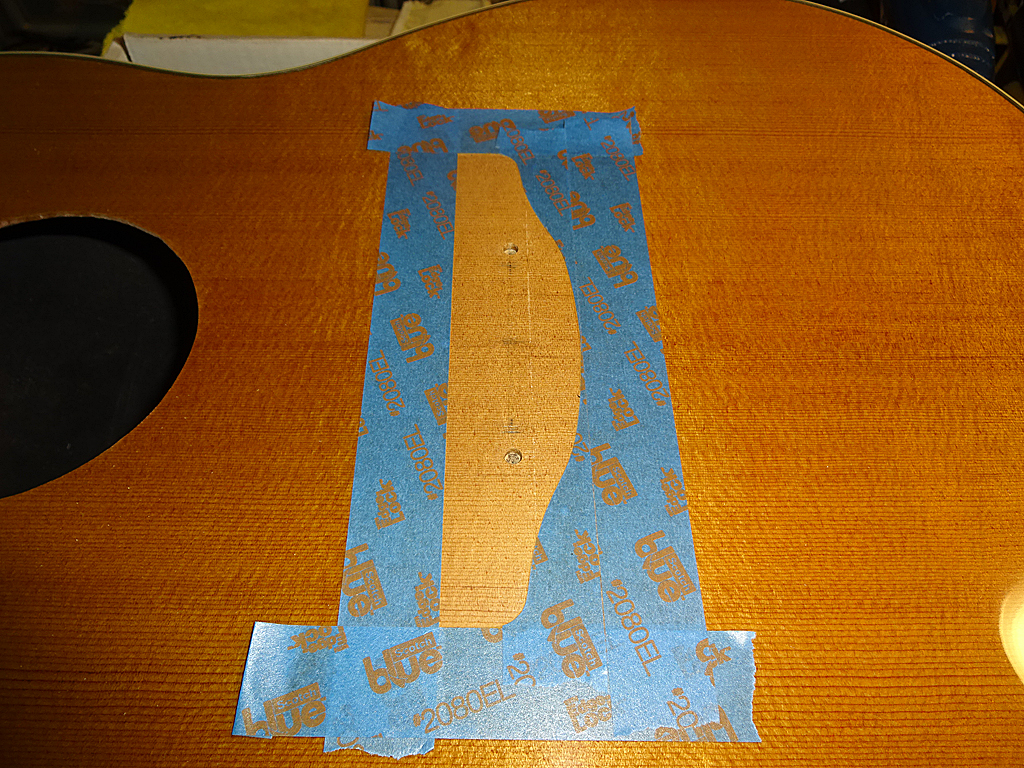
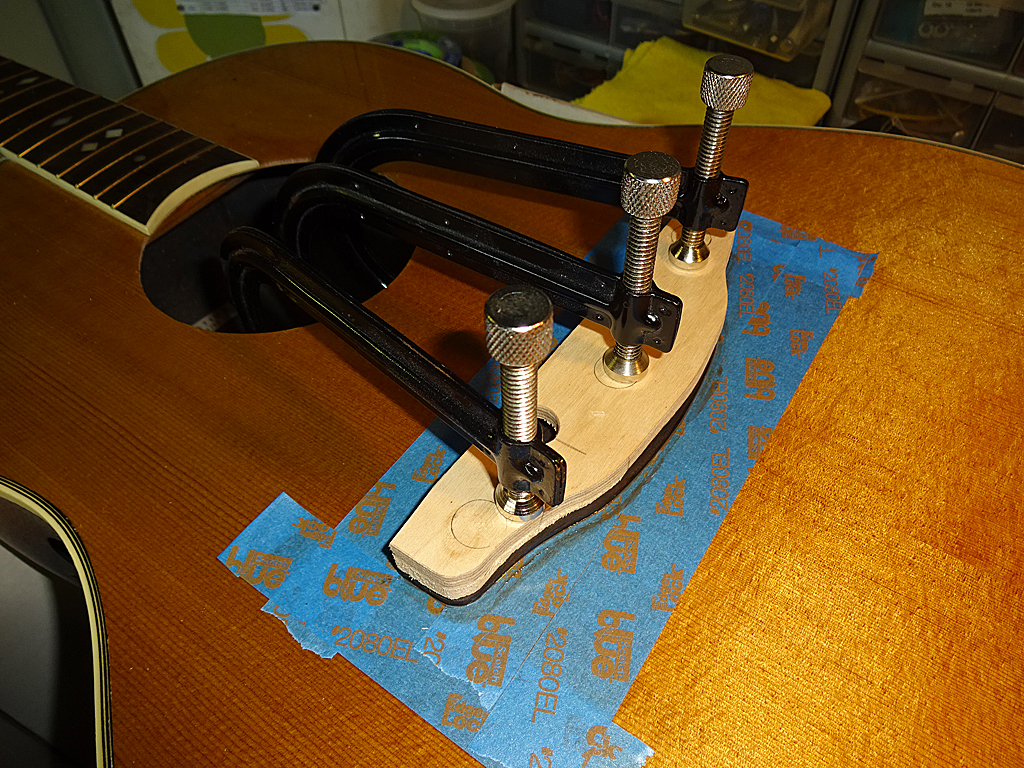
I put the bridge into place, then lightly scored the finish and removed the masking tape to get down to bare wood. Then, I masked around the bridge so I don't get any glue on the top finish.
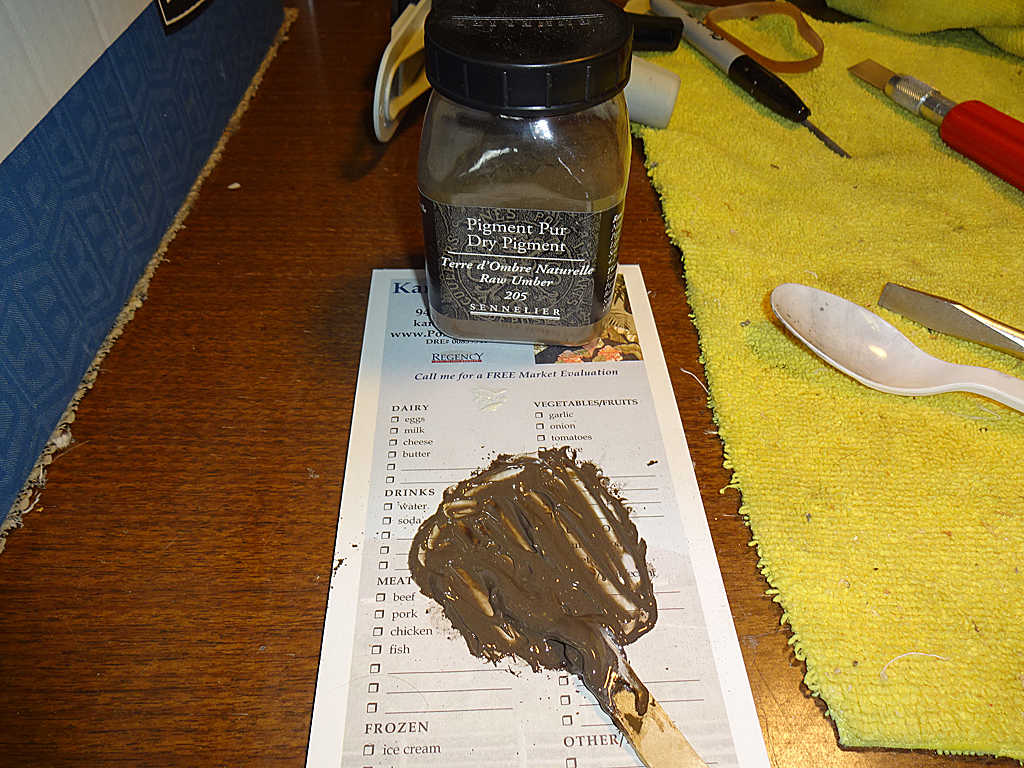
I didn't like the white line of glue that's visible under the bridge, so I mixed some raw umber dry pigment with the Hysol to more or less match the color of the ebony bridge.
The bridge is glued and clamped into place. Once the glue has tacked up, I'll remove the masking tape and let it finish curing. The Hysol should be mostly cured by tomorrow afternoon, so I'll pull the clamps off and let it finish curing until Tuesday.
After I pull the clamps off, I'll trim and glue the rosette, new nut, etc. It's getting really close now. (woo hoo!)
Posted 2016-03-13 6:36 AM (#522889 - in reply to #522874) Subject: RE: 1978 1617 Legend Rebuild...
Joined: December 2004 Posts: 553
Location: Denmark
DanSavage - 2016-03-12 2:02 PM
(woo hoo!)
+1
Pretty headstock indeed. Besides that it's amazing how clean Your work seems. Most gluing I do end up as a mess with glue all over including my fingers, the workbench etc. etc.
Posted 2016-03-13 7:14 AM (#522890 - in reply to #518943) Subject: Re: 1978 1617 Legend Rebuild...
Joined: October 2012 Posts: 1018
Location: Yokohama, Japan
WOW! Just WOW...DanSavage. Awesome work as usual. Coloring the hysol is a great idea! A bit surprised at the aggressive choice of adhesive for the bridge. I thought you might go for Hide or OBG. The work on the O decal is done so beautifully...professionally. I'll be following in your foot steps soon, as I'll need an O decal to put on my carbon fiber face plate of my upgraded iDea headstock. When Alain Prost was the F1 World Champion, he was nicknamed "The Professor" because his moves were so precise. That's a nickname befitting for you! I am learning so much from your posts. Can't wait to see the finished product. Thanks so much for sharing!
Posted 2016-03-13 12:51 PM (#522893 - in reply to #518943) Subject: Re: 1978 1617 Legend Rebuild...
Joined: March 2013 Posts: 359
Location: undisclosed
If there is a place to get aggressive with glue it is the bridge. Great work Dan, you do a amazing job of documentation. I get going and don't want to stop, its only been the last couple of years since I got a cell phone which you would think would make it easier.....
Posted 2016-03-13 9:32 PM (#522911 - in reply to #522883) Subject: Re: 1978 1617 Legend Rebuild...
Joined: June 2012 Posts: 2303
Location: Lake Forest, CA
moody, p.i. - 2016-03-12 7:03 PM
Did I miss the opportunity to have my Adamas I neck refinished?
Nope.
As I recall you wanted to take your Adamas neck from gloss to satin, right? Your Adamas has the cauliflower headstock, right?
I'm not keen on refinishing the front of the headstock, but I'm open to doing the back of your neck to make it more playable for you.
I checked with Eastwood, but they don't make a satin 2K urethane. So, we're stuck with doing one of two things:
1) Sand the back of neck to reduce the gloss to a satin finish.
2) Spray satin polyurethane.
Keep in mind that to do the second choice will require doing the first. Using a sandpaper with a very fine grit will probably give you the satin finish you desire.
Posted 2016-03-13 9:35 PM (#522913 - in reply to #522889) Subject: RE: 1978 1617 Legend Rebuild...
Joined: June 2012 Posts: 2303
Location: Lake Forest, CA
tpa - 2016-03-13 4:36 AM
DanSavage - 2016-03-12 2:02 PM
(woo hoo!)
+1
Pretty headstock indeed. Besides that it's amazing how clean Your work seems. Most gluing I do end up as a mess with glue all over including my fingers, the workbench etc. etc.
When I was building model airplanes, I got glue everywhere, too. More at the beginning than the end, but still.
Working on guitars has caused me to get more careful with the gluing. :D
Posted 2016-03-13 9:48 PM (#522914 - in reply to #522890) Subject: Re: 1978 1617 Legend Rebuild...
Joined: June 2012 Posts: 2303
Location: Lake Forest, CA
Thanks, Ken.
I've been coloring epoxy for years. Pigment is sold in gel form, but there's no guarantee that the gel will be compatible with epoxy. So, I started using dry pigment so I didn't have to worry. Plus, dry artist pigment can be mixed to get whatever color you need.
I did consider using HHG for this bridge, but the point of this guitar was to build it as closely to my 1619 as possible to limit the variables so I could more directly compare the differences between a torrefied top and a non-torrefied top. Both guitars are about the same vintage, with the same method of bowl construction. I built both tops using the same brace pattern and the same types of glue for gluing down the braces.
The bridge on my 1619 was originally glued down with HHG, but I did a poor job of prepping the top and it popped off after about a month. So, I reglued it with Hysol as I knew that wouldn't result in a failed glue joint. (it hasn't)
So, to eliminate the bridge glue as a variable, I used the same glue on this 1617 as the 1619. Even so, the bridge on the 1619 was walnut and this one is ebony, but I figured the differences between the two would be minimal.
That's also why I decided to pop for the cost of electronics, including the piezo bridge saddle. If I had gone with my original plan of using a bone saddle, I would not be able to be sure that the difference in sound was due to the torrefied top or the bone saddle.
I'm really glad I spent the dough to buy my Alps printer. It's one of the few ever produced that's able to print opaque colors, like gold foil. Although I used a different method to print the decals on Jay's guitar, the Ovation logo on the later guitars used gold foil outlined in black, and it would have been impossible to print that later logo using the method I used on Jay's O.
arumako - 2016-03-13 5:14 AM
WOW! Just WOW...DanSavage. Awesome work as usual. Coloring the hysol is a great idea! A bit surprised at the aggressive choice of adhesive for the bridge. I thought you might go for Hide or OBG. The work on the O decal is done so beautifully...professionally. I'll be following in your foot steps soon, as I'll need an O decal to put on my carbon fiber face plate of my upgraded iDea headstock. When Alain Prost was the F1 World Champion, he was nicknamed "The Professor" because his moves were so precise. That's a nickname befitting for you! I am learning so much from your posts. Can't wait to see the finished product. Thanks so much for sharing!
Posted 2016-03-13 9:49 PM (#522915 - in reply to #522893) Subject: Re: 1978 1617 Legend Rebuild...
Joined: June 2012 Posts: 2303
Location: Lake Forest, CA
Cavalier - 2016-03-13 10:51 AM
If there is a place to get aggressive with glue it is the bridge. Great work Dan, you do a amazing job of documentation. I get going and don't want to stop, its only been the last couple of years since I got a cell phone which you would think would make it easier.....
Thanks, Chris.
This level of documentation comes from years of building model airplanes. Those guys want to see every detail of a build. (LOL!)
Posted 2016-03-13 9:58 PM (#522916 - in reply to #518943) Subject: RE: 1978 1617 Legend Rebuild...
Joined: June 2012 Posts: 2303
Location: Lake Forest, CA
So, back to the build.
The glue was cured enough to pull the clamps off and drill the hole for the pickup wire.
Rosette was glued into place with 5-minute hardware store epoxy.
Tuners are mounted, truss rod nut was put back into place. If you look closely you can see a bronze washer under the truss rod nut. The nut was pretty much bottomed out on the threads, so I was left with two choices --cut more threads or find a washer that would push the nut back up the threads.
I looked through my model airplane parts and found a bronze wheel bushing that was thick enough to give the nut some more bite in the threads, but had a large enough ID to fit over the truss rod, but with a small enough OD to fit inside the truss rod pocket. (Thank to Associated R/C!)
While I'm waiting for the Hysold to fully cure the next job is to start making the bone nut. Since this nut is bleached it's pretty bright white. After I finish it and polish it, I'll probably dip it into some Rit dye to give it a vintage look to match the color of the binding.
Posted 2016-03-14 9:40 PM (#522935 - in reply to #518943) Subject: RE: 1978 1617 Legend Rebuild...
Joined: June 2012 Posts: 2303
Location: Lake Forest, CA
Well, I couldn't help myself.
I cut the slots in the nut, strung it up (D'Addario PB, 10-47) to set the action.
All I can say is, Wow! I love this torrefied wood. I played a couple of songs for SWMBO and her comments was that it was really LOUD, clear but not twangy. (a good thing)
Here's what it looks like.
I need to fix the high-e nut slot --I cut the slot a little too deep and it's buzzing slightly on the first fret. I also need to round the nut, polish it and glue it down permanently, but the sound of the guitar is everything I wanted it to be.
Tons of sustain, just like Jay's 485 and fantastic tone. In fact, I had to put the OP-Pro in because there was so much sound coming out of the hole. I may just keep the PBs on there for the time being.
I'll take some proper beauty shots tomorrow and post them. I just wanted to share the latest.
Posted 2016-03-15 8:15 PM (#522965 - in reply to #518943) Subject: RE: 1978 1617 Legend Rebuild...
Joined: June 2012 Posts: 2303
Location: Lake Forest, CA
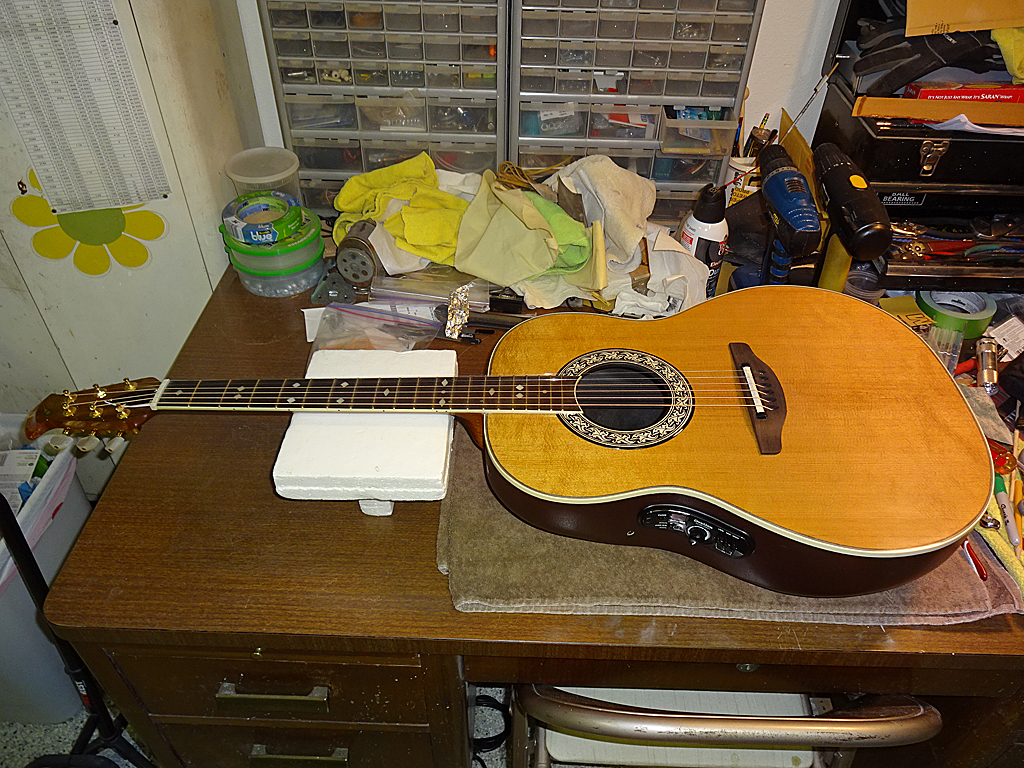
Thanks everyone for you kind words. It's been a real pleasure sharing this project with you. Not as pleasurable as playing this guitar now that it's done, but close.
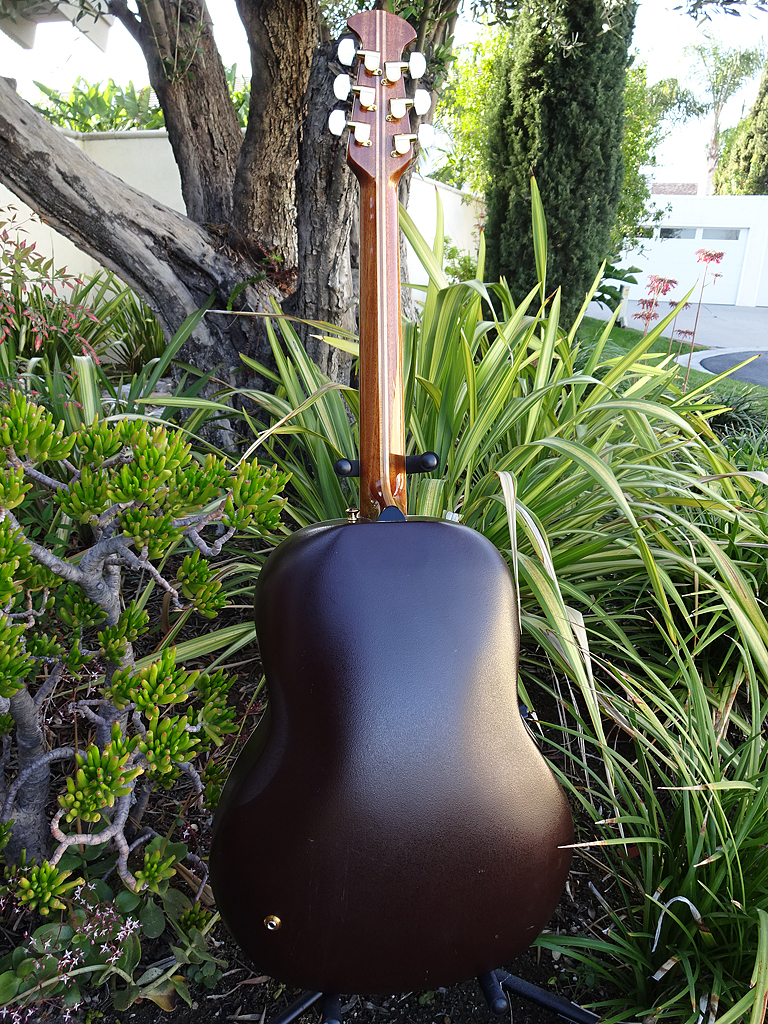
As promised, it's done. Not 100% done, but done enough until I change out the strings.
And, the project has not been without its flaws, such as the binding separation at the waist on the bass bout side.
But, all in all, I'm very happy with it. I did have a chance to play its cousin, the 1619 to compare the sound of the two. They both are of the same generation bowls, necks, etc., and have the same brace pattern on the top. In short, there's no comparison. This guitar sounds better, hands-down.
Posted 2016-03-15 10:53 PM (#522967 - in reply to #522914) Subject: Re: 1978 1617 Legend Rebuild...
Joined: October 2012 Posts: 1018
Location: Yokohama, Japan
My goodness, things have progressed rapidly! Thanks for always responding so graciously and thoroughly to my inquiries, Dan. I really appreciate it. What a great comparison/experiment!
DanSavage - 2016-03-13 11:48 AM
Thanks, Ken.
I've been coloring epoxy for years. Pigment is sold in gel form, but there's no guarantee that the gel will be compatible with epoxy. So, I started using dry pigment so I didn't have to worry. Plus, dry artist pigment can be mixed to get whatever color you need.
I did consider using HHG for this bridge, but the point of this guitar was to build it as closely to my 1619 as possible to limit the variables so I could more directly compare the differences between a torrefied top and a non-torrefied top. Both guitars are about the same vintage, with the same method of bowl construction. I built both tops using the same brace pattern and the same types of glue for gluing down the braces.
The bridge on my 1619 was originally glued down with HHG, but I did a poor job of prepping the top and it popped off after about a month. So, I reglued it with Hysol as I knew that wouldn't result in a failed glue joint. (it hasn't)
So, to eliminate the bridge glue as a variable, I used the same glue on this 1617 as the 1619. Even so, the bridge on the 1619 was walnut and this one is ebony, but I figured the differences between the two would be minimal.
That's also why I decided to pop for the cost of electronics, including the piezo bridge saddle. If I had gone with my original plan of using a bone saddle, I would not be able to be sure that the difference in sound was due to the torrefied top or the bone saddle.
I'm really glad I spent the dough to buy my Alps printer. It's one of the few ever produced that's able to print opaque colors, like gold foil. Although I used a different method to print the decals on Jay's guitar, the Ovation logo on the later guitars used gold foil outlined in black, and it would have been impossible to print that later logo using the method I used on Jay's O.
So now with all this attention to detail you've got the perfect comparison! That means you have two vintage 70's Os with modern OP Pro pre-amps! Your work never ceases to amaze me!
Posted 2016-03-16 9:03 AM (#522973 - in reply to #522967) Subject: Re: 1978 1617 Legend Rebuild...
Joined: January 2009 Posts: 1249
Location: Texas
Dan...another sweet looking O. Congrats.
Soooo...are you deducting bracing and top or just the torrified top as being the main culprit in the improvement of acoustic response?
Additionally, I would be interested, since there is acoustical separation...if there is any noticeable difference between the two, plugged in, with the same settings.
Posted 2016-03-16 11:44 AM (#522975 - in reply to #522967) Subject: Re: 1978 1617 Legend Rebuild...
Joined: June 2012 Posts: 2303
Location: Lake Forest, CA
arumako - 2016-03-15 8:53 PM
My goodness, things have progressed rapidly! Thanks for always responding so graciously and thoroughly to my inquiries, Dan. I really appreciate it. What a great comparison/experiment!
So now with all this attention to detail you've got the perfect comparison! That means you have two vintage 70's Os with modern OP Pro pre-amps! Your work never ceases to amaze me!
Any plans for a video shoot-out between the two?
Thanks, Ken.
Not immediately. Right now the 1619 has 80/20s and the 1617 has PBs. Once I change the strings I may do a side-by-side comparison video.
Posted 2016-03-16 11:49 AM (#522976 - in reply to #522973) Subject: Re: 1978 1617 Legend Rebuild...
Joined: June 2012 Posts: 2303
Location: Lake Forest, CA
jay - 2016-03-16 7:03 AM
Dan...another sweet looking O. Congrats.
Soooo...are you deducting bracing and top or just the torrified top as being the main culprit in the improvement of acoustic response?
Additionally, I would be interested, since there is acoustical separation...if there is any noticeable difference between the two, plugged in, with the same settings.
Thanks, Jay.
I built this guitar as identically as possible to the 1619 so that I could reduce the number of variables down to just the difference between normal wood and torrefied wood.
This means that the improvement in the sound can be isolated to the torrefied wood.
It would be interesting to see if they sound different when plugged in. I'll try that tonight and let you know.
Posted 2016-03-16 3:22 PM (#522980 - in reply to #518943) Subject: Re: 1978 1617 Legend Rebuild...
Joined: December 2015 Posts: 287
Location: Katmandu
It's outright uncanncy to see a 1617 in a state as if she had just left the factory in New Hampshire -- or even better than that. What a marvelous piece of restoration work which I never thought possible as home-made!
Merely the nut could use a rounding off and eventually polishing towards the peghead as it seems a little square-shaped still, but that may just be the photos.
Posted 2016-03-16 5:19 PM (#522983 - in reply to #522980) Subject: Re: 1978 1617 Legend Rebuild...
Joined: June 2012 Posts: 2303
Location: Lake Forest, CA
leonardmccoy - 2016-03-16 1:22 PM
It's outright uncanncy to see a 1617 in a state as if she had just left the factory in New Hampshire -- or even better than that. What a marvelous piece of restoration work which I never thought possible as home-made!
Merely the nut could use a rounding off and eventually polishing towards the peghead as it seems a little square-shaped still, but that may just be the photos.
Thanks! It's a brand-new 40-year-old guitar. :D
Yep. You've got a good eye. I still need to round and polish the nut, but I'm going to wait to do that until I change the strings. It's perfectly playable in the mean time, so I'm in no big hurry.
Posted 2016-03-16 10:38 PM (#522987 - in reply to #522984) Subject: RE: 1978 1617 Legend Rebuild...
Joined: June 2012 Posts: 2303
Location: Lake Forest, CA
BanjoJ - 2016-03-16 5:44 PM
I have a question for you Dan.
I recently scored an Op-Pro preamp, can, pickup and cables off Aussie eBay, and I'm planning to install it in my 1982 Folklore 1614.
I was planning to make a template for the cut-out from one of my other O's. Is that what you did for your 1617?
Hi Paul,
Yep. I took the OP-Pro can out of my 2078, then traced the opening onto Bristol paper.
The trickiest part is knowing where to put the hole on the new guitar. What I did was to hold the can up to the front of the guitar, then looking front to back, move it back and forth until the curve of the can matched the curve of the waist.
Upon further reflection, it would be easy enough to put some masking tape on the side parallel to the top starting at the joint where the neck joins the body and mark the start of the hole, then transfer the tape to the guitar where you want the hole to go. I just eye-balled it, but using the tape would be more precise.
I put some masking tape on the waist, then traced the template onto the tape. I used my Dremel cut-off wheel to rough cut the opening, then used a sanding drum to grind the opening back to it's final shape.
Remember, you can always sand off more material to enlarge the hole, but it's more difficult to shrink the hole if you get it too large.
Posted 2016-03-22 8:47 PM (#523060 - in reply to #522973) Subject: Re: 1978 1617 Legend Rebuild...
Joined: June 2012 Posts: 2303
Location: Lake Forest, CA
jay - 2016-03-16 7:03 AM
Additionally, I would be interested, since there is acoustical separation...if there is any noticeable difference between the two, plugged in, with the same settings.
I had a chance to compare the 1619 to the 1617 when plugged in.
Before I did the comparison I strung the 1619 with the same strings as the 1617 and to be honest, I can't tell any difference between the two.
This isn't surprising because the pickups only read the vibration of the strings, not the tops.
I did an acoustic-only blind-sound test between the two with my wife and she picked the 1617.
Posted 2016-03-23 8:59 AM (#523070 - in reply to #523063) Subject: Re: 1978 1617 Legend Rebuild...
Joined: June 2012 Posts: 2303
Location: Lake Forest, CA
WRT the wood bowl project, I'm taking a break for a while. I've got a web app I'm building for the prison ministry at our church for those reentering society. After that, we'll see.
Posted 2016-03-24 11:10 PM (#523117 - in reply to #523060) Subject: Re: 1978 1617 Legend Rebuild...
Joined: October 2012 Posts: 1018
Location: Yokohama, Japan
DanSavage - 2016-03-22 10:47 AM
I had a chance to compare the 1619 to the 1617 when plugged in.
Before I did the comparison I strung the 1619 with the same strings as the 1617 and to be honest, I can't tell any difference between the two.
This isn't surprising because the pickups only read the vibration of the strings, not the tops.
I did an acoustic-only blind-sound test between the two with my wife and she picked the 1617.
Despite knowing better, I always find myself wanting to believe that the pre-amps make a huge difference in capturing the unique sound of each acoustic guitar. I guess that's why the Cool Tube type pre-amp with piezos and mics are gaining in popularity. I guess mics are still the most accurate method to reproduce acoustic guitar voicing.
...redeeming model airplanes, guitars, and people...sounds like a busy time for you Dan. We'll be looking forward to your wood bowl project with great anticipation!
Posted 2016-03-26 6:55 PM (#523187 - in reply to #518943) Subject: RE: 1978 1617 Legend Rebuild...
Joined: June 2012 Posts: 2303
Location: Lake Forest, CA
A good pickup and preamp makes all the difference in the electronic sound of the guitar.
Ovation's acoustic preamp and pick-up has long been recognized as some of the best in the business, which is why they're used so much in the studio.
A friend of mine is a professional musician in L.A. and does a lot of studio recording. Whenever he's got acoustic guitar work to do the engineers always ask him to bring his Legend. I talked to him about why this is and he explained that with most guitars the engineers have to mix out the strong bass response. But, the Ovation electronics are very balanced so it's easier to get good sound out of them than other guitars. Yes, if you want to capture the actual sound of the guitar, you have to mic it.
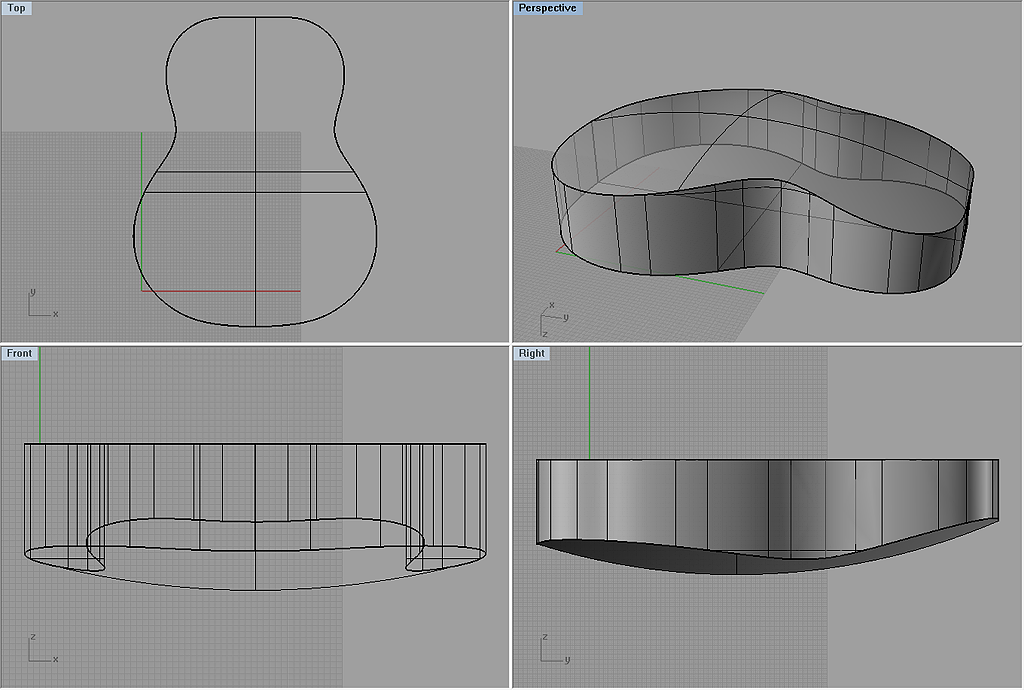
I'm goofing around in 3D CAD to get an idea of how to build the mold for bending of the wood staves. Here's the first crack at it. This bowl was made with a sphere. But, it's too thick at the upper and lower bouts.
This exercise tells me that the bowls on Ovations and the Alvarez DY92 are not truly spherical. The next exercise will involve making a bowl with a custom contour.
Posted 2016-03-31 10:42 AM (#524314 - in reply to #518943) Subject: Re: 1978 1617 Legend Rebuild...
Joined: June 2012 Posts: 2303
Location: Lake Forest, CA
Very cool. Like the 101 keyboard, the roller mouse has become an industry standard.
I used DesignCAD 3D for many years and designed several model airplane kits using it. While it was cutting edge for the late 1980s when I started using it, the lack of updates left it in the dust when compared to other 3D tools.
These days I'm using Rhino 3D. I've designed several 3D printed parts I'm selling on Shapeways.com.
Posted 2016-03-31 8:08 PM (#524331 - in reply to #518943) Subject: RE: 1978 1617 Legend Rebuild...
Joined: March 2016 Posts: 13
Really impressive work, and informative for wannabe luthiers like me. Can you tell me how you remove the binding near the neck? Is it attached with epoxy?