|
|
Joined:
May 2015
Posts: 186
Location: Glendora, CA | Any opinions (Dan?) on how hard a reset/glue this is? I am willing to try to pick it up for $40 and try to advance my rudementery luthier skills if it seems like it might be viable...and since its a Pacific Rim model if I screw it up...at least I am not ruining a classic!! http://losangeles.craigslist.org/lac/msg/5257664913.html 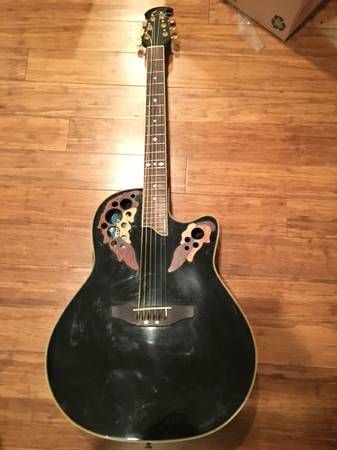 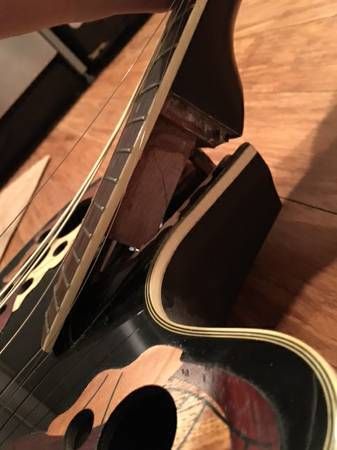
|
|
| |
|

Joined:
June 2012
Posts: 2345
Location: Pueblo West, CO | If you're going to just re-glue it, then it's just a matter of slathering on the Hysol and clamping it back together. (making sure the neck angle is right, of course) |
|
| |
|

Joined:
May 2015
Posts: 186
Location: Glendora, CA | hummmmmhummm... so same scraping and glueing then reseting... and how do I set the neck angle (he asks like a newbie)
|
|
| |
|

Joined:
June 2012
Posts: 2345
Location: Pueblo West, CO | With the neck in place, take a straight edge and lay it on the frets and see where it's 'aimed' at the bridge. Anything over the top of the bridge is good. The higher, the better. (within reason) Here's Jay's Balladeer. 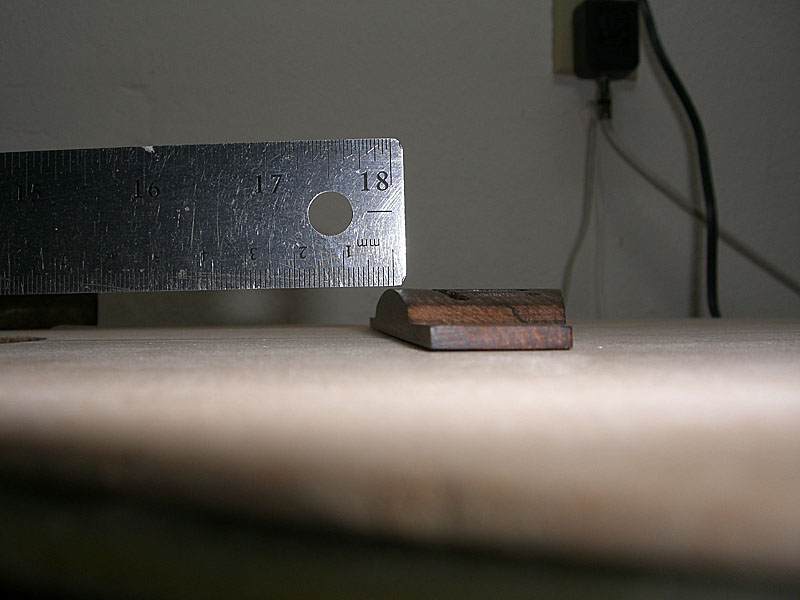
Naturally, you'll also want to make sure it's square to the body. I lay a yardstick along one side of the neck at the fretboard, then the other, then measure the distance to find the center line. If it's the same as the center seam of the top wood, or the center of the bridge, then you're golden. |
|
| |
|

Joined:
August 2007
Posts: 1008
Location: Tuscany, Italy | Dan is inspiring many of us to test our luthier skills (thanks Dan).
Way to go Tennessee.....take your chance to save an O. |
|
| |
|
Joined:
December 2003
Posts: 13996
Location: Upper Left USA | I like it! |
|
| |
|

Joined:
June 2012
Posts: 2345
Location: Pueblo West, CO | Thanks for the kind words, guys.
Like I've always said, guitars are just bits of wood and metal glued and screwed together. |
|
| |
|

Joined:
October 2012
Posts: 1093
Location: Yokohama, Japan | Ah Tennessee...welcome to the abyss! Ever since I started hanging around in the BFLG I've noticed that O restoration is addictive! The folks at the OFC are so knowledgeable, and as you've already discovered, the BFLG folks are especially creative. One of the things I've noticed about the Celebrity models is that most of them sound mediocre due to inconsistent assembly (although the Asian "AX" designated builds seem to fare better). While they'll never sound like USA Os, a good reassembly can actually make a Celebrity sound pretty close to fantastic even with a laminated sound board. Yours has got to be the CC257, and at 40 bucks you can't go wrong. If the pre-amp works, I'm pretty sure you can get 40 bucks for an OP24+. If the reassembly is successful, no doubt somebody will be willing to pay anywhere from 200 to 300 bucks for it. You might even like the way it sounds and want to keep it for a while. Anyway, good luck with the rebuild! Make sure to post pics of the final re-assembly. Thanks for sharing your journey! |
|
| |
|

Joined:
May 2015
Posts: 186
Location: Glendora, CA | Thanks so much for the amazing information guys! Meeting up with the seller on Monday so hopefully it will be worth the trip! I will keep all informed.
Thinking I am not skilled enough yet to attempt the bolt on retrofit so if I take it on it will just be a reglue/reset. My work has become more and more supervising that fabricating so it feels really good to be tactile again. |
|
| |
|

Joined:
May 2015
Posts: 186
Location: Glendora, CA | Grabbed it for $40. It is a CS-257, Korean made USA Bowl which is nice even though its a shallow. The top is in nice, flat shape with standard issue pick swirls but no cracks or dings. Headstock has several minor nicks to the top. Still has both shims (brown & white). Nice guy, first owner bought it he said 17 years ago from Guitar Center, dabbled but never really got into guitar. Should be a fun project. Pics and process to follow... |
|
| |
|

Joined:
May 2015
Posts: 186
Location: Glendora, CA | The top is in really good shape, with some polishing it could get to great. 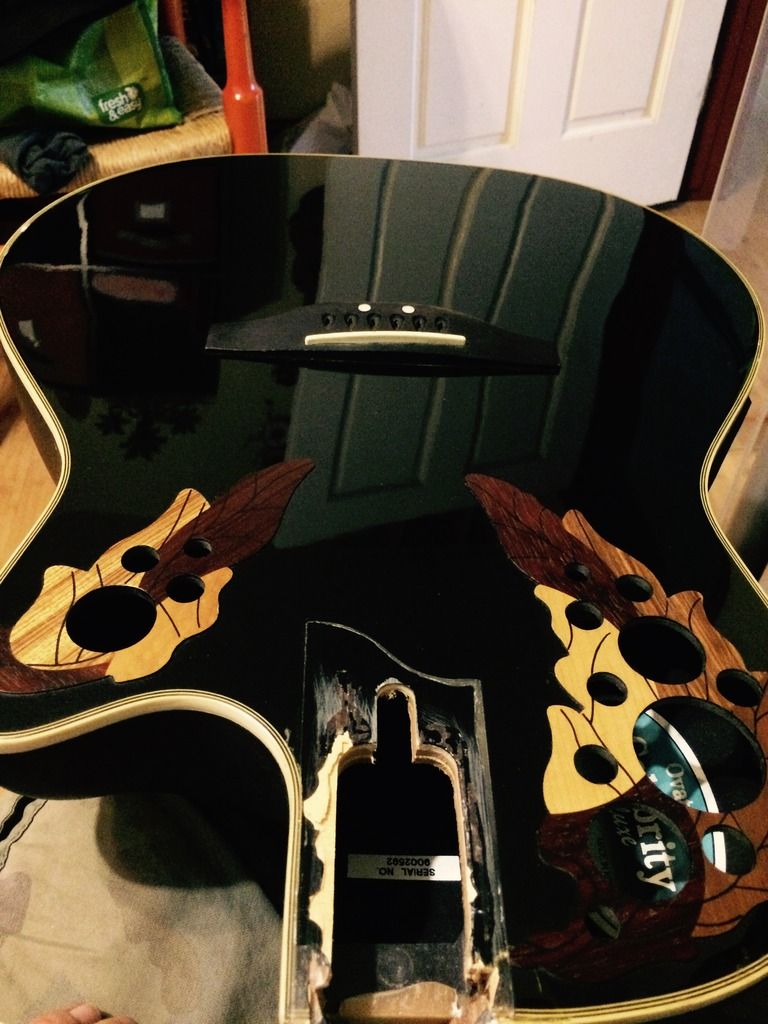
|
|
| |
|

Joined:
May 2015
Posts: 186
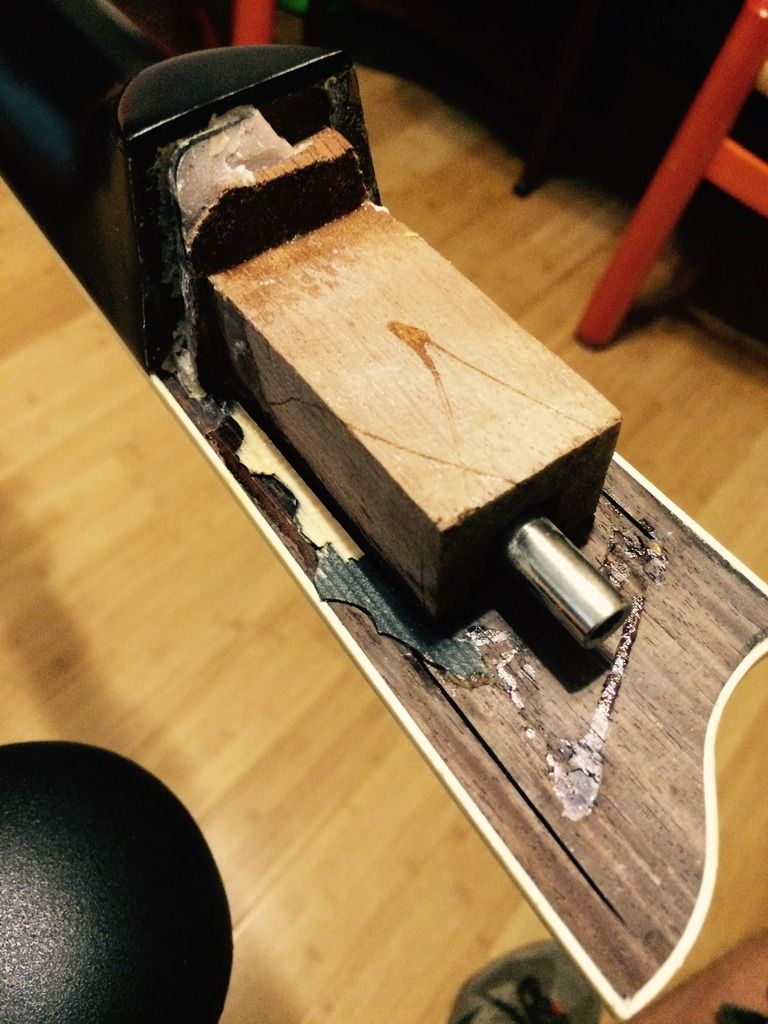
Location: Glendora, CA | Wow the amount of glue in this thing is stagering The guy who owned it said he never liked playing it because the action was too high... seeing this I am wondering if this was a factory missalighned neck. Ah... Pacific Rim Models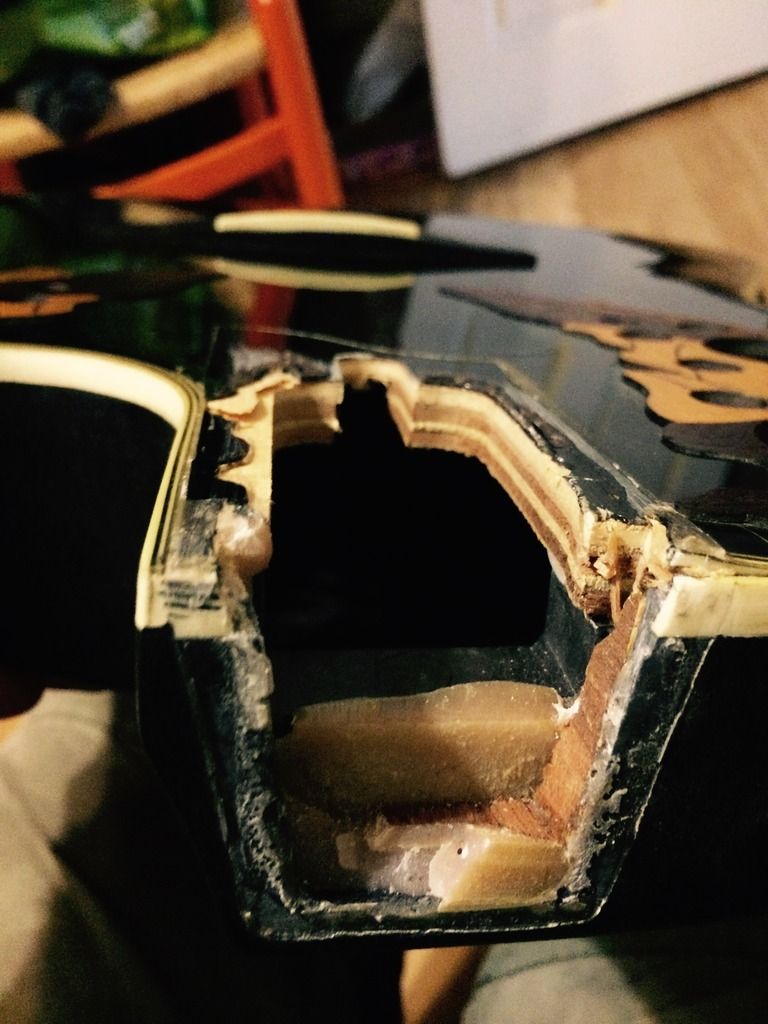 Gonna get all that outa there and see what is what It doesnt look like there was much epoxy on the fretboard where it overlaps the sound board, does this seem normal? Looks more like a half harted attemt to rough up the surface and very little glue, than something intentional. 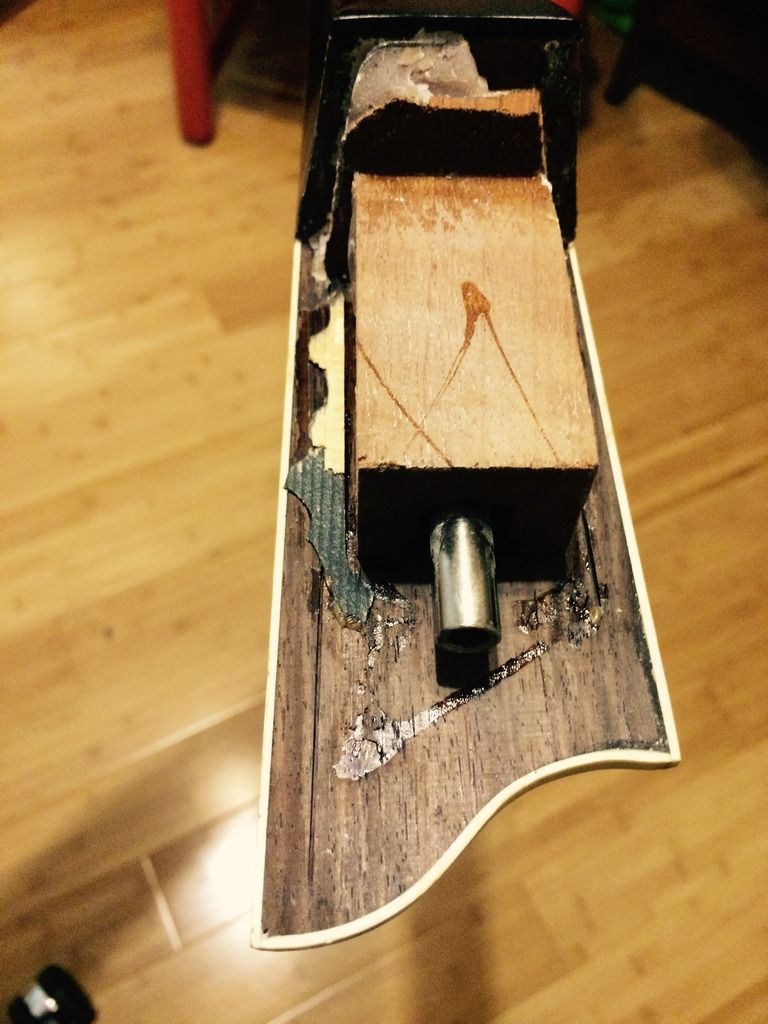
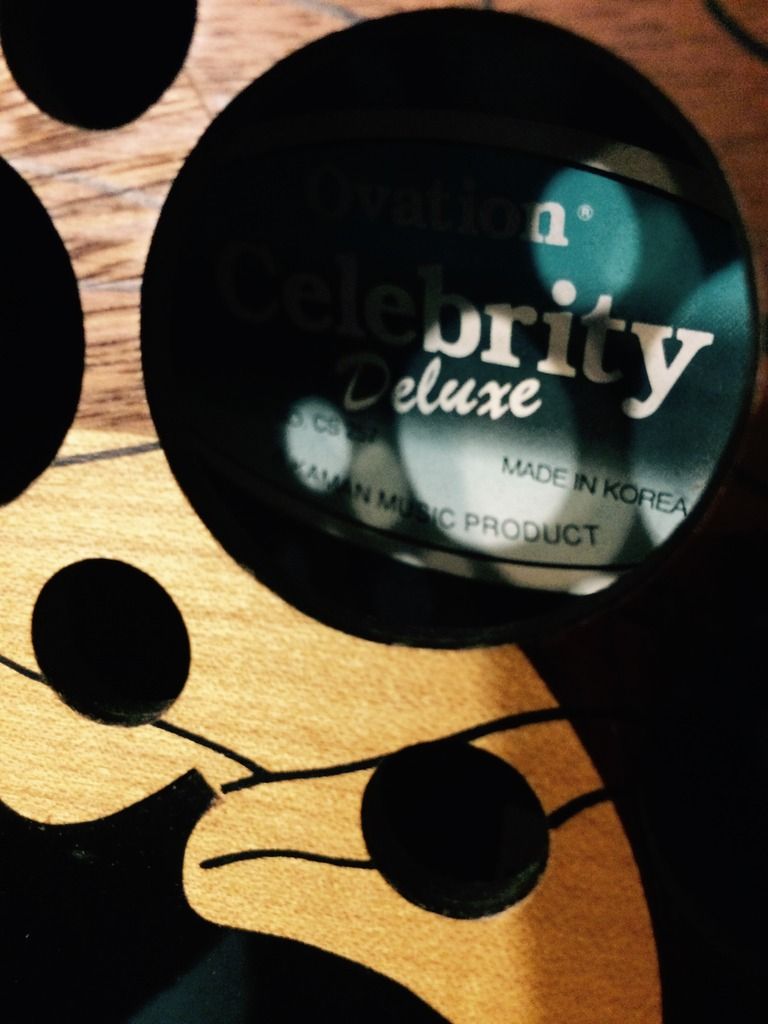 USA Bowl... 
Edited by Tennessee 2015-10-12 10:13 PM
|
|
| |
|
Joined:
September 2006
Posts: 10777
Location: Keepin' It Weird in Portland, OR | Yup... It probably came from the factory with High Action.
I have found a few older Celebrity's have nice action...
So I thought that maybe they were making them better back then.
But maybe it is because the older ones with crappy action ended-up in the Trash Can.
So the ones that got saved from the 80's are the Good ones.
 just thinking out loud just thinking out loud 
|
|
| |
|

Joined:
June 2012
Posts: 2345
Location: Pueblo West, CO | I've read that high action from the factory is normal, no matter who the manufacturer is. This allows the buyer to have the action adjusted to suit his/her own taste.
The height of the saddle in the pics would help account for the high bridge action. Also, since the original owner said he bought the guitar, but never really did anything with it means he probably never had the nut action adjusted, either. Putting the neck back into place, even without gluing, then checking the neck angle with a ruler should reveal whether the guitar can be made playable.
 "Do you think you used enough glue there, Butch?" Great big gobs of gooey, greasy epoxy in the neck block is normal. Unfortunately, this construction technique has not helped Ovation's reputation with luthiers over the years. |
|
| |
|

Joined:
May 2015
Posts: 186
Location: Glendora, CA | Ok so got the majority of the epoxy out and tested the neck. Looks like it just musta been glued/set badly because I put a ruler on it and it lines up just at the top of the bridge - in fact it looks almast the same as the pic Dan posted above - just perhaps another 1/8" higher. 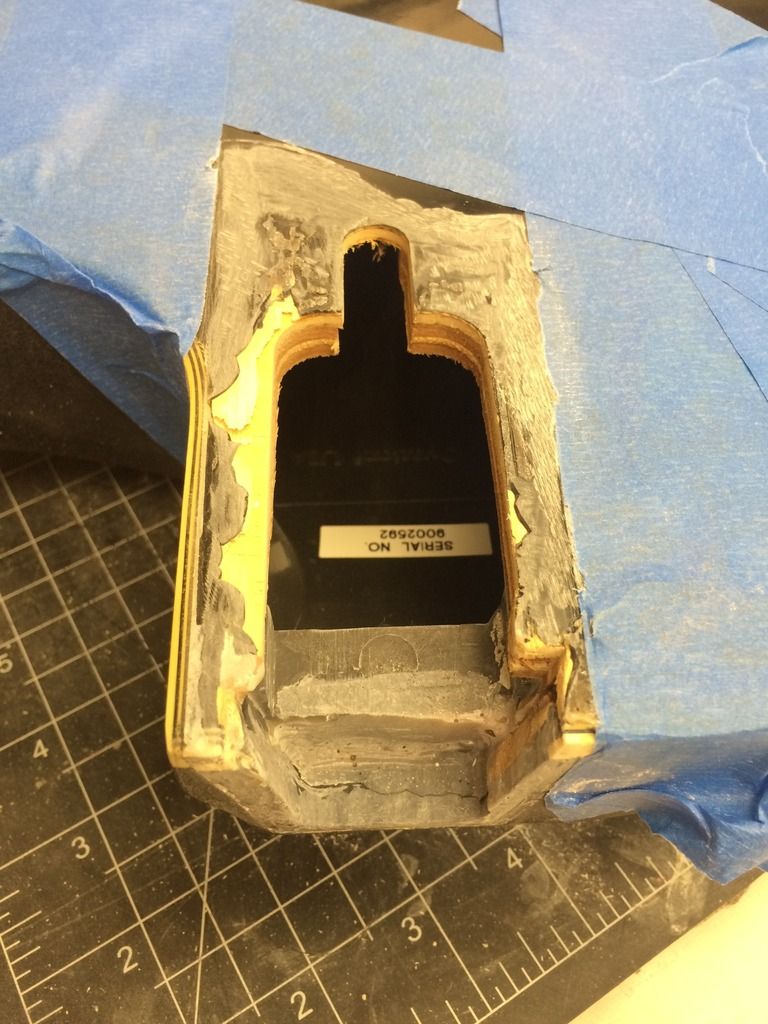
The dovetail was broken off on one side so not sure if this can just be glued back together now or if it will need a bolt on refabrication... |
|
| |
|

Joined:
June 2012
Posts: 2345
Location: Pueblo West, CO | Actually, having the neck angle point to the top of the bridge is a good thing. Even if the neck angle is 1/8" above the top of the bridge, that will still be okay.
Given the construction of the neck at the body end, I don't think you'll be able to to convert this to a bolt-on neck. The truss rod is getting in the way.
For the amount of money you paid, this might be a good guitar to use to practice your epoxy mixing skills, if you catch my drift. 
Seriously, though, you could rebuild the dovetail on the neck with scraps of wood to get a tight fit into the neck block, which would enable you to use a minimum amount of epoxy in the neck joint. |
|
| |
|

Joined:
May 2015
Posts: 186
Location: Glendora, CA | You know you mentioning the truss rod makes me realize - I think they put the wrong neck on this model. Shouldn't Elites have the truss rod adjustment at the top of the head with a cover? Or do these shallow bowls adjust from inside the bowl? |
|
| |
|

Joined:
May 2015
Posts: 186
Location: Glendora, CA | No I was wrong... They have the truss rod adjustment on the bottom...why? Wouldn't it have been more practice to stay with the original design? Even my first crappy applesauce fake elite had the truss rod adjustment at the top...
Edited by Tennessee 2015-10-14 8:17 AM
|
|
| |
|

Joined:
June 2012
Posts: 2345
Location: Pueblo West, CO | Having the truss rod adjust from the inside of the bowl is the modern way of doing this and is not unique to Ovations.
Since the US models feature the Kaman bar, which is made from aluminum and is mounted in a channel in the neck, they can be made to have both a bolt-on neck and the truss rod adjustment nut inside the bowl.
But, this is a glue-on neck with a standard truss rod adjuster. For other guitars with glue-on necks, such as Martins, the dove-tail is deep enough and the fit of the dovetail into the neck block is precise enough that having the truss rod adjuster inside is not a problem. |
|
| |
|

Joined:
May 2015
Posts: 186
Location: Glendora, CA | got it.
It just seems like the lack of a center hole would make it easier to precisely adjust from the top as opposed to opening up the bottom of the guitar to make adjustments. I mean I haven't adjusted a truss rod so I have no idea - just seems if you had it on a bench it would be more difficult to adjust from below... |
|
| |
|

Joined:
October 2012
Posts: 1093
Location: Yokohama, Japan | Making good progress Tennessee! What you are seeing is pretty typical in my experience with Celebrity models. After you clean the junk off of the neck/bowl and set it to the body, they usually line-up pretty well.
DanSavage is right about the conversion to a bolt-on configuration for the CS-257. There just is no space under the truss rod housing wood block (unless you shave it down and "make" some space - there's probably about 3mm that can be shaved off...not the best choice). Truss rods for most all Celebrity models adjust from the inside of the bowl; so I don't think the wrong neck is on there. DanSavage is also spot on about the dovetail rebuild (I've faithfully followed his advice and he's never been wrong about anything!). You can use scrap wood as shims and epoxy and clamp them on to the neck dovetail joint. Take a sharp chisel or a dremmel and reshape the joint to fit the bowl dovetail socket. The fit doesn't need to be super high quality. Just get it snug enough and epoxy the neck back on to minimize unnecessary adhesive build-up. Looking at the chunks of wood missing from the neck dovetail on your CS-257 - this might be your best option. If wood chunks are missing from the heel of your neck, shims may be needed there as well.
IMHO clamping an "Elite" style neck to the body is always challenging. Sometimes the neck begins to lift ever so slightly - throwing the neck angle off enough to make "low action" an impossibility. But if you think through your clamping strategy and do a lot of dry runs, you should be fine. At this point, I think "patience" is your best friend! Good luck! |
|
| |
|

Joined:
May 2015
Posts: 186
Location: Glendora, CA | Ok so got some hardwood shims on order... stay tuned |
|
| |
|

Joined:
May 2015
Posts: 186
Location: Glendora, CA | They arrived. Hoping to have some time soon to glue some hardwood to be shaped - working 11 hour days is getting old... Wait I am getting old...ah crap. |
|
| |
|

Joined:
May 2015
Posts: 186
Location: Glendora, CA | Ok so its been a good 72 hours since I glued in my scrap hardwood to the side of the dove joint that needed filling. Sharpening off the chisel... |
|
| |
|

Joined:
October 2012
Posts: 1093
Location: Yokohama, Japan | Way to go Tennessee! I'm right behind you on my CC247. Hoping to glue my shim into place tomorrow night! Good luck!
Edited by arumako 2015-10-28 12:53 AM
|
|
| |
 Reseting/reglueing a neck on a CC
 Reseting/reglueing a neck on a CC