|
|
Joined:
December 2003
Posts: 13984
Location: Upper Left USA | I just thought I'd stick this OP30 in until I have an iDea...
 |
|
| |
|
Joined:
January 2007
Posts: 672
Location: New South Wales, Australia | Ever do any ironing on that bench?? |
|
| |
|
Joined:
October 2006
Posts: 5575
Location: big island | Originally posted by ozwatto:
Ever do any ironing on that bench?? solder ironing |
|
| |
|
Joined:
December 2003
Posts: 13984
Location: Upper Left USA | We have long ago mastered the technique of removing items from the Dryer and hanging them up immediately to eliminate ironing!
I'd like to think that SWMBO subliminaly enjoys hearing the creaking sounds of the ironing board while I'm working away! It can't hurt! |
|
| |
|
Joined:
December 2006
Posts: 6268
Location: Florida Central Gulf Coast | I'd love to hear that PM plugged in! |
|
| |
|
Joined:
December 2003
Posts: 13984
Location: Upper Left USA | It worked out nicely, the Pre-set button calms the highs down nicely.
The tuner is priceless! |
|
| |
|
Joined:
February 2004
Posts: 1634
Location: Warren,Pa. | I put an OpPro in my Pacemaker. The tuner is the best thing that ever happened to that guitar! XLR out is nice, too. |
|
| |
|
Joined:
November 2002
Posts: 3603
Location: Pacific Northwest Inland Empire | Now, THAT is operating at a "higher level of inference"! An on-board tuner on a 12-er (forehead slap).
Good work, Mike!! |
|
| |
|
Joined:
November 2006
Posts: 3969
| Woody & bauerhillboy - did you start with 1115's? I've been thinking of doing the same with my 1615 but didn't know what to do with the hole from the volume pot. For now I replaced the old preamp with a stack-knobber, nice to have tone control onboard. |
|
| |
|
Joined:
August 2006
Posts: 3145
Location: Marlton, NJ | Serge - those little black plastic caps from home depot work perfectly. That's what I used on Glenn's guitar and it's barely noticeable. |
|
| |
|
Joined:
November 2006
Posts: 3969
| Thanks Mike, I'll give 'em a look-see. Might be a nice little project for this weekend since I have an OP30 lying around. |
|
| |
|
Joined:
December 2003
Posts: 13984
Location: Upper Left USA | This/was a 1115-1.
"the hole from the volume pot."
For the glass or Lyrachord bowls all you need some epoxy to patch the hole. I have used the "Bumper Repair Patch" kits from Walmart or wherever.
To cover it all use a can of Flat Black Krylon and hold the can 3-4 feet away for the textured (organized Blob) effect.
Ventilation, masking and temp control are important!
The rear access hole wasn't necessary but it sure helped. |
|
| |
|

Joined:
December 2008
Posts: 1453
Location: Texas | I hope that I get to the point where I am as comfortable with that kind of surgery as you guys are. As much as I would love to electrify my old Balladeer, I can't imagine drilling holes in it! That's why I'm looking for a new O A/E to keep the Balladeer company, and THAT's how I ended up joining the OFC.
Little did I know what kinds of dangerous ideas and uncontrollable guitar lust I might pick up here ;-)
At least I can now list 2 items of relevance in my signature:
- 1979 Custom Balladeer
- 2004 Standard Ironing Board |
|
| |
|
Joined:
August 2006
Posts: 3145
Location: Marlton, NJ | Woody - how did you line up where to cut the hole for the can? I got a few gray hairs from that one! |
|
| |
|
Joined:
February 2004
Posts: 1634
Location: Warren,Pa. | Mine is a 1115 and, while it didn't come with any electronics, I had long ago installed a small B-Band preamp. In removing THAT, I was left with a rectangular hole about 1 1/2" x 2 1/2" that was not going to be totally hidden by the new cutout for the OpPro can.
Now I realize I do not treat this guitar like it's a collector's item. I took a small piece of vinyl siding (red) left over from my house and epoxied it to the inside of the bowl. Then I mixed up enough epoxy to pour onto the outside of this patch so that I was left with a flush repair. From that point I made the cut for the OpPro. I was left with a little bit of the patch still visible, so I brushed on some black paint.
The real question is...what PICKUP did I install with my OpPro since I only had a 3/32" saddle slot. K&K Pure Western.
John <>{ |
|
| |
|
Joined:
December 2006
Posts: 6268
Location: Florida Central Gulf Coast | Originally posted by standing:
- 2004 Standard Ironing Board  |
|
| |
|
Joined:
December 2003
Posts: 13984
Location: Upper Left USA | My first O, 1112-1 is still modification free and likely to stay that way out of reverence.
For a Template I just eyeballed it and made sure that I drew the hole smaller.
Then I remembered that I had a parts bowl on the shelf and traced and cut a template.
Note: The oval preamp cans are not the same curve as the fiber bowls. I used a little Black RTV for the 1/16" gap and you will need to glue some landing pads for the hold down ears.
I'll shoot some pics. |
|
| |
|
Joined:
August 2006
Posts: 3145
Location: Marlton, NJ | I used the clay home-made thingymabobber when I did mine. It fits like a glove - no gaps anywhere. The template wasn't pretty, but it worked to perfection.
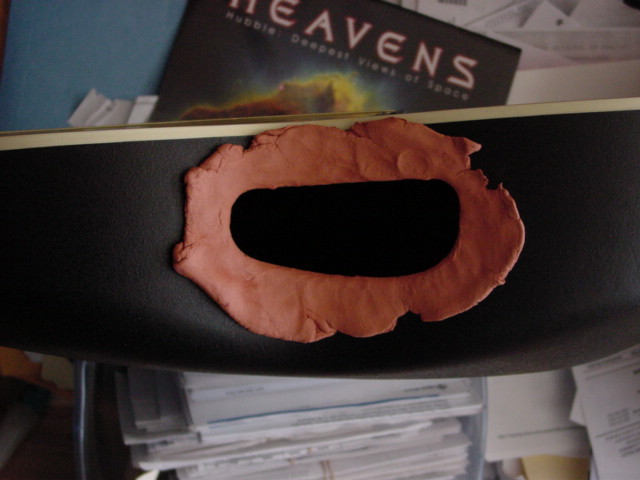
The little "template" that they include with the iDea scares me a bit - it's basically a thin little kidney-shaped sheet of rubber. It does nothing to help you locate where to actually put the thing. |
|
| |
|

Joined:
December 2004
Posts: 4394
Location: East Tennessee | Thingymabobbers always work best. :D
Did you use regular clay like kids play with? |
|
| |
|
Joined:
August 2006
Posts: 3145
Location: Marlton, NJ | It was air-hardening modeling clay. Most important was that it didn't leave any marks or stains on the bowl. |
|
| |
|
Joined:
September 2006
Posts: 10777
Location: Keepin' It Weird in Portland, OR | Originally posted by CrimsonLake:
The little "template" that they include with the iDea scares me a bit - it's basically a thin little kidney-shaped sheet of rubber. It does nothing to help you locate where to actually put the thing. I thought that the little rubber thingie was a gasket for a snug, vibration-free fit?
As to a template, I thought you would just trace the rubber center-thingie onto paper.
That's a good reminder to make the hole abit smaller...
You can always make the hole bigger.
Yeah, the onboard tuna make it all worthwhile!
Even if you rarely plug-it-in. |
|
| |
|
Joined:
August 2006
Posts: 3145
Location: Marlton, NJ | My rubber thingie came with an innie part and an outie part. The outie part looks like a rubber gasket and is probably used as you say. In the directions, they say to use the inner thingie as a template.
Think of it this way ... it's like trying to fit the yin and the yang together. They only fit one way perfectly, otherwise they'll be a gap.

This, by the way, is why I NEVER finish anything! I spend too much time trying to get it perfect. |
|
| |
|
Joined:
December 2003
Posts: 13984
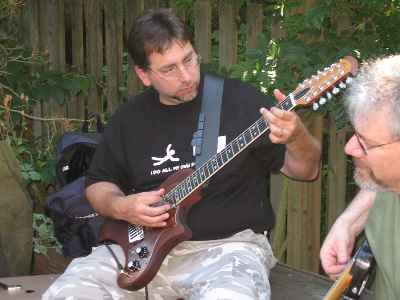
Location: Upper Left USA | I hired an extra from the Overweight Actors Union to make a short video for me.
Pacemaker with OP30 via canon A520 Digicamera |
|
| |
|
Joined:
December 2006
Posts: 6268
Location: Florida Central Gulf Coast | Whoa Mike! That's superb. Sweet, sweet and lovely sound. Gotta love dem ol' 'O's....
You play this one softly which is more of my style. Plus I love the minor influenced progressions. Very nice job on the PM and the music! Thanx!  |
|
| |
